


Place the pair of winter traction frames decking-to-decking with the metal teeth facing each other, align the toe ends approximately 15–20 cm above the pack lip and secure them vertically against the rear panel using two 25–50 mm webbing straps with cam buckles: one at hip-belt level and one about 30–40 cm higher. This configuration minimizes rattling, protects bindings, keeps weight close to your spine and prevents the frames from catching on brush.
Use the frames’ built-in holes or the cross bars as anchor points. Thread each strap through a frame opening or loop it around the tail and pass the webbing under the pack’s compression strap or daisy-chain before cinching. For quick clipping, add a locking carabiner through a central frame hole and into a reinforced pack loop; choose a carabiner rated ≥15 kN and fasten with a short length (30–50 cm) of 10–12 mm tubular webbing–this reduces torsion and concentrates load on reinforced points.
For the A-frame method lay the pair across the top flap with toe ends up and tails pointing down alongside the hip-belt: clip toes into the ice-axe loop or a top daisy, then secure tails under a lower compression strap or around the hip-belt using a cam strap. Pad contact points with 3–5 mm closed-cell foam or electrical tape to prevent abrasion; tuck all loose strap tails under elastic keepers or use 10–15 cm Velcro wraps to stop flapping.

Before leaving the trailhead perform a 10–20 second shake test and walk for 50–100 m on varied terrain to confirm there is no rotation or chafing. Re-check after heavy snow accumulation or stream crossings. If anticipating long steep ascents move the frames to an internal pocket or side carry position to keep the center of gravity forward; otherwise keep them centered and tight to the pack for best load stability.
Securing Winter Frames to Your Rucksack
Use two 1.5″ cam straps (120 cm) plus one short shock cord to fasten frames vertically on the outside of the rucksack with the tails pointing down for minimal swing and lower center of mass.
Required hardware
- 2 × 1.5″ cam straps, 120 cm (wide webbing resists cutting from crampon points)
- 1 × 6 mm shock cord, 40 cm, with a cord lock
- 2 × short daisy-chain or nylon loop points sewn to pack (50–70 mm apart)
- 1 × thin closed-cell foam pad (10 × 5 × 1 cm) to protect pack fabric
- 2 × plastic toe covers or a 15 cm strip of hard plastic (salvaged water bottle) to shield sharp teeth
Step-by-step method
- Place foam pad between frames and rear panel where metal will contact fabric.
- Set frames on outside of rucksack, vertical, bindings outward, tails down; align center of frames with the pack’s central spine.
- Loop first cam strap through lower frame opening and around pack’s hipbelt ladder or lower daisy chain; tension to pull frame snug against pack–do not overtighten (10–15 kgf of tension is adequate).
- Run second cam strap through upper frame opening and over shoulder harness webbing or upper daisy chain; tension to remove play while keeping shoulder straps free.
- Wrap shock cord around top of frames and clip to a sternum-strap loop or top haul loop; use cord lock to remove vibration and prevent bounce.
- Cover exposed crampon points with plastic covers and tuck protruding straps into webbing slots or secure with short zip-ties; trim excess strap to ≤10 cm and heat-seal cut ends.
- Perform load test: walk 50 m on flat ground, then adjust straps if frames shift more than 3–5 cm laterally.
Placement notes: mounting lower on the pack reduces leverage on the shoulder straps; mounting higher improves gait clearance but increases sway. For long approaches use the lower position; for technical climbing move frames to the rear daisy chain to keep tool access clear.
- Quick-release option: replace one cam strap with a locking carabiner through the frame hole and a removable webbing loop – allows removal without unthreading straps.
- Snow melt management: orient bindings so snow sheds away from the pack’s top lid and use a small drainage hole in foam pad if melting occurs.
- Weight guideline: keep total frontal projection under 2.5 kg to avoid excessive shoulder loading on multi-day trips.
For related safety reading about consequences of roadside incidents, see how can a car accident impact your life.
Match frame size and type to available mounting points on your pack
Pick a frame whose maximum length does not exceed 85% of the vertical lash span on your pack; for typical 30–40 L daypacks that translates to frames ≤30 in (76 cm).
Frame length vs pack volume
Pack volume and lash geometry guide size choices: for ultra‑light daypacks (<25 L) use frames ≤26 in (66 cm); for 25–35 L daypacks choose ≤28 in (71 cm); for 35–50 L multi‑day packs accept 30–32 in (76–81 cm) with diagonal or vertical carry; for expedition packs (50 L+) you can manage 34–38 in (86–97 cm) but plan for horizontal lash across lid or dedicated external gear straps.
Consider width and tail profile: tapered frames under 220 mm fit daisy chains and narrow compression straps; wide‑tail or flotation tails >260 mm require broader webbing or dual straps spaced ≥10 cm apart to avoid rotation.
Binding profile, crampons and mounting hardware
Frames with raised crampons, rigid rails or large bindings need clearance from the pack face. Allow 2–3 cm between crampon points and fabric; orient the unit binding‑side outward to prevent sharp points pressing into the pack, or add a foam barrier if carrying binding‑side in. If the frame includes stake holes or carabiner slots, use those for single‑point quick‑release lashing; if only daisy chains and ice‑axe loops exist, route two straps through separate anchor points (top lid loop + lower compression strap) to prevent pendulum swing.
Strap length recommendations: minimum 40 cm for diagonal/vertical lash on medium packs, 60+ cm for horizontal lash on large packs or when crossing the lid. For frames longer than 32 in, prefer horizontal lash with two straps and an anti‑twist secondary strap through a lower gear loop.
If your pack lacks suitable anchors, select a smaller frame or use a purpose‑built carry sleeve. Always perform a loaded trial: walk 50–100 m with the rig carried as intended, check for rubbing, twist, or binding interference, and adjust anchor spacing or orientation until the frame rides stable and does not obstruct shoulder straps or hipbelt movement.
Secure rigid metal-frame gear using daisy-chain straps
Use two 25 mm (1″) tubular nylon straps, 120–150 cm long, with low-profile cam buckles: one strap routed through a lower daisy-loop under the frame rails, the second through an upper loop over the toe-box area; tension both so the frame sits flush against the pack body with under 3–5 cm of play when shoved laterally.
Tools and materials
Recommended: two 25 mm tubular webbing straps, two low-profile cam buckles or quick-release V-straps, two small 6 mm accessory cords (30–40 cm) for safety tethers, a 3–5 mm closed-cell foam pad or neoprene sleeve to protect pack fabric, and two lightweight locking or non-locking carabiners if your daisy-chain spacing requires clipping instead of threading.
Routing and tensioning
Position the metal rails parallel to the pack back. Thread the lower strap through a daisy-loop located about 20–25 cm above the pack base so it cups the tail of the frame; route the webbing under the frame rail and back up through the same loop or adjacent loop to form a girth-hitch, then snug the cam buckle until the frame no longer swings. Place the upper strap through a higher daisy-loop aligned with the frame toe; pass the strap over the frame tube, through the opposite daisy-loop if available, and tension evenly to pull the frame close to the pack face.
Run the 6 mm cords as secondary safety ties: loop one around the frame crossbar and through a daisy-loop, secure with a double fisherman’s or water knot on tubular cord, and tuck excess into a gear pocket. Add the foam pad between metal and fabric at contact points to prevent abrasion; center the pad over the crampon/cleat area if metal teeth sit near the pack fabric.
Final checks: compress the pack load lightly and walk for 50–100 m; re-tighten straps until movement is negligible. If daisy-chain spacing prevents threading, use slim carabiners to create a continuous anchor and route straps through the carabiner gate, then cinch. For an alternative carry option consult best hydration waist pack for running.
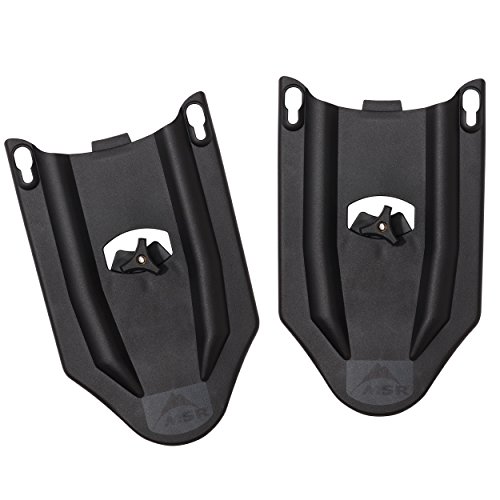
Fasten modern plastic frames with crampons: padding and clip placement
Place frames with crampon teeth pointing away from the pack and angled slightly downward (≈30–45°); pad all contact zones with closed-cell foam strips 3–6 mm (1/8–1/4″) thick and 20–30 mm (3/4–1¼”) wide to prevent plastic-on-fabric abrasion.
Padding: material, size, and placement
Use closed-cell EVA or neoprene tape (self-adhesive or wrapped and secured with friction tape). Apply two strips per contact point: one under the toe/leading lip and one under the tail/rear lip. Length per strip: cover 10–15 cm (4–6″) of frame where it touches the pack; overlap edges by 5–10 mm. Replace foam when compression exceeds ~30% of original thickness or when surface cracking appears.
Clip and strap placement
Position primary straps at 25% and 60% of the frame length measured from the nose (for a 70 cm frame, that’s ≈17–18 cm and ≈42 cm). Use 20–25 mm (3/4–1″) low-stretch webbing with cam or quick-release buckles. Pass the lower strap under the frame just behind the crampon pivot point so the crampon is immobilized; pass the upper strap across the midframe to stop lateral movement. Keep tension snug enough that a firm tap on the frame produces no more than 5–10 mm of play.
Tuck or secure loose buckles and webbing tails with elastic keepers; route straps around pack compression straps or hipbelt anchors rather than through external pockets to avoid zipper damage. For bindings with removable clips, unclip and stow clips inside the pack if they create point loads against the fabric.
Quick checklist: crampon teeth outward/down 30–45°, foam 3–6 mm at toe and tail (cover 10–15 cm), straps at 25% and 60% of frame length, 20–25 mm low-stretch webbing, ≤10 mm play after tensioning, secure loose hardware.
Carry frames on the hipbelt or shoulder straps to preserve balance
Place the pair on the hipbelt with the pivot ends toward the pack and fasten low – this lowers the system’s center of mass by roughly 10–15 cm and cuts roll torque nearly in half compared with high shoulder carry.
Hipbelt placement: set the frames vertically, tails pointing down beside the thigh, with two attachment points spaced 12–18 cm apart to prevent rotation. Pull webbing to 150–250 N (≈15–25 kgf) per strap; use a second compression strap or cord at the upper frame body to stop pendulum motion. Add 3–5 mm neoprene or closed-cell foam where metal contacts webbing to prevent abrasion and noise.
Shoulder-strap placement for short moves: sling a single frame diagonally across one shoulder when you expect frequent don/doff. Keep the mass within 20 cm of the shoulder seam and limit carry time to segments under 30 minutes if the pair >1.2 kg. Alternate sides every 20–30 minutes to reduce unilateral fatigue.
Balance trade-offs by weight: if the pair exceeds 1.2–1.5 kg, prefer hipbelt mounting; under 1.2 kg, shoulder carry is acceptable for short transitions. For traverse or exposed ridgelines, always move the pair to the hipbelt before technical sections to minimize top-heavy behavior and reduce swing that can upset footing.
Quick-don tips: position the lower strap release on the side you use to step into the frames (right for right-dominant users) so the operation takes one hand. Route straps so buckles sit above the hipbelt foam, not under it, to keep release accessible while maintaining load transfer to hips.
| Placement | Estimated COM shift | Sway risk | Strap tension | Recommended use |
|---|---|---|---|---|
| Hipbelt, low vertical | -10 to -15 cm (down) | Low | 150–250 N per strap | All-day carry, technical terrain |
| Hipbelt, high horizontal | -5 to -8 cm | Medium | 120–180 N | Short approaches, limited swing control |
| Shoulder sling, diagonal | +5 to +10 cm (up) | High | 80–150 N | Short transitions, frequent on/off |
| Shoulder, stacked pair | +8 to +12 cm | Very high | Secure both ends; 150–250 N total | Only when hipbelt unavailable; avoid on exposed sections |
Use a 3-layer pad: 6 mm closed-cell EVA + 3 mm neoprene + 1000D Cordura cover over spike zones
Cut rectangular shields sized to cover the crampon cluster: 20×30 cm for single-frame units, 30×40 cm for larger or dual-frame setups. Total pad thickness 8–12 mm prevents puncture from typical 4–6 mm steel points while keeping low bulk. Place shield directly between metal spikes and the pack fabric; orient the traction points away from the fabric whenever frame geometry allows.
Materials & specifications
Preferred stack: 6 mm closed-cell EVA (shock absorption, moisture-resistant) + 3 mm neoprene (conformity and abrasion buffer) laminated to a 1000D Cordura face for cut resistance. Use bar-tack or box stitches at 25 mm intervals if sewing; for glue-only builds use contact cement (Barge) and seam tape on edges. If weight matters, substitute 500D Cordura and drop EVA to 4 mm – expect ~30% less puncture margin.
Fastening and placement tips
Make pads removable: glue one side of 25 mm industrial Velcro to Cordura and sew the mating strip to the pack panel. For non-sewing retrofit, route two 12 mm webbing loops around existing compression straps and slide the pad between loops and spikes; secure with 2–3 zip ties fitted with rubber sleeves to prevent chafing. Space ties 8–12 cm apart and tension until the pad stops shifting under 15–20 N of lateral force. Add 30–40 cm of inner-tube rubber strips under the EVA for extra bite protection on aggressive crampons.
For riders seeking a pack with a reinforced front panel, consider models reviewed at best travel backpack for professionals.
Build a quick-release carry system for rapid on-trail transitions
Use a short, vertical quick-release sling: 25 mm (1″) tubular nylon webbing, 30–40 cm length, sewn or heat-melted loop with an ITW Nexus Fastex side‑release buckle placed mid-loop so the release tab sits within easy reach at chest level on the rucksack. Route the sling through a daisy chain or lash point and clip the traction frames under the loop so they hang heel‑first for one‑handed unclip.
Parts and specs: 25 mm tubular webbing (breaking strength ~3,000–5,000 lb), ITW Nexus 25 mm side‑release buckle, 6–8 mm accessory cord (550 paracord), small wire‑gate carabiner (6–10 kN) as a backup, closed‑cell foam pad 2–3 mm for spike protection, 20–30 mm hook‑and‑loop strap for holding crampon teeth away from fabric.
Fabrication steps: stitch or use a 25 mm cam‑stitch on the webbing ends, leave a 10–12 cm pull‑tab past the buckle for gloved release, secure the buckle to the webbing with a bar tack or reinforced box stitch, lash the sling to the pack’s vertical daisy chain with a girth hitch or through‑and‑back webbing route. Add a short paracord retention loop that clips to the wire‑gate carabiner to prevent accidental opening while hiking.
On‑trail use: position the sling centerline over the sternum for direct one‑hand access; suspend the frames vertically with the spike side away from the pack shell and the toe end down so you can unclip and swing into place. Keep the foam pad between spikes and fabric and wrap the hook‑and‑loop around the frame to compress the pads for quieter carry.
Testing and maintenance: before each outing, give the system a firm downward tug (~20–30 kgf hand force) to confirm buckle seating and webbing stitching; inspect stitches, nylon glazing, and the paracord retention for abrasion. Replace webbing showing >10% fray or a compromised buckle immediately.


