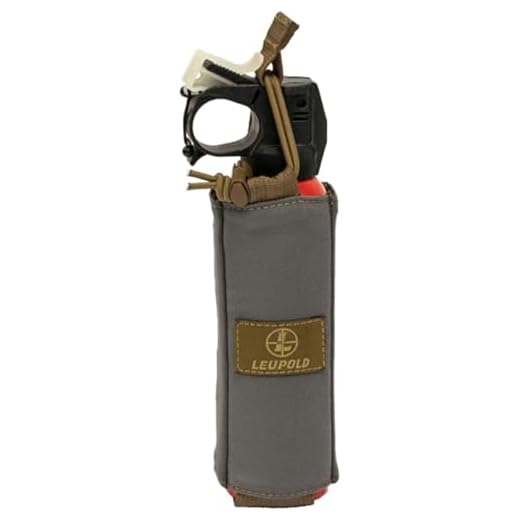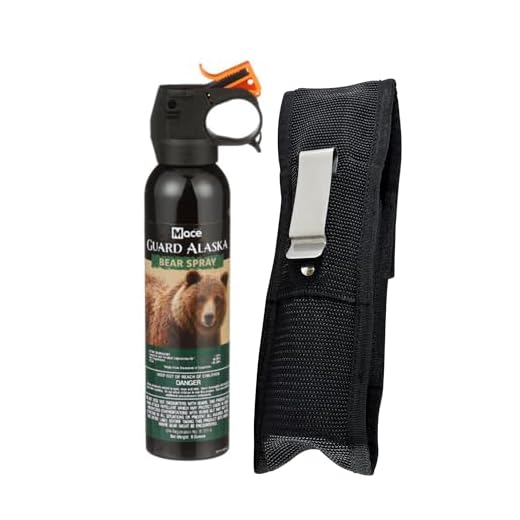


Place a 7–10.5 oz (200–300 g) pressurized defense canister in a hip‑belt holster on the trail side, nozzle pointed away from your body, safety clip engaged. Secure the unit with a short tether to a top D‑ring or load‑lifter; that prevents loss during slips or sudden movements and keeps the device within one smooth reach.
If the rucksack lacks a dedicated sheath, fit a shoulder‑strap pouch or MOLLE holster on the hip‑belt. Keep the deterrent on the side you draw with your dominant hand so extraction does not require removing the pack. Target an accessible range of about 12–15 cm (5–6 in) from the hip buckle; tether length of 10–18 cm (4–7 in) plus a small quick‑release snap balances retention with rapid deployment.
Orient the actuator away from your torso and always engage any built‑in safety collar or clip. Store away from heat sources and direct sun; avoid temperatures above 50°C (122°F) or prolonged exposure below −20°C (−4°F). Inspect canisters at least once per season for dents, corrosion or expired manufacture date – replace per manufacturer guidance (commonly every 3–4 years) or immediately after any discharge.
Confirm local regulations for aerosols in parks and while traveling; airlines and some protected areas prohibit transport. Train draws and aiming with an inert practice unit while wearing gloves and pack load; for group outings, assign one carrier per 3–4 hikers and agree a simple retrieval protocol to minimize fumbling during an encounter.
Mount a holster on the shoulder strap for fastest draw
Install a rigid, thumb-release holster on the dominant-side shoulder strap so the actuator sits 8–12 cm (3–5 in) below the clavicle, nozzle facing outward and canted 12–20° for a straight index-finger path; secure with two anchor points (top and bottom) to prevent rotation.
Hardware and placement specifics
Use a polymer or reinforced nylon holster that accepts a 150–250 ml aerosol canister. Attach via MOLLE clips, heavy-duty snap-hooks through the strap webbing, or by sewing a 25 mm webbing loop to the strap. Top anchor should be at the strap’s upper third; bottom anchor 6–8 cm (2.5–3 in) below the holster base. If strap lacks attachment points, feed 3 mm paracord through the strap channels and tie a girth hitch with a locking knot. Add a 25–35 cm (10–14 in) elastic safety lanyard with a weak-link breakaway to stop the canister from separating during a draw or tumble.
Retention, orientation and field checks
Choose a holster with a single-thumb retention tab or magnetic closure that releases with a single deliberate thumb motion. Orientation: actuator rim should sit 0–2 cm (0–0.75 in) forward of the strap plane so the thumb clears fabric during deployment. Run 50 dry draws: 20 standing, 15 while walking at 3–5 km/h (2–3 mph), 15 while hoisting the pack onto or off the shoulders; goal is consistent one-handed deployment under 2.0 seconds. Inspect after each session for stitching stress, clip creep, or strap compression; re-torque or refasten attachment hardware after the first three outings and every 10 afterwards.
Clip canister to hip belt for stability while hiking
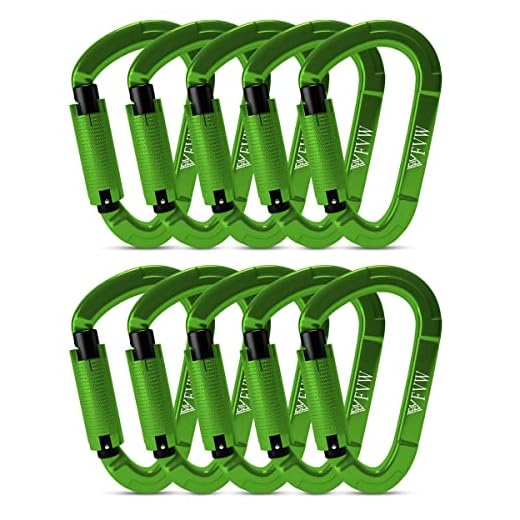
Clip the canister to the outer webbing of the hip belt roughly 10–15 cm (4–6 in) forward of the iliac crest using a stainless-steel locking carabiner or a swivel bolt‑snap, then secure a short shock cord (15–20 cm / 6–8 in) with a cord lock to prevent rotation and vertical bounce.
Attachment methods
Preferred hardware: 316 stainless or zinc‑plated bolt‑snap, or a small locking carabiner rated ≥2 kN. Mount to 25–38 mm (1–1.5 in) load‑bearing webbing or a dedicated belt holster with a 20–25 mm Velcro retention strap. For canisters weighing over ~350 g (12 oz) use a dual‑point setup (clip + secondary webbing loop or sleeve) to stop pivoting. Avoid thin decorative loops; plastic clips can become brittle below 0°C (32°F).
Placement and orientation
Place the device on the same side as your dominant hand for fastest access (e.g., right‑handers on the right hip). Orient the actuator/upstream end slightly rearward (10–20°) so the discharge opening cannot be blocked by clothing or gear while still allowing a clear, gloved fingertip index and pull. Set vertical position so the top of the canister is level with or slightly above the top of the pelvis for an unobstructed draw without lifting the hip belt. After mounting, perform a dry draw wearing gloves and with the hip belt loaded to confirm no snagging and stable, low‑bounce behavior.
Place on dominant-side chest strap for one-handed access
Mount the holster on the dominant-side sternum strap 10–12 cm (4–5 in) below the collarbone, with the actuator facing forward and rotated ~20–30° outward so a single-hand cross-body reach places the thumb directly over the trigger pad.
Placement and angle
Center the canister body inside a low-profile open-top holster so the actuator is exposed but protected by a short retention tab. Position the holster so the bottom of the canister sits ~6–8 cm (2.5–3 in) from the pack shoulder seam to avoid interference with load-bearing straps. For most defensive aerosols (225–300 g / 8–10.5 oz), this keeps weight off the neck and within the natural draw arc.
Retention, attachments and practice
Use a holster with elastic retention plus a quick-release snap or Velcro safety that can be released single-handed. Add a 20–30 cm shock-cord tether with a small carabiner to prevent loss after deployment. Test draw speed with an inert training cylinder: 20 repetitions seated, 20 while walking at 3–4 km/h, and 10 under mild exertion. Aim training shots at 3–6 m to simulate real deployment range. For field gear cleaning and gear fluids, refer to best antifreeze for pressure washer.
Safety checklist: confirm holster does not rub harness zippers, actuator guard is in place, tether is clipped, and canister temperature remains between -20 °C and +50 °C (-4 °F to 122 °F).
Use retention clip and orientation rules to prevent discharge
Attach a locking retention clip (stainless-steel spring with positive secondary latch) to the canister collar so the actuator is recessed and the nozzle points 90°–135° away from your torso to minimize accidental activation against straps or clothing.
Specify clips rated for 15–25 N static pull resistance and compatible with diameters 45–70 mm; preferred materials are 316 stainless or fiber-reinforced polymer with corrosion resistance and service range −20°C to +60°C. Select clips that produce audible feedback when locked and that resist vibration loosening over extended movement.
Orientation rules: shield the actuator behind a rigid shroud or tuck it between webbing so no object can depress it; aim the nozzle laterally or rearward (never upward toward the face). For vertical mounts place the actuator outward; for horizontal mounts angle the nozzle ~45° toward trail side so the discharge vector clears your body and nearby companions.
Inspection and maintenance: perform a weekly visual check for cracked seals, missing safety tab, or clip deformation and run a 20 N pull test before multi-day outings. Replace clips after 1,000 km of cumulative movement or at first sign of spring loss. When ambient temperature exceeds 40°C store the canister upright and keep the retention latch engaged while traversing rough terrain.
Train to retrieve and deploy one-handed from the selected orientation until average draw time is under 2.5 seconds; use dry drills that include locking and releasing the retention clip. For rugged mounting hardware and strap options consult pack reviews at best luggage brands south africa.
Insulate and shield the canister from freezing and direct sun
Maintain the canister’s operating temperature between 0°C and 40°C (32°F–104°F) by using a thin neoprene or closed‑cell foam sleeve with a reflective outer layer; leave the actuator exposed for immediate use.
Cold‑weather measures
- Use a 3–5 mm neoprene sleeve or 6 mm closed‑cell EVA foam wrap to reduce conductive heat loss; add a fleece liner for an extra 2–4°C retention during long stops.
- Place a single disposable heat pack (iron‑oxidation hand warmer) adjacent to the canister inside the sleeve when ambient temperatures are below 0°C; do not allow the warmer to touch the nozzle or tamper with any relief valve.
- If the canister feels stiff or sluggish after exposure to sub‑freezing temps, warm it gradually in an inside clothing pocket for 10–20 minutes and test a short burst in a safe direction before relying on it.
- Avoid insulating with materials that trap moisture (cotton, untreated wool) – use hydrophobic foams or neoprene to prevent freeze‑thaw ice buildup on fittings.
- Keep a spare insulated pouch sealed in an inner compartment for cold days; swap the canister into that pouch during stops rather than leaving it exposed.
Sun and heat protection
- Apply a reflective/Mylar outer layer (aluminized fabric or high‑reflectance tape with ≥0.8 solar reflectance) over the insulating sleeve to lower solar gain when exposed to direct sunlight.
- When stationary, move the canister into shade or under a dark garment layer; avoid leaving it on sunny surfaces or under clear plastic for prolonged periods (more than 15–30 minutes in strong sun).
- Never store the canister near engine exhaust, camp stoves, or inside a closed vehicle on hot days; keep it below 49°C (120°F) as a safety limit specified by most aerosol manufacturers.
- For extended exposure risk, fabricate a small rigid sun shield (aluminum or thin composite disc) that clips over the sleeve – vents must allow pressure relief and access to the actuator.
Quick checklist before setting out: inspect the sleeve for tears, verify reflective layer intact, ensure actuator remains uncovered, and carry a compact spare pouch and one disposable heat pack for cold conditions.
FAQ:
Where on my backpack should I keep bear spray so I can reach it quickly?
Place the canister in a shoulder-strap holster or a small chest pocket so you can grab it without taking the pack off. A holster clipped to the sternum area keeps the spray within arm’s reach while leaving both hands free for balance. If you prefer the hip, attach it to the hip-belt on the strong side (right for right-handed people, left for left-handed) in a dedicated pouch that prevents rotation. Practice drawing the canister a few times with an empty or training unit so your hand motions are smooth and muscle memory forms before you need it for real.
How should the spray be oriented in the holster to avoid accidental discharge and to make aiming easier?
Position the nozzle away from your face and slightly forward or upward so you can bring it quickly to eye level and aim at an oncoming animal. Keep the safety clip or lock engaged while it’s stored; choose a holster with a retention strap or snap to stop the canister from falling out. Do not tuck the canister with the nozzle pointing toward your chest where a sudden bump or chest compression could cause problems. Check the manufacturer’s label for any orientation guidance specific to your model.
Can I carry bear spray in checked luggage or on an airplane when traveling to a wilderness area?
Airlines and security agencies usually ban pressurized defensive sprays from carry-on baggage and often restrict them in checked baggage. Many providers prohibit canisters of the size and formulation sold as wildlife deterrents. Before travel, check the airline’s hazardous materials rules and the transportation security authority website for the country you’re leaving from. If the spray is not permitted, arrange to buy a canister locally at your destination or use alternative protective measures until you can obtain one legally.
How do I keep bear spray safe from heat and accidental bursting when hiking in hot weather?
Avoid prolonged exposure to direct sunlight and do not leave the canister inside a closed vehicle on hot days. Store it in a shaded pocket or holster and keep the safety cap on at all times while not in use. Use a holster that shields the trigger area and fastens securely so it can’t be knocked loose by branches. Inspect the canister before each trip for dents, rust, or other damage that could weaken the container. If you notice physical damage or swelling, replace the unit.
Is it better for each person in a group to carry their own bear spray, or should one person be responsible for the canister?
Individual carriage gives everyone quick access in case the group spreads out. For smaller groups where members stay close, carrying one well-positioned canister with a designated, practiced handler can work, but this increases response time if the handler is not immediately available. Agree on a plan before setting out: who will carry the spray, where it will be mounted, and how the group will react if wildlife appears. Keep the device secured but reachable, and run a simple drill so people know how to move and keep distance while the handler prepares the spray.


