
Recommendation: Mount an insulated sleep quilt in a waterproof stuff sack beneath the lower compression straps of the rucksack and secure it at two points with 5–8 mm cord loops plus a 20–25 mm webbing strap; this keeps mass low, minimizes swing and preserves access to the main compartment.
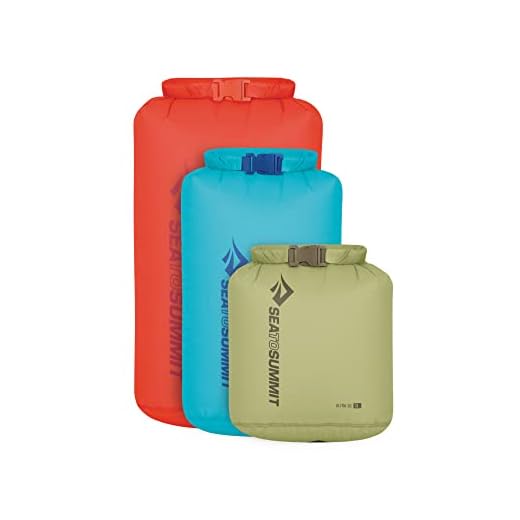
Pack method: roll the insulation into a tight cylinder, expel air, then place in a 3–10 L dry sack. Thread a webbing strap through the sack’s lash points or wrap it around the cylinder, route cord or straps through the pack’s daisy chains or lower haul loop, tension and lock with a cordlock or small buckle. Use two attachment points spaced 15–25 cm apart to prevent rotation; finish knots with a double overhand or secure with a small spring clip for quick release.
Hardware and dimensions: 20–25 mm flat webbing, 5–8 mm accessory cord, lightweight wire-gate carabiners (3–5 kN) for non-load-bearing security, and a rubber-lined cordlock for elastic tensioners. For longer rolls add a third stabilizer strap across the middle. Strap lengths of 40–60 cm are typical; trim excess and seal cord ends to stop fraying.
Practical tips: keep the roll below the lid and no more than ~20 cm longer than the pack torso to reduce snag risk; avoid covering the hipbelt or side pockets. Re-tension after the first 1–2 km and before stream crossings. For wet conditions place contents inside an inner drybag and maintain snug external straps to limit water entry and flapping in wind.
Secure a sleep kit to a rucksack
Use two 25 mm (1″) nylon webbing straps with low-profile cam buckles: place one strap 10–15 cm from the top of the rolled system and the second 10–15 cm from the bottom to clamp the roll tightly against the pack’s rear panel.
Route the lower strap through the hip-belt stabilizer or the pack’s lower compression loops to transfer load to the hips; route the upper strap through the lid strap, daisy chains or ice-axe loop to prevent vertical slip. If your pack lacks external anchors, thread straps through the shoulder-strap anchor points (briefly unthreading the closure) and re-seat them after tightening.
Prevent lateral swing with a short cross-lash: use 4–6 mm shock cord, 20–30 cm per side, crossed over the roll ends and tied with a constrictor knot or a double fisherman. Wrap the cord once around each end, tension, then secure the loose ends with a tiny cord lock or a heat-melted bead for glove-friendly one-handed release.
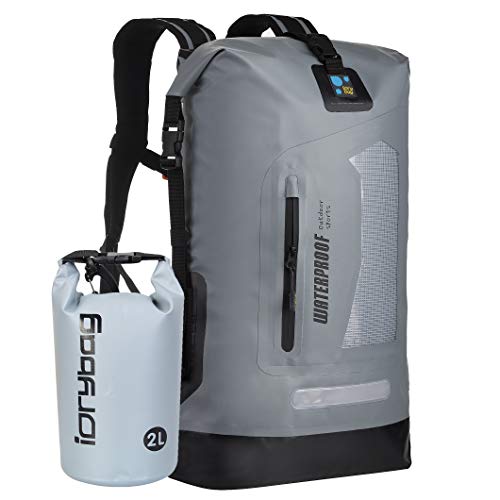
Limit external mass to ≤2 kg (≤4.4 lb) to avoid gait disruption and increased shoulder strain; heavier systems should be packed inside the main compartment near the rear panel. For weather protection use a waterproof dry sack (Seam-taped or welded seams) and tuck the sack’s opening under the top lid or hip-belt webbing. For extra weather/UV coverage consider a compact rain shield or umbrella: best uv protection umbrella brands in usa.
Mark strap ends with high-visibility tape or a colored paracord pull; keep one release tab accessible while wearing the rucksack so the roll can be detached quickly without removing the pack.
Identify strongest attachment points on your pack: compression straps, daisy chains and ice‑axe loops
Place heavy external loads on the lower horizontal compression straps anchored to the frame sheet; keep the mass within 5–10 cm of the frame to preserve balance and reduce pendulum forces on technical terrain.
Compression straps
Lower versus upper: use the bottom pair for bulky, dense items (rolled quilt or bivy roll) and the mid/side straps for stabilizing midweight items. Use two straps spaced 15–30 cm apart rather than one wide span. Thread the strap through the roll twice or use a wide webbing lash to prevent slippage. Preferred hardware: 20–25 mm (3/4″–1″) nylon webbing with ladder‑lock sliders or cam buckles; avoid tying knots in thin straps. Inspect anchor points for continuous webbing that passes into the frame – sewn‑through webbing and box‑and‑cross or bartack stitching indicate higher load capacity.
Daisy chains and ice‑axe loops
Treat daisy chains as accessory points: each individual rung is not rated for heavy or dynamic loads. To spread load, run a strap or sling through multiple rungs or clip with a carabiner through several loops. Ice‑axe/tool loops are made for vertical tool retention and short, static loads; use a locking carabiner or dedicated tool tether if you need a secure hold. Do not suspend your weight from daisy chain rungs or single stitch points. Check for abrasion where webbing rubs against buckle teeth or edge seams; worn fibers or pulled stitches mean use a different anchor or repair before trusting the point.
Inspection and simple field test: visually confirm double‑box or bar‑tack stitches, no exposed core fibers, and intact buckle teeth. Give each anchor a firm pull (one‑handed, then two‑handed) to detect slippage or stitching creep; replace straps rated below manufacturer specs for any load you care about. For fragile insulation items use a compression sack or dedicated lash strap rather than relying solely on daisy chains or small tool loops.
Attach a rolled sleep sack to bottom or side compression straps without crushing insulation
Place two 5–10 mm closed-cell foam strips between the roll and each strap, then tension straps only until the foam compresses slightly (target strap load ~20–40 N, roughly 2–4 kgf).
Roll orientation: roll with the opening tucked toward the pack body and the stitched seams outward; place foam strips at strap contact points (one under and one over the roll if straps run across). Route straps so webbing contacts foam, not loft. Aim for a 10–20 mm visible loft gap at each strap location after cinching.
Sack and routing: use a lightweight mesh or loose stuff sack to keep the roll contained without compressing it; thread bottom or side straps through the sack’s daisy loops or the sack’s reinforced tie points to create a cradle rather than a tight wrap. If straps are adjustable, set them to hold horizontally – avoid vertical pinching that flattens insulation along the roll’s length.
Material-specific limits: for down, limit diameter reduction to no more than 30% (keep at least 60–70% of uncompressed thickness); for synthetic, allow up to 40% compression but still maintain foam spacers. Avoid layering heavy gear on top of the roll and check strap tension after 500–1,000 m of walking; re-tension to restore the 10–20 mm loft gap. For unrelated packing or field-care tips see how to clean a cat that hates water.
Secure a dry sack to the hipbelt or lid for quick access and load stability
Use a 1–2 L waterproof dry sack placed at the hipbelt level and retained with two short straps or soft shackles so the mass sits at the lumbar plane; target a release time under 3 seconds and keep external mass ≤2 kg to avoid hipbelt torque.
Anchoring methods and placement
Prefer a dual‑point anchor: route one short strap through the hipbelt webbing on each side or through the hipbelt pockets, then clip both to a single loop on the dry sack for redundancy. For lid mounting, anchor across the top lid strap and a secondary point on the daisy chain or lid hook. Keep the sack centered or slightly off‑center toward your dominant hand for faster retrieval.
Avoid long dangling webbing: limit suspension drop to 10–15 cm from the belt line so the center of mass remains within ~5 cm of the lumbar plane. If the sack contains an insulated quilt or roll, compress to 25–35% of loft to reduce pendulum effect while preserving insulation integrity.
Rapid‑release and security details
Use low‑profile side‑release buckles or cord with a locking toggle for one‑handed release. Backup with a short bite of cord tied as a slipped figure‑eight or a quick‑release knot (e.g., Tarp‑Release) so you can free the sack under load without tools. Inspect attachment points for chafe and double‑back any webbing to prevent slippage.
| Item | Recommended spec | Purpose |
|---|---|---|
| Dry sack | 1–2 L, roll‑top, TPU or Cordura laminated | Keep insulation dry and compressible for hipbelt mounting |
| Soft shackle / webbing loop | 5–8 mm Dyneema loop or 15–20 mm webbing, 30–40 cm | Low‑bulk, strong anchor with minimal abrasion |
| Quick‑release buckle or cord toggle | Micro side‑release buckle or cord toggle with 3–4 mm cord | One‑hand access; secondary holding method |
| Backup cord | 3–4 mm accessory cord, 40–60 cm | Secondary safety tie using a slipped knot for emergency release |
Perform a field test loaded with the typical kit: walk several hundred metres, crouch and bend, then test single‑handed retrieval. Adjust position or shorten straps if the sack swings or interferes with hipbelt rotation. Replace worn webbing and toggles before multi‑day trips to maintain reliability.
Lash bulky or irregular insulated rolls with cord, daisy chains and shock-cord
Use 3–5 m of 4 mm accessory cord and a trucker’s hitch to create a multi-point lashing through daisy‑chain loops; add a 5–10 mm foam spacer under high‑compression points to preserve loft.
Multi‑loop cord lashing (best for odd profiles)
Anchor one end with a girth hitch or clove hitch through a lower daisy loop or sewn attachment, then route the cord around the item and back through the next daisy loop, repeating 2–4 passes so loads distribute across multiple loops. Leave the wraps slightly angled so they cradle bulges rather than pinching one spot. Finish with a trucker’s hitch for mechanical advantage, tension until the item is immobilized but loft remains ~2–3 cm at the thickest sections, and lock the tail with two half hitches. Protect shell fabric where the cord crosses seams by inserting a 3–5 cm webbing pad or a short strip of duct tape under the cord.
Shock‑cord cradle (fast, adjustable, quick release)
Use 4–6 mm elastic cord woven in a zigzag through successive daisy loops to form a springy cradle. Cut cord length at roughly 1.5× the circumference of the object, feed both ends through a low‑profile cordlock, and pre‑tension to remove slack while preserving loft. Add a short trekking‑pole or carbon spreader bar under the central span to prevent collapse over irregular shapes. For rapid release, use a locking carabiner as a single anchor point through two or three daisy loops and clip the cordlock loop to it; this concentrates load but keeps detachment simple.
Material and knot notes: accessory cord 3–5 mm (nylon braid or 550‑type) balances strength and handling; Dyneema cord works but requires more secure stopper knots (figure‑8 or double overhand) because of slipperiness. Use trucker’s hitch for tension, clove or girth for initial anchor, and two half hitches as backup. Inspect lashings after 15–30 minutes of walking and re‑tension if the load shifts.
Weatherproof and balance an externally carried insulated roll to prevent sway and wetting
Place the insulated roll inside a welded roll-top dry sack (recommended volumes: 3–6 L for solo quilts, 8–12 L for double systems) made from PU- or silicone-coated nylon with taped or welded seams and a hydrostatic-head rating ≥3,000 mm; then keep that assembly as close to the pack frame as possible and secured at two vertical points 20–30 cm apart to stop pendulum motion.
- Materials and protective layers
- Use a 70–210D silicone- or PU-coated nylon dry sack with welded seams; avoid sewn seams without taping. Target HH ≥3,000 mm for multi-day exposure; ≥5,000 mm for extended rain/snow.
- Add a thin secondary barrier: a sealed 0.5–1.0 mil polyethylene liner inside the dry sack for redundant protection against seam leakage.
- Cover external assemblies with a pack rain cover or custom-stitched sleeve when travel includes long stretches in spray or heavy precipitation; ensure the cover vents at the bottom to limit trapped moisture.
- Sway-reduction techniques (mechanical and placement)
- Shorten the lever arm: keep the outermost surface of the roll within 12–20 cm of the pack’s rear frame to reduce torque and aero drag; longer protrusions increase moment arm and sway exponentially.
- Two-point restraint: use two firm anchor points separated vertically by 20–30 cm to prevent rotation around a single axis. If only one anchor is available, add a secondary safety tether to the harness or frame as a fail-safe.
- Use elastic dampers: 3–4 mm shock cord run in a cradle around the roll absorbs gust impulses; pre-load to ~25–35% of stretch to provide dynamic damping without chafing fabric.
- Orient horizontally across the lower back when possible; a transverse orientation reduces sail area and wind-induced oscillation compared with a long vertical projection.
- Split long loads into two shorter bundles mounted symmetrically left/right if available – two smaller masses sway less than one long pendulum and improve lateral balance.
- Load-management and stability adjustments
- Counterbalance internal packing: place heavier items (cookset, fuel, water) low and close to the spine to offset the external mass and keep the combined center of gravity within the torso box.
- Tighten hipbelt and sternum strap to transfer loads to hips and compress the external assembly toward the frame; increase hipbelt preload by one notch when carrying an external roll longer than 15 cm.
- Trim external length: if the roll extends below the pack base more than ~10 cm, reposition or shorten–excessive lower projection causes snagging and rotatory instability on uneven terrain.
- Test on flat ground before moving: walk 20–30 paces, turn sharply and stop to feel for rotation; adjust anchor spacing, shock-cord preload and strap tension until motion is negligible.
- Wetness-control in variable conditions
- Ventilate after heavy activity: avoid sealing a damp insulated roll for long periods; unzip the dry sack mid-camp to reduce condensation buildup if weather allows sheltered airing.
- Use desiccant packs inside the dry sack on multi-day trips in cold/wet climates to reduce moisture accumulation; replace or dry them daily if saturated.
- For snowy travel, keep the roll angled slightly forward/up so meltwater sheds away from seams and the pack frame rather than pooling against tapes or closures.
- Carry quick-release capability: set one easily reachable buckle or cord so the roll can be dropped or stowed under shelter within 10–15 seconds if a deluge or river ford threatens saturation.
Implement these steps together: waterproof redundancy (welded dry sack + liner + rain cover), minimize lever arm and use two vertical anchors, add elastic damping, and rebalance internal loads – this combination greatly reduces sway and the risk of water intrusion for externally carried camp insulation.


