

Placement and sizing: Choose patches between 7–10 cm (3–4 in) for the main panel and 4–6 cm for pockets. Keep a margin of 15–20 mm from seams and zippers to avoid stress points. Distribute weight symmetrically–place heavier items low and centered, lighter ornaments toward the top or sides.
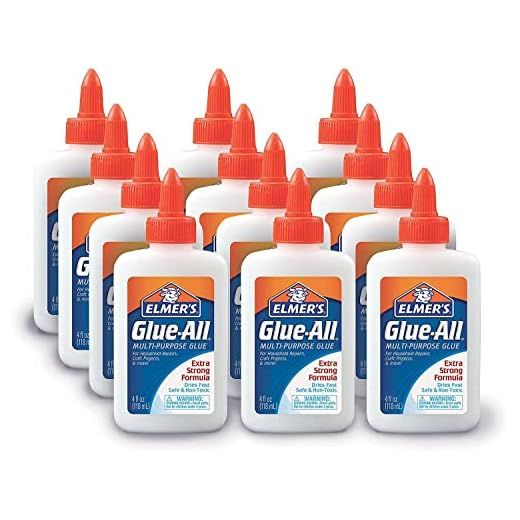
Attachment methods: For permanent additions, sew with polyester-wrapped nylon thread using a 90/14 or 100/16 needle and a tight backstitch or small zigzag (stitch length 2 mm). For semi-permanent fixes, combine a thin layer of industrial fabric adhesive (e.g., E6000) with stitching for a secure bond. Iron-on patches require 150–160 °C for 15–25 seconds with a protective cloth; avoid heat on nylon/polyester panels–test on a scrap.
Pins, charms and rings: Use enamel pins with rubber or felt backing pads to protect material; secure with 4–6 mm split rings or 25–30 mm lightweight carabiners for keychains. Limit each attachment to 50 g maximum and keep total added weight under 300 g to prevent strap strain and zipper failure.
Paint, stencils and heat-setting: Use textile acrylics or premixed fabric paints; if diluting, add fabric medium at a 1:1 ratio with acrylic. Apply thin coats, allow 30–60 minutes between layers, then heat-set under a cloth at 140–150 °C for 3–4 minutes. Cure for 24 hours before handling. Machine wash inside-out on a gentle 30 °C cycle; air dry.
Hardware upgrades and reinforcement: Install 6 mm grommets with leather or thick vinyl washers (2–3 mm) to spread load when adding straps or chains. Use rivets for heavy mounts; punch holes with a hand punch and set with a bench press or hammer-tool. Add a leather patch (3–4 mm) behind high-stress areas and stitch through both layers for lasting support.
Maintenance and safety: Remove detachable elements before washing, trim loose threads, and carry a micro repair kit: heavy-duty needle, polyester thread, a few spare rivets/grommets, and superglue. Avoid sharp or pointed ornaments near school or airline settings; choose blunted edges and secure fasteners to prevent accidental snags.
Select embellishments by fabric type: adhesives, patches, and paints that work
Canvas / denim: Sew-on patches are the most durable; use a 2–3 mm stitch and backstitch at stress points. For glue-only attachment choose a flexible, waterproof adhesive (E6000, Tear Mender, or Aleene’s Fabric Fusion). For paint, use 100% acrylic textile paint or acrylic mixed 1:1 with textile medium; allow 24–48 hours cure, then heat-set by ironing through a pressing cloth on cotton setting for 3–5 minutes. Machine wash warm (30–40°C) inside out after 72 hours.
Adhesives and patch types by material
Nylon / polyester (tarp-like, ripstop): Iron-on adhesives often fail on slick synthetics. Best approach: sew patch with a heavy-duty nylon thread + apply a flexible seam-sealer (Tear Mender or seam grip). For permanent no-sew repairs use neoprene contact cement designed for synthetics; clamp 12–24 hours. Use textile spray paints made for synthetics or acrylic + textile medium; test a hidden area first because coating can stiffen fabric.
Leather, faux leather, vinyl: Avoid standard fabric glues. Use contact cement (Barge), leather glue, or rivets for heavy load areas. For color changes, use formulated leather paints (Angelus or equivalent) after cleaning with a leather preparer/deglazer; finish with a flexible acrylic finisher to prevent cracking. Do not iron these materials.
Suede and nubuck: Adhesives stain and stiffen; prefer sewing, rivets, or snap hardware. If patching is unavoidable, use thin sew-on patches and leather-specific glue sparingly along edges only. For coloration use suede dyes applied with suede brush, not acrylics.
Application details and durability tips
Always degrease and roughen non-porous surfaces with 220–320 grit sandpaper for better adhesion. Test every adhesive/paint on a scrap or hidden seam for color change and hand-feel after curing. Stitch + glue is the strongest combo: glue to index placement, then stitch perimeter. For iron-on patches use a 30–60 second press at manufacturer-specified temperature and overlap edges by 1–2 mm; add stitches if the item will carry weight. Seal painted areas with a flexible clear coat; allow at least 48–72 hours before subjecting to moisture or heavy flexing. For inspiration or gear-specific recommendations see best messenger bag for street photography.
Measure and mark placement for symmetrical sticker, patch, and pin arrangements
Place the central element on the pack’s vertical centerline at a fixed distance: for standard daypacks (14–18 in / 35–46 cm wide) set the primary sticker or patch 2.5 in (6 cm) below the top seam; for smaller packs reduce to 1.5 in (4 cm).
Find the centerline by folding the pack flat or by measuring width with a tape measure and marking midpoints at top and bottom. Connect marks with removable masking tape or a washable fabric marker to create a straight reference axis.
For mirrored rows, measure lateral offsets from the centerline. Common spacings: tight cluster = 0.5 in (1.3 cm) between edges, standard = 1 in (2.5 cm), airy = 1.5–2 in (3.8–5 cm). Use a quilting ruler or metal straightedge to mark tick points on both sides at identical distances.
To lay out a circular or radial arrangement, use a compass method: tape a small pin at center, tie a thread with a pencil at the desired radius (1.5–3 in / 4–8 cm typical), swing the pencil to trace the placement circle, then divide 360° by the number of elements to mark angles (e.g., four items = 90° apart, six = 60°).
Create templates from scrap paper or cardstock: draw each element to scale, cut out, and test-adhere with low-tack tape. For stickers, reposition the template until edges align with seam and zipper clearances; for patches and pins, mark exact corners and hole centers through the template.
When working on curved panels, measure along the fabric’s contour using a flexible tape; transfer marks to the inside by inserting a sheet of cardboard and poking a pin through the marked point so the interior line shows through without permanent marks on the outer fabric.
For pin arrays, mark hole centers with a fine awl or tailor’s chalk while the pin shank sits in the template. Insert protective cardboard between outer and inner layers before making holes; place small washers or leather discs behind the lining to distribute stress.
Validate symmetry by taking a photo from eye level with the pack sitting upright; check that centerline, horizontal alignments, and equal spacing read correctly in the image. Adjust templates and marks until the photo shows even balance before any permanent attachment.
Hand-sew patches: needle size, thread type, step-by-step stitch methods
Use a size 9–11 sharps needle with bonded nylon or polyester thread for lightweight ripstop and thin synthetics; switch to size 3–7 heavy sharps (or a milliner/embroidery needle) for canvas/Cordura; use a saddler/glovers (leather) needle for leather patches.
Needle and thread selection
Needles: light fabrics – sharps size 9–11 (fine point, smaller eye); medium weight canvas/Cordura – sharps size 5–7 (stiffer shaft, larger eye); leather – saddler/glovers needle size 1–3 (curved optional for thick edges). Use a heavy needle when you must pre-punch fewer holes.
Thread: bonded nylon or bonded polyester for strength and abrasion resistance; waxed linen or waxed polyester for leather. Match thread thickness to fabric: lightweight fabric – 40–60 wt polyester; medium canvas – 30–40 wt bonded polyester or nylon; heavy-duty seams – upholstery/threaded cord 0.8–1.2 mm (or Tex 90–135 if labeled). Pre-wax synthetic thread lightly to reduce tangles.
Step-by-step stitch methods
Prep: trim patch edges, fuse or use temporary adhesive dots to hold position, clamp with clips if needed. For thick fabrics or leather, mark stitch line 2–3 mm from edge; for light nylon use 1–1.5 mm. If fabric is laminated, test a scrap to ensure stitch penetration without delamination.
Pre-pierce option: for heavy material, use an awl or pricking iron to make evenly spaced holes (spacing 2.5–3.5 mm for canvas; 1.5–2.5 mm for ripstop). Pre-piercing keeps stitches uniform and reduces needle stress.
Backstitch (structural, low visibility): 1) Bring needle up at point A; 2) Insert at B then come up at C (one stitch length ahead); 3) Insert back into A and repeat so each stitch overlaps previous; 4) Keep stitch length 2–3 mm on canvas, 1–1.5 mm on ripstop. Backstitch equals near-machine strength for handwork.
Running stitch with reinforcement: 1) Make a short running stitch sequence (3–4 stitches); 2) On the return pass, double back through the same holes to lock; 3) Use this when edge visibility is acceptable but extra hold is needed.
Whipstitch / Overcast (edge finish): 1) Work from the patch edge outward, inserting needle from underside and catching only the patch edge and base fabric lip; 2) Space stitches 2–3 mm apart for canvas, closer for thin fabric; 3) Pull tension evenly to avoid puckering. Use waxed thread for leather or thick threads for a decorative look.
Saddle stitch (for leather patches): 1) Use two needles on a single waxed thread; 2) Pre-pierce holes with an awl; 3) Push one needle through the hole from each side so threads cross in the middle; 4) Repeat for each hole keeping tension firm; 5) Finish with two back-and-forth passes through the last hole and trim close.
Securing ends and hiding knots: tie a small surgical knot, sink the knot into a pre-made hole or behind the patch edge, then run 2–3 locking stitches over it. Alternatively, bury the tail by threading it back through several stitches on the underside.
Tool list: thimble, awl/pricking iron, curved or straight needles per material, bonded nylon/polyester thread, beeswax, small clamps or fabric clips, fine-point marker for layout. For a robust field-ready pack see best hiking backpack on a budget.
Apply heat transfers and iron-on patches without melting synthetic materials
Set the heat source to 110–140°C (230–285°F), place a Teflon sheet or parchment paper over the patch, and use 10–15 second presses at low–medium pressure in 2–4 repetitions while testing on a scrap first.
Fabric temperature guidance: polyamide/nylon – 110–130°C (230–266°F); polyester and polyester blends – 125–140°C (257–284°F); cotton-rich areas tolerate up to 150–160°C (302–320°F) but avoid those temperatures on pure synthetics. If the item has a PU or water‑repellent coating, assume the safe ceiling is 120°C (248°F).
Adhesive selection: pick transfers labeled “low‑temp,” “nylon‑safe,” or “cold‑peel.” Cold‑peel adhesives reduce heat exposure because you allow cooling before removing carrier. Avoid standard hot‑peel patches that require single long, high‑temperature presses.
Application sequence for a hand iron or heat press: 1) insert a flat stabilizer (thin cotton or pressing board) inside the bag to prevent internal distortion; 2) pre‑press the target area for 3–5 seconds to remove moisture and wrinkles; 3) position patch, cover with Teflon/parchment, apply 10–15s press, lift for 5–10s, repeat 2–3 times; 4) follow manufacturer peel instruction (hot or cold) and finish with a light second press through the barrier for 5–8s if allowed.
Testing protocol: cut a 5×5 cm (2×2 in) scrap of the same fabric or use an inconspicuous seam area. Test three settings: reduce temperature by 5–10°C if any glossing, puckering, softening, color shift, sticking, or smell of burning occurs. Record the successful setting for future repeats.
Pressure and timing tips: prefer multiple short presses over a single long press; use light‑to‑medium pressure (press feels like firm thumb resistance) to avoid local overheating. Disable steam; steam increases heat transfer and can warp synthetics.
If adhesion fails or the surface shows heat damage, switch to a sew‑on patch or a textile adhesive rated for synthetics (solvent‑free, flexible formula). For thin, highly stretchable synthetic fabrics select flexible low‑temperature vinyl or stretch HTV labeled for nylon.
Post‑application care: wait 12–24 hours before washing. Machine wash cold (≤30°C / 86°F) on a gentle cycle, turn the item inside out, and air dry or tumble at low heat only. Reapply light pressing with Teflon sheet after many washes if edges begin to lift, using the original safe test settings.
Stencil and paint on nylon or cotton duck: paint selection, priming, and curing
Use a flexible acrylic textile paint formulated for synthetics on nylon and a heavy-body textile acrylic for cotton duck; prioritize paints labeled “wash-fast” and “flexible” and perform a tape-and-wipe adhesion test before full application.
Paint selection and mixing
- For nylon: choose paints explicitly marked for synthetic fabrics or “for nylon” (water-based acrylics with a bonding agent, or solvent-based flexible enamels when ventilation allows). Avoid standard artist acrylics without a textile medium – they can flake on stretch.
- For cotton duck: use heavy-body textile acrylic or pigment inks mixed with textile medium for better penetration and hand feel.
- Mix ratios: for improved flexibility, mix 2 parts paint to 1 part textile medium (1:1 if using heavy pigment inks). For airbrushing, thin with up to 10–20% flow improver or water for water-based systems; never exceed manufacturer thinning limits for solvent-based products.
- Opacity: use opaque base colors for dark fabrics; apply a white or light-colored undercoat in two thin layers, cured between coats, before stenciling saturated colors.
Surface prep and priming
- Clean: wipe the area with isopropyl alcohol (70–90%) to remove oils, silicone, and fabric finishes; allow to dry 10–15 minutes.
- Scuff: gently abrade nylon with 400–600 grit sandpaper or synthetic scouring pad to increase mechanical adhesion; for cotton duck this step is optional unless fabric has a tight coating.
- Primer options:
- Nylon: apply a thin coat of an acrylic adhesion promoter or plastic primer designed for flexible substrates (1–2 light coats, flash 10–15 minutes between). Follow solvent safety guidelines.
- Cotton duck: prime with a flexible textile ground or thin acrylic gesso if heavy opacity is needed; allow full dry time per label.
- Test adhesion with a cross-hatch and tape pull before committing to the full design.
Avoid saturating the weave; build opacity with multiple thin coats (wet film ~0.1–0.2 mm per pass) rather than one heavy coat to prevent cracking and stiffness.
- Stencil application:
- Secure stencil with low-tack repositionable spray adhesive or adhesive stencil sheets to eliminate bleed under edges.
- Use a foam pouncer or stipple brush and apply paint in an up-down stippling motion; wipe excess paint from the tool before touching the fabric.
- Remove stencil while paint is still slightly wet for sharp edges; if layering colors, allow each layer to tack-dry (10–20 minutes) before re-masking.
Curing and sealing
- Curing timelines:
- Cotton duck: heat-set painted areas with a household iron at ~150°C (300°F) using a pressing cloth on the reverse side for 2–3 minutes per area, or tumble-dry medium for 20–30 minutes when the paint label permits.
- Nylon: avoid high-heat ironing and tumble-drying. Prefer paints that air-cure to full hardness; allow 72 hours at 20–25°C and low humidity for optimal crosslinking. If low heat is required, use a heat gun or hairdryer on the lowest setting at 20–30 cm distance in short bursts, keeping surface temperature below ~90°C (194°F).
- Sealant choices:
- Use a flexible water-based textile varnish or a clear flexible polyurethane labeled for fabrics. Apply 2–3 light spray or brush coats, 15–30 minutes between coats.
- For nylon, select sealers specifically marked safe for synthetics; solvent-heavy sealers can harden or cause yellowing.
- Post-cure care: wait 7 days after final cure before washing. Machine wash cold, gentle cycle, mild detergent; line dry. Do not use bleach or high-heat drying for at least one month after application.
For a concise primer on protein-folding organelles that may inspire layered stencil textures, see which of these organelles folds proteins.


