

Apply a 2-part epoxy (example: J-B Weld ClearWeld) to both damaged webbing faces, press a pre-cut nylon repair patch (match width, typically 25–50 mm) over a 30–40 mm overlap, clamp firmly and allow 2 hours for handling strength and 12 hours for near-full cure.
Prepare surfaces: trim frayed fibers to a 3–5 mm clean edge, degrease with 90% isopropyl, scuff both surfaces with 240–320 grit sandpaper, then wipe with solvent. Use a thin epoxy bead to avoid stiffness at the joint; remove excess before cure to prevent hard ridges that rub clothing.
For load-bearing failures at the connector, replace plastic hardware with a stainless steel tri-glide or ladder lock sized to the webbing. Route webbing with a 25–30 mm double-back overlap, secure the overlap using two stainless pop rivets spaced 15–20 mm apart or apply a 25–35 mm adhesive-backed metal clamp designed for webbing.
Temporary field options: double up a 7.6 mm (0.3 in) heavy-duty zip tie through the original hardware and cut flush; or use heat-shrink tubing (120–150°C application) slid over the joint and heated for 45–90 seconds with a heat gun for added abrasion protection. For melted ends, briefly pass a flame and press with pliers to seal; allow complete cooling before tensioning.
Test repaired assembly with a static load equal to expected use plus 25% margin (example: if typical load is 20 kg, test at 25 kg) for 30 minutes, then inspect daily for 48 hours. Replace permanent components if any slippage, delamination, or hardware deformation appears.
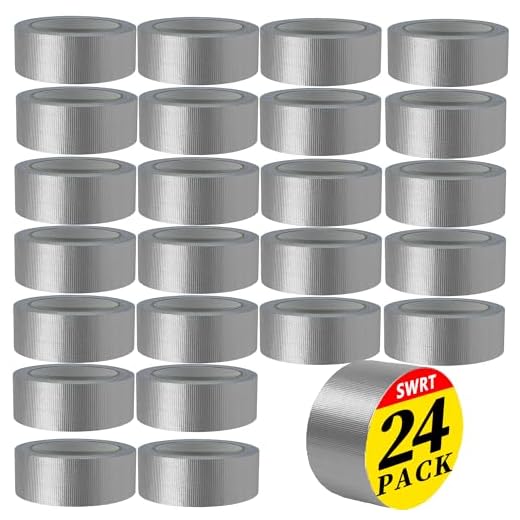
Quick emergency repair using duct tape and packing tape
Use a 2″ (50 mm) cloth duct tape core wrapped longitudinally and circumferentially, then seal the whole area with clear packing tape for abrasion resistance and water repellence.
Tools and materials: one roll 2″ cloth duct tape, one roll clear packing tape, scissors, lighter or lighter-size heat source (optional), spare cord or shoelace. Work on a flat surface and dry the damaged section.
Preparation: trim loose threads and burned synthetic fuzz with scissors; melt the very ends of nylon or polyester webbing briefly with a lighter to stop further fray (apply flame for 1–2 seconds and press to fuse–do not hold flame directly on skin).
Primary method: cut a duct tape strip whose length equals the damaged zone plus 6″ (150 mm) extra on each side. Lay the tape sticky side up, center the webbing across the tape, fold the tape over so the adhesive faces adhesive and the webbing is completely encased. Press firmly to eliminate air pockets.
Reinforcement: add 3–4 full-wrap circumferential turns using 2″ duct tape, overlapping each wrap by ~50%. Then apply two 1″ wide longitudinal strips of duct tape along both edges of the repaired section to form a stiff backbone that distributes load over a larger area.
Final sealing: cover the entire repaired length with 2–3 overlapping layers of clear packing tape, smoothing with your palm or a flat tool to remove bubbles. Packing tape reduces dirt adhesion and protects the cloth tape from abrasion and moisture.
If the connection point to hardware failed, create a temporary loop: feed the loose webbing end through the buckle or D-ring, fold it back 2–3″ (50–75 mm) and secure the fold with multiple wraps of duct tape, then follow with packing tape sealing. Add a secondary lashing with paracord or shoelace knotted tightly as insurance.
Load guidance: treat this as a short-term remedy–limit carried weight to 5–10 kg (11–22 lb) and avoid dynamic loads (jumping, swinging). Inspect the repair every few hours; rewrap immediately if adhesive loosens or edges peel.
Replacement tip: keep a small repair kit (duct tape strip pre-cut to 6″ and a 6″ clear tape strip) in an external pocket for faster on-the-go application during trips.
Secure a torn webbing with zip ties and heat-shrink tubing
Use three to five heavy-duty zip ties (6–8 in / 150–200 mm, 50–120 lb / 22–54 kg tensile) plus a 2–3 in (50–75 mm) length of 3:1 heat-shrink tubing sized 1.5–2× the webbing width to create a compact, load-bearing splice.
Materials
- Zip ties: 6–8 in (150–200 mm), UV-resistant nylon, 50–120 lb rating – 3–5 pieces
- Heat-shrink tubing: 3:1 shrink ratio, length 50–75 mm, expanded ID ≈1.5–2× webbing width
- Flush cutters or diagonal pliers
- Heat source: heat gun (300–400°F / 150–200°C) recommended; lighter or soldering iron as alternative
- Optional: adhesive-lined tubing or a thin smear of cyanoacrylate for extra bonding
Procedure
- Measure webbing width and select tubing with expanded inner diameter about 1.5–2× that width; cut tubing to 50–75 mm.
- Overlap the torn ends by 40–75 mm depending on expected load: 40–50 mm for light use, 60–75 mm for heavy loads.
- Position 3–5 zip ties over the overlap, spaced roughly 10–15 mm apart. Place one tie within 5 mm of each end of the overlap and remaining ties evenly between.
- Tighten ties sequentially, pulling each until the webbing layers sit flush and the ties compress but do not bite through fibers; use medium hand force–do not overtighten.
- Trim tie tails to 2–3 mm with flush cutters; flatten trimmed tips against the tie head by brief contact with a lighter or by pressing with pliers.
- Slide heat-shrink tubing over the repaired section so it covers all ties plus 5–10 mm of webbing on each side.
- Shrink tubing with a heat gun on low/medium (approx. 150–200°C). Keep the gun moving, shrink until tubing conforms tightly and smooths tie edges. If using a lighter, apply brief, sweeping motions from ~50 mm distance to avoid scorching.
- Optional: apply a drop of cyanoacrylate at each tie head under the tubing before shrinking to lock ties; allow cure per adhesive instructions.
- Inspect joint for any sharp edges, exposed fibers, or uneven compression. Test under gradual load before regular use.
Safety and performance notes: leave at least 40–60 mm overlap for load-bearing use; anticipated load capacity is lower than original factory stitching–use this method for field repairs or medium-duty carry. Avoid open flame near tubing and synthetic webbing whenever possible; if heat discoloration or melting occurs, redo using lower heat and greater distance.
Replace broken shoulder webbing using paracord or a heavy-duty shoelace
Use Type III (550) paracord doubled for a durable replacement: measure the original webbing length and add 18 in (45 cm) for knots, fold the cord and thread the loop through the existing tri‑glide or D‑ring, pull both ends evenly and secure with two stacked double fisherman’s knots; melt the paracord tails with a lighter until fused, press flat with pliers and trim to ~6 mm.
Materials and measurements
Recommended: Type III 550 paracord (≈550 lb tensile, 7 inner strands) or waxed round boot shoelace 4–6 mm for temporary use. Hardware: 1 in (25 mm) tri‑glide, ladderlock or stainless D‑ring matching webbing width. Tools: lighter, pliers, sharp scissors, tape measure, optional CA (cyanoacrylate) glue for knot locking.
Procedure
Fold paracord to create a doubled load-bearing section, route the loop through the bag’s hardware so the folded end bears the load, then tie double fisherman’s knots on the two working ends to join them. For an adjustable length reproduce the original routing through the tri‑glide and add a constrictor or stopper knot to minimize slippage. If using a heavy shoelace, tie two surgeon’s knots plus a finishing overhand, apply a small drop of CA glue to the knot faces and trim excess. Test progressively under load–apply 20–30% of expected weight first, re-tension knots, then increase to full load.
If original hardware is missing, purchase 1 in (25 mm) ladderlocks or D‑rings rated ≥300 lb working load and match width to your webbing; for unrelated product-review reference see are servis fridge freezers any good.
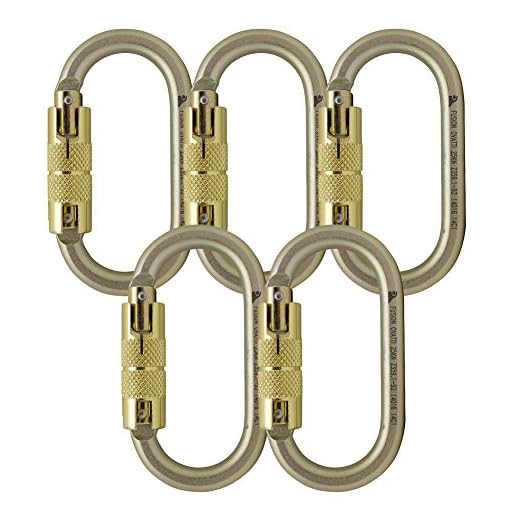
Attach temporary sling using a carabiner and metal O-ring
Use a locking steel carabiner rated ≥10 kN and a welded stainless-steel O-ring (ID 25–38 mm, 3–5 mm thick) combined with a pre-sewn 25 mm (1″) nylon webbing or a sturdy belt to create a dependable emergency carrying loop.
Required items
Locking steel carabiner (screw- or twist-lock), rating ≥10 kN; welded stainless O-ring, 25–38 mm internal diameter, 3–5 mm cross-section; pre-sewn webbing loop, luggage shoulder strap, camera strap or a leather belt with metal loop; small lighter to seal cut nylon if using a fresh webbing end.
Step-by-step
Slip the O-ring onto the pack’s existing anchor point: D-ring, buckle slot or remaining webbing eye. If the original material is frayed, thread the O-ring through the hole left by the torn section so load spreads across the metal ring rather than the damaged textile.
Take a pre-sewn replacement loop (camera strap, luggage strap or belt loop). Clip the locking carabiner through both the O-ring and the replacement loop’s metal ring or sewn eye so the two connect as a single assembly; use two carabiners (one through O-ring, one through replacement loop) only if alignment or fit requires it.
Orient the carabiner so the gate faces away from high-abrasion edges and loads pull along the major axis (lengthwise). Close and lock the gate; verify the O-ring shows no deformation and the carabiner gate fully seats under moderate test load (place 5–10 kg and inspect).
Limit carried weight to the lowest rated component (often the replacement belt or sewn loop). For repeated use replace textile components with factory-sewn webbing and the O-ring with a rated stainless or steel ring designed for load-bearing applications.
Rebuild length using a replacement buckle or tri-glide
Use a replacement tri‑glide or ladder‑lock matched to the webbing width (12 mm / 1/2″, 20 mm / 3/4″, 25 mm / 1″) and rated for your load; choose metal (steel or aluminum) for heavy carry and acetal plastic for everyday loads.
Tools and materials: replacement buckle or tri‑glide, sharp scissors or webbing shears, lighter or soldering iron, ruler or tape measure, flat-nose pliers, small screwdriver (if removing a stitched bar), and a dab of contact cement or fabric glue for the folded end.
1. Measure the existing webbing width and ordered part that exactly matches; mismatched width reduces holding strength. 2. Remove old hardware by unthreading; if the end is frayed trim 2–4 mm beyond damage. 3. Lightly melt the cut edge with a lighter or soldering iron and press flat with pliers to fuse fibres and stop fray. 4. For the most secure length rebuild use a double-back feed: thread the webbing under the center bar, then over the outer bar so the load rides on two layers of webbing. Allow 3–5 cm of overlap for strong hold. 5. Apply a small amount of contact cement between the folded layers and clamp until set; optionally add a short length of thin aluminum webbing clamp (crimp) if metal hardware is acceptable.
Check adjustability and load retention by pulling hard on the webbing and loading incrementally (hang a 10–20 kg weight briefly). If slippage occurs, re-seat the webbing, increase overlap to 5–7 cm, or switch to a metal tri‑glide with serrated bar for extra bite.
| Hardware type | Common widths | Recommended use |
|---|---|---|
| Plastic ladder‑lock (acetal) | 12 mm, 20 mm, 25 mm | Light daily carry, camera slings, small daypacks |
| Metal tri‑glide (aluminum/steel) | 20 mm, 25 mm, 38 mm | Loaded rucksacks, work gear, high‑abrasion applications |
| Side‑release buckle (with adjuster) | 20 mm, 25 mm | Quick detachment points and length adjustment for medium loads |
For outdoor gear compatibility and accessory ideas see best wind resistant patio umbrella south florida and travel tracking options at best luggage tracking tags for android.
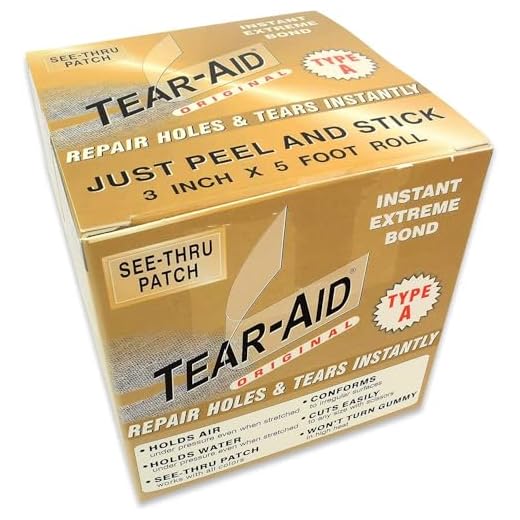
Reinforce frayed webbing with fabric glue and adhesive repair patches
Apply a flexible fabric adhesive to the damaged area, press fibers flat, then cover with an adhesive repair patch that overlaps the weakened zone by at least 1 in (25 mm) on all sides.
Materials
Recommended adhesives: Gear Aid Tenacious Tape (repair patches), E6000 or Shoe Goo (flexible industrial adhesive), Aleene’s Fabric Fusion or Tear Mender (for natural fibers). Tools: sharp scissors, isopropyl alcohol wipes, small spatula or wooden stick, roller or firm cylindrical object, weights or spring clamps, disposable gloves, lighter (for synthetic webbing only), measuring tape.
Step-by-step
1) Inspect and mark the frayed area; measure the length to cover and add ≥1 in (25 mm) overlap per side for light use, ~2 in (50 mm) per side for heavy loads. 2) Trim loose fibers flush with a sharp scissor; for nylon/polyester pass a lighter quickly (<2 s) along the edge to fuse fibers – short passes only. 3) Clean with isopropyl alcohol and allow 2–5 minutes to evaporate. 4) If using liquid adhesive, apply a thin, even layer extending beyond the fray by 12–25 mm; press strands flat with a spatula. 5) While adhesive is still tacky, position the repair patch so it covers the area with specified overlap; use a roller or firm object to smooth from center outward and remove air pockets. 6) Apply continuous pressure: place a 1–2 lb (0.5–1 kg) flat weight or clamp for at least 1 hour, then leave undisturbed. 7) Allow adhesives to cure to handling strength: 4–6 hours for tack set, full bond 24–72 hours (follow manufacturer). 8) Water exposure: wait 72 hours for maximum wet strength. 9) Perform a gradual load test at reduced weight before regular use; if the repair slips or the patch peels, remove and reapply with a stronger adhesive or larger patch.
Safety: use solvent adhesives in a well-ventilated area, wear gloves, avoid open flame while adhesives are curing. For heavily shredded webbing or load-bearing failure, use a replacement webbing solution rather than a patch.


