


Tools & materials: 550 parachute cord (Type III, ~4 mm diameter), sharp scissors or snips, lighter or mini-torch, 10 mm heat-shrink tubing (cut to 8–12 mm pieces), small pliers, sewing needle and heavy polyester thread (Tex 70 or upholstery thread), bodkin or large safety pin for threading, optional cord lock (single-hole or two-hole).
Sizing guideline: measure the existing channel diameter: use 3 mm cord for channels under 5 mm internal width, 4 mm for standard channels, 5–6 mm for reinforced or external draw loops. Add 20–25 cm to the finished cord length to allow for knots and a cord lock; for shoulder-draw loops add 30–40 cm.
Step sequence: Cut the replacement cord to length. Slip heat-shrink over one end before any knots. Fuse each cut tip with a lighter for 1–2 seconds, then compress the softened tip with pliers to form a bead that won’t fray. Attach a bodkin or safety pin to the other end and feed through the channel until it exits at the anchor point. Tie a secure stopper knot (double overhand or double fisherman) at the exit; trim and melt the tail into the knot. Slide heat-shrink over the knot and apply heat for a sealed finish. Fit a cord lock between two knots or at the working end, then lock into position.
Repairing torn anchor tabs: if the attachment tab is worn, replace it with a 15–20 mm nylon webbing loop folded and bar-tacked across the original slot. Stitch 4–6 passes with heavy polyester thread perpendicular to the load direction; use a zigzag pattern or bar-tack to spread load. If sewing by hand, use a curved upholstery needle and make 8–12 tight stitches per pass.
Damage control & fabric protection: avoid direct flame contact with fabric: place aluminum foil or a damp cotton patch between flame and material while fusing cord tips. For slippery liners, coat the fused bead with a drop of cyanoacrylate glue to prevent pull-through. For reflective or color-matched results, choose cord with matching sheath or use a short length of colored heat-shrink over the exposed section.
Restore drawcord on a branded daypack: durable replacement method
Replace the damaged cord with a 3–4 mm high-strength kernmantle or braided polyester line, install a 5–8 mm spring cordlock, splice and melt the ends, then secure with a 10–12 mm heat-shrink sleeve for a long-lasting repair.
Recommended tools and materials: safety pin or bodkin, thin stainless wire or paperclip for stiffening, lighter or hot knife, 10–12 mm heat-shrink (2:1), bonded nylon or heavy polyester thread, sewing awl or heavy-duty needle, small seam ripper, Gear Aid Seam Grip or MCNett seam sealer, scissors, pliers.
Procedure: unzip or open the pocket that gives access to the cord tunnel; if no access exists, rip 2–3 cm of the interior seam in a hidden area. Attach a 10–12 cm stiffening wire to the cord tip with tape, push the assembly through the tunnel using a safety pin or bodkin, and pull until endpoints emerge.
After routing, slide the cordlock onto the line, melt the cord tip cleanly with a hot knife or lighter, and quickly compress the melted end with pliers to form a compact stopper; slide heat-shrink over the fused tip and apply heat until snug. Tie a secure knot (figure-eight or double overhand) behind the cordlock if additional retention is needed.
Anchor reinforcement: where cord attaches to webbing or fabric, add a 6–10 pass bar-tack using heavy bonded thread or perform a box-x stitch with a sewing awl. For extremely worn anchor points, sew a 25 mm nylon webbing patch over the area and bartack through both layers to restore load-bearing capacity.
Temporary solutions: use a shoelace or paracord loop tied with a double fisherman’s knot and wrapped with electrical tape; use a split-ring or small carabiner at the exit hole to prevent the cord from slipping into the channel. Always ventilate when melting synthetics and test tension and cordlock function before full use.
Replacement part suggestions: 3–4 mm braided polyester or kernmantle cord; single-hole or dual-hole cordlocks rated for that diameter; 10–12 mm heat-shrink tubing (3:1 or 2:1). Common suppliers: outdoor gear retailers, sewing and marine shops, or online parts suppliers listing cordlocks and shockcord by inner diameter.
Locate and identify the damaged cord: drawcord, zipper pull, or bungee
Inspect the cord exit point and perform a short pull test: if the outer braid frays but the length does not recoil, it’s a non‑elastic drawcord; if the core snaps back and stretches under load, it’s elastic shock (bungee); if the cord detaches from a metal or plastic slider or the knot/crimp separates, the zipper pull is compromised.

- Tools to have: flashlight, seam ripper or small awl, ruler or tape (mm), calipers (optional), lighter, pliers, small weight ~1 kg, replacement cord samples (2 mm, 3 mm braided; 3–4 mm shock).
- Visual clues:
- Frayed sheath only, no visible core → braided polyester/nylon drawcord.
- Sheath split with rubbery strands or inner latex visible → elastic shock cord.
- Knot pulled through slider, metal crimp missing, or cord loop separated at slider → zipper pull damage.
- Cut/melted end clean and sealed → formerly synthetic; burnt residue indicates nylon/polyester.
- Tactile checks:
- Pinch and pull with thumb/forefinger using 5–10 lb (2–4.5 kg) of force: braided cord resists and holds length; bungee stretches and returns.
- Pinch sheath and inspect for a distinct inner core (elastic core will be concentric and springy).
- Measurement guidelines:
- Zipper pulls commonly use 2–3 mm braided cord. Measure diameter at an undamaged section.
- Drawcords in hems/hoods often range 3–5 mm (flat or tubular). Record width and whether hollow or solid.
- Shock cord typical diameters: 2.5–4 mm; note stretch behavior by hanging a 1 kg weight and measuring extension. Recoil should be near original length within 5–15 seconds; elongation >50% under 1 kg indicates loss of elastic integrity.
- Entry point inspection:
- Open the hem seam a few stitches if cord is trapped to inspect internal abrasion points.
- Look for sharp fabric edges, worn grommets, or exposed stitching that abrades cord – abrasion at a fixed location identifies the likely failure cause.
- Quick decision cues:
- Fray only + no stretch loss → replace with same diameter braided nylon/polyester; melt ends or use heat‑shrink and cord lock.
- Elastic core exposed or slow rebound → replace with matched diameter shock cord; use end crimps or knot with protective tubing.
- Detached from slider or broken crimp → reuse cord if intact, otherwise replace pull with 2–3 mm braided cord and secure with a metal crimp or knot plus heat seal.
Record diameter, material feel (firm vs. springy), and exact failure location before buying replacement parts – this prevents ordering incompatible cord types or sizes.
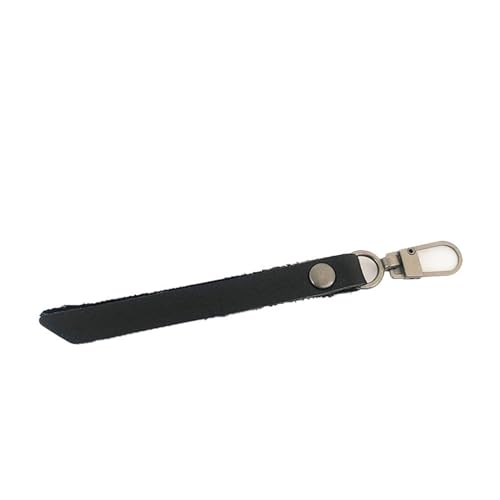
Reattach or replace a frayed zipper pull using keyring, paracord, or zipper-pull kit
Use a 550 paracord loop (~4 mm diameter) folded to a finished length of 6–8 cm secured with a cow hitch (fold cord in half, pass loop through slider hole, pull ends through loop) for a low-bulk, long-lasting replacement; trim ends to 6–8 mm and melt with a lighter, then press with pliers to seal.
Materials for paracord method: 12–16 cm of 550 paracord (or 3 mm braided polyester for narrow sliders), scissors, lighter, small silicone bead (5–8 mm) or 20 mm length of 3:1 heat-shrink tubing, and needle-nose pliers. If grip is required, thread the bead onto the cord before making the hitch, then seat it against the slider.
Keyring temporary repair: use a 10–15 mm split ring (standard #1–#2). Open the ring with a small flat screwdriver or paperclip tool, slide the ring through the slider hole, then attach a short cord tail or metal tag. This provides instant function and tolerates heavy pull loads until a permanent tab is installed.
Zipper-pull kit (permanent OEM look): kits normally include a molded or metal pull tab, tiny split ring, and a crimp/sleeve. Remove remnants, thread the split ring through the slider eye, attach the replacement tab, position the crimp over the ring if supplied and compress with flat-jaw pliers or a crimping tool. Choose metal tabs for heavy-use gear and molded plastic for low-profile aesthetics.
Small-diameter slider holes: use 2–3 mm cord or waxed braided polyester; for very fine holes, use nylon monofilament looped and melted tip. For larger sliders, 550 paracord or a 12–15 mm keyring provides better leverage and wear resistance.
Tools and finishing: needle-nose pliers, diagonal cutters, lighter or micro-flame, optional lighter guard, and a 3–4 mm heat-shrink tube for a neater finish. After melting cord ends, press against a flat metal surface to flatten and prevent snagging. Test by pulling with a steady 15–25 kg force to confirm retention.
For heavy-duty applications or when carrying bulky equipment such as a best commercial backpack leaf blower, prefer metal tabs and 550 paracord or a reinforced keyring assembly to resist abrasion and repeated load cycles.
Replace a snapped drawcord: feed new cord, secure knots, and heat-seal ends
Use 3–4 mm braided nylon or 550 paracord (4 mm) and cut length to 1.5× the internal channel length (example: 60 cm channel → 90 cm cord). Tools: blunt safety pin or bodkin, masking tape, sharp scissors, lighter, small needle-nose pliers, optional heat-shrink tubing (3–4 mm × 8–12 mm).
Stiffen the cord tip with a 20–25 mm wrap of masking tape or melt a 3–4 mm bead to form a pulling point; attach a safety pin through the taped tip. Feed by pushing the pin through the channel while bunching fabric forward; work the fabric back over the pin in short increments. If the channel has turns or stops, use a 0.8–1.2 mm gauge wire threaded with the taped cord or a crochet hook inserted from the exit point to grab the pin.
To join a new cord to any remaining original tail, use a double fisherman’s knot for permanent strength (dress and cinch tight), or a surgeon’s knot for lower bulk. After tightening, leave a 4–6 mm tail. For a stopper at the end, tie a double overhand or figure-eight knot sized so it will not pass back through the channel opening.
Trim tails to 3–5 mm, hold with pliers and apply a brief lighter flame to melt the tip until a small molten bead forms; press flat with pliers while hot to create a low-profile stopper that resists fraying and snagging. Work in a well-ventilated area and avoid breathing fumes from melted synthetics.
If replacing cord that runs through a cord lock, measure the lock hole diameter before choosing cord; use 2.5–3 mm braided nylon for 3 mm holes or swap to a larger lock for paracord. For a neat finish, slide a 6–10 mm length of heat-shrink tubing over the end before melting, then shrink to cover the sealed bead.
For child carriers or lightweight strollers with similar drawcord channels, reference practical sizing and feeding techniques at best umbrella stroller for sleeping.
Mend broken bungee or strap cord: splice elastic, add cordlock, or sew a reinforcement
For an immediate load-bearing repair, splice the elastic with a double-fisherman knot, whip the junction with waxed nylon thread (6–8 turns), add a single drop of cyanoacrylate, then cover with 20–30 mm of heat-shrink tubing; for adjustable tension use a barrel cordlock sized to the cord diameter and secure tails with a constrictor knot and 10–15 mm of heat-shrink; for torn webbing or attachment points sew a 20–25 mm box-x bartack using bonded nylon thread (Tex 70–90) and a heavy curved sailmaker/ upholstery needle (#16–#18).
Tools & materials
Bonded nylon or polyester thread Tex 70–90; curved sailmaker or upholstery needle #16–#18; small barrel cordlock (choose inner hole 3 mm for thin cord, 4–6 mm for shock cord); heat-shrink tubing 4–6 mm diameter, 20–30 mm long; cyanoacrylate glue; lighter or hot-air source for shrink; tape or whipping twine; sharp scissors; optional: lighter-weight paracord (for replacement inserts) and a needle-nose pliers.
Procedures and measurements
Splice elastic (durable, low-profile): trim damaged ends to clean cut, overlap 25–30 mm, tie a double-fisherman knot or two stacked overhand knots with the overlap aligned. Whip the overlap with 6–8 tight turns of waxed thread, lock the whipping with a surgeon’s knot, add one small drop of cyanoacrylate on the final wrap, then slip on 20–30 mm heat-shrink and activate. Expected hold for medium loads: 60–80% of original strength; test under safe load before reuse.
Install cordlock (adjustable): choose cordlock inner aperture equal to cord thickness (measure diameter with calipers). Feed both ends through the cordlock barrel, pull to desired tension, tie a constrictor or double overhand stopper 10–15 mm from the cordlock, trim tails to 6–8 mm and cover with a tiny bead of glue or short heat-shrink. For elastic cords, avoid excessive heat; use low-temperature shrink or protective tape beneath the shrink.
Sew reinforcement (torn webbing/attachment): position webbing flat, stitch a 20–25 mm box-X using 8–12 passes of bonded nylon thread with 2–3 mm stitch length. Use a curved needle through multiple layers, and backstitch each end 6–8 times. For machine sewing, set to heavy-duty needle and use a zig-zag followed by a straight bartack pattern. After sewing, apply a small amount of flexible fabric glue to the edges to reduce fray.
When to replace the entire cord: replace when elastic recovery under load has dropped by ~25–30%, when the core is visible or cut along >25% of circumference, or when multiple splice attempts fail load testing. For replacements, use shock cord or paracord with equal or greater rated stretch and load spec.
Additional reading: how can a hoax generate social change


