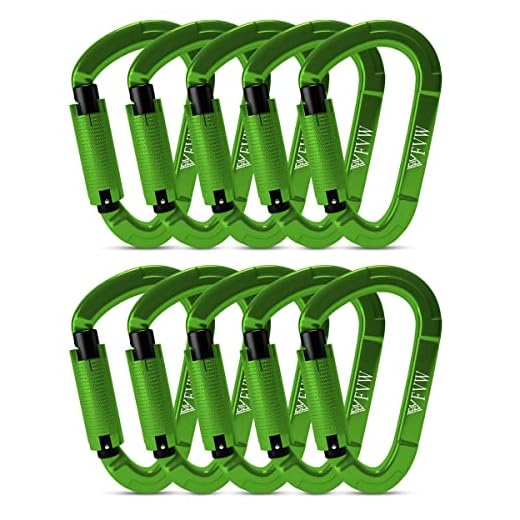


Suspend the shoulder-mounted power unit from its harness D-ring onto a heavy-duty wall bracket rated at least 50% above the device weight (for most petrol models that weigh 15–25 lb / 7–11 kg choose a bracket rated 30–40 lb minimum; for commercial units 30–40 lb choose a bracket rated 60–80 lb). Use a locking carabiner or safety clip through the reinforced strap loop and orient the intake/nozzle downward to prevent debris accumulation inside the housing.
Attach the bracket to wall studs whenever possible: use 3/8″ lag bolts (3″ length) with a 5/16″ pilot hole for typical softwood studs; on concrete or block install 3/8″ x 2½” sleeve anchors. Space fasteners to align with standard stud centers (16″ or 24″) and tighten to firm feel – avoid over-torquing foam or plastic bracket components. If studs are unavailable, select rated toggle anchors for hollow walls and verify load rating meets the bracket’s specification.
Set mounting height so the shoulder straps sit at approximately 1.6 m (63 in) from the floor when the unit is suspended; this allows a single-handed lift for most users while keeping the unit off the ground. Leave a 12–18″ (30–45 cm) clearance above the mount for strap routing and 18–24″ (45–60 cm) clear space around the nozzle for attachment removal and maintenance access.
Before storing, cool the engine and close the fuel valve; for petrol models run the carburetor dry or drain fuel into an approved container to avoid leaks and vapors. For battery versions remove the pack and store it separately at roughly 40–60% state of charge in a cool, dry spot. Use a small secondary strap or zip tie as a retention backup on the harness loop to prevent accidental decoupling during vibration or if the primary clip fails.
Inspect mounting hardware and strap connection every 3 months: check lag bolts for tightness, examine the harness for fraying, and replace any plastic bracket parts showing cracks. Apply a thin foam or rubber pad between metal bracket and harness to reduce wear on straps and to damp vibration while the unit is stored.
Mounting a Strapped Leaf Vacuum for Safe Storage
Use a 3/8″ steel J-hook rated ≥75 lb installed into a wall stud with a 3/8″ × 3″ lag screw; position the hook 60–66 inches above the floor so the harness shoulder straps sit naturally and the engine remains vertical with the fuel cap facing upward.
Step-by-step installation
- Locate a stud with an electronic stud finder; mark the stud center at the chosen height (60–66″).
- Drill a 3/16″ pilot hole through drywall into the stud about 2½” deep to reduce splitting.
- Thread the J-hook onto a 3/8″ × 3″ lag screw and drive until the hook base is flush with the wall; do not over-torque–stop when snug and secure.
- If no stud is available, use a 1/2″ toggle or Molly anchor rated ≥150 lb; follow anchor manufacturer instructions for hole size and installation depth.
- Test the mounting by applying a 75–80 lb downward load before placing the unit; inspect for wall movement or audible creaks.
Positioning and pre-storage actions
- Let the engine cool for at least 10 minutes after use to avoid heat transfer to the wall or mount.
- For storage longer than 30 days: drain the fuel tank and run the engine dry to prevent carburetor gumming. For short-term storage, add fuel stabilizer and run 3–5 minutes.
- Route the harness so padded back rests against the wall and straps loop once over the hook to prevent slipping; place padding or a 4″ length of rubber hose over the hook to protect webbing.
- Point the intake/nozzle away from the wall to avoid contact with wall finishes and to improve airflow around the engine.
- Remove batteries (if applicable) and store in a cool, dry place at ~40–60% state of charge and 32–68°F ambient temperature.
- Keep the unit at least 3 feet from heat sources, open flames, water heaters and direct sunlight.
- Place a small drip tray beneath the mounting area if you expect residual fuel or oil leakage.
- Inspect straps, clips and rivets monthly for wear or deformation; replace any component showing fraying or cracked plastic.
- If straps slip on the hook, add a short length of high-friction tape or a rubber sleeve to increase grip.
Select a wall hook or rack rated for your unit’s weight and dimensions
Choose a hook or rack with a minimum static load rating of 1.5–2× the dry weight of the machine: small battery models (4–7 kg / 8–15 lb) – 11–23 kg (25–50 lb) rated hardware; mid-size units (9–14 kg / 20–30 lb) – 23–45 kg (50–100 lb) rated hardware; heavy commercial rigs – 45+ kg (100+ lb) rated solutions.
Load rating and mounting geometry
Apply a safety factor because straps and fuel tanks shift weight. Use single-point hooks only for machines under ~15 lb; for heavier items choose a wide cradle or dual-point rack to spread load and prevent rotation. Measure machine width, harness depth and center-of-gravity height: allow 15–25 cm (6–10″) of clearance from wall to accommodate harness and protrusions; provide a horizontal support length of 20–30 cm (8–12″) so the unit rests on the hook instead of the straps alone.
Hardware type and installation specifics
Mount into a structural member whenever possible: 3/8″ lag screws (3″ long) into a wood stud with a 5/16″ pilot hole, torqued to manufacturer specs; for concrete or brick use 3/8″ sleeve or wedge anchors with 50–75 mm (2–3″) embedment. For drywall-only locations use metal toggle bolts rated ≥100 lb per fastener and pair them on wider brackets. Select corrosion-resistant steel (galvanized or stainless) and add a rubber or polyurethane sleeve on contact surfaces to protect painted or plastic casings and shoulder straps.
Prepare the engine unit: cool, isolate ignition, and secure fuel
Allow the engine housing to cool to below 60°C (140°F) before moving or suspending the unit – typical cooldown is 15–30 minutes after shutdown; verify with an infrared thermometer or by touching the casing with a heavy glove until it feels only warm.
Isolate ignition
Remove the spark plug cap by pulling straight from the boot; do not twist the wire. Once disconnected, place the cap so it cannot contact metal parts (secure with a zip tie to the handle or engine frame) or fit an insulated protective cap over the terminal. For extra protection during maintenance, fully remove the plug with the correct socket (common sizes 5/8″ or 13/16″), set it aside on a clean surface, and keep the exposed cylinder thread covered with a cloth to prevent debris entry.
Cap or drain fuel
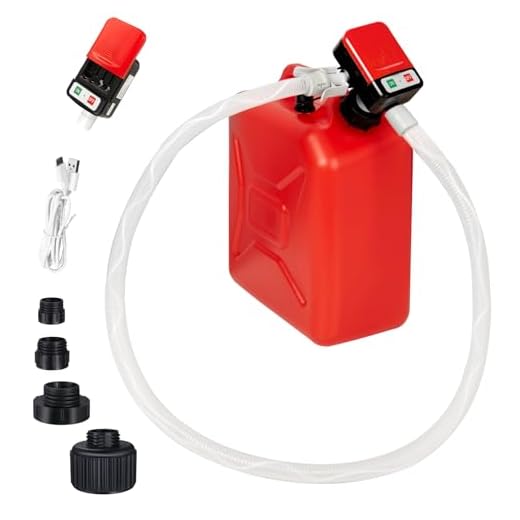
If storing short-term, tighten the factory fuel cap, set any fuel valve to OFF, and run the unit at idle until the carburetor drains (usually 1–2 minutes). For long-term suspension or transport, drain the fuel tank into an approved metal or DOT-rated plastic container using a hand pump; do not siphon by mouth. If the model has a drain screw or removable fuel line, route the line into the container and catch residual drops with an absorbent pad. Perform draining outdoors on concrete, keep at least 3 m (10 ft) from open flames, and avoid sparks – no smoking. If fuel will remain in the system for more than 30 days, add a fuel stabilizer and run the engine 3–5 minutes to circulate the treatment.
Wear nitrile or chemical-resistant gloves and eye protection while handling fuel; keep rags and pads in a sealed metal can after use. For small spills on fabric or carpet, treat promptly according to steps for odor and stain removal – see how to clean cat pee out of a rug. Keep essential tools and a compact safety kit in a small carry pouch or best cycling waist packs so ignition isolation and fuel work can be completed without a full toolbox.
Install mounting hardware: locate a stud, drill pilot hole, and fit a screw hook or heavy-duty toggle anchor
Mount directly into a vertical stud whenever possible; use a screw hook with a shank length that achieves at least 1.5″–2″ embedment into the stud. For most units choose a 1/4″–3/8″ lag screw hook and pre-drill a pilot hole sized to the screw shank (see table). Select anchors with a working load rating ≥ 2× the unit weight and use two mounting points spaced 6″–12″ apart to share the load.
Locate a stud with a magnetic or electronic stud finder set to detect wood and live wiring. Confirm stud center by drilling a 1/16″ test hole; if you hit a void, move 3/4″ and test again. Mark the stud center vertically at the desired mounting height; avoid areas directly above outlets, switches, or plumbing risers.
Drill the pilot hole straight into the stud to the planned depth using a stop collar or tape on the bit. For 2×4 framing expect ~1.5″ wood thickness behind drywall; ensure hook penetrates that depth. Insert the screw hook with a washer beneath the hook base to spread compression; tighten with a socket wrench until snug–over-torquing can strip the wood fibers. If vibration is a concern, add a nylon locking nut on the hook stem if the hook design allows.
For drywall-only locations choose heavy-duty metal toggle anchors (not plastic molly sleeves) sized to the load. Drill the manufacturer-specified hole, insert the toggle so the wings deploy behind the board, and pull the tension until the toggle seats flush. Tighten the screw incrementally; final pull should produce firm compression against the drywall without crushing paper or gypsum. Use a backer board (¾” plywood ~4″x6″) behind the drywall if the anchor manufacturer’s weight rating is marginal.
For masonry or concrete use a hammer drill and carbide masonry bit. Clean the hole with compressed air, insert a sleeve or wedge anchor rated for the substrate, and torque the anchor to the anchor spec. For 3/8″ wedge anchors into concrete a minimum embedment of 1.5″–2″ is recommended.
| Mount type | Typical drill bit | Approx. working load per fastener | Recommended fastener |
|---|---|---|---|
| Wood stud (lag screw hook) | 1/4″ lag → 3/16″ bit; 5/16″ lag → 1/4″ bit; 3/8″ lag → 5/16″ bit | 1/4″ ≈ 150–250 lb; 5/16″ ≈ 250–400 lb; 3/8″ ≈ 400–600 lb (single) | Galvanized or stainless lag screw hook + fender washer |
| Heavy-duty metal toggle (hollow wall) | Typically 1/2″ hole (follow manufacturer) | 200–800 lb depending on model and board thickness | Metal snap/toggle anchor with #10–1/4″ screw |
| Masonry (concrete/block) | Carbide masonry bit matching anchor size (e.g., 3/8″) | Wedge anchors: 500+ lb per anchor (depends on embedment) | Expansion/wedge anchor or sleeve anchor with matching hook |
Wear eye protection and keep a small level on the hook assembly to ensure the two mounting points are coplanar. If using a single-point hook, add a secondary restraint (strap or clip) to prevent rotation. For exterior or yard storage accessories consult additional hardware designed for wind loads such as umbrella and pole bases – see best beach umbrella stand for wind.
Suspend from the backplate or reinforced harness loop to prevent strap deformation and keep the unit balanced
Suspend the unit by the rigid backplate or the reinforced harness loop – never support the full weight on shoulder straps or thin webbing. Target the factory lifting point or stitched harness loop; those are designed to carry static load without compressing or creasing the adjustment webbing.
Attachment hardware and ratings
Use a locking carabiner or stainless steel screw-eye that provides a working load at least 3× the mass of the machine. Typical consumer units weigh 7–14 kg (15–30 lb); choose connectors rated ≥45–90 kg (100–200 lb) or ≥2 kN (2,000 N) for margin. Prefer carabiners with a gate opening ≥10 mm so the webbing sits flat on the spine of the hook rather than pinched at the gate.
Balancing procedure and strap preservation
Mount the connector at the top-center lifting point and verify the frame hangs level within ±5°; use a small bubble level on the backplate or sight along the frame. If the assembly tilts more than 5°, shift the anchor horizontally in 10–20 mm increments until level. Unbuckle waist and chest straps, lay shoulder straps straight (not folded) and secure them with a Velcro strap or elastic loop so they do not carry the unit’s weight or develop permanent creases. For long-term storage keep webbing relaxed (no high-tension knots) and avoid pinching straps between the backplate and mounting hardware.
Secure loose parts and position the nozzle upward to prevent fuel drips and tipping during storage
Point the discharge tube vertically (within 0–10° of true vertical) and immobilize all external moving parts before mounting the unit.
Required items
Tools: two 4–6 mm cable ties, one 25–50 mm wide hook-and-loop strap (12–24 in long), one 1″ thick closed-cell foam pad (50–100 mm length), two 1″ rubber grommets or protective sleeves, one small labeled plastic pouch for loose attachments.
Step-by-step procedure
Fold shoulder straps flat against the rear plate and secure with the 25–50 mm hook-and-loop strap wrapped twice; leave harness buckles unclipped to prevent deformation. Route the throttle and choke cables along the frame and fasten them with two 4–6 mm cable ties spaced 80–120 mm apart; position the ties so controls remain in neutral and cannot move under gravity.
Remove detachable nozzles/accessories and place them in the labeled pouch hung separately on the same support or stored on a shelf. Slip 1″ rubber grommets or sleeves over any exposed tube edges that would contact the wall or hook; add the 1″ closed-cell foam pad between the discharge tube and wall to prevent abrasion and limit swing by absorbing shocks.
Verify balance: with the tube vertical the unit should sit flush against the wall/support without forward tilt. If it leans forward, shift the mounting point 50–75 mm higher on the support or add a 200–450 g counterweight to the rear plate low point to move the center of mass aft. Do not let the nozzle rest at an angle greater than 20° from vertical – angles beyond that increase drip risk and torque on the support.
Final check: tug the tube and straps to confirm no movement exceeds 15 mm. Ensure loose items are restrained, accessories are stowed, and the nozzle remains upright throughout a 30-second shake test before leaving the unit in storage.
FAQ:
Can I hang my backpack blower on a wall hook, and what type of hook or bracket should I use?
Yes — a wall-mounted hook or bracket is a convenient way to store a backpack blower, but pick hardware that will safely carry the tool’s weight and protect its shape. Use a heavy-duty steel J-hook, a commercial equipment bracket, or a purpose-built rack rated above the blower’s weight (most backpack blowers weigh 15–30 lb / 7–14 kg). Fasten the hook into a wall stud with a lag screw for the strongest support; if a stud is not available, install a strong toggle anchor or masonry anchor sized for the load. Do not hang the unit by the shoulder straps, since straps can stretch or deform over time — place the hook under the frame, handle, or a solid structural part of the blower body. Add a short sleeve of rubber or foam to the hook to prevent paint or housing damage. Choose a dry, ventilated storage spot away from direct heat, open flames, or fuel storage. Remove the battery or disconnect the spark plug before handling the blower for storage if the manufacturer recommends it, and consult the owner’s manual for any model-specific guidance.
What should I do with fuel or battery power before hanging a gas or battery backpack blower for storage?
For gas models, stop the engine and let it cool. If you will store the unit for several weeks or months, run the tank nearly empty or add a fuel stabilizer and run the engine a few minutes so the stabilizer reaches the carburetor; some users prefer to drain the tank and carburetor for long-term storage. Check fuel lines and the primer bulb for leaks and wipe off spilled fuel before hanging. For battery models, remove the battery and store it in a cool, dry place on a partial charge per the battery maker’s instructions. Clean dirt and debris from intake and fan areas and place the blower on the hook so it sits upright without stressing plastic parts.


