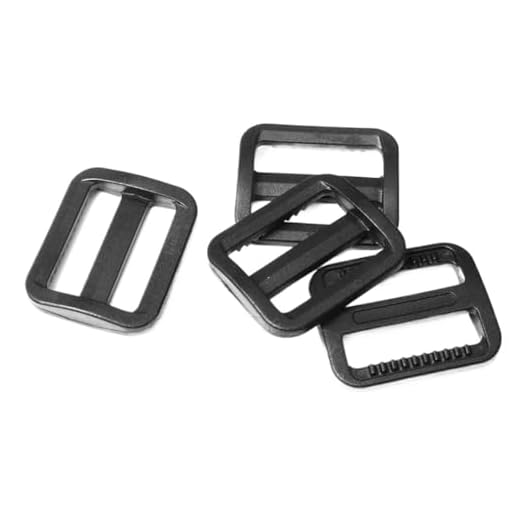


Immediate recommendation: Feed the webbing through a ladder‑lock buckle from the underside, pull 25–30 mm of tail past the buckle, then pass the tail back through the outer slot to create a double‑backed hold; tension to remove slack, trim the tail to 20–30 mm and fuse the cut end for polyester or apply a short heat‑shrink sleeve for nylon.
Tools and specifications: Use webbing widths matched to the buckle (commonly 20, 25 or 40 mm). Target webbing break strengths of ~2,500–4,000 N for general use. For sewn reinforcement, use bonded polyester thread (size 69 or 92) and perform three bar‑tack passes across the tail, each bar 6–8 mm wide. If hand‑sewing, aim for 6–8 stitches per inch with a heavy needle. Trim with sharp scissors (45° cut reduces snagging) and melt briefly (1–2 s) to prevent fraying; avoid prolonged heating to prevent weakening.
Quick inspection checklist: cycle the assembly under 50% of anticipated working load, then to full working load, and verify slippage is under 5 mm. Replace any webbing showing ≥10% fiber abrasion or hardened/melted ends that crack. For high‑load or frequently adjusted connections, add a sewn stop or create a sewn anchor around the buckle to eliminate tail movement entirely.
Select a fastening method by webbing material and buckle type
Select a fastening technique that matches webbing width, fiber type and buckle construction: 10–15 mm webbing (lightweight polypropylene/polyester) – use tri‑glide sliders or a simple fold‑and‑stitch with a 20–30 mm tail; 20–25 mm webbing (standard nylon/polyester) – use double‑back through a metal cam or ladder lock with a sewn box‑X and a 40–60 mm tail; 35–38 mm webbing (tactical or heavy duty) – prefer riveted metal side‑release or bartack reinforcement plus a stitched safety tuck of 60–90 mm.
Nylon: use bonded nylon or polyester thread, box‑X or bar‑tack patterns with at least six passes. Polyester: similar stitch patterns but higher heat resistance when finishing cut ends. Polypropylene: seals cleanly with a low flame; finish with a melt and press. Tubular webbing: feed through buckles designed for rounded profile or flatten first and secure with bartacks. Leather: use rivets or copper Chicago screws rather than machine stitching through thick sections.
Plastic side‑release buckles – feed tail through male/female channels and finish with two rows of straight stitches plus a cross X; allow 50–70 mm tail for adjustability. Metal cam buckles – route webbing under the cam plate and leave 45–65 mm tail; stitch or rivet the free end if cyclical loading is expected. Ladder locks – fold the webbing back and bartack the fold; recommended tail length 40–60 mm. Quick‑release assemblies for heavy loads should combine a sewn loop plus a safety tuck, not just a single friction feed.
Recommended hardware sizes: use rivets 5–7 mm diameter for 20–25 mm webbing, 7–9 mm for 35–38 mm. Thread: bonded polyester #69 (tex 70–90) for machine sewing of heavy webbing. Stitch length: 3–4 mm for dense, load‑bearing stitching. Test any repair to 1.5× expected working load before regular use.
For removing ingrained dirt from heavy synthetic webbing, use low‑pressure detergent cleaning and rinse thoroughly; an appropriate unit is available at best pressure washer with soap dispenser. Always verify buckle function and webbing finish after cleaning; repeat stitching or hardware installation if thread or fibers show damage.
Form a no-slip bight on nylon webbing using common buckles
Double-back the webbing through a tri‑glide or ladder‑lock and secure the tail with a stitched box‑X, leaving at least 75 mm (3 in) of free end before finishing to prevent slippage.
Tri‑glide / ladder‑lock procedure: feed the webbing under the centre bar, over the outer bar, then back under the centre bar so the webbing makes two full passes across the centre bar. Keep the webbing flat and untwisted; for 25 mm (1″) webbing leave 75 mm tail, for 38 mm (1.5″) leave 100 mm. Position the stitched area 10–15 mm from the buckle flange. Use a sewn box of 20–30 mm square with an X across it; if possible add two parallel reinforcement rows 6–8 mm apart.
Cam‑jaw hardware: run the tail through the cam and tension, then route the tail back to a sewn anchor or secondary tri‑glide. Do not rely on the cam teeth alone for repeated reversing loads; add a mechanical backup (stitched anchor, second slider or rivet). Maintain the same tail lengths and stitching pattern as for sliders and heat‑seal the trimmed end.
Side‑release / quick‑connect pieces: thread through the female slot, fold back and pass the tail through any internal plate or slot before stitching. If machine sewing is unavailable use a folded bar‑tack with heavy nylon thread or an industrial rivet placed 12–15 mm from the folded edge; leave 20 mm of webbing beyond the rivet for future inspection.
Sewing and finishing details
Thread: bonded polyester or nylon, UV‑resistant. Needle: industrial size 16–18 (90/14). Stitch length: 3–4 mm. Recommended box dimensions: 20–30 mm square for 25–38 mm webbing; X stitched from corner to corner with three additional parallel passes across each side. For hand work use waxed nylon cord and a saddle stitch with at least six passes per leg. Trim tail to 8–12 mm beyond the final stitch and fuse the cut edge with a heat sealer or lighter to prevent fray.
Verification and maintenance
Static test: apply a load equal to expected working load (for personal use, test at twice the normal load) and inspect for any slippage or stitch elongation. Recheck after 100 cycles of flexing; if movement exceeds 5 mm, rework the attachment or add an extra pass and reinforcement. Replace webbing that shows fraying through the sewn area, broken threads, or visible flattening of fibers.
Shorten and secure excess webbing without sewing or special tools
Fold 3–4 inches (7–10 cm) of excess 1″ (25 mm) nylon webbing under the main line, pass the tail back through the buckle or triglide twice, pull tight, then cinch a small zip tie 6–8 mm from the folded edge and trim the tail to 5 mm; melt the trimmed tip briefly with a lighter to stop fraying.
Measurements and material-specific actions
For 3/4″ (19 mm) webbing leave 2–3″ (5–7 cm) of tail; for 1.5″ (38 mm) leave 4–6″ (10–15 cm). Nylon: melt-and-press cut edge for a neat finish (1–2 seconds with a lighter, then press with metal or pliers). Polyester: avoid open flame – apply a drop of clear fabric sealant or cyanoacrylate glue and allow 10–15 minutes to cure. Cotton: trim, apply fabric glue, or tuck securely; cotton will not melt.
Tool-free alternatives and security notes
If no triglide is available, create friction by folding the tail back and threading it under the standing section twice, then secure with one of these common fixes: 1) silicone O-ring or rubber band slid over the folded area (use a 10–12 mm ID ring on 1″ webbing); 2) small keyring or split ring through a cutout or D-ring to trap the tail; 3) two tight half-hitches around the standing part (only for low-load use). A 2–3 mm zip tie or a 20–30 mm length of heat-shrink tubing (applied with hot water if no heat gun) provides tidy, low-cost retention. Do not rely on melted ends or a single zip tie for critical load-bearing applications; for heavy loads have the webbing professionally shortened or replaced.
For travellers replacing gear, compare carry systems and sizes before modifying any load-bearing component: best luggage to bring to europe.
Quick one-handed re-thread while wearing the pack
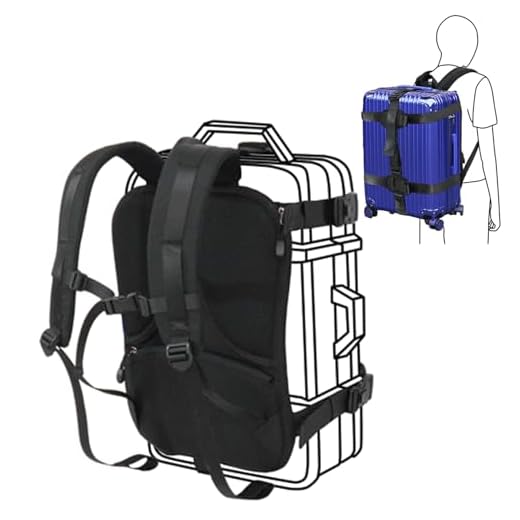
Anchor the buckle against your sternum with your elbow or rib cage, pinch the webbing tail between thumb and index, then feed and tension using the palm – aim for a final tail of 6–10 cm (2.5–4 in).
Step-by-step single-hand procedure
- Stabilize: lean forward ~10° and pull the bag slightly toward the front by shifting your hips; trap the buckle frame between chest and elbow so it won’t rotate.
- Create feed slack: press the running webbing (load-bearing line) against the buckle slot with the base of your thumb; with fingertips push 3–5 cm (1–2 in) of tail through the slot so there’s just enough to grab and seat.
- Seat the tail: for slider/tri-glide style, push the tail from the underside through the bottom slot, then tuck it back over the crossbar; for cam-style, depress the cam with the knuckle and push the tail through while holding the cam closed against your chest.
- Tension with the palm: curl your palm around the main webbing and pull straight away from the buckle until the harness sits flush against your shoulders and sternum; aim for a firm feel, not bone-tight.
- Set final length: stop when the tail measures 6–10 cm; tuck the remaining end into the elastic keeper or under the folded section of webbing using a single-finger push while maintaining tension with your palm.
Quick checks and emergency fixes
- Tension test: give the tail a sharp downward tug once – if it slips more than 1 cm, repeat the sequence immediately.
- Fast emergency secure: tie a single overhand knot on the tail around the main webbing and push the knot into the buckle cavity; holds for short descents or until you can stop and re-seat properly.
- Gloved or wet hands: press the buckle to the chest and use the palm-to-thumb pinch method described above; textured gloves often increase friction and reduce slips.
- Long-term adjustment: if repeated one-handed re-feeds are needed on long hikes, pick a model with an accessible slider and keep an elastic keeper on the trail; see recommendations for durable designs at best backpack for the pct.


