

Step sequence: 1) Turn one blazer shoulder inside out and tuck the other shoulder into it so the lapels nest without crushing. 2) Smooth 3–4 sheets of lightweight tissue paper along the back and sleeves to reduce surface creasing. 3) Lay trousers on top along the natural crease, fold once at the hip so the legs rest over the jacket body, then fold horizontally once more if the carry vessel is shallow. 4) Enclose in a garment sleeve, plastic dry-cleaner bag, or a lightweight zippered folder to limit friction and moisture.
Select a rucksack with 25–35 L for a single formal outfit plus essentials; use 40 L or more if shoes and a toiletry kit travel with it. Place the wrapped set adjacent to the bag’s back panel (spine side) so the item stays flat and receives structural support from the frame or padded back. Stow shoes in a separate pouch at the bottom to keep weight low and balance the load; roll belts and place them around shoe bags to save space.
Extras that reduce wrinkles and speed recovery: a thin folding board or garment folder keeps creases straight during transit. On arrival, hang the outfit for 20–30 minutes to let gravity relax fibers, then use a handheld steamer for 2–4 minutes per panel (jacket front, back, sleeves; trousers along the crease). Carry a small sewing kit or wrinkle-release spray in a clear pouch for quick touch-ups.

Organize liquids in sealed plastic pouches and position them upright away from the garment sleeve. For multi-day travel, rotate use: place daily-wear items deeper in the rucksack and reserve the top compartment for the formal set so access requires minimal reshuffling.
Choose a bag size and compartment layout for formalwear
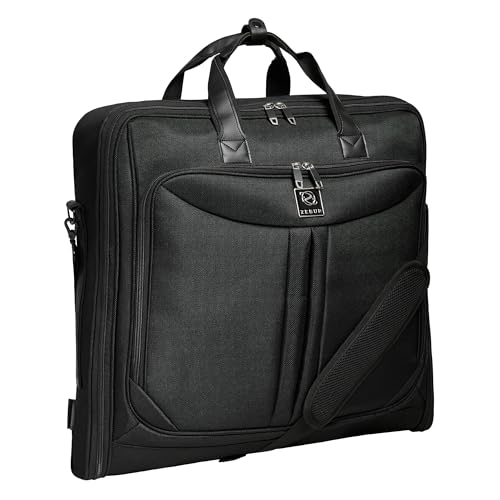
Choose a 30–40 L bag with a clamshell main opening and a removable flat garment sleeve measuring at least 60×40 cm (24×16 in) for a single jacket-and-trousers set; increase to 35–45 L if you add one pair of shoes, or 45–60 L for two full outfits plus shoes and toiletries.
Recommended interior dimensions and thickness allowances
Main sleeve internal length should exceed jacket shoulder-to-hem by 5 cm (2 in); a 60 cm (24 in) length suits most blazers. Allow 3–6 cm (1.2–2.4 in) thickness for a folded jacket with tissue paper, 1–2 cm (0.4–0.8 in) for trousers folded once. Plan main compartment depth of 12–20 cm (4.7–7.9 in) for a single outfit, 20–30 cm (7.9–11.8 in) for shoes plus clothing.
Compartment layout and features to prioritize
Clamshell or lay-flat opening to let the garment lie flat; a dedicated removable sleeve with a low-friction lining and zip or snap closure to isolate the jacket-and-trousers ensemble. Internal compression straps or elastic bands to hold the sleeve in place and reduce movement. Separate ventilated shoe/dirty pocket with waterproof coating to protect textiles. Padded divider for laptops or foldable accessories so electronics do not press against the garment. External quick-access pocket sized for a tie, collar stays and travel steamer sheet. Choose water-resistant exterior fabric and smooth interior lining to minimise creasing; a small internal hanger loop helps reposition the sleeve after removal.
Button, fold, and layer the jacket to protect shoulders and lapels
Fasten the appropriate buttons before folding: single-breasted, two-button – secure the top; three-button – secure the middle; double-breasted – fasten both rows. This holds lapels and collar in place and reduces shifting during transit.
-
Prepare a flat surface at least 60 × 40 cm. Lay the jacket face-down with the hem closest to you; smooth fabric from shoulder to hem with your palms to remove surface creases.
-
Protect shoulders: turn one shoulder inside out about 3–4 cm and tuck the opposite shoulder into the inverted cavity so shoulder pads nest. The nested shoulders should form a single block roughly 4–6 cm thick, preserving shape and preventing pinching at the outer edges.
-
Shield lapels: place a thin barrier (dry-cleaner plastic sleeve, sheet of tissue paper, or a folded button-down shirt) under each lapel. Use a sheet 0.5–1 mm thick or a folded cotton shirt; extend the barrier 2–3 cm beyond lapel tips to stop abrasion.
-
Fold sleeves straight down the back, aligning cuffs with the jacket’s hem. Do not cross sleeves over the front; that concentrates creasing. If cuffs are padded, slip a 1–2 cm rolled cloth behind each cuff to avoid hard creases.
-
Make the final fold to match compartment width: fold the jacket vertically once so the hem meets the shoulders. If the carrying compartment is narrow, fold again to reach a final width of 25–30 cm. Aim for a compact stack 3–6 cm thick depending on fabric weight.
-
Layering inside the bag: place two medium-weight tees (rolled) or a thin sweater beneath the nested shoulders for 2–4 cm of cushioning. Add a second soft layer on top of the folded jacket to distribute any external pressure. Avoid placing hard items directly above shoulder areas.
Trending Now Hayden Hill Organic Cotton Garment Storage BagMoth-proof and breathable design.Crafted from luxurious organic cotton, this hanging garment bag protects long dresses and coats while ensuring breathability, making your closet look elegant and organized.
-
Do not use compression straps over shoulder pads; if straps must be used, secure them across the lower half of the folded jacket only.
-
For wool or structured fabrics, include a breathable dry-cleaner sleeve around the folded jacket to reduce surface friction and light moisture exposure.
-
Upon arrival, hang the jacket on a shaped hanger and let it rest for 30–60 minutes; gently steam or smooth with hands to release minor creases.
Fold trousers flat and align creases to prevent new wrinkles
Fold trousers lengthwise along the existing crease, matching inseams and outer seams so both legs lie perfectly on top of each other; smooth from waist to hem with the palm and secure the alignment with a thin sheet of tissue paper before making the cross-fold.
Tools and target dimensions
Use a flat surface, a pressing cloth, lightweight tissue sheets and a stiff cardboard insert (20–30 cm long, width matching the waistband). Aim for a final folded length that fits your carry compartment: 30–38 cm for compact day carry, 40–50 cm for standard travel compartments. Keep the folded stack thickness under 3 cm where possible to avoid pressure creasing.
Step-by-step technique
1. Empty pockets and fasten the waistband; align the inseam and outer seam so leg edges match exactly.
2. Smooth the fabric with long, single-direction strokes from waist to hem–do not rub back and forth. Use a lint-free cloth between iron and fabric when applying steam: wool setting (~140–150°C) with steam, cotton at higher heat (~190–200°C), synthetics at low heat (~110–130°C); always check the garment label first.
3. Slide one or two sheets of tissue paper inside each leg and a single sheet along the length of the fold to reduce friction and buffer pressure points.
4. Fold lengthwise so the crease lines are perfectly stacked, then fold across once at the knee for deeper compartments or twice for very compact ones; make the last fold so the trousers’ final length equals the measured compartment length to avoid shifting.
5. Insert a thin cardboard or plastic board against the folded face to keep the plane flat, and place the folded trousers on top of softer items (shirts or a garment sleeve) rather than under heavy gear to prevent new creases.
For recommendations on suitable carrying options consult best backpack boyz strains and best snowmobile backpack.
Place the jacket against the rucksack back and cushion with soft items
Place the folded jacket flat against the rucksack back panel with shoulder seams running parallel to the spine and the collar pointing upward; keep the center of the shoulders 1–2 cm from side zippers or frame edges.
Exact placement and alignment
Center the garment on the back panel so lapels lie over the spine line; offset by 1 cm toward the stronger strap side if the bag has a load lifter. Leave a 2–3 cm air gap at the top to avoid collar compression from the shoulder strap. Ensure no hard objects (buckles, chargers, shoe edges) sit directly behind the shoulder area.
Soft-fill recommendations and quantities
Use 2 rolled t-shirts (8–10 cm diameter) tucked behind each shoulder to recreate shoulder shape; place a folded merino sweater (200–300 g) horizontally across the lower back to prevent the jacket from sagging. Fill lapel valleys with thin items: two silk scarves or three pairs of rolled dress socks per lapel. For extra protection, slide a breathable garment sleeve or a dry-cleaner bag between the jacket and other contents to reduce friction.
Distribute cushioning so pressure is gradual: thicker padding (sweater) at the lumbar zone, medium padding (rolled tees) at the shoulders, and thin padding (socks/scarves) along lapels and collar. Avoid overstuffing–allow 5–8 mm flex space around critical seams to prevent new creases during movement.
If the rucksack has a firm back panel, place a 3–5 mm foam sheet or folded microfibre towel behind the jacket for shock absorption; if the back is soft, increase internal padding by one extra rolled item per shoulder. Place heavier gear either below the jacket or in a separate exterior compartment to keep the dressed layer free from concentrated weight.
Unfold and revive the garment: hang, steam, and spot-press problem areas
Hang the jacket on a wide-shoulder hanger (40–46 cm / 16–18 in) within 10 minutes of removing it from your bag; clamp trousers by the waistband and leave vertical for 30–60 minutes so gravity relaxes fibres.
Use a handheld steamer with distilled water: hold 5–10 cm (2–4 in) from fabric, steam in downward passes, 3–6 seconds per panel, repeat 2–3 times. For wool blends, follow with a gentle brush along the nap; for lightweight synthetics, increase distance to 10–15 cm (4–6 in) and use shorter bursts to avoid shine.
For localized pressing, place a cotton muslin or tea towel over problem spots and press with an iron on the garment’s recommended setting: wool setting for pure wool, medium for wool blends, low for polyester blends. Apply firm contact for 2–4 seconds, lift, reposition, never slide the iron across shaped areas (lapels, shoulders). Test on a hidden seam for 3–4 seconds before treating visible panels.
Trouser creases: align seams, mist a fine spray of room-temperature water along the crease, cover with a pressing cloth, press with steam-on medium heat for 4–6 seconds per section, then hang immediately to cool for 10–15 minutes to set the line.
Spot treatments: oil/grease – sprinkle cornstarch or talc, leave 4–8 hours, brush off; sweat/discoloration – dab with 1 part white vinegar to 3 parts water, blot outward, rinse with a damp cloth, air-dry flat; ink – blot with isopropyl alcohol on a cotton swab, work from the edge inward, then neutralize with a damp cloth. Always test in an inconspicuous area first.
Restore shape for shoulders and collars by inserting a rolled towel or foam support and leaving suspended for 12–24 hours; use collar stays for spread collars and a tailor’s ham when pressing curved seams. If a steamer is unavailable, hang the garment in a closed bathroom during a 10–15 minute hot shower, then follow with light brushing.
For travel-related hardware or securing questions consult general transit guidance: are there transit bolts in integrated fridge freezer.