
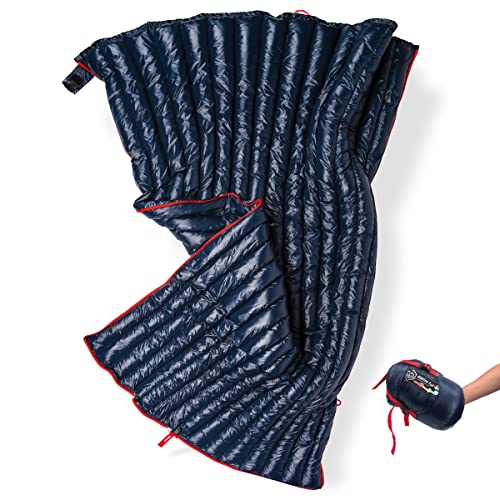


Sleep system: keep bag + pad + shelter ≤1.5 kg; choose a sleeping bag with a comfort rating at least 5°C below the expected night low; inflatable pad with R-value ≥3.0 for colder nights; single-wall ultralight tent or tarp-shelter in the 600–1,200 g range depending on season.
Clothing: adopt a three-layer setup – next-to-skin (merino or synthetic) 1–2 shirts, 1 set of liners; insulating midlayer 200–300 g (synthetic or light down); waterproof breathable shell (3-layer or equivalent) with pit zips; pack two pairs of socks (wool/synthetic) plus one lightweight camp pair; target total clothing weight ≤1.2 kg.
Hydration and food: plan 2–4 L daily depending on temp and exertion; carry a compact filter (~90–120 g) and one 1 L soft bottle + 0.5 L emergency bottle; aim 2,500–4,000 kcal per day; use high-calorie dehydrated meals or calorie-dense bars ≈400–600 kcal/100 g; budget 500–800 g food weight per day.
Navigation and safety: always carry map + compass and practice bearings; add a GPS or smartphone with offline maps and a 10,000 mAh power bank; headlamp 150–300 lm with spare batteries; lightweight first-aid: blister kit, adhesive dressings, sterile gauze, tape, antihistamine, pain reliever; secure permits where required and leave a clear itinerary with an emergency contact; check weather 24–48 hours prior to departure.
Pack organization: place heavy items close to the spine between shoulder blades; frequently used gear in hipbelt and top pockets; sleeping system compressed at the bottom; use a 30–50 L pack for minimalist multi-day outings, 50–75 L when resupply is limited; aim total carried weight under 20% of body weight; perform at least one loaded shakedown hike of 2–3 days.
Footwear and foot care: break in boots or trail shoes over two weeks with progressively longer walks; use appropriate lacing to control heel slip; carry gaiters on rocky or muddy routes; treat hotspots immediately and inspect feet daily; choose socks with 3–5% elastane for fit and durable seams to reduce blisters.
Define route, daily mileage targets and bailout points
Set a primary daily target in miles and a conservative reserve target 25–40% lower.
Daily mileage targets
Use realistic pace estimates: 3.0 mph on easy compact trails; 2.5 mph on rolling terrain; 2.0 mph on sustained steep terrain; 1.0–1.5 mph on technical or route-finding sections with heavy packs.
Calculate expected distance as pace (mph) × planned moving hours, then account elevation: add 1 hour per 1,000 ft (≈305 m) of ascent to moving time before converting back to miles. Example: 8 moving hours at 2.5 mph = 20 miles; 3,000 ft ascent adds 3 hours → effective moving time 5 hours → adjusted distance ≈ 12.5 miles.
Apply terrain multipliers to moving time: muddy or snowy conditions ×1.3–1.5; dense bush or route-finding ×1.4–1.6; steep scree or long talus fields ×1.5–2.0. Use the lower bound of the adjusted range as the daily target when unknowns exist.
Bailout points & route mapping
Place bailout waypoints on the map and in GPS files at intervals that allow exit within a single long day: typical spacing 8–15 miles or at fixed exits such as roads, trailheads, towns, ferry terminals. For each waypoint record: access type, distance from nearest camp, cumulative elevation, estimated moving time, water sources, and transport options.
Create two bailout tiers: Tier A reachable during planned daylight (primary alternate), Tier B reachable with an emergency push (maximum solo distance commonly 20 miles). Prioritize bailouts with cell coverage, vehicle access, or scheduled public transport.
Export GPX with bailout waypoints, print a simple paper list of cumulative distances and elevations, mark sunrise/sunset times and known phone-signal patches from coverage maps. If resupply is used, locate resupply bailouts no more than 48 hours apart.
Daily checklist: planned miles, conservative reserve miles, distance to nearest bailout. If reserve drops below 25% of planned, shorten next day’s objective or shift camp closer to the next bailout waypoint.
Choose and test footwear and socks suited to expected terrain and weather
Select footwear with 10–15 mm (1–1.5 cm) of toe room while standing, test that measurement at the end of a long day when feet swell, and always wear the exact socks intended during fitting sessions.
Match footwear type to terrain and load: rigid leather boots with a stiff shank for heavy loads and steep scree; midweight hikers for mixed technical ground and moderate packs; trail runners with aggressive tread for fast travel on firm trails and light packs. Aim to select footwear one half to one full US size up from street shoes when toes hit the box on downhill test runs.
Decide on a membrane based on precipitation and water exposure: waterproof membranes (e.g., Gore‑Tex) prevent ingress during prolonged rain and snow but reduce evaporative cooling under sustained exertion; breathable non‑waterproof uppers with robust gaiters keep out debris while drying faster after stream crossings. Choose waterproof when continuous wetness is likely; choose breathable if frequent drying is expected and overheating is a concern.
Sock system: use a thin synthetic or nylon liner (0.5–1 mm) plus an outer cushion sock, or a single well‑fitted sock if liners feel uncomfortable. Sock weights: lightweight 100–140 g/m² for hot conditions, midweight 160–220 g/m² for mixed temperatures, heavyweight 220+ g/m² for cold. Material notes: synthetic outer socks dry fastest; merino offers odor control and thermal regulation but takes longer to dry.
Testing protocol: complete at least three graduated field tests wearing full pack weight and planned insoles – 8–12 km, 20–25 km, then a 30+ km day including sustained descents. Include at least one wet exposure test (stream crossing and simulated rain). Track metrics: blister count, hot spots (location and timing), heel slip (target <5 mm after lacing), toe‑bang incidents, and toenail bruising.
Lacing and fit adjustments: use a heel‑lock (runner’s loop) to eliminate heel lift; if toes hit the box on downhill, increase size 0.5–1 size or try a wider last. Swap factory insoles with aftermarket orthotics if arch support or metatarsal pressure is problematic; verify changes on a 10–20 km test hike before committing.
Break‑in schedule: accumulate 50–100 km of progressive wear across at least two weeks: short walks, then day hikes at pack weight, then multi‑day loads. Replace footwear showing sole separation or midsole collapse before long unsupported travel.
Sock hygiene and quantities: carry 2–3 outer pairs plus 1 liner pair per week of planned time; change socks nightly or immediately when wet. Rinse, wring, and hang inside a ventilated vestibule; synthetic pairs typically dry in 1–3 hours in sun/wind, merino may take 3–8 hours depending on humidity.
Debris mitigation and accessories: add gaiters when using breathable shoes on loose scree, mud or heavy brush; use thin toe caps or protective tape over friction hotspots discovered during testing; keep a small repair kit (needle, thread, duct tape) to patch sock holes that can otherwise cause blisters.
Decision checklist before final packing: toe room 10–15 mm while standing; heel slip <5 mm after heel‑lock; no persistent hotspots after 30+ km test; socks dry within usable overnight window; membrane choice aligned with expected precipitation pattern. If any item fails a checklist item, repeat targeted tests or change model before departure.
Pack and weigh gear: set a baseweight goal and balance load distribution
Set a baseweight target: ultralight 6–10 lb (2.7–4.5 kg); lightweight 10–15 lb (4.5–6.8 kg); conventional 15–25 lb (6.8–11.3 kg).
Define baseweight as pack mass excluding food, fuel and water. Weigh every item individually with a digital kitchen or postal scale; record weights to nearest 1 g (0.04 oz) when possible. Add grouped totals: shelter, sleep system, torso clothing, footwear, cook system, electronics, repair kit. Compare totals against target and mark high-weight offenders.
Use two quick methods: 1) Empty-pack sum – weigh each item on scale and sum values. 2) Full-pack subtraction – weigh worn clothes plus fully loaded pack, then subtract worn clothes weight. Cross-check both results; discrepancy >4% signals missed items or scale error.
Trim list by priority order: heavy items with low utility first (bulk clothing, redundant tools), then medium items (cookset size, battery capacity). Aim to reduce baseweight by 10–25% when possible; a 20% cut on a 15 lb pack saves 3 lb, which typically reduces shoulder and knee strain noticeably during multi-day routes.
Load distribution rules: place the heaviest items within a 4–8 inch (10–20 cm) vertical band centered along the spine and close to the shoulder harness. Load hipbelt to carry 60–70% of total pack mass. Stow sleeping system and compressible clothing at bottom to stabilize; frequently accessed items belong in top lid or hipbelt pockets.
Fit and adjustment tips: tighten hipbelt snugly onto the iliac crest, then tension shoulder straps so pack feels supported but hips bear the majority of weight. Set load lifters at a 30–45° angle to pull top of load toward torso. Use compression straps to prevent shifting; add thin foam or a small drybag behind heavier items to maintain a smooth spine contour.
Test hikes: conduct 2–3 shakedown hikes with target baseweight plus typical daily food to evaluate comfort at 3, 6 and 12 miles. If shoulder or neck pain appears within first mile, shift 2–4 lb lower and closer to hips; if lower-back fatigue occurs at mid-distance, move 1–3 lb higher toward shoulder strap line and re-tighten hipbelt.
| Category | Typical weight | Placement | Trim suggestion |
|---|---|---|---|
| Shelter (tent/tarp) | 8–48 oz (225–1360 g) | Centered, high-mid pack (4–8 in / 10–20 cm from shoulder strap) | Choose lighter footprint or single-wall option; eliminate extra stakes |
| Sleep system (bag/pad) | 12–40 oz (340–1135 g) | Bottom of pack, compressible | Lower temperature rating only if route allows; use inflatable or lighter pad |
| Pack shell | 18–80 oz (510–2270 g) | Exterior carries load; internal frame close to spine | Replace with frameless or lighter frame; remove unnecessary straps |
| Cook system | 2–20 oz (60–570 g) | Mid-pack or lid | Opt for titanium cup and smaller stove; remove spares |
| Clothing (base layers, insulation) | 16–48 oz (450–1360 g) | Compressed in drybag near bottom or worn | Limit to multipurpose pieces; wear heavier items while hiking |
| Food (per day) | 12–20 oz (340–570 g) | Top or accessible pouch | Choose calorically dense rations; resupply instead of carrying excess |
| Water (per L) | 35 oz (1000 g) approx | Front pockets or side bottles for easy access | Plan water sources to minimize carrying distance |
If excess mass needs removal mid-route, consider shipping nonessential items home or to the next town; check postal and item-specific rules via resources such as can i mail wine as a gift.
Meals, calories, snacks and stove fuel calculations
Calories, meal composition and sample menu
Carry 2,800–4,200 kcal daily, scaled to body mass and exertion level.
Estimate metabolic need using Mifflin‑St Jeor: Men: BMR = 10×kg + 6.25×cm − 5×age + 5. Women: BMR = 10×kg + 6.25×cm − 5×age − 161. Apply activity multiplier: 1.35 (light load), 1.55 (moderate), 1.8 (heavy). Example: 70 kg, 175 cm, 35‑yr male → BMR ≈ 1,624 kcal; moderate activity → ≈2,518 kcal. Add 10–30% reserve in cold or steep terrain days → target ≈2,770–3,273 kcal.
Aim snack density 100–125 kcal/oz (3.5–4.4 kcal/g). Plan 2–4 snacks daily at 200–400 kcal each. Meal sizing guideline: breakfast 400–700 kcal, lunch 400–700 kcal, dinner 600–900 kcal. Keep 500–800 kcal emergency stash in an easily reachable pocket.
Macro split guideline: protein 15–25% of kcal, carbs 50–65%, fat 20–35%. Typical calorie densities: nuts 5.5–6.5 kcal/g, peanut butter 5–6 kcal/g, chocolate 5–5.5 kcal/g, dried fruit 3–3.5 kcal/g, freeze‑dried meals 2.5–3.5 kcal/g (dry weight varies by brand). Convert kcal targets into grams using these densities when packing.
Sample daily pack (≈3,000 kcal): breakfast – instant oats + powdered milk + honey (≈600 kcal); lunch – tortillas + 80 g peanut butter + dried fruit (≈700 kcal); dinner – freeze‑dried entrée rehydrated (manufacturer kcal ≈800–1,200); snacks – 200 g mixed nuts (≈1,200 kcal) split across day. Label each day’s food with kcal and dry weight to speed resupply decisions and rationing.
Reduce stove dependence by including one cold meal or using cold‑soak rehydration. Test the full menu on a multi‑hour training hike of similar load and duration; increase carried kcal if consistent hunger or weight loss appears.
Stove fuel: measure stove efficiency and compute fuel needs
Determine daily liters of boiling/reconstitution: typical range 1.25–2.5 L (breakfast hot drink 0.5–1 L, dinner 0.5–1 L, drinks 0.25–0.5 L). Perform a stove test: weigh fuel canister, boil 1 L ambient temp water, reweigh. Fuel used (g) per 1 L = Δweight. Average three trials to reduce variance.
Calculate daily fuel grams = liters needed × grams per liter from test. Add 30–50% reserve in cold or high altitude. Example: test yields 12 g per 1 L; planned 2 L daily → 24 g daily; 10 days → 240 g total. Common canister sizes are 100–230 g; convert total grams to number of canisters and round up.
If canister testing is not possible, use conservative estimates by stove type: integrated high‑efficiency systems ~10–20 g/L, standard burner + pot setups ~20–35 g/L. Expect snow melting to multiply fuel use ~2–4× relative to boiling liquid water; adjust totals substantially when melting required.
Fuel‑saving tactics: consolidate boils into a single session, heat only required volume, use a windscreen, choose one high‑calorie cold meal daily, pre‑soak items where safe, and carry a measured spare canister rather than relying on exact math under variable conditions.
Train with a Loaded Pack – Build Endurance, Hill Repeats and Recovery Days
Carry 10–15% of body mass on 60–90‑minute walks, 3× weekly for two weeks; increase load by 5% every 2 weeks until target is reached; include one long day (3–6 hours) at target load by week 6–8.
8‑week progression (sample)
- Weeks 1–2: Two 60–90 min loaded walks at conversational pace (3.0–4.0 mph / 4.8–6.4 km/h), one unloaded strength/mobility session (30–45 min).
- Weeks 3–4: Increase load to 15–20% body mass. One hill session (see protocol), one interval tempo walk 60–75 min at RPE 6, one long loaded day 2–3 hours at easy pace.
- Weeks 5–6: Load 20–25% body mass. Long day 3–5 hours with pack, include 2–3 hours continuous walking at Zone 2 heart rate (~60–70% HRmax). Maintain one hill session and one maintenance strength session.
- Weeks 7–8: Final load at target. Simulate consecutive days: back‑to‑back loaded day (4–6 hours) followed by an easier 2–3 hour loaded day to train recovery under load. Reduce intensity of hill repeats to preserve freshness.
Hill repeats protocol and recovery
- Gradient & length: choose a hill with 6–12% grade, 60–120 seconds uphill per rep (≈80–200 m). Aim 6–10 reps at RPE 7–8 (hard but controlled).
- Work/rest: climb effort, then descend or walk flat for 2–4 minutes active recovery. Keep heart rate dropping into Zone 2 before next repeat.
- Frequency: one dedicated hill session weekly during loading phase; reduce to one every 10–14 days during peak weeks.
- Supplementary strength: 2 sessions/week (30–45 min) with weighted step‑ups, split squats, Romanian deadlifts and plank variations – 3 sets of 6–12 reps, progressive overload using kettlebell or pack.
- Deload: every 4th week cut volume by 40–60% and drop intensity to avoid accumulated fatigue; keep mobility and light aerobic work.
- Nutrition & hydration during long days: 30–60 g carbs/hour for efforts under 3 hours; 60–90 g/hour when activity exceeds 3 hours. Aim 0.25–0.4 g protein/kg within 60 minutes after hard sessions and 1.4–1.8 g protein/kg daily during heavy loading weeks.
- Hydration guideline: 500–750 ml/hour in moderate conditions; increase with heat or heavy exertion. Replace electrolytes when sweating heavily.
- Soft‑tissue care and sleep: 10–15 minutes daily mobility plus foam rolling 3× weekly; target 7–9 hours sleep nightly to maximize recovery.
Test strap comfort and hipbelt performance under load; try urban messenger options: best messenger bag for hiking and larger travel cases: best luggage for a river cruise.
FAQ:
How do I choose the right backpack for a multi-day hike?
Look for a pack sized for the length of your trip: daypacks are 20–35 liters, weekend packs 35–55 L, multi-day packs 55–75 L. Fit matters more than volume. Measure your torso length and try packs with adjustable frames or different frame sizes. A well-fitting hip belt should carry most of the load so your shoulders are free; test this by loading the pack with weight in the store or on a trial walk. Check suspension features (frame type, load lifters, hip-belt padding), side and hip pockets, attachment points for tools, and whether a rain cover is included or available. Lighter materials reduce base weight but may trade off durability. If you can, try several models with a weighted load and walk on uneven ground before buying.
What should I pack for a five-day summer trip in the mountains?
Focus on layering and lightweight, high-energy consumables. Clothing: moisture-wicking base layers, one insulating mid layer (fleece or thin down), a breathable waterproof shell, hiking socks plus one spare pair, hat and light gloves for cool nights. Footwear: broken-in hiking boots or trail shoes and lightweight camp sandals. Shelter and sleep: tent, stakes, footprint, sleeping bag rated for expected low temps, and sleeping pad. Food and cooking: compact stove, fuel, pot, lighter or matches in a waterproof container, lightweight meals and snacks that provide calories and salt. Water: filter or purifier, collapsible water container, and knowledge of likely water sources. Safety and tools: map and compass, headlamp with spare batteries, basic repair kit, multi-tool, first aid kit. Extras: sunscreen, insect repellent, toiletries in small quantities, trash bags, and a small dry bag for electronics. Keep total pack weight reasonable by choosing multifunction items and removing nonessential duplicates.
How can I train physically for carrying a loaded pack?
Progressive conditioning helps avoid soreness and injury. Start several weeks before the trip with regular hikes, gradually increasing distance and elevation gain. Add a weighted pack on training hikes and raise the weight each week until it matches or slightly exceeds your planned base weight. Supplement with strength work for legs (squats, lunges), hips and core (planks, deadlifts or good-morning variations), and cardio sessions (hills, stair climbing, intervals) to build endurance. Practice walking on terrain similar to your route and include downhill practice to train eccentric muscle control. Schedule rest days, stretch after workouts, and pay attention to foot care—break in boots and use blister prevention strategies during training hikes.
How should I plan water and food resupply for remote sections?
Research water availability along your route using guidebooks, recent trip reports, and local land-management maps. Identify reliable springs, streams, or established resupply points and note seasonal changes that could dry sources. Carry purification options—filter, chemical treatment, or UV device—and bring spare filters or tablets. For stretches with limited water, plan to carry extra liters; a common guideline is 3–4 liters for hot, dry terrain but adjust based on source spacing and exertion level. For food, plan calorie-dense meals and trial a few recipes at home to confirm preparation time and fuel needs. If towns or road crossings provide resupply, list distances between points and options available there. If allowed, consider food caches placed ahead of time, but check regulations and wildlife risks before doing so.
What safety gear should I take and how can I handle emergencies on the trail?
Bring a tailored first aid kit and learn how to use its contents. Add items for blisters, wound care, and common trail ailments. Carry a reliable light source, an emergency shelter or bivy, a way to start a fire, and tools to repair critical gear. For communication and location help, consider a personal locator beacon or satellite messenger if you will be outside cell coverage; learn how to activate it responsibly. Share your planned route and schedule with a trusted contact and set check-in times. Learn basic wilderness skills: treating hypothermia, splinting fractures, moving an injured person short distances, and reading weather signs. In an emergency, stabilize the injured, keep them warm and hydrated, and seek help via available devices or by moving toward help if safe to do so. Practicing scenarios and taking a wilderness first aid course will increase confidence and improve outcomes.


