


Recommended hardware: split ring 20–25 mm (0.8–1.0 in) for standard key tags; micro carabiner 20–30 mm (0.8–1.2 in) with spring gate or locking sleeve for valuables. Keep individual charm weight under 40 g (1.4 oz) and total external load below 150 g (5.3 oz) to avoid stress on straps and zippers. Use 304 stainless steel or solid brass for corrosion resistance; avoid plated iron hardware near salt or rain.
Best attachment points: daisy chains, lash tabs, shoulder-strap D-rings, sternum-strap buckles and the top haul handle. When using zipper pulls, route the split ring through the pull tab hole (or both pull tabs for dual zippers) instead of clipping directly to fabric seams. Distribute heavier items evenly left/right to prevent strap tilt and reduce wear at single stitch points.
Security and durability measures: use a locking carabiner for expensive fobs or ID tags; apply a short length of heat-shrink tubing or a silicone sleeve to metal rings to prevent scratching. Avoid clipping to compression straps or load-bearing webbing; attach only to reinforced points or add a bartack stitch if a loop looks thin. For removable setup, choose a snap hook with a spring gate rated to 50–100 N for quick detachment without compromising retention.
Noise and convenience tips: eliminate jingling by storing multiple small items on a single split ring or by placing a foam bead/silicone spacer between items. For travel or school, stow keys inside a small zip pocket when passing through security or when carrying electronics. For everyday wear, limit external trinkets to two or three lightweight pieces and rotate heavier items into the interior compartment to preserve longevity of the knapsack hardware.
Attaching Charms to a Rucksack: Practical Instructions
Use a small locking carabiner with a gate opening of at least 8 mm on a reinforced D‑ring or grab handle; choose stainless steel or anodized aluminum and keep individual pendant mass below 200 g to prevent material fatigue and excessive swinging.
Hardware selection
Recommended connectors: split rings (inner diameter 10–20 mm, wire 0.9–1.2 mm) for permanent links; lobster clasps (12–15 mm) for quick removal; swivel hooks (18–22 mm) to avoid torsion; locking carabiners for heavier items. Materials: 316 stainless for water resistance, brass for patina, zinc‑plated steel for low cost. For ultra‑light novelty charms choose micro‑snap hooks rated under 50 g. Check connector break strength: aim for at least 10× the charm weight (e.g., a 50 g charm on a connector rated ≥500 g).
Placement and securing
Attach heavier trinkets to lower compression straps, bottom daisy chain loops or reinforced webbing to lower center of gravity; suspend lightweight fobs from zipper pulls or shoulder strap loops. Limit outward projection to 15 cm from the bag surface to reduce snag risk. For zipper attachment use a split ring plus a small lobster clasp so the charm can be removed without unzipping. Avoid thin fabric loops–perform a pull test of ~5 kg for 10 seconds before regular use. For semi‑permanent fixes sew a 1.5–2 cm webbing tab with polyester thread using 6–8 backstitches spaced ~3–4 mm or install a 5 mm rivet; for MOLLE panels use 1″ clips or a doubled 550 paracord lanyard (length ~120 cm before knotting) with a secure knot and melted ends.
Inspect connections every 4–6 weeks: check for corrosion, bent gates, frayed thread and loose rivets. Remove metal pendants with liquids or glass contents exceeding 200 ml during transit inspections. Perform a final pull check after attachment (steady pull up to ~5–10 kg) to confirm integrity before daily use.
Identify secure attachment points on different pack styles
Attach small metal fobs and charm rings to reinforced gear loops, daisy chains or sewn zipper tabs; limit hanging weight to under 30 g (≈1 oz) from zipper pulls and up to 200 g (≈7 oz) from sternum or hipbelt D‑rings–move heavier items inside the main compartment.
Urban daypacks and commuter rucksacks
Use the top haul handle for quick clips and the dedicated zipper pull tabs for decorative trinkets. For commute use, clip heavier key rings to metal D‑rings on the hipbelt or the sternum strap buckle point; secure with a small locking carabiner or welded split ring (stainless steel, 3–6 mm wire). Avoid attaching anything to shoulder strap webbing loops that sit under backpacking load, and keep charms away from front compression straps and bottle mesh to prevent snagging. For rainy storage solutions related to city gear, see best umbrella stroller ireland.
Technical, hiking and roll‑top packs
Weave accessories into MOLLE/PALS or daisy chain rows and secure with a zip tie or locking micro‑carabiner; for anything over 500 g (≈1.1 lb) route it inside the pack or to a reinforced hipbelt loop. On roll‑top designs, attach to the metal D‑ring under the flap rather than the fabric roll itself. For sling and messenger styles, prefer the reinforced handle or a sewn accessory loop near the strap anchor. If a charm or metal piece drops and soils surrounding fabric or nearby surfaces, consult stain removal steps at how to clean cat puke off carpet and, for beach or sun gear that may travel with your pack, see best place to buy a beach umbrella jensen beach.
Step-by-step methods for fastening charms to zipper pulls
Recommendation: select a 10–20 mm split ring or a 15–25 mm micro carabiner in stainless steel or solid brass; these sizes match most metal and fabric zipper tabs and sustain 5–7 kg without permanent deformation.
Method 1 – Split-ring direct attachment (fast, durable)
1. Use a 10 mm or 15 mm split ring for thin metal zipper tabs; use 20 mm for thicker fabric tabs.
2. Pry the ring open with a split-ring opener or thin flat screwdriver; avoid opening by twisting the ring sideways.
3. Thread the inner coil past the zipper tab hole until the charm slides onto the ring.
4. Inspect both coils to ensure the charm cannot slip between them; squeeze closed with flat-nose pliers if gaps appear.
5. Expected hold: 5–7 kg. Time: 2–5 minutes.
Method 2 – Micro carabiner (quick-release, heavier load)
1. Choose a wire-gate micro carabiner, 15–25 mm length, stainless steel or aluminum with a spring gate.
2. Clip gate open, pass through the zipper tab hole or loop, and close gate fully; check gate spring action.
3. For security, add a split ring between the charm and carabiner to prevent lateral slipping.
4. Expected hold: 7–15 kg depending on material. Time: 1–3 minutes.
Method 3 – Quick-link (screw-gate) for semi-permanent mounting
1. Select a 6–10 mm quick-link (threaded oval link) or a 1/8″ screw link in steel.
2. Unscrew half-turn, pass through the tab, screw closed until tactile resistance; apply one drop of thread locker if extended use outdoors is planned.
3. Verify alignment so the charm hangs without rotating into the zipper teeth.
4. Expected hold: 10–25 kg. Time: 3–6 minutes.
Method 4 – Sew-reinforced swivel snap for fabric tabs (neat, low abrasion)
1. Use a 10 mm swivel snap with a 6–8 mm throat; prepare 18–22 cm of 550 paracord or 3 mm leather thong.
2. Fold cord to form a lark’s head around the zipper tab, leaving a 2–3 cm tail below the fold.
3. Stitch 6–8 passes through both cord layers and the tab with 50 wt polyester thread using a size 18 needle; backstitch at each end.
4. Apply a small dab of clear contact cement to lock stitches, trim excess and melt/paraffin-seal paracord ends.
5. Expected hold: 8–12 kg. Time: 15–25 minutes.
Method 5 – Rivet + split ring for permanent, high-strength mounting
1. Choose a 4–5 mm solid rivet set and an installation tool; pre-drill a 3.2 mm hole through the zipper tab (for fabric tabs, reinforce with a short leather patch 20×10 mm).
2. Insert rivet through charm loop and tab, set with a hammer and rivet setter until flush.
3. Add a 15–20 mm split ring after riveting if removability is needed.
4. Expected hold: 15–30 kg. Time: 8–15 minutes.
| Method | Minimum tools/materials | Typical hold (kg) | Estimated time |
|---|---|---|---|
| Split-ring direct | Split ring (10–20 mm), flat-nose pliers | 5–7 | 2–5 min |
| Micro carabiner | Micro carabiner (15–25 mm), optional split ring | 7–15 | 1–3 min |
| Quick-link (screw) | Quick-link 6–10 mm, thread locker (optional) | 10–25 | 3–6 min |
| Sew-reinforced swivel snap | Swivel snap, paracord/leather, needle, polyester thread, contact cement | 8–12 | 15–25 min |
| Rivet + split ring | Rivet set 4–5 mm, drill/awl, split ring | 15–30 | 8–15 min |
Using carabiners, split rings, and swivel clips by item weight
For items under 30 g (single metal key, small decorative fob): choose 10–12 mm split rings or lightweight wire carabiners with a 6–8 mm gate opening; stainless or nickel-plated steel is preferred for corrosion resistance.
-
30–200 g (multiple keys, electronic fob, small multi-tool): use 15–20 mm split rings or solid‑gate carabiners with a 12–20 mm gate opening. Recommended materials: 316 stainless, brass, or zinc alloy with thicker plating. Swivel clips with a 10–15 mm mouth and a robust spring work well to reduce twisting when worn on a strap or loop.
-
>200 g (heavy multi-tools, compact power banks, metal accessories up to ~500 g): select locking carabiners (screw-lock or twist-lock) or heavy-duty swivel snaps rated for accessory loads; prefer hardware specifying a load rating. Use split rings ≥22 mm and ≥2.5 mm wire thickness or replace split ring with a short chain link to spread stress.
Gate type and strength guidelines:
-
Wire-gate carabiners: light and low-friction; best for items <100 g. Avoid for bulky/heavy loads due to lower bending resistance.
-
Solid/gate carabiners: stiffer, better for repeated use and moderate loads (30–300 g).
-
Locking carabiners: use when item weight exceeds 200 g or when accidental detachment would be problematic; look for stamped ratings (kN). For non-life‑safety accessory work, a 1–5 kN rating gives wide safety margin; certified climbing gear should be used only where appropriate.
Swivel clip specifics
-
Choose swivel clips with sealed rivets or ball bearings when frequent rotation occurs; this prevents thread fatigue on fabric loops. Prefer brass or stainless swivel bodies for marine or humid environments.
-
Measure mouth width: make sure clip opening clears the attachment point (webbing thickness, zipper pull tab). If mouth < attachment thickness, use a short split ring as an adapter.
Split ring specs and lifespan
-
Diameter and thickness: 10–12 mm × ~0.8 mm for light use; 15–20 mm × ~1.0–1.5 mm for everyday sets; ≥22 mm × ≥2.0–2.5 mm for heavy clusters.
-
Finish: electropolished stainless reduces prying wear; plated rings (zinc, nickel) will eventually flake under abrasion–replace annually if exposed to abrasion or saltwater.
-
Failure signs: visible gap between coils, flattened cross-section, or reduced spring back – replace immediately.
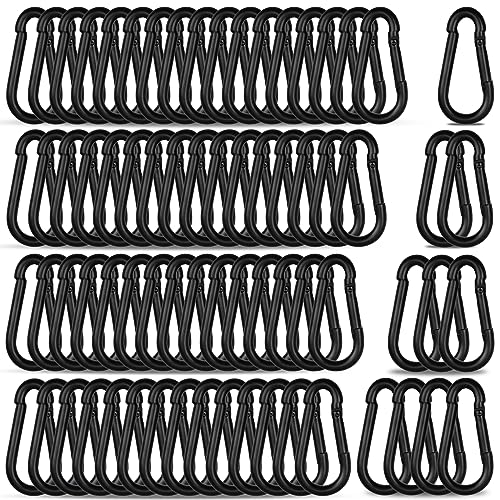
Hot Pick CREST Stainless Steel Split RingsIdeal for keeping keys secure and accessibleThese marine-grade stainless steel split rings are perfect for organizing your keys and ensuring easy access. Durable and corrosion-resistant, they are ideal for DIY projects, crafts, and other keychain uses.
Attachment strategy for multiple items
-
Distribute weight across two attachment points on the bag or strap: use a primary carabiner for the main cluster and a secondary split ring for frequently used items (house key, transit pass).
-
For heavy clusters, insert a short chain or use a thick carabiner through a reinforced D‑ring rather than pulling directly on a thin zipper pull to prevent fabric tearing.
Maintenance and quick checks
-
Weekly: test gate snap and swivel smoothness; check for corrosion at hinge and spring points.
-
Monthly: weigh the assembled items with a kitchen scale. If combined mass increases beyond the hardware class used, upgrade to the next category.
-
When replacing: match or exceed previous diameter and choose metal over plastic for medium and heavy loads.
Securing heavy or fragile fobs to straps and D-rings
Use a locking screw-gate carabiner or a threaded quick link made of stainless steel or brass; choose hardware with a stated working load at least 5–10× the mass of the ornament. Mount the attachment at the strap base or directly to the D-ring loop (not at the mid-strap or free-hanging end) to minimize leverage and swing.
Heavy items – mechanical load control
For items under 50 g: 10–12 mm split ring or 3–4 mm accessory carabiner. For 50–200 g: 18–25 mm heavy-duty split ring or 4–6 mm screw-gate carabiner. For >200 g: use a 6 mm+ threaded quick link or a locking carabiner rated for handheld loads; use a secondary webbing loop (2–3 cm wide) sewn or cinched around the strap to spread load across two attachment points. Use stainless steel (316) for coastal use; brass for corrosion resistance and softer metal-to-metal contact.
Fragile items – anti-shock and anti-abrasion measures
Limit pendulum length to 1–3 cm between fastener and item to reduce impact velocity. Add a short shock-tether (elastic cord with protective braid) when items weigh 30–150 g and are breakable; choose shock cords with Shore hardness matched to the mass (higher dampening for heavier small objects). Wrap the fragile piece in closed-cell foam sleeve or use heat-shrink tubing (apply at low heat to avoid melting) to prevent metal-on-metal strikes. Secure with a secondary safety loop (thin nylon strap or safety wire) tied to a second D-ring or strap ladder so a primary failure won’t result in loss or damage.
Additional practical tips: orient threaded closures upward to shed water, trim excess webbing and melt ends to stop fray, double-check quick-link torque after first 24 hours of use, and test attachments with 3–5× body shakes before carrying valuable or heavy items in crowded conditions.
Prevent snags, noise, and accidental loss while commuting
Store metal fobs and bulky trinkets inside a zippered compartment or immobilize them within 5 cm of the bag surface using silicone tubing or narrow hook-and-loop straps; keep externally exposed items under 30 g whenever possible and move anything over 80 g into the main compartment.
Placement and routing
Route short tethers under the shoulder webbing or behind a sternum strap so edges cannot catch on poles, doors, or clothing. Use interior anchor points (sewn loop, internal D-ring, or a small zippered pouch) for items that must remain accessible; external clips should be tucked beneath a flap or into a side pocket while in transit. Maintain a free-hang length below 5 cm to prevent catching on crowding and bike racks.
Noise damping and abrasion prevention
Reduce jingling by covering metal rings and exposed hardware with 3 mm silicone tubing (cut 15–25 mm lengths) or with 6 mm heat-shrink tubing (apply steady heat until snug). Add small rubber O-rings between moving metal parts to stop metal-on-metal contact. For fabric friction points, wrap 20–30 mm of self-fusing silicone tape rather than adhesive tape to avoid residue. Swap metal charms for leather or silicone variants when silence matters.
For fragile pieces, place them inside a padded microfibre pouch inside the main compartment or a lined internal pocket; remove pendants with glass or thin enamel before cycling or commuting in crowded transit.
Prevent accidental loss by anchoring each fob with a short tether (braided cord or 2–3 mm webbing) sewn or clamped to an internal loop. If using a removable clip, add a secondary micro-lock (tiny zip tie or sewn keeper) so a single snag won’t let the item fall off.
Perform a quick pre-departure check: 1) tug each attachment for 3 seconds, 2) shake the bag once and listen for rattle (any persistent noise means re-damp or relocate), 3) confirm sliders and internal anchors sit flat and tucked. Replace frayed tethers immediately; do not rely on worn split rings or corroded metal.