


Immediate recommendation: Use a double-walled corrugated box 6–15 cm larger than the loaded item on every side; common sizes for day- and commuter packs are 61×41×25 cm (24×16×10 in), for 30–50 L expedition packs use 76×46×30 cm (30×18×12 in). Place the folded bag in a sealed plastic liner to block moisture, then surround it with 3–5 cm of crumpled kraft paper or polyethylene foam to prevent movement.
Remove detachable components (hydration bladders, external straps, straps with batteries) and pack them separately inside the case. Protect zippers and buckles with 2–3 mm cardboard strips and wrap fragile contents (electronics, sunglasses) in at least two layers of bubble wrap (bubble size ≥ 6 mm). Distribute weight so the heaviest items sit flat against the base; use void fill to maintain a 2–3 cm clearance from all inner walls.
Sealing and documentation: Close seams with 48 mm (2 in) pressure-sensitive filament tape: apply two longitudinal strips and three transverse strips over flaps. Attach a printed label on the largest face and place a duplicate packing list in a clear pouch taped to the exterior and another copy inside. Photograph packed contents and all label faces before handoff. Purchase tracking and insure for declared value; for international consignments complete CN22/CN23 customs forms and list contents with HS codes and accurate values.

Carrier and cost guidance: choose ground courier for parcels under 20 kg to reduce fees; compare carrier dimensional-weight rules (L×W×H ÷ carrier divisor) because oversized but light items are billed by dim weight. Typical domestic rates run roughly $10–$50 depending on dimensions and weight; international small parcels commonly start near $40–$60 plus duties. If total girth (2×W + 2×H) plus length exceeds 213 cm (84 in), move to freight services and obtain a quoted rate.
Measure dimensions and weigh the packed rucksack to estimate transport cost
Use a rigid tape measure and a postal scale; record length × width × height and total gross weight after packing.
Measure along the longest points including protruding straps and external pockets. Round each linear measurement up to the next whole inch (or whole centimetre). Include all packaging layers when measuring: inner compression bags, bubble wrap, and the outer carton or padded mailer.
Dimensional weight calculation
Most carriers bill by the greater of actual weight or dimensional (volumetric) weight. Common DIM divisors: 139 (in³ per lb) for many commercial services, 166 for some postal options, and 5000 cm³ per kg for international air freight. Calculate as: (L × W × H) ÷ divisor. Round the resulting dimensional weight to the carrier’s billing increment (usually next whole pound or 0.1 kg).
| Example packed rucksack | Imperial | Metric |
|---|---|---|
| External measurements | 22″ × 14″ × 9″ | 56 cm × 36 cm × 23 cm |
| Gross weight | 3.5 lb | 1.6 kg |
| Volume | 2,772 in³ | 46,304 cm³ |
| Dim weight (÷139) | ≈20.0 lb → billed 20 lb | ≈9.1 kg → billed 9.1 kg (using 5000 cm³/kg) |
| Billing result | billed weight = 20 lb (dimensional > actual) | billed weight = 9.1 kg |
Compare results for the specific carrier and service level you plan to use; carriers often use different divisors and rounding rules. Check for oversize surcharges: many couriers apply extra fees when length + girth exceeds 130″ (≈330 cm) or when a single side exceeds carrier limits.
Before finalizing the parcel, reduce volume where possible: remove excess air with a compression sack, detach removable straps, and use a box sized close to the packed item. Weigh the complete parcel again after boxing. Keep a photo of the measurements and the scale readout for claims or disputed quotes. Reference reading: are there any preservatives in freezer boilies
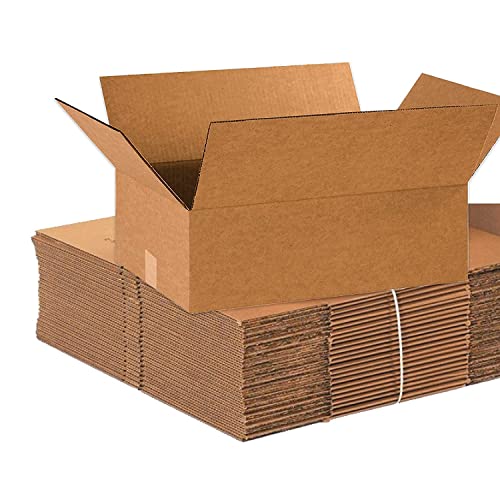
Select the right box or rigid mailer and add layer-by-layer padding
Choose the container
Pick a corrugated box or rigid mailer that leaves 2–3 in (5–8 cm) clearance around the item for cushioning. For slim, lightweight rucksacks use a rigid board mailer with internal foam panels; for bulkier or heavier bags use a corrugated box. Prefer double-wall corrugated for contents over ~20 lb (9 kg); 32ECT is acceptable for most medium-weight parcels, upgrade to 44ECT or double-wall for long transit or stacked storage. Avoid thin poly mailers for items with hardware or rigid shapes.
Layer-by-layer padding procedure
Layer 1: Place the item in a sealed polyethylene bag or dust cover to block moisture; seal openings with a strip of tape. Layer 2: Wrap the whole item with 2–3 full turns of 3/16″–1/4″ (4–6 mm) bubble wrap, overlapping by ~50% and taping at intervals. Pay special attention to straps, buckles and zippers by folding them inward or adding small foam pads beneath metal parts. Layer 3: Add corrugated wrap or 1/8″–1/4″ (3–6 mm) foam sheeting around corners and edges; use cardboard corner guards for high-risk corners. Layer 4: Prepare the box bottom with 2 in (5 cm) of void-fill (crumpled kraft paper, air pillows or foam peanuts). Place the wrapped item centered on that layer. Layer 5: Fill all remaining voids with additional loose fill or air cushions until the item cannot move more than 1/2 in (1.3 cm) when rocked; there should be firm resistance on all sides. Final layer: Add a 1–2 in (2.5–5 cm) top cushion before closing.
Closure and reinforcement: Seal with pressure-sensitive polypropylene tape (48 mm / 2 in wide) using the H-taping method: one strip along the center seam and two along the box edges. For boxes over ~30 lb use water-activated tape or an additional wrap of filament tape. Mark orientation arrows if the bag must remain upright and attach any required labels on a flat panel; remove old labels and clean the surface before applying new ones.
Secure straps, compress contents, and fasten zippers to prevent shifting
Tighten every external strap, remove slack, and lock loose ends with reusable Velcro wraps or single-use 4″ (100 mm) cable ties so nothing flaps during transit.
- External strap procedure:
- Pull each webbing tail flat, thread end back through the buckle where possible, then fold and secure with a 12 cm hook-and-loop strap or a 4″ cable tie. Use 6″ (150 mm) ties for wide hip or load-lifter straps.
- Tuck compressed tails into hip-belt pockets, side pockets, or under compression straps to avoid catching on packaging edges.
- For thin loose ends, add a 2–3 cm rubber band or heat-shrink sleeve to prevent fraying and slipping.
- Compress contents:
- Group soft items into 10–20 L packing cubes or 20–40 L compression sacks. Aim to reduce each group to 30–50% of its unpacked volume; this limits internal voids where items can shift.
- Use one compression cube per main compartment rather than multiple small loose items; cubes with a single central zipper and a secondary compression strap hold position best.
- For bulky but non-fragile textiles, vacuum bags can reduce volume by up to 60–70%–avoid vacuuming foam-padded gear or items that must retain loft.
- Place dense items toward the centerline and low in the cavity, then surround them with compressed textiles to create a firm core that resists movement.
- Internal lashing and void filling:
- Use 3 mm paracord or 1/4″ shock cord to lash heavy or rigid pieces to internal attachment points or frame stays; secure with a taut-line hitch so tension stays adjustable.
- Fill remaining voids with crumpled packing paper, foam inserts, or extra clothing rolled tightly–aim for gaps no larger than 2–3 cm to stop internal sway.
- Fasten zippers and protect access points:
- Route zipper pulls together and pass a 4″ zip tie or a TSA-approved zipper lock through both pulls; trim excess tie flush and note that single-use ties provide tamper evidence.
- Where zippers can be hidden, tuck the joined pulls into a zipper garage or an internal pocket and secure the pocket mouth with a short Velcro tab.
- Apply a small piece of self-adhesive silicone or heat-shrink tubing (10–15 mm) over exposed metal pulls to prevent snagging on packaging materials.
- Verification test:
- Hold the item by its top handle and perform ten firm shakes, then press each side for 10 seconds. Reopen main access; acceptable movement is under 1–2 cm for small items and under 5 cm for larger rigid components.
- If movement exceeds those limits, add another internal lash or increase compression on the largest packing cube.
Final quick checks: trim leftover plastic tie tails to 3–5 mm, mark any tamper-evident seals with a date, and confirm all external straps are secured flat against the surface to avoid catching during handling.
Compare carriers and service levels – transit time, cost, and size limits
If the packed rucksack is under 5 lb and fits a Flat Rate box, choose USPS Priority Mail Flat Rate Small or Medium for 1–3 business days and often the lowest delivered price.
Transit time and typical cost ranges
USPS: Priority Mail 1–3 business days; Retail Ground 2–8 business days. Typical domestic rates: Priority for a small parcel commonly $8–20; larger or heavier parcels rise by zones. Insurance up to $100 included on some Priority labels; extra available.
UPS: Ground 1–5 business days by distance; 2nd Day Air and Next Day Air available at higher premiums. Ground for a medium, 10–25 lb parcel usually runs $12–60 depending on distance; expedited services commonly $50–200+. Commercial accounts yield sizable discounts versus retail rates.
FedEx: FedEx Ground 1–5 business days; FedEx Express options (Express Saver, 2Day, Overnight) carry stepped price jumps similar to UPS. Expect ground prices in the same ballpark as UPS; overnight can exceed $100–200 for heavier packages.
DHL (international focus): Express international transit typically 1–5 business days to major markets; prices frequently exceed domestic options by 2–5×. Use DHL for fastest cross‑border delivery and when customs clearance speed matters.
Size, weight limits and pricing levers
Weight caps: USPS max 70 lb per parcel; UPS and FedEx parcel services commonly cap at 150 lb; DHL often limits ~70 kg (154 lb) for a single piece. Size caps: USPS enforces length + girth ≤ 108 in; UPS/FedEx standard parcel services apply length+girth limits up to 165 in (oversize or freight rules above that). Always check carrier rules for oversized surcharges.
Dimensional pricing: carriers bill by greater of actual weight or dimensional (volumetric) weight. If the packed rucksack is light but bulky, dimensional weight will increase the bill. Reduce volume by compressing, using smaller rigid mailers, or fitting into a carrier Flat Rate/Regional Rate box when possible.

Practical selection rules: use Flat Rate for light, dense enough items that fit the box; choose ground for best price on heavy, compact consignments; select express only when guaranteed delivery time matters. Run all three carrier calculators with the same dimensions/weight and compare delivered price + declared value/insurance + signature/hold options before buying a label.
Account tips: open a business or discounted account if sending multiple pieces – discounts of 10–40% are common; negotiate or use third‑party shipping marketplaces for volume pricing. For international shipments, add estimated customs duties and allow 1–3 extra business days for clearance unless you prepay duties.
Prepare customs paperwork and declare contents for international transport
Complete a commercial invoice with: HS (Harmonized System) code for each line item, precise English description (no “miscellaneous”), quantity, unit value in USD (or EUR), total value, currency, country of origin, net and gross weights, unit dimensions, reason for export (sale/gift/sample/return), and the chosen Incoterm (DDP, DAP, EXW). Include consignee and consignor tax/ID numbers (EORI, VAT, EIN) when applicable.
For postal consignments use CN22 for small parcels and CN23 for larger or higher‑value parcels; for courier deliveries attach a commercial invoice and packing list (carriers commonly request three copies). Upload documents to the carrier portal and place one printed copy inside the outer pouch or adhesive envelope to avoid delays at customs.

Declare batteries explicitly: list chemistry, number, and watt‑hour (Wh) rating. Apply IATA rules for air transport: lithium‑ion ≤100 Wh per cell/device is generally acceptable without airline approval, 100–160 Wh requires carrier approval, >160 Wh is prohibited on passenger aircraft. Mark the package “Contains lithium batteries” and include a battery declaration when requested.
Identify restricted or controlled items before dispatch: perishables, alcohol, aerosols, seeds/plants, animal products (CITES), weapons and replica firearms, certain electronics/encryption items and chemicals may require permits or be banned. For antiques, artwork or high‑value electronics check export licences and import permits; include certificates of origin or CITES permits where required.
Set duty/tax responsibility clearly: specify DDP if sender will prepay duties and coordinate a customs broker, or DAP if consignee pays. Under‑declaring value risks fines, seizure and return costs; declare transaction value and provide proof of sale if requested. Use accurate declared weight and dimensions to match carrier billing.
Use HS code lookup tools on tariff authority sites or commercial databases to find the correct commodity code; include that code on invoices to speed classification. Translate brief item descriptions into the destination country’s language if local customs prefer non‑English paperwork.
Maintain records: keep digital copies of commercial invoices, packing lists and customs declarations for at least two years and longer if local law requires. If sending personal luggage consider tags and deals when preparing contents: see best luggage deals black fridahy and secure ID with best luggage tags to use.
Label clearly, choose insurance or declared value, and arrange drop-off or pickup with tracking
Affix a 4×6-inch printed label (thermal preferred) with recipient full name, street address, apartment/suite, city, state/province, postal code and daytime phone; use a sans-serif font at least 18 pt, center the label on the largest flat face and keep it 1 inch from all edges.
Place an identical address slip inside the parcel; include a return address and a secondary contact number. Do not cover barcode zones with tape–if protection is needed, apply a single smooth strip over non-barcoded areas or use a clear carrier-approved label sleeve.
Declare a value equal to the item’s replacement cost. For declared value under $100 use carrier-standard coverage; for $100–$1,500 purchase additional declared value through the carrier; for amounts above $1,500 obtain a specialized transit policy from a third-party insurer that covers loss, theft and accidental damage. Keep original receipts, serial numbers, and three dated photos (item, packed item, packed inside box) to support any claim.
When buying protection, confirm coverage limits, deductibles and exclusions (e.g., wear, manufacturing defects). Note claim windows are limited–keep records of tracking number, proof of mailing (receipt), weight and dimensions; submit claims with proof of value and photos if required by carrier or insurer.
For high-value consignments hand the parcel to a counter agent, request signature confirmation or adult-signature-required service, and obtain a hand-stamped proof of acceptance. For routine parcels schedule an online pickup and save the pickup confirmation number; avoid unattended drop boxes for items valued over $100 unless the carrier explicitly supports insured drop-box deposits.
Enable tracking notifications (SMS and email) and set delivery preferences: hold-for-pickup at a local facility, delivery to a secure pickup point, or require recipient signature. Archive the tracking history and final delivery image/screenshot until the replacement-value claim period expires.


