

For cotton or cotton-blend fabrics use a fusible web or iron-on transfer: set a household iron to 160–170°C (320–338°F), preheat the target area for 5–7 seconds, position the emblem adhesive-side down, cover with parchment paper and press with steady pressure for 15–20 seconds for items under 6 cm, 25–30 seconds for larger pieces; let cool under a flat weight for 5 minutes before moving.
For synthetic shells (nylon, ripstop, PU-coated) avoid direct heat unless the manufacturer confirms tolerance; prefer mechanical attachment: use a heavy-duty sewing machine needle 90/14–100/16, polyester-wrapped nylon thread, and a zigzag or overedge stitch with stitch length ~1.5–2.5 mm. Hand-sew with an upholstery or crewel needle using a backstitch at ~2 mm intervals and double the thread for shear strength.
If sewing is impractical, choose a washable fabric adhesive labeled for outdoor gear (examples: fusible web like HeatnBond for fabrics; Aleene’s Fabric Fusion for non-heat-safe joins). Apply a thin, even bead, press for 30–60 seconds, clamp or weight the join, and cure undisturbed for 12–24 hours. For removable options, use sew-on hook-and-loop tape: glue the loop side to the emblem and stitch the hook side to the pack flange for reliable repeated removal.
Surface prep: remove dirt and oils with isopropyl alcohol, flatten seams, and avoid placing emblems over tension points (zipper ends, strap anchors). Always test the chosen method on a scrap of the same fabric at the selected temperature and cure time. After attachment wait 24 hours before machine washing; when laundering use cold water, gentle cycle and air-dry–do not tumble-dry at high heat for at least 48 hours. If edges lift after initial use, tack them with a few catch-stitches or apply a thin line of washable adhesive and re-cure under pressure.
Match backing to bag fabric: iron-on, sew-on, and PVC options
Choose sew-on for coated or laminated textiles, leather, suede and thin ripstop nylon; choose iron-on for heavy cotton, denim and tightly woven polyester; choose PVC-backed rubber emblems for Cordura, ballistic nylon and gear that will face abrasion and moisture.
Iron-on: use a fusible adhesive such as heat-activated EVA or commercial fusible web (e.g., HeatnBond) on plain woven substrates. For cotton/denim set iron to cotton/linen (160–180°C / 320–355°F) and press 20–30 seconds with firm pressure using a Teflon sheet or parchment between heat source and emblem; allow full cooling before moving. For synthetic fibres reduce temperature to 120–140°C (250–285°F) and test on a scrap–many coated or PU finishes will blister, so avoid heat on laminated surfaces. After bonding, secure perimeter with a short sewing stitch for long-term wear.
Sew-on: use bonded polyester or nylon thread (Tex 70–135); machine needles 90/14–100/16 for heavy fabric, 110/18 leather or denim needles for treated hides. Hand-sewing: use waxed thread and saddle stitch or backstitch. Reinforce thin or brittle fabrics with a lightweight cotton or synthetic interfacing on the wrong side to prevent pull-through. Stitch types: close zigzag/satin stitch for embroidered emblems, straight stitch with bartacks at corners for embroidered or woven badges. Keep stitch line 2–4 mm from emblem edge to avoid fraying.
PVC-backed emblems: do not apply heat. For uncoated heavy nylons or Cordura, attach with neoprene-based contact cement, E6000 or industrial contact adhesives following manufacturer cure times (press and weight for 12–24 hours). For maximum mechanical reliability use rivets, Chicago screws or bar tacks through pre-punched pilot holes; use a backing washer or interior leather patch to distribute load. Avoid solvent glues on PU-coated fabric unless specified as compatible.
Mixed-method recommendation: for light woven polyester use a thin fusible tape to temporarily position, then lock with machine stitches (zigzag or topstitch). For heavy use items, prioritize mechanical fastening (stitching + rivets) over adhesive-only bonding. For water-resistant or coated fabrics, prefer sewn attachment to maintain coating integrity; if adhesive bonding is the only option, test bond strength on a discarded scrap first.
Prep pack surface: cleaning, drying, and light abrasion for reliable adhesion
Use 70–90% isopropyl alcohol on a clean microfiber cloth; wipe the target area for 20–30 seconds, then let air-dry for 10–15 minutes. If you’re working on a best cheap backpack, apply the same sequence.
Cleaning protocol
Remove loose debris with a soft brush or lint roller, then vacuum with a narrow nozzle. For oily or food residues use a 1:10 solution of dish soap and warm water; agitate with a soft toothbrush for 30–60 seconds, rinse with a damp cloth, and blot with a dry towel. For synthetic fabrics and water-resistant coatings skip soap and use the alcohol method to break down DWR and oils. For genuine leather or delicate PU finishes avoid alcohol; use saddle soap or a damp cloth with mild detergent and test on an inconspicuous spot.
Abrasion and drying
Lightly scuff smooth, shiny nylon or polyester with a Scotch-Brite pad or 320–400 grit sandpaper – 10–20 even strokes with moderate pressure is sufficient. For canvas, use 120–240 grit and fewer passes to avoid fraying. Do not abrade welded seams, seam-tape areas or thin laminates. After scuffing vacuum or brush off dust, then wipe with a fresh alcohol pad to remove residue. Allow the area to dry at ambient temperature for 30–60 minutes; ideal application conditions are 15–25°C and relative humidity under 60%.
Tip: Mask surrounding fabric with painter’s tape to protect surface finish; perform a small adhesion test on an inconspicuous spot and wait the product’s recommended cure time before stressing the bond.
Iron-on emblems on nylon and polyester: heat settings, pressing time, and protective cloth
Set household iron to 270–300°F (130–150°C) for polyester; 250–275°F (120–135°C) for nylon, no steam; press with firm, steady pressure for 6–15 seconds depending on fabric and adhesive, then allow full cooling before testing adhesion.
Temperature, time and repeats
Household iron: synthetic/low setting (~130–150°C) for polyester appliqués – start 10–12 s; for nylon start 6–8 s. Use short additional pulses (4–6 s) on edges if needed after cooling. Heat press: 130–150°C, low pressure, 8–12 s for polyester; 120–135°C, low pressure, 6–9 s for nylon. Always disable steam functions.
Preheat the target area 2–3 s to remove surface moisture and flatten fibers. After first press let the area cool 60–90 s; if bond fails at edges, reheat with the protective layer and apply 2–3 short presses rather than one long press to reduce melt risk.
Protective cloth and technique
Use a single layer of thin cotton (quilting cotton or plain white tea towel) or a PTFE/Teflon non-stick sheet between iron and emblem to prevent glossing, adhesive bleed, and melting. Parchment paper works as a disposable alternative; avoid plastic wrap or polyester sheeting that can melt onto the fabric.
Position emblem, cover with protective cloth, press from center outward to expel air, and apply steady downward force. For slick, PU-coated or ripstop synthetics test on a scrap: some coatings prevent adhesion – if transfer is weak, finish with small hand stitches or use a flexible textile adhesive rated for coated synthetics.
Needles, stitches, and edge reinforcement for hand and machine sewing
Recommendation: use a 100/16 denim/jeans or 110/18 topstitch needle for heavy canvas and webbing; use an 80/12 ballpoint for lightweight ripstop nylon or polyester; select a leather or titanium-coated 100–110 needle for PVC-coated or synthetic-leather surfaces.
Needle selection (specifics)
- Lightweight synthetics (ripstop nylon, ultralight polyester): size 75/11 or 80/12 ballpoint; needle point preserves weave and prevents runs.
- Medium-weight fabrics (canvas, cotton duck, medium nylon): 90/14 or 100/16 universal/jeans needle; smooth penetration without excessive hole enlargement.
- Heavy webbing, thick canvas, multiple layers: 110/18 topstitch or 120/19 heavy-duty; use a longer hooked eye for heavier thread.
- Coated synthetics and PVC: leather/specialty point 100–110; replace needle after visible burrs to avoid skipped stitches.
- Machine feet: use a walking foot for multiple layers; use a non-stick foot or teflon presser if glues/coatings stick to the foot.
- Needle-change cadence: replace needles after 6–8 hours of heavy work, or immediately if skipped stitches appear or fabric snags.
Thread types and sizes
- Exterior durability: bonded nylon or bonded polyester in sizes 69 or 92 (industrial denier) for load-bearing seams and strap attachment.
- Topstitching/visible seams: polyester 30wt (commercial topstitch) for clean lines and UV/moisture resistance.
- Hand sewing: waxed polyester/nylon cord 0.6–1.0 mm for saddle or lock stitching; use two-needle saddle stitch for maximum strength.
- Use polyester for UV/water resistance; bonded nylon offers abrasion resistance on rough webbing.
Reference for durability trade-offs and construction ideas: best umbrella stroller for cobblestone streets
Stitch types and machine settings
- Hand stitches:
- Saddle stitch (two needles): interlocking strong stitch for straps and badges–stitch spacing 2–3 mm with waxed cord.
- Backstitch: single-needle alternative with stitch length 2.5–3 mm; tie off with 4–5 reversing stitches at ends.
- Whipstitch or blanket stitch: edge finishing where you need to lock raw edges; spacing 3–4 mm.
- Machine stitches:
- Straight stitch for structural seams: stitch length 3.0–3.5 mm on heavy fabrics; use longer length (2.5–3.0 mm) for topstitching depending on visibility.
- Triple straight or triple-stitch mode for high-stress points (repeated stitch pattern gives redundancy).
- Zigzag/satin stitch to encase a raw edge: width 3–5 mm, density tight for a satin look; use tear-away stabilizer beneath to avoid puckering.
- Bartack: set very short stitch length and repeat or use dedicated bartack function for strap anchors and corner reinforcements; typical bartack length 6–8 mm with 5–10 passes depending on machine capability.
- Tension and presser foot:
- Lower top tension slightly when heavier thread is used; test on scrap before sewing final item.
- Use a large-groove or open-toe foot for visible topstitching; use a non-stick foot for coated materials.
Edge finishing and reinforcement techniques
- Fold-and-stitch: fold raw edge under 2–4 mm and machine-stitch with topstitch thread; fold prevents fraying on woven fabrics.
- Serged or overcast edge: use serger to trim and overcast raw edge; for machines without serger, a tight zigzag along the raw edge performs similarly.
- Binding: apply narrow bias tape or webbing over the edge and stitch through all layers; use double-row stitching for load points.
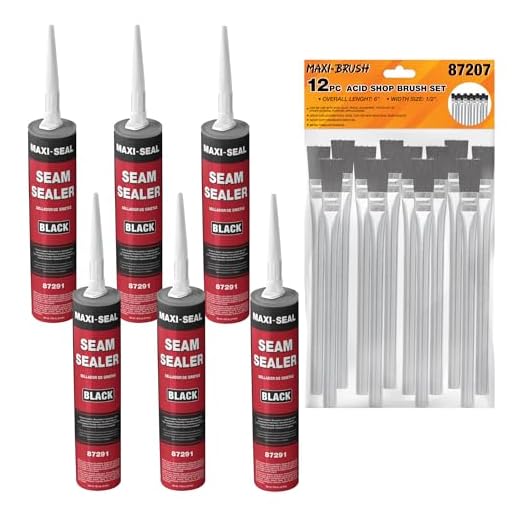
- Seam sealants: apply a thin bead of seam sealant or fray inhibitor to synthetic cut edges before sewing to stop abrasion-related fraying; allow full cure time per product instructions.
- Reinforcement patterns for high-load areas:
- Box with an X: rectangle (20–30 mm per side) with an X across it for strap bases and badge corners; stitch length 2.5–3 mm with heavy thread.
- Multiple parallel rows: 2–3 parallel rows spaced 4–6 mm apart for carry handles and lift points.
- Bar tack plus box: bar tack at ends of a box increases shear resistance–perform 6–10 dense zigzag passes for each bar tack.
- Stabilizers and underlay:
- Tear-away stabilizer under lightweight fabric prevents puckering during dense satin or zigzag stitching; remove after sewing.
- Water-soluble topping prevents stitches from sinking on open-weave fabrics; rinse or dissolve after completion.
Practical tip: always sew a test on a fabric scrap with the same layers, thread, needle, and stabilizer; inspect stitch formation, adjust tension, and check that reinforcement stitches lay flat without splitting fibers.
Use a flexible polyurethane seam sealer (e.g., Gear Aid Seam Grip WP or Aquaseal) for sewn joins and a neoprene contact cement (e.g., Barge All‑Purpose Cement) for coated textiles or rubber-to-textile bonds; plan 24–72 hours to reach full strength at 20°C/50% RH, with tack times from 5–30 minutes depending on type.
Adhesive selection
Polyurethane elastomeric sealers: remain flexible under repeated flex, resist abrasion and water, bond well to nylon, polyester, and coated fabrics. Typical brands: Gear Aid Seam Grip WP, Aquaseal. Open/tack: 10–30 min; handling: 1–4 hours; full cure: 24–72 hours (20°C/50% RH). Avoid urethane products that require moisture cure if work area is very dry.
Neoprene/contact cements: best for heavy coated fabrics, rubber, and vinyl. Apply to both surfaces, allow to become tacky, mate and press. Brands: Barge All‑Purpose, Weldwood. Tack: 5–20 min; handling: immediate to 1 hour; full strength: 24–48 hours.
Acrylic-based fabric glues: fast-setting, good UV stability on synthetics, lower smell than neoprene. Tack: 1–10 min; full cure: 12–48 hours. Use when rapid service is required but expect slightly reduced stretch compared with urethane.
Silicone sealants: generally not recommended for flexible textile joins – many silicones have poor abrasion resistance and can delaminate under repeated flex. Use only for non-structural waterproofing on coated surfaces after testing.
Application technique and curing guidance
Metering: dispense a thin, continuous bead or spread a uniform film; excess glue increases stiffness and prolongs cure. For contact cement apply to both faces; allow solvent to flash until surface is tacky (test by light touch). Immediately press and roll using a rubber roller or dowel to expel air and ensure full contact.
Seam treatment: inject polyurethane seam sealer into stitch channels using a syringe or nozzle; smooth with a rounded tool to push sealant into the needle holes. Remove excess before skin contact; wipe tools with solvent recommended by the manufacturer.
Clamping and rolling: apply consistent pressure over the bonded area for 30–120 minutes depending on product; permanent pressure (roller, clamps, or weights) for contact cement improves peel strength. Avoid shearing the joint until initial set is achieved.
Ambient effects: benchmark cure at 20°C/50% RH. Higher temperature and humidity accelerate moisture-curing polyurethanes; cold (below ~10°C) can extend full cure from days to a week. Ventilation reduces solvent exposure and speeds solvent-based adhesive drying.
Verification: perform a 24–72 hour flex and water test before returning item to heavy use. Apply only after confirming adhesion on a 2×2 cm inconspicuous test area when working with coated or dyed textiles.
Storage and safety: keep cartridges and tubes sealed, store at 5–25°C, discard per manufacturer expiry. Use PPE and ventilation for solvent-based products; avoid open flames during application. For home workshop logistics and unrelated appliance sourcing see are there any british made fridge freezers.
| Type | Best for | Application | Tack time (20°C) | Full cure | Notes |
|---|---|---|---|---|---|
| Polyurethane (elastomeric) | Nylon, polyester, coated fabrics, sewn seams | Brush/syringe, smooth into seam | 10–30 min | 24–72 h | Flexible, waterproof, abrasion resistant |
| Neoprene / contact cement | Coated textiles, rubber, vinyl | Apply both surfaces, wait tacky, press & roll | 5–20 min | 24–48 h | Fast grab, high initial bond, solvent odor |
| Acrylic fabric glue | Synthetics requiring quick return to service | Bead or spot, press | 1–10 min | 12–48 h | Lower odor, moderate flexibility |
| Silicone | Non-structural waterproofing on coated surfaces | Bead, tooled smooth | 10–60 min (skin) | 24–72 h | Poor abrasion resistance on textiles; test first |


