


Refuse listings priced below 50% of official retail unless the seller provides clear, close-up photos of the interior leather/nylon serial patch, original receipt with SKU, and a corner shot of the product tag showing production year. The serial patch is usually sewn into the main compartment’s back panel; counterfeit units often have glued or printed tags with blurred typefaces.
Compare hardware and stitch metrics: genuine pieces use stamped metal pulls (look for crisp engraving and consistent plating), heavy-duty coil or molded zippers, and reinforced strap bases. Use a loupe or magnifier to confirm stitch density–authentic seams commonly show 8–12 stitches per inch on load-bearing areas and 10–14 on decorative top seams. Loose threads, uneven stitch length, or exposed glue are red flags.
Inspect graphics and logo details at high resolution: edges of prints on authentic items are razor-sharp, colors match official product photos within a 3–5% delta on RGB sampling, and pattern alignment across seams is symmetrical. Smell the lining–authentic coated canvases or PU finishes have a faint chemical polymer note; overpowering solvent or rubber odors suggest low-grade materials.
Cross-check measurements and weight against the brand’s spec sheet: typical medium-sized models weigh between 600 g and 1,100 g; deviations greater than ±20% warrant verification. Verify seller provenance–orders from authorized retailers, orders with traceable shipment numbers, and accounts with 50+ positive history reduce risk. Keep photographic evidence of any discrepancies for claims or returns.
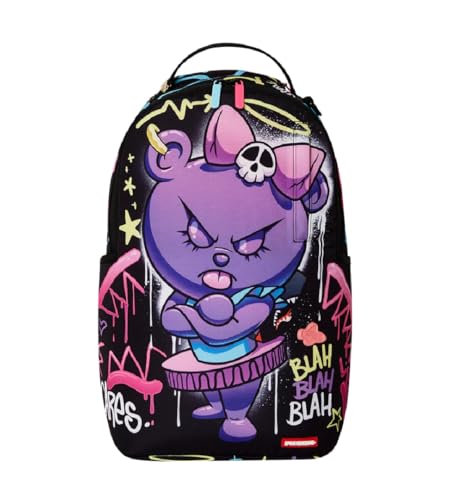
Authentication checklist for the brand’s bag
Verify the internal leather tag first: genuine pieces feature a heat‑stamped leather tab with a 10–12 character alphanumeric code and clean, shallow emboss depth; photograph the tab and compare against the brand’s support database or official SKU lists.
Technical checks
Zippers: authentic units use branded metal zips (commonly YKK or Riri) with consistent logo engraving, smooth dual‑direction pull, and no plastic teeth; inspect slider casting for crisp edges and weigh a metal slider – worn fakes often feel hollow.
Print alignment and stitching: pattern repeat should match across seams within ±2–3 mm; main seams typically show 8–10 stitches per inch using bonded polyester thread; loose threads, uneven spacing, or off‑register prints indicate imitation.
Hardware and plating: buckles and D‑rings are solid brass or zinc alloy with uniform plating and no flaking; hardware finishes on authentic units maintain color within a 2–3% variance across components and have manufacturer marks on the reverse side.
Interior construction: lining fabric shows consistent dye, heat‑sealed felled seams, and an inner label stitched on all four corners; glue marks, single‑side adhesive, or printed labels glued in place are red flags.
Weight and material density: compare grams per square meter (GSM) of ballistic nylon or canvas with known authentic specs (authentic ranges typically 300–600 GSM depending on model); lighter-than-expected panels often signal lower‑grade substitutes.
Hidden security features: check for season‑specific elements like sewn‑in QR/NFC tags, micro‑text on leather edges, or laser‑etched serials; scan QR/NFC with a smartphone and verify it resolves to an official brand page.
Purchase red flags and verification steps
Price and seller vetting: offers below 40–60% of current retail without clear reason should be treated as suspect; insist on an original invoice showing SKU, authorized retailer name, and matching serial; prefer payments that offer buyer protection.
Photo comparison: request high‑resolution closeups of logos, interior tags, zipper backs, and hardware stamping; compare against official product photos at the brand’s site and note any font, spacing, or color discrepancies.
Extra resource: for related outdoor gear selection advice, see best pool patio outdoor furniture with umbrella for chlorine pools.
Inspect the logo patch, stitching and font alignment
Measure the logo patch precisely: genuine patches typically measure about 2.0 × 3.5 in (51 × 89 mm) with vertical placement 10–15 mm below the top seam and lateral offset within ±2 mm.
Stitching specifics
Use a 10× loupe and a metric ruler. Main seams on authentic pieces use lockstitch with a stitch length of roughly 2.2–3.0 mm; inconsistent lengths >3.5 mm indicate lower-quality assembly. Edge finishing should show even overlock/zigzag stitches with no loose filament ends; look for uniform stitch tension (no fabric puckering or thread loops). Thread appearance: bonded polyester with a low-sheen, slightly textured finish – high-gloss threads often mean cheaper substitutes. Examine the patch reverse: factory backing is clean, with a thin adhesive film or neat heat-press marks; excess glue blobs or frayed backing cloth are red flags.
Font and logo alignment
Compare letters against a high-resolution official logo image. Check baseline straightness (acceptable deviation ≤0.5 mm across the logo) and vertical centring (±1.0 mm). Stroke widths should match reference within ±0.3 mm; uneven stroke thickness or jagged edges point to low-resolution printing or poor embroidery digitizing. Kerning errors (visible extra space between specific letter pairs such as “S‑A” or “R‑P”) are common in imitations – measure average inter-letter gap and flag variations >20% from the reference. Also verify letter proportions: counter spaces (holes in letters like O, A, R) must be symmetrical and free of thread overflow.
Tools that speed verification: digital calipers for mm-level placement checks, a 10× loupe, a bright daylight LED lamp, and a reference logo file (vector/PDF) for overlay. For unrelated product-testing tips check best cordless mower for uneven lawns.
Examine zippers, clasps and metal stamps for brand markings
Inspect metal hardware immediately: genuine pieces usually carry industry-standard manufacturer marks (examples: YKK, RIRI, ITW Nexus, SBS) stamped or cast on sliders, stops and buckle bodies – marks are crisp, uniformly placed and free of spelling errors.
Zipper specifics
Check the slider back for a manufacturer code and a size number (#3, #5, #10). Authentic sliders show a deep, even stamp or clean raised logo; counterfeit sliders often have shallow, inconsistent markings or none at all. Examine the teeth: molded metal teeth align exactly and interlock without wiggle; coil zippers sit flush in the tape with neat overlock stitching. Operate the zipper: a genuine unit moves smoothly under slow, steady pulls and resists separation under light upward pressure. Feel the pull tab – solid metal pulls weigh noticeably more than hollow replicas and have consistent plating without bubbling or flaking.
Clasp and stamp checkpoints
Open and close plastic and metal clasps 10–15 times: authentic buckles click sharply and re-engage without side-play. Inspect spring-loaded parts for visible welds or seams – quality clamps use tight, symmetrical joints. Metal stamps with brand names or serials are usually located on the underside of flap edges, inside main compartments near seams, or on the inside of buckle bodies. Genuine stamps have uniform font height, consistent letter spacing and a minimum engraving depth that resists light abrasion.
| Feature | Genuine signs | Counterfeit signs |
|---|---|---|
| Slider marking | Crisp manufacturer logo or code on the slider back; correct size number; centered | No mark or uneven shallow stamp; wrong font or misspelled brand |
| Teeth & engagement | Evenly spaced metal or coil teeth, smooth alignment, no wobble | Irregular spacing, loose teeth, snagging during movement |
| Pull tab & finish | Solid feel, uniform plating, laser-etched or cast logo where applicable | Hollow feel, chipped plating, sticker logos or glued-on tags |
| Buckle/clasp action | Sharp, consistent click; minimal lateral play; clean seams | Soft click or no click; excessive wobble; visible resin flash |
| Metal stamp/serial | Uniform font, consistent depth, located in predictable spots; if serial exists, it matches internal tag | Shallow etch, inconsistent characters, mislocated stamp, serial absent or mismatched |
Perform a discreet surface check: rub a fingernail across a small, hidden plated area – genuine plating resists immediate flaking; cheap plating chips easily. Compare suspected hardware to clear images from official product references: matching placement, font and part shape provides the strongest non-destructive confirmation.
Compare materials, lining patterns and construction to official photos
Start by matching fabric texture, weight and print registration against high-resolution product images from the brand site: genuine pieces use consistent fabric types (examples: coated nylon with a subtle sheen, bonded faux-leather with a fine grain) and manufacturers list denier ranges–expect 600D–1680D for heavy-duty panels, 200D–420D for lighter trim.
Material checklist
- Surface feel: scrape fingertips across the print–authentic finishes are smooth with no loose fibers; counterfeit surfaces may feel fuzzy or plasticky.
- Weave visibility: zoomed photos of originals show tight, even weave; visible irregular gaps indicate inferior textile or printed overlay.
- Print scale & registration: main graphics should align with seams and zippers as shown in official imagery; mismatched or cropped art is a red flag.
- Edge finishing: genuine seams often have painted or heat-sealed edge trim that is uniform in width; uneven paint, raw fraying or excess glue spots point to replica manufacturing.
- Trim materials: shoulder straps, piping and handles use matched webbing and faux-leather with consistent color tone across pieces; mismatched shades imply aftermarket parts.
- Thread type and stitch density: expect polyester bonded thread and 8–12 stitches per inch on load-bearing seams; loose, long stitches or broken threads signal lower quality.
Lining and internal construction checklist
- Interior fabric pattern: official interiors replicate a specific print or solid color–compare pattern scale, repeat and placement to photos; counterfeit linings often show different print orientation or lower-resolution motifs.
- Pocket shape and placement: compare number, size and seam placement of internal pockets to product shots; extra or missing pockets indicate non-original assembly.
- Label and tag position: inside labels on genuine items are sewn in precise locations and have specific font weight and spacing; verify label text spacing against the brand image.
- Seam finishes: originals use bound or overlocked seams with clean tape covers at stress points; exposed raw seams or minimal overlock stitching are signs of poor construction.
- Backing and padding: back panels and straps use visible foam thickness and quilting patterns; thin, flat padding differs from photos and reduces support.
- Consistent dye and print bleed: examine photos for color uniformity under zippers and inside pockets; dye inconsistency or bleeding on seams typically appears on counterfeits.
Workflow: capture a well-lit, high-resolution photo of the item, open every compartment, then compare each checklist point side-by-side with official images at 100% zoom. Mark deviations and prioritize mismatches in material type, interior pattern placement and seam finishing when assessing authenticity.
Verify serial numbers, hang tags and purchase from authorized sellers
Check the item’s serial number against the brand’s official authentication resource immediately: enter the code on the manufacturer’s verification page or send the full alphanumeric code plus clear photos (tag, interior label, exterior logo area) to customer support for confirmation.
Serial number and hang-tag checklist
Locate the code on the sewn interior label, beneath an inner pocket zipper, on the reverse of the main hang tag, or embossed on a leather patch. Legitimate codes are usually alphanumeric (commonly 6–12 characters), may include a scannable QR or barcode, and often match a SKU printed on the hang tag and care card. Scan any QR; it should resolve to an official product page or registration form. Mismatches between SKU on the hang tag, box and online listing, faded/poor-quality printing, absence of a barcode, or a QR that redirects to a generic site are red flags.
Authorized sellers and transaction proof
Purchase from the brand’s webstore or from names listed on the official dealer locator. On marketplaces, prefer sellers with an official storefront badge, long history, high positive feedback, and “fulfilled by” arrangements linked to authorized retailers. Ask the seller for an itemized invoice showing seller name, order number, SKU and date of sale before completing payment. If verification is needed, send that invoice and serial to the brand to confirm authorization. Avoid listings with prices more than ~30% below MSRP, vague seller profiles, missing hang tags or refusal to provide serial photos; those indicate higher risk. Keep all receipts, hang tags and photos for warranty or authentication follow-up.


