
 Michael Turner

Recommendation: Set the hip belt to carry 60–80% of the load; tighten until the padding rests on the iliac crest and weight shifts off the shoulders. Then snug the shoulder harness to remove slack–pads should contour without supporting the majority of the mass.
Place the pack so the top edge sits 2–3 in (5–7 cm) below the C7 vertebra. Adjust in this order: hip belt → shoulder harness → sternum clip → load-lifter webbing. Aim for load-lifter angles of 30–45° from the pack to the shoulder seam to pull the mass closer to your torso and reduce torso torque.
Position the sternum clip about 6–8 cm below the collarbone to stabilize the shoulder bands without impeding breathing. Leave webbing tails 4–6 in (10–15 cm) past the buckle; neatly fold or secure excess to avoid snags. For day loads under 10 kg target roughly 60% hips / 40% shoulders; for heavier packs shift toward 80% hips.
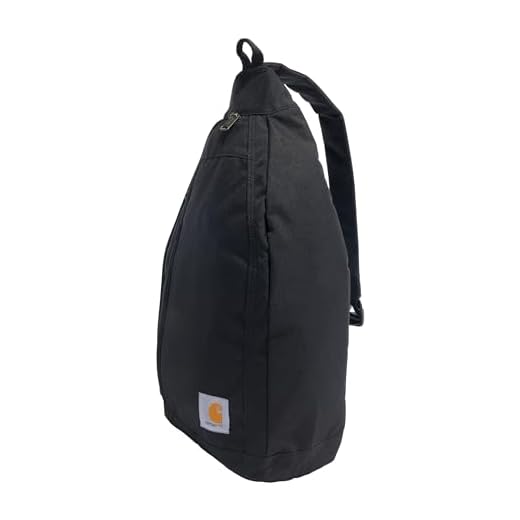

Walk for 5–10 minutes and reassess: if the load rocks, tighten load-lifters incrementally; if shoulders feel overloaded, slightly loosen shoulder harness and redistribute heavier items lower and closer to the spine. Make small adjustments until the load feels stable, centered, and allows a full range of motion.
Set shoulder harness length for a snug, balanced carry
Set the shoulder harness so the pack body sits 1–2 inches (2.5–5 cm) below the collarbone (use the C7 vertebra as a reference) and the load’s center of mass falls roughly between the lower scapulae (T7–T10).
Adjustment sequence
Loosen the harness and sternum connector; fasten and tighten the hip belt onto the iliac crest. With the hip belt carrying the majority of weight, pull the shoulder webbing down and back until it contacts the trapezius without digging in. Position the sternum connector 1.5–2.5 inches (4–6 cm) below the collarbone and slide it until the shoulder pieces angle inward about 10°–20° toward the chest.
Fine-tune by adjusting webbing in 1–2 cm increments: for day loads under 6–8 kg leave ~1–2 cm (two-finger) clearance between shoulder and webbing; for loads above 12–15 kg reduce clearance to ~0.5–1 cm (one finger). If shoulders bear most of the weight after hip-belt tightening, shorten the shoulder webbing further or re-seat the hip belt higher on the iliac crest.
Dynamic tests and targets
Walk, squat and perform three light jumps; acceptable vertical shift of the pack relative to the torso is ≤2 inches (5 cm). When reaching forward, the shoulder harness should not compress the trapezius or pinch the neck – adjust down until pressure is distributed across the upper lateral shoulder muscle. If the sternum connector rides up toward the throat or the shoulder pieces dig in during motion, move the shoulder anchors up or down on the pack (or switch to a different harness height) until the harness maintains position without creating localized pressure points.
Adjust and lock sternum strap to stop shoulder slip
Place the sternum strap 2–4 cm (0.8–1.6 in) below the sternal notch (just under the collarbones) and snug it until one flat finger fits comfortably between the chest and the webbing; tighter for heavy loads, looser for aerobic movement.
Thread the webbing through the buckle’s ladder-lock in the recommended direction: feed the webbing from underneath the fixed bar, over the center bar, then back under the outer bar so the cane of the buckle pinches the webbing when loaded. Pull firmly to set; the correct routing prevents slippage under repeated load cycles.
If the webbing continues to creep, make a small overhand knot in the tail 3–5 cm (1.2–2 in) from the buckle and dress the knot tight against the ladder-lock to create friction without compressing the chest. For synthetic webbing, a single zip tie or sewn stopper just behind the buckle gives a removable, secure stop.
For elasticated chest pieces leave 10–20 mm (0.4–0.8 in) of dynamic stretch when standing upright so breathing and arm swing aren’t restricted; test by raising arms overhead for five seconds – the harness should stay in place without tugging at the neck.
To prevent chafe, route any excess webbing into the sewn keeper or loop it under a rubber elastic keeper; melt the raw nylon end briefly with a lighter and press flat to stop fraying (use pliers and work in a ventilated area).
If shoulders still slip on steep terrain, reposition the sternum strap slightly higher (by 1–2 cm) to increase lateral hold, and add non-slip pads under the shoulder surface or a thin silicone gripper strip to the harness contact area for extra purchase without altering fit.
Secure Excess Webbing to Prevent Flapping and Snagging
Keep 6–12 inches (15–30 cm) of spare webbing past the adjuster; secure the remainder with a low-profile finish such as a doubled overhand plus tuck or a stitched elastic keeper to remove movement and reduce snag points.
Low-profile methods
- Roll-and-tuck (fast, no tools):
- Flatten the loose webbing against the main strap body.
- Roll toward the adjuster in tight 1–1.5 cm turns until 4–6 inches (10–15 cm) remain.
- Tuck the rolled section under the webbing layer closest to the pack or into a daisy-chain loop; secure with a silicone band or elastic keeper.
- Double overhand + full tuck (secure, field-repairable):
- Make a double overhand knot in the free tail about 2–3 inches (5–8 cm) from the end to form a stopper.
- Cinch the knot tight and feed the tail back under the nearest webbing guide or into a ladder-lock slot.
- Pull with a 20–30 lb (9–14 kg) test load to confirm it does not slip.
- Elastic keeper or webbing clip (repeatable, low profile):
- Slide a stitched elastic loop or a purpose-made webbing clip over the adjusted webbing and position it 1–2 inches from the adjuster.
- Use a rubber band or velcro mini-strap behind the keeper if it slips on slick materials (nylon, UHMW).
Trimming and finishing
- Only trim when surplus exceeds 18 inches (45 cm); leave a minimum operational tail of 4–6 inches (10–15 cm) to allow re-adjustment.
- Cut at a 45° angle and melt the cut edge briefly with a lighter to prevent fray; press melted tip flat with pliers for a low-bulk profile.
- If using stitching to shorten, sew through both layers at the adjuster edge with polyester thread; use a backstitch pattern with at least five stitches spaced 3–4 mm apart.
For route planning resources check best places to backpack in colorado. For protecting expensive gear consider options in best way to buy umbrella insurance.
Use a trucker’s hitch to cinch compression webbing tight
Create a 2:1 mechanical advantage with a trucker’s hitch: make a small loop in the running webbing, pass the free end around the load or through the opposite anchor, feed it through the loop, pull the free end until the load is snug, then lock off with finishing hitches.
Quick steps
1) Form a fixed loop about 6–8 in (15–20 cm) across in the midsection of the webbing; a simple overhand loop or an alpine butterfly on webbing works well.
2) Route the free end around the object or through the opposing buckle/anchor point so the loop faces outward for easy threading.
3) Thread the free end through the loop, pull the running end hard to compress the load; the 2:1 advantage doubles your pull force at the anchor.
4) While holding tension, secure the running end with two half hitches around the standing part, or use a slipped overhand followed by a safety half hitch for quicker release under load.
Tensioning, lengths and safety
Pulling force numbers: a 40–60 lb pull yields roughly 80–120 lb at the anchor with the 2:1 ratio; aim for tension that eliminates movement without deforming padding or gear. Leave a finishing tail of 12–18 in (30–45 cm) before locking off to allow for final adjustments and a secure knot.
Keep webbing flat and wrinkle-free through the knot to avoid slippage and abrasion; route away from sharp edges and through rated buckles only. Inspect webbing for cuts or UV degradation before applying high tension. If webbing becomes dirty after use, consult how to clean cat pee out of couch cushion for cleaning tips applicable to fabric webbing care.
Create a quick-release knot for one-handed webbing release
Use a slipped buntline hitch formed on a bight with 19–38 mm (3/4″–1.5″) polyester or nylon webbing; leave a 15–20 cm (6–8 in) free tail and a 5–7 cm (2–3 in) release loop for reliable single-handed operation.
Materials
Recommended: 19–38 mm polyester or nylon webbing (avoid slippery polypropylene or very thin cord), sharp scissors, lighter or heat source to fuse synthetic ends, and a flat surface for dressing the knot.
Step-by-step
1. Fold a bight in the working end so the loop measures 5–7 cm across; hold the bight between thumb and forefinger of the hand you will use to release.
2. Wrap the standing part once around the anchor (d-ring, ladder lock, compression bar) and take the bight around the standing part to form a buntline structure: pass the bight up through the small eye created between standing part and wrap.
3. Instead of pulling the bight all the way through, leave a slipped loop (the 5–7 cm release loop). Dress the knot by pulling the standing part tight while keeping the slipped loop aligned so it sits against the wraps.
4. Adjust tail length to 15–20 cm; a short overhand stopper on the free tail (single overhand, not tightened against the knot) reduces accidental snag release while keeping single-handed pull functional.
5. Test under incremental load: apply moderate tension, then pull the release loop with one hand to confirm full and clean release. If the knot jams, increase loop size by 1–2 cm or add one additional wrap before forming the buntline.
6. For glossy or low-friction webbing, add a second wrap before forming the buntline and retest; avoid relying on this knot for body-suspension or life-critical applications.