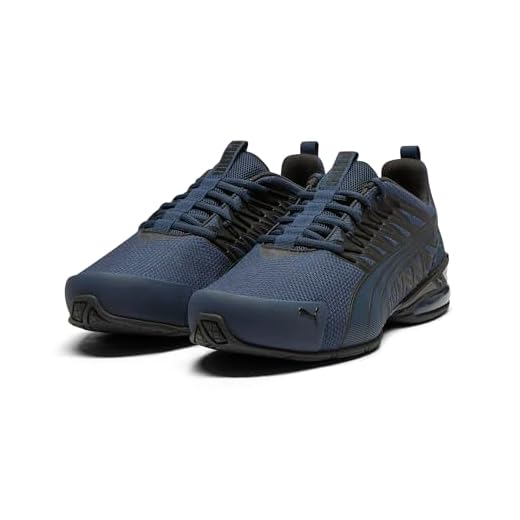


Recommendation: For low-cut trainers use 120–140 cm of lace; for mid/high boots choose 180–260 cm of cord or a 1.8–3 m section of 550 paracord. Form two opposing loops through the top two eyelets of each shoe, clip a small locking carabiner through those loops and attach the carabiner to a lower compression strap or daisy chain on the rucksack.
Position the pair with soles together and laces centered so the mass sits within 10–15 cm of the pack shell; this reduces swing and improves balance. Prefer the lower lumbar attachment or hip-belt gear loop rather than a shoulder strap to keep weight low. Use a screwgate carabiner rated 5–10 kN for reliable closure during hiking or commuting.
Prevent abrasion by placing a 10–15 cm nylon webbing pad or sleeve between soles and pack fabric. For wet pairs, orient the toe outward and leave a 2–3 cm gap for airflow; secure a secondary non-metallic cord to stop rattling without compressing ventilation space.
Weight and inspection: expect an added 300–800 g for a typical pair of sneakers and 800–1,500 g for heavier boots. Check all fastenings every 10–20 km on foot or after 30–60 minutes of vehicle travel. Replace cords or laces when fraying exceeds 30% of the strand diameter.
Quick checklist: correct cord length, rated locking carabiner, low attachment point, abrasion pad, 2–3 cm ventilation gap, regular inspection.
Select the strongest loop or D-ring on your pack for footwear attachment
Use the frame-level haul loop or a reinforced lower-lash D-ring located at the pack base or hip-belt; prefer metal or molded rings integrated into multi-row stitching rather than single-stitched webbing.
Choose attachment points with these measurable features: webbing width ≥20 mm, at least two parallel rows of stitching plus bartacks, visible box-X stitch pattern, no frayed fibers, and hardware that shows no cracking or deformation. If manufacturer ratings exist, pick points rated ≥1 kN for occasional suspension; for repeated load cycles select ≥5 kN-rated hardware.
| Attachment point | Typical location | Strength indicators | Recommended use |
|---|---|---|---|
| Haul loop (structural) | Top center, anchored to frame | Box-X stitch, multiple stitch rows, thick webbing | Primary choice for short-term suspension and heavy items |
| Lower lash D-ring | Bottom front/side near base | Metal ring, reinforced webbing, bartacks | Good for securing footwear during transit; tolerates moderate loads |
| Hip-belt ring | Side of hip-belt | Stitched into belt, heavier webbing | Best for weight distribution when carrying items for long periods |
| Daisy-chain webbing | Front lash points | Single-stitched loops, narrow spacing | Avoid for suspension; use only with secondary backup |
Inspection checklist
Perform a visual and tactile check before each trip: press along the stitch lines for soft spots, inspect for UV degradation (color fading and brittle fibers), run a finger under each stitch row to feel for broken threads. Perform a pull test: apply 30–40 kgf (66–88 lbf) steady pull for 10 seconds; any slippage, elongation, or stitch failure disqualifies the point.
Attachment examples and precautions
When using carabiners, pick locking models rated ≥8 kN and clip through the reinforced ring and a secondary webbing loop when possible. Avoid clipping only through daisy-chain slots; split load across two independent points when carrying valuable or heavy items. For unrelated technical reading, see which of the following statements about proteins is false.
Thread laces through eyelets and webbing to lock footwear in place
Use 120–150 cm of 4 mm cord for trainers; choose 550 paracord (~4 mm, 550 lb break) for boots. Melt ends to stop fraying and fold over any exposed splice.
Feed each lace tail through the lowest eyelets from the outside in so the lace lies along the outsole. Route the free tail through the pack’s lower webbing loop or daisy chain front-to-back, keeping the cord flat against the webbing to reduce abrasion.
Return the tail to the footwear and pass it through an upper eyelet (outside-in) to form a locking loop that pulls the toe box toward the webbing. For heavier footwear, run a second pass through a higher webbing loop to secure midfoot pressure points.
Secure with a double overhand knot on each side, then add a compact figure-eight stopper; leave 10–15 cm tails and tuck them under a compression strap or inside the shoe. For rapid release, swap the final stopper for a small cord lock or a 3–5 mm bungee cinch rated 50–100 N.
Protect contact points with a 2–3 cm sleeve of heat-shrink tubing or a short strip of webbing to prevent wear. Inspect knots and webbing after the first 5 km or after 30–60 minutes of movement, and re-seat cords if any slippage appears.
Quick-release knot for one-handed footwear removal from a pack
Recommendation: make a slipped figure-eight with a locking slipped half-hitch – holds securely under typical load yet releases with a single pull on the release tab.
Specifications
Use laces or cord 3–5 mm diameter (paracord 550 ~4 mm recommended). Reserve a release tab of 3–5 cm for reliable one-handed grasp; total spare tail length should be at least 35–45 cm for low-profile sneakers, 45–60 cm for mid/high boots. Test knot with 20–25% of expected carried weight before field use.
Step-by-step (assumes both lace ends already routed where needed)
1. Fold a bight in the working lace about 15–20 cm from its end.
2. Form a figure-eight on the doubled section: make a loop, pass the bight around the standing parts and feed it through the final loop to create a neat eight with the bight as the exiting turn.
3. Dress and snug the figure-eight so wraps sit flat; keep the bight centered as the loop you will pull to release.
4. Add a locking slipped half-hitch: wrap the free tail once around the base of the figure-eight (the standing parts), pass a small bight of the tail through, and snug. That small bight becomes the quick-release tab.
5. Trim excess leaving the 3–5 cm tab, melt-singe synthetic cord ends or add a tiny rubber bead to improve grip; tuck any remaining tail under adjacent webbing to prevent snagging.
To free the load with one hand, pinch the release tab and pull sharply; the slipped half-hitch and figure-eight will collapse and release the footwear.
Notes: avoid relying on this knot for loads exceeding ~20 kg; if carrying heavier items, add a secondary safety wrap or a metal clip. For sudden rain protection while working with cords outdoors, compare compact shelters such as best way to use photography umbrella and best small mini umbrella.
Clip a carabiner to lace ends for secure hold and one-handed release
Use a small aluminum screw‑gate or wire‑gate carabiner with these specs: length 50–70 mm, gate opening 8–12 mm, weight 15–30 g, and a major‑axis rating ≥5 kN. Pass both lace aglets through the gate or through a short loop made from the lace tails, close the gate fully and orient it downward and rearward to minimize snags. Choose a wire‑gate for fastest one‑hand removal; choose a screw‑lock when abrasion or rough terrain demands extra security.
Protect textile wear by sliding 20–30 mm of heat‑shrink tubing or a rubber sleeve over the lace where metal contacts it; trim tubing flush so no exposed metal rubs cord. Keep lace tails aligned with a small elastic band or a cable tie (cut flush) before clipping to reduce movement and rattling during gait.
For redundancy, use two small carabiners stacked or add a tiny split ring between lace loop and main clip. Before setting out, perform a static pull test of 10–20 N and a few dynamic tugs to confirm gate closure under realistic motion. For one‑hand detachment: brace the pack strap with your palm, press the gate inward with thumb and pull the aglets away in a single motion.
Cross-and-cinch lacing across pack body to stop footwear swing
Cross both lace pairs over the pack panel in an X, route each free end under the nearest horizontal compression strap or webbing rung, then pull until the footwear sits flat against the shell with no discernible lateral play when you flick it with a finger.
Placement, orientation and distance
Place the heel or instep against the lower half of the back panel so the mass center is within 8–12 cm of the pack surface; toes pointing down reduce pendulum length. Keep the X centered over a compression strap or webbing ladder rung so the straps act as secondary anchors.
Materials, lengths and final securing
Recommended lace/cord lengths: 80–110 cm (31–43 in) for low-top trainers, 120–160 cm (47–63 in) for mid/high boots. Use waxed flat laces or 3–4 mm braided cord for higher friction; flat polyester tends to slip. Make two full wraps around the strap/webbing after the X, cinch firmly, then tuck excess ends under the last wrap or into a webbing slot to prevent flapping. Recheck tension after 0.5–1 km; if slippage occurs, add an extra wrap or place a short rubber strip between lace and shell to increase grip.
Secure footwear in a mesh sac and fasten the sac to a strap to protect internal gear
Use a 30–40 × 15–20 cm nylon mesh sac (3–5 mm holes) with a cord-lock and reinforced base; place footwear with soles facing the pack surface, compress the opening until the sac volume is reduced by ~40%, then form a 40–50 cm tail for final securing.
Mesh sac specification
- Material: 420D nylon mesh with double-stitched seams and taped bottom panel.
- Mesh size: 3–5 mm for rapid drainage and airflow while keeping debris out.
- Closure: single drawcord (3–4 mm paracord) plus a spring cord-lock; avoid plain knots as sole closure.
- Capacity: one adult pair up to 1.2 kg; two lightweight pairs only if total ≤1.8 kg.
Step-by-step securement
- Insert footwear with soles inward and tongues tucked to reduce abrasion against the rucksack fabric.
- Pull the cord-lock until the sac compresses ~40% (reduces pendulum effect) and remove excess slack from the opening.
- Create a 40–50 cm loop in the drawcord by folding and making a bowline-on-a-bight or a clove-hitch attachment point (see knots below).
- Seat the loop as close to the pack surface as possible and fasten to a horizontal strap or webbing segment low on the rear panel to minimize leverage.
- Lock the connection with a secondary half-hitch; leave a 15–20 cm tail for quick inspection and one-handed release if needed.
- Positioning: mount the sac near the pack’s lower rear panel or in a side compression channel so the weight is kept against the rucksack body and does not rub the hip belt.
- Water control: angle the sac mouth slightly downward (10–30°) so water drains away from the main compartment when moving.
- Redundancy: run a short (10–15 cm) safety loop of thin cord through the sac webbing and under the main strap; knot with a simple overhand to serve as a backup if the primary fastening loosens.
Recommended knots and specifics
- Bowline on a bight – reliable loop that does not jam; make it with a 40–50 cm working tail and finish with a half-hitch around the standing part for security.
- Clove hitch with locking half-hitch – quick to set on webbing; wrap twice, then add a locking half-hitch with a 15–20 cm tail tucked under the first turn.
- Constrictor knot only for long stows that won’t need frequent opening; it grips tightly but is difficult to untie after wet/dirt exposure.
Do not exceed the sac’s rated load (keep total external added mass ≤1.8 kg) and inspect cord-locks and seams before each trip; replace any paracord with visible abrasion or a worn cord-lock immediately.


