


Choose a compact satchel sized 4–6 L with a 20–25 cm height, padded shoulder straps (≥10 mm foam) and a load limit no greater than 10–15% of the child’s body weight – for a 20 kg kid keep total packed mass under 2–3 kg.
Prefer materials with tested abrasion resistance such as 600D polyester or ripstop nylon, PU-coated for water repellency. Insist on YKK or equivalent zippers, double-stitched seams at stress points and a reinforced base panel. Target empty-satchel weight below 400–450 g for preschool models; labels should list material composition and washing instructions.
Look for ergonomic details: tapered, padded straps at least 25–35 mm wide with adjustable length range ~30–45 cm, a low-profile sternum clip to reduce sway, and a ventilated back panel for breathability. Add reflective strips on front and shoulders for visibility in low light and an internal ID pocket for caregiver contact details.

Packing recommendations: place heavier items close to the back panel, limit toys and nonessentials to one or two small items, and use front pockets for frequently accessed items. Inspect fastenings weekly; repair loose stitching immediately to avoid sudden rupture.
Care and storage: spot-clean with mild detergent, machine wash on gentle cycle at 30°C inside a laundry bag only if label permits, then air-dry flat away from direct heat. Reapply a waterproofing spray after three to six months of regular outdoor use. For licensed character motifs, verify safety labels and absence of small detachable parts for children under three years.
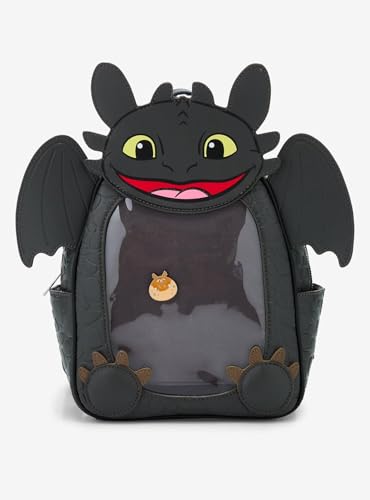
Care and Use Guide for Toothless-Themed Kids’ Rucksack
Limit cargo to ≤10% of the child’s mass: e.g., 2 kg (4.4 lb) for a 20 kg child; absolute maximum 3 kg (6.6 lb) for daily use to protect developing spine.
Fit and safety
- Shoulder straps: set so the top of the pack rests between shoulder blades; strap length typically 25–40 cm from top attachment to buckle for ages 3–8.
- Chest strap: mount 8–12 cm below the collarbone to stabilize load without restricting breathing.
- Padding: 8–12 mm dense foam on straps and 10–15 mm on back panel for children under 6; use thicker foam for older kids with heavier loads.
- Webbing width: 25–35 mm recommended; replace if frayed or narrower than 20 mm.
- Reflective area: install ≥40 cm² total reflective material on front and straps for low-light visibility.
- Zippers: test full travel monthly; repair bent sliders with pliers or replace with matching size (#5 or #8 common on kids’ packs).
Cleaning and maintenance
- Material identification: typical outer shell = 600D polyester or PVC-coated fabric; interior lining = polyester taffeta. Check label before cleaning.
- Spot wash method: use mild, neutral-pH detergent; warm water ≤30°C (86°F); scrub with soft brush; rinse thoroughly.
- Machine wash guidance: only if label permits; use gentle cycle, cold water, garment bag; remove foam inserts and metal accessories first.
- Drying: air dry flat, away from direct sun and radiators; do not tumble dry or iron printed decals.
- Stain removal: treat ink/oily stains with isopropyl alcohol applied to cloth, then follow with mild detergent wash.
- Zipper care: apply silicone zipper lubricant or paraffin every 3 months to prevent corrosion and sticking.
- Storage: empty pockets, fasten zippers, store in ventilated area at 10–20°C with humidity <60% to avoid mildew.
Practical packing checklist for preschool and early school days:
- Hydration: 350–500 ml bottle in side pocket (weight ~0.4–0.6 kg when full).
- Food: insulated lunchbox 0.8–1.2 L (empty weight 150–300 g).
- Clothing: light jacket folded flat, volume 1–1.5 L; place near back panel for even load.
- Books and notebooks: A5 format for preschool; A4 for early primary – aim for combined paper weight ≤1.2 kg.
- Small items: pencil case, tissues, spare socks in top compartment to balance weight distribution.
- Repair tip: reinforce torn seams with 3–4 mm polyester thread and a double backstitch; seal exposed seam ends with clear fabric glue.
- Replacement schedule: inspect monthly; consider replacing the unit when structural seams fail, foam compression exceeds 50%, or reflective elements are damaged.
Set shoulder straps so the satchel rests flat against the upper back; place sternum strap at mid-chest and limit carried weight to ≤10% of the child’s body mass (≤5% for ages 2–3).
Torso measurement and panel position: measure from the C7 vertebra to the top of the iliac crest; target torso length 23–31 cm (9–12 in) for ages 2–6. Adjust the rear panel height so the top of the bag finishes ~2–3 cm below C7 and the bottom does not extend more than 5 cm (2 in) below the waistline.
Shoulder straps setup: tighten straps until there is 1–2 fingers (1–2 cm) clearance under the collarbone; strap width should be ≥5 cm for even pressure distribution. Use S-shaped straps that contour to the shoulders. Position the sternum clip 5–7 cm below the collarbone and tighten just enough to pull the straps inward without restricting breathing.
Waist/hip belt and load transfer: for toddlers, fit the low-profile hip belt on top of the iliac crest; tighten to transfer roughly 60–70% of the light load to the pelvis if the belt is present. Verify actual carried mass on a scale (example: 12 kg child → pack ≤1.2 kg).
Back panel contact and clearance: choose a padded, contoured panel that maintains contact along the upper back; clearance between panel and spine should be <2.5 cm when loaded. Prevent sagging: the bag must not tilt away from the torso when the child bends; shorten straps in 1–2 cm increments until stability is achieved.
Dynamic fit test: have the child walk 10 steps, run 5 steps, jump lightly and raise arms overhead. Straps must remain stationary, sternum strap must not migrate toward the throat, and the pack should feel balanced. Re-check fit after 10 minutes and after any load change.
Care and complementary gear: clean straps and panel with mild soap and water; avoid aggressive machine washing if foam inserts exist. For cleaning equipment warranty details see best pressure washer warranty. For rain cover or small weather gear pairing see best uv protection folding umbrella and for nearby seating/table arrangements consult best shape table umbrella for a rectangular table.
Routine to teach a child to put on and remove the small school pack
Use 5-minute focused sessions twice daily: demonstrate once, assist twice, then allow one independent attempt; repeat for 10–14 days or until the child completes the sequence with one verbal cue.
Donning sequence (step-by-step)
1. Place the pack on a low chair or bench (25–30 cm / 10–12 in high) so the child can reach the straps without stretching.
2. Ask the child to pick up one strap and slide the corresponding arm through; model this motion once, then assist by guiding the wrist if needed.
3. Repeat with the second arm; keep instructions to two short phrases: “left arm,” “right arm.”
4. If a chest or sternum strap exists, fasten it at the sternum level so the pack sits mid-back; demonstrate the clasping motion and let the child mimic it.
5. Perform a quick balance check: have the child stand and take two normal steps; if the pack shifts excessively, remove and retry the sequence focusing on steady hand placement.
Removal sequence and troubleshooting
1. Unclip any chest strap first, then ask the child to lean forward slightly and slide one arm back out, then the other; practice this twice per session.
2. If the child struggles with unclipping, switch clasp type temporarily (Velcro or magnetic clip) or teach a two-word trigger such as “clip open” paired with a hand motion.
3. Use a three-step progress chart on the wall: Demonstration → Assisted → Independent. Mark daily successes with a sticker; target progression rate: move from Assisted to Independent within 7–10 sessions for most 3–5 year-olds.
4. Troubleshoot common delays: if comprehension is slow, break the sequence into individual micro-skills (pick strap, slide arm, clip) and practice each for 2–3 sessions; if motor control limits release of clips, offer a fidget-free practice clip of the same type for repetition.
Milestones: by session 5 the child should complete donning with one verbal cue and assistance only for fastening; by session 12 expect consistent independent donning and removal in under 60 seconds.
Packing and weight limits: what to carry, load distribution
Limit total carried mass to 5–7% of body weight for ages 2–3 and 8–10% for ages 4–6; if packed weight exceeds those percentages, relocate heavy items to an adult bag or stroller.
Typical item weights and sample packs
Common item mass (grams): filled child water bottle 250–350; small insulated bottle 200–300; snack/fruit 50–150; compact lunchbox 300–600; single disposable diaper 45–60; two diapers 90–120; travel wipes 40–80; change of clothes 200–350; lightweight rain jacket 120–200; soft toy 50–120; small first-aid kit 80–120; foldable sunhat 30–50; pencil case with crayons 80–150; tablet or large electronic device 300–500 (avoid if possible). Example loads: 2-year-old (12 kg) target 600–840 g – water 250 + 2 diapers 120 + wipes 50 + snack 100 + small toy 80 = 600 g; 4-year-old (16 kg) target 1.3–1.6 kg – water 300 + lunchbox 450 + jacket 150 + wipes 50 + spare shirt 250 = 1.2 kg; 6-year-old (20 kg) target 1.6–2.0 kg – water 350 + lunchbox 500 + jacket 150 + book 200 + pencil case 120 = 1.32 kg.
Packing order and balance rules
Place the heaviest single items close to the child’s spine at mid-back height (not low on the hips); keep the center of mass centered left-to-right; put frequently accessed things (snack, wipes) in front or external pockets for quick reach; use compression or internal dividers to stop items shifting; avoid heavy rigid objects against the spine–wrap them in soft cloth or move them outward; limit one heavy item per side to preserve symmetry; if a single item forces asymmetry, transfer it to the caregiver’s carry.
Cleaning, zipper fixes and quick strap repairs at home
For fresh stains, blot immediately with a microfiber cloth dampened with warm water (30–40°C) and 1–2 drops of mild liquid detergent; work from the outside of the stain toward the center and rinse the area with a clean damp cloth within 2–3 minutes to remove soap residue.
Machine wash only if the label permits: place the item inside a mesh laundry bag, use cold cycle (≤30°C), mild detergent, gentle spin (400–600 rpm), no bleach or fabric softener; remove immediately and reshape while damp, hang to air-dry away from direct sunlight and radiators.
Hand-wash method for structured children’s daypack: soak in lukewarm water with 10 ml mild detergent per 2 L water for 10–15 minutes, scrub seams and pockets with a soft brush, rinse under running water until suds clear, squeeze gently (do not wring), reshape and air-dry flat to preserve padding and shape.
Zipper quick fixes: if slider separates from teeth, pinch slider gently with flat-nose pliers while running it up and down to realign; lubricate with a graphite pencil rubbed along the teeth or a smear of candle/paraffin wax to improve movement; replace a broken pull tab temporarily with a split ring, paperclip or keyring.
Slider replacement: remove top stop (crimped metal) with small pliers, slide off old slider, fit a new slider of the same width (#3, #5, #7 etc. – match stamped size on slider), slide back onto teeth, crimp a new stop using a folded metal stop or stitch across the tape end with heavy polyester thread if metal stop is unavailable.
Teeth misalignment: gently unzip to the misaligned point, inspect for bent teeth and push them back straight with the flat edge of scissors or a small screwdriver; test by moving slider slowly; if multiple teeth are damaged, replace the entire zipper tape or use a seam ripper to remove and sew in a new zipper.
Quick strap repairs: for separated webbing, fold broken end under by 25–30 mm and sew a box‑X or bar‑tack pattern with heavy polyester or bonded nylon thread using a size 16 or 18 needle; make 6–8 passes for strength. If no machine is available, hand-sew with a curved upholstery needle.
Frayed synthetic strap ends: melt the frayed tip briefly with a lighter (2–3 short bursts), then press flat with pliers to fuse fibers; do this over a metal surface and ventilate the area. For natural-fiber straps, bind the end with whipping twine and sew to prevent unraveling.
Broken plastic buckle: remove the strap from the damaged side and thread through a replacement side-release buckle of the same width; secure loose ends with a cross-stitch or whipstitch. Temporary fix: loop the strap through a heavy-duty carabiner or use a metal snap hook until a proper replacement is installed.
Emergency reinforcements: cloth duct tape wrapped around a torn strap plus a couple of hand stitches holds for short trips; a safety pin can stabilize a detached pocket; sew-on patches (nylon or canvas) glued with fabric adhesive then stitched extend life of worn areas.
| Problem | Immediate fix (tools) | Estimated time |
|---|---|---|
| Fresh liquid stain | Microfiber cloth, mild detergent, warm water | 5–10 min |
| Stiff or stuck zipper | Graphite pencil, paraffin/candle, pliers | 2–7 min |
| Broken pull tab | Split ring, paperclip, keyring | 1–3 min |
| Slider off or worn | Replacement slider, pliers, top stop or heavy thread | 10–30 min |
| Torn strap webbing | Heavy polyester thread, needle or sewing machine, lighter (synthetic) | 15–45 min |
| Broken buckle | Replacement buckle (match width), scissors, thread | 10–20 min |
After repairs, perform a load test: attach a 2–3 kg weight, shake and lift 10 times to confirm stitching and hardware hold; recheck stitches after one week of use and re-seal melted ends if any loosening appears.


