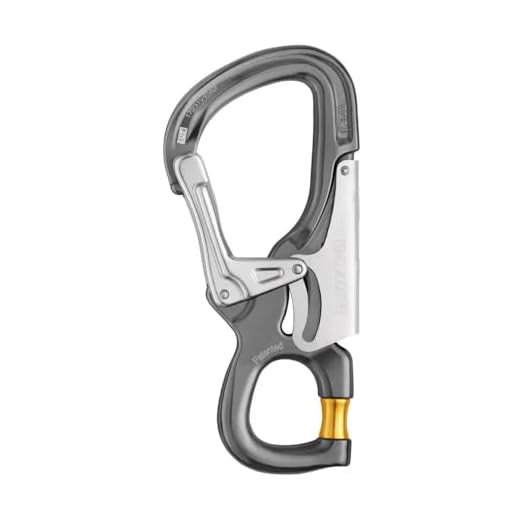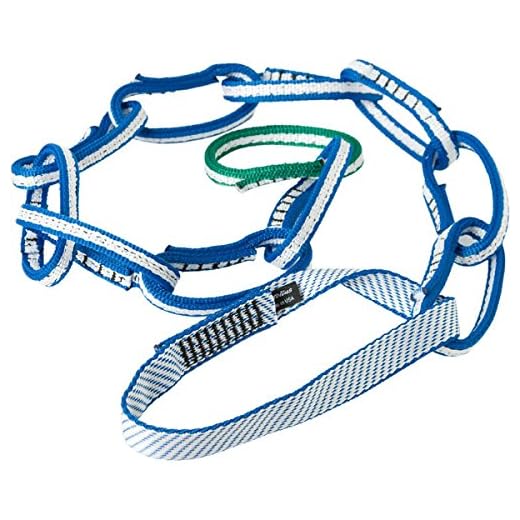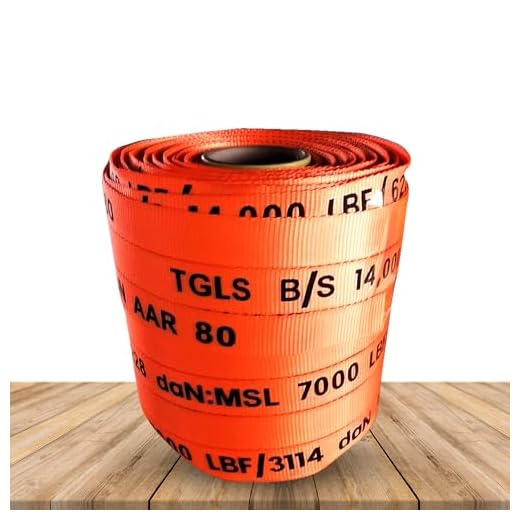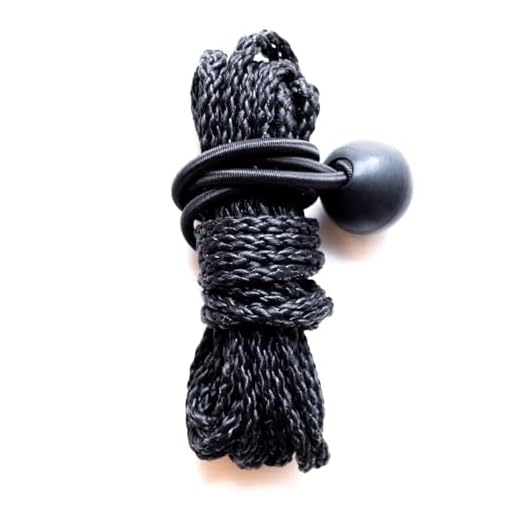


Recommendation: Thread a locking carabiner through 25 mm webbing tab to secure items up to 8–10 kg; place two attachment points 8–12 cm apart to reduce sway and spread load across webbing.
Common uses include ice-axe carry with pick-facing-forward and leash routed through reinforced slot, trekking-pole stow by crossing shafts and fixing with elastic cord, sleeping-mat lash using horizontal straps and quick-release buckles, and helmet clip via vent straps or snap hook.
Construction pointers: choose high-tenacity nylon or polyester webbing, expect bartack stitching at stress zones, and prefer metal hardware with >10 kN rating when attaching sharp or heavy tools. Inspect stitching and webbing every 3–6 months or after sustained heavy use; replace frayed webbing or cracked hardware immediately.
Packing technique: keep dense mass close to user’s spine by placing heavy items near lumbar area; mount bulky, low-density items higher and secure to lid straps or daisy-chain; use lower lash points for fuel canisters or stoves to lower center of gravity. When moving on steep terrain, clip quick-access kit to hipbelt or shoulder strap.
Quick rule: double-back webbing tails, heat-seal cut ends, and use redundant attachments when carrying sharp tools; test any aftermarket addition with a static 10 kg hang for 10 minutes before relying on it in the field.
Attachment points: practical uses and setup
Mount helmet to external daisy chain using a helmet clip; cinch strap until vertical movement stays under 1–2 cm.
Choose carabiners: non-climbing aluminum, gate opening 18–25 mm, strength ~5 kN; use screw-lock gates when item weight exceeds 1 kg or movement risk exists.
Use 550 paracord when lashing; cut lengths 0.5–1.5 m depending on item size; finish with a double fisherman or figure-eight stopper to prevent slippage.
Heavy or sharp gear
Place heavy loads inside main compartment close to back panel when possible; external attachment intended to carry lightweight items only. Limit external mass to under 5 kg unless pack specification permits higher load.
Secure ice tools by routing pick under lower webbing and clipping shaft to upper daisy chain with a short bungee or strap; protect fabric contact points with padding tape to avoid abrasion.
Quick-access items
Clip flashlight, keys, sunglasses, or water bottle to shoulder strap within 10–15 cm of sternum strap to reduce snagging and ease retrieval; use small accessory carabiners or spring clips rated 1–2 kN.
Keep hydration hose routed through shoulder strap hose clip and anchored to chest strap to prevent swinging while walking; reposition clip height near collarbone to enable comfortable reach.
Maintenance: Inspect webbing every trip; replace frayed sections or restitch using heavy nylon thread. Rinse salt or mud with fresh water and air dry away from direct heat.
Attaching Carabiners and Quick-Access Tools to Gear Straps
Use locking screwgate carabiners rated ≥20 kN on load-bearing webbing; use lightweight wire-gate or key-style clips (rated 3–8 kN) only for keys, flashlight, multi-tool, and hydration tube clips.
Recommended attachment combos
Shoulder strap: clip headlamp with quick-release biner plus 10–12 cm elastic tether to avoid flailing during movement. Sternum strap: row of mini carabiners or elastic loops for sunglasses and whistle, keeping weight centered. Hipbelt: mount small pouch with snap-hook or low-profile carabiner for snacks, phone, or GPS; keep tether length under 15 cm to reduce snag risk. Daisy-chain webbing: place heavier items lower on chain using locking biner; place quick-access items higher for reach.
Material choices: aluminum gate sizes 15–25 mm balance weight and opening; steel gates suit repeated heavy use. Use nylon sling or sewn daisy extender when attaching tools that might rotate or chafe webbing; avoid metal-on-metal contact that can wear webbing stitching.
Safety checklist
Inspect gate function and kN rating before each trip. Avoid clipping multiple items onto one carabiner when any item may shift load. Use locking mechanisms during climbing or hauling operations; use non-locking hardware only when load remains purely cosmetic or convenience-level. Replace rusted or bent carabiners; retire units after visible deformation or after significant impact.
| Type | Gate kN | Best uses | Notes |
|---|---|---|---|
| Locking screwgate | 20–30 kN | Load-bearing attachment, hoisting, rescue | Manual lock; heavier but secure |
| Auto-locking | 20–30 kN | Single-handed secure clipping on shoulder strap | Faster than screwgate, slightly pricier |
| Wire-gate | 8–12 kN | Light tools, quick-access items | Low weight, resists gate flutter |
| Key-style/aluminum snap | 3–8 kN | Keys, pouch zippers, decorative clips | Not rated for climbing or serious loads |
Quick tip: pair critical tool with a short tether (8–15 cm) anchored to separate webbing point so losing one clip won’t drop both tool and spare. For unrelated reading on pet nutrition while prepping gear, see best adult dog food for medium breeds.
Securing Trekking Poles and Ice Axes in Daisy Chains
Use dual-point attachment: thread lower shaft through two adjacent daisy-chain webbing slots, then capture handle with a 15–20 cm tubular sling and locking connector; add a tip cradle with 3–4 mm shock cord to eliminate 3–5 cm play.
Trekking-pole technique
Align shafts parallel to pack side with handles up, tips down. Thread lower shaft through two adjacent daisy-chain slots at hip and mid-torso positions. Fit a 15–20 cm tubular sling around handles and secure with a girth hitch to webbing point; use a water knot on flat webbing or double-fisherman on cord. Create tip cradle using 3–4 mm shock cord, tie with surgeon’s knot or adjustable sliding knot, tension to 3–5 cm slack. Use a locking connector rated ≥15 kN as main attachment.
Ice-axe technique
Position head pointing down and away from body; thread shaft through upper daisy-chain slot near shoulder, then secure pick-side with a short sling into lower webbing point. Protect webbing where metal head contacts with small rubber sleeve or abrasive tape. Add secondary tether to harness or sternum strap using quick-link rated ≥15 kN when crossing steep sections; keep pick oriented down and tip covered with axe protector. Practice one-handed release on flat ground prior to route.
See gear recommendations: best skateboard backpack.
Threading Straps Through Load Attachment Points to Compress and Stabilize Gear
Thread webbing through exterior attachment points, route across load, then cinch until gear sits snug against pack frame; aim to minimize movement when briskly shaking pack.
Hardware, materials, tension targets
Use straps 12–25 mm wide (½”–1″); 19 mm (¾”) balances strength with low bulk. Prefer polyester webbing when low stretch desired; choose nylon when superior abrasion resistance and knot holding matter. Expect polyester stretch around 2–4% under sustained load, nylon stretch around 5–10% when wet. Tighten until soft foam or sleeping pad compresses roughly 10–20% of original thickness; rigid items may need compression up to 30% to remove bounce.
Routing patterns, spacing, safety checks
Single-pass: run strap through one attachment and buckle; suited to light, flat items. Cross-pass: thread through two opposing points, cross over load, then cinch to generate lateral compression and stabilize asymmetrical cargo. Loop-through with back-pass: feed strap through attachment, under load, back through another attachment and buckle to resist shear during dynamic movement. Space multiple straps 10–15 cm apart when compressing tall or irregular items; place one low near hipbelt anchor and one higher near shoulder anchor to limit pitch and roll. Pull webbing until firm, add one sharp tug to seat buckle teeth, then test by walking 100–200 m and rechecking tension. Keep webbing tails 20–30 cm long before tucking into elastic keepers or threading through daisy-chain rungs to prevent snagging. Avoid routing straps across waterproof zipper seals or fabric seams that could leak or fail under repeated tension. Inspect buckles and stitching after heavy loads; replace any strap showing abrasion, fraying, or UV damage. Avoid overtightening to point where frame sheet or internal stays bend; if frame distortion appears, redistribute items inside pack or move heavy items closer to spine. Loads exceeding 10–15 kg benefit from redundant straps and hourly checks on long treks.
Routing Hydration Tubes and Electronics Through Shoulder, Sternum Anchor Points
Route hydration hose along shoulder strap webbing; secure at collarbone with sternum-strap keeper and low-profile Velcro, keep bite valve at chest height for one-handed access.
Quick specifications and targets:
- Hydration hose length: aim 70–90 cm for chest-mounted valve; 100–120 cm when mouthpiece stored near hip.
- Cable slack allowance: 10–15 cm between retention points to permit torso movement without tugging.
- Retention spacing: primary at base of neck, secondary at sternum strap, tertiary just above hip belt.
Step-by-step routing
- Insert hose or audio/charging cable into shoulder channel from pack top; pull until connector reaches collarbone.
- Attach first keeper at base of neck to prevent downward migration during activity.
- Clip bite valve or inline connector to sternum-strap keeper; adjust strap height so valve rests near center-right of chest.
- Secure remaining slack with elastic keeper or Velcro strap along lower harness; avoid twisting hose or pinching cables under sternum buckle.
- Route electronics cable inside shoulder channel toward chest pocket or lid; place battery or battery bank in shoulder pocket or top lid to minimize run length and weight shift.
- Use quick-disconnect fittings for hydration hose and right-angle USB connectors for electronics to reduce wear at junctions.
Hardware and wear prevention
- Recommended parts: low-profile cord locks, reusable silicone tube retainers, magnetic valve holder, split-loom tubing, adhesive cable anchors.
- Strain relief: install short loop of paracord near connector and secure with a zip-tie through that loop to avoid direct pull on connector pins.
- Chafe protection: wrap 3–5 cm of heat-shrink tubing or cloth tape where hose contacts webbing; replace tape after heavy use.
- Water management: place inline quick-disconnect above sternum strap to allow reservoir removal without detaching electronics cabling.
Troubleshooting tips: if valve kinks during shoulder movement, shift keeper 2–3 cm toward neck; if audio or charging drops intermittently, swap to right shoulder channel and test with shorter cable length to isolate connector strain.
Choosing Attachment Points to Optimize Weight Distribution: Heavy vs Light Items
Place items heavier than 4 kg low, centered, and as close to pack frame as possible; secure to lower load-bearing webbing or hipbelt anchors and cinch with compression straps to shift load onto hips.
Heavy items (over 4 kg)
Mount heavy gear at mid-lumbar height or slightly above hips, within 2–5 cm of pack back panel. Use reinforced lower lash points, haul straps rated with clear working-load-limit (WLL), or dedicated internal compartment adjacent to frame. Apply two-point fixation: one primary strap plus a secondary stabilizer to prevent pendulum motion. Tighten load-lifter straps (10–15° angle to shoulder straps) until pack face sits flush with torso; aim to have 60–80% of gross load supported by hipbelt. If using external carry, pick webbing at least 25–38 mm wide and rated with WLL ≥ 3× item mass.
Light items (under 1 kg) and medium items (1–4 kg)
Attach light items to upper accessory webbing, shoulder strap daisy anchors, lid pockets, or external mesh to keep center of mass close but allow quick access. Medium-weight pieces suit side-compression points or mid-level accessory anchors; distribute these evenly left/right to avoid lateral imbalance. Use single-point carabiner clips or small cam straps for light loads; choose low-profile buckles and avoid over-tightening to preserve quick retrieval. For mixed loads, move heaviest component inward and highest allowed component no more than 15–20 cm above hipbelt to keep center of mass near torso.
Checklist: classify item weight (light 4 kg); select anchor with WLL ≥ 3× item mass; prefer multiple attachment points for heavy or awkward shapes; always cinch compression straps until minimal gap remains between gear and frame.
Inspecting Attachment-Point Strength and Simple Field Repairs of Frayed Webbing
Replace webbing if core fibers visible or fray length exceeds 20% of strap width.
Inspect stitching, edge wear, and attachment hardware monthly during heavy use; probe with fingernail to detect soft spots that indicate fiber failure.
Quick inspection checklist
- Measure fray length: mark ends of undamaged zone; if damaged segment >20% of overall strap length, plan immediate replacement.
- Check stitch integrity: note pulled threads, missing bar tacks, long single-thread failures.
- Assess substrate: inspect webbing edges; note abrasion, core fiber exposure, discoloration from sun or chemical attack.
- Hardware interface: inspect anchor points, sewn bartacks, and any retained heat-fused ends; note movement or slippage.
- Load test quick check: apply controlled hand tension then a moderate load (carry weight or simulated load) and observe for progressive elongation or seam creep.
Field repair methods
-
Sewed splice – materials: sewing awl or heavy needle, bonded polyester thread (size 69 or 92), spare webbing strip. Steps: align overlap minimum 100 mm (4 in); stitch box pattern with center X; make at least 4 passes per side; finish with multiple bar tacks. Expected load restoration: ~60–75% of original strength.
-
Heat-capped end – materials: lighter or small torch, metal plate to press molten end. Steps: trim jagged fibers close, melt tip until edges fuse, flatten while hot to form smooth cap. Purpose: prevent further unraveling; note that load capacity will not be restored by this alone.
-
Wrap-and-zip temporary repair – materials: self-fusing silicone tape or heavy-duty duct tape plus two heavy zip-ties. Steps: wrap damaged area tightly with tape overlapping 50%; secure each tape end with a zip-tie spaced ~15 mm apart. Use as short-term measure only; avoid exposing repaired area to high dynamic loads.
-
Replacement splice – when spare webbing available, remove damaged section and insert new segment with overlap 100–150 mm and box-X stitch or rivet-plate kit. Match width and polymer type: polyester offers low stretch and superior UV resistance; nylon gives more dynamic stretch.
-
Emergency anchoring – if attachment point seam has failed, route spare strap around solid frame element, secure with two heavy-duty carabiners or a threaded metal plate and bolts when hardware exists. Avoid using single thin cord as primary load path.
Tool list to carry: sewing awl, bonded thread, heavy needle, small scissors, lighter, spare webbing strip, several heavy zip-ties, and a roll of self-fusing tape. Replace repaired items at first opportunity; purchase replacement webbing and repair kits via best patio umbrella online stores when other suppliers unavailable.
FAQ:
What are the small horizontal or vertical loops sewn onto the front of my backpack?
Those loops are called lash points or gear loops. They provide attachment spots for items you want to carry outside the main compartment: carabiners, water bottles, pouches, keys, or lightweight tools. On hiking packs the loops can also hold trekking poles, a helmet, or small pieces of climbing equipment. Some loops are decorative or low-strength and meant only for light loads, while others are reinforced for heavier gear — check the pack’s tag or manual to see which are load-bearing.
How should I use a daisy-chain webbing safely to secure extra gear?
Use a strong connector such as a locking carabiner through an appropriate loop rather than threading rope through every slot. Clip the item close to the pack so it sits against the fabric and won’t swing free. For heavier items, choose reinforced points near the frame or compression straps and spread the load across multiple anchor points. Avoid overloading a single stitched loop; inspect stitching and fabric for wear before each trip and retighten ties periodically during use to keep gear from shifting.
Are the loops on my pack suitable for carrying ice axes or trekking poles?
Some packs include purpose-built axe or pole attachments: a lower loop to hold the shaft and an upper elastic or snap keeper to secure the head. Those systems are designed to resist the forces created while hiking. Generic gear loops may not be strong enough for metal tools. If your pack has a dedicated axe/pole feature, use it as instructed. If not, use a proper carrier, stow the tool inside the pack, or attach it with strong straps to reinforced points rather than relying on flimsy webbing.
Can I attach a daypack or extra load to these loops for a multi-day trek, and what should I watch for?
Yes, you can attach extra gear, but do so carefully. First, confirm which loops are rated for load-bearing — attach heavy items to the frame or compression straps instead of thin decorative webbing. Keep weight low and close to your back so it does not pull the pack off balance. Secure items with adjustable straps or cords and tuck straps so they won’t snag. Regularly check seams and attachment points for stretching or damage; prolonged heavy loads can weaken stitching. Finally, consider how the added gear affects mobility and ventilation, and remove external loads for technical sections or when climbing to avoid interference.


