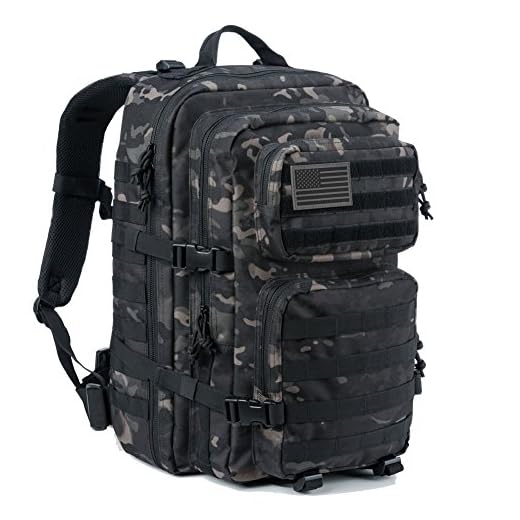


Mystery Ranch ASAP 3-Day Assault Pack is recommended for frontline patrols: 20–25 L main volume, 1.2 kg empty weight, constructed from 500D/1000D Cordura, features full MOLLE/PALS webbing, hydration sleeve, removable lid, and zippered admin pocket.
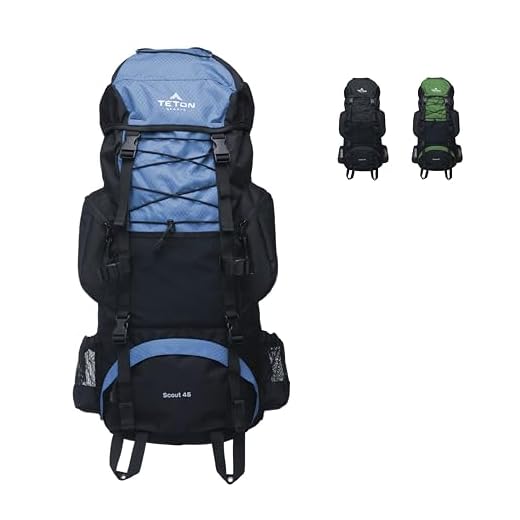
For extended patrols or resupply missions select a sustainment rucksack such as Mystery Ranch Mission 75 or Eberlestock V2: capacities 60–75 L, empty weight 2.3–3.2 kg, recommended load 25–45 kg depending on frame type, integrated internal frame or detachable external frame options available.
Aim for a hip belt that transfers at least 60% of carried weight; adjustable torso length with 5 cm increments improves fit across body types; low-profile hip pockets enable quick access to map, GPS, extra magazines.
Choose fabrics based on abrasion versus weight tradeoffs: 500D Cordura reduces mass but offers less abrasion resistance than 1000D; select DWR coating and tuck-away raincover rated for sustained exposure; hardware such as GT Cobra buckles or ITW Nexus improves service life.
Packing guidance: place heavy items close to spine, compress load with side straps, carry water bladder low in pack for better center of gravity; employ modular pouches for ammo, med gear, comms; confirm compatibility between webbing spacing and pouch attachment points (25 mm PALS spacing standard).
Mission-specific capacity: choosing liters and load limits for patrol, ruck, and assault
Recommended volumes: 15–25L for assault, 20–35L for patrol, 45–70L for ruck.
Assault: select 12–20L assault pouch for short, high-speed entries; keep load under 10–12 kg (22–26 lb) or roughly 10–15% body mass; carry ammo, trauma kit, comms, one small water source.
Patrol: choose 20–35L patrol pack for day missions; target 8–15 kg (18–33 lb) based on patrol length and resupply cadence; include 1.5–3L hydration bladder, lightweight rain shell, spare socks, basic tools, food for 12–24 hours.
Ruck: use 45–70L rucksack for multi-day moves and heavy sustainment; plan 20–30 kg (45–66 lb) for conditioned personnel; keep sustained load near 30% body mass and avoid exceeding 40% except for short carries; dedicate space for sleeping system, stove, fuel, and water containers.
Packing technique: place heaviest items close to spine and high on shoulders to preserve agility; position hip belt so hips accept 60–80% of mass; use compression straps to eliminate sway; keep navigation, tourniquet, and radio in quick-access pockets.
Modularity and integration: use a detachable assault pack for rapid egress; select internal-frame rucks for 20–30 kg loads, external-frame or frame-sack combos for bulky >30 kg loads; verify compatibility with body armor and load-bearing rigs before deployment.
Progressive load plan: increase carried mass by no more than 10% per week while maintaining aerobic conditioning; simulate mission tempo during training marches; treat foot care and sleep management as part of load planning to reduce injury risk.
best travel uv travel umbrella new york times offers compact waterproof options for lightweight weather protection. For post-operation gear care and moisture removal consult methods to remove water from an air compressor.
Material selection and coatings: comparing Cordura, ripstop, TPU laminate and water resistance
Choose 1000D Cordura for load-bearing panels; pair with 25–50 µm TPU laminate and fully taped or welded seams for sustained waterproof protection plus high abrasion resistance.
Denier selection and placement
Recommended layout: 1000D Cordura on base and lower side panels; 500D Cordura for upper panels and lid; 210D ripstop for inner pockets and lid lining; 70–140D ripstop laminated with 20–35 µm TPU for lightweight external pockets and admin panels. Abrasion-resistance ranking by material: 1000D >> 500D >> 210D ripstop. For weight-sensitive builds, select 210D ripstop + 25 µm TPU to reach hydrostatic head around 5,000 mm while adding minimal mass. Reinforce high-wear zones (corners, lower edges, strap attachment points) with Cordura patches or bar-tacked overlays.
Coatings, waterproof metrics, seams and hardware
PU coating: typical hydrostatic head 1,000–5,000 mm; breathability low; recoating interval 12–24 months under heavy wear. TPU laminate: common thickness 20–80 µm; achievable hydrostatic head 10,000–20,000 mm when fully bonded; supports welded seams and higher puncture resistance versus thin PU. DWR: apply C6 treatment for initial beading; expect bead loss after abrasion and reapply via spray-on after 6–12 months of heavy use. Seams: welded seams on TPU-laminated fabrics outperform taped seams on coated fabrics for prolonged immersion; welded seams remove seam-tape delamination risk. Zippers: pick #10 or molded-coil with storm flap plus waterproof zipper tape; field-repair options include seam-sealing tape and solvent-based PU patch kits.
Service-life estimates: 1000D Cordura + TPU + welded seams – 5–10 years under heavy operational tempo; 500D Cordura + DWR + taped seams – 3–7 years. Laminated 70–140D nylon for ultralight builds typically endures 1–3 years under abrasion-intensive tasks. For full waterproofing across seams, prefer welded seams + TPU laminate over taped seams + PU coating. For balanced performance, spec 1000D structural panels, 210D laminated main body, welded seams on critical panels, and C6 DWR on external surfaces.
Frame and suspension choices: internal-frame, external-frame, frameless – selection guidance
Select an internal-frame rucksack for dynamic movement and torso stability with loads between 12–35 kg; choose external-frame rigs for sustained heavy hauls above 30–40 kg or bulky cargo; choose frameless designs for assault/light recon missions with loads under 10–12 kg.
Load ranges, terrain and mission fit
- Internal-frame
- Recommended load: 12–35 kg. Optimal for 10–30 km marches or multi-day patrols where agility matters.
- Terrain: technical trails, urban, vehicle-mounted insertion where close-fit stability reduces snags and improves balance.
- Suspension details: integrated aluminum or composite stays, articulated hipbelt, load-lifter straps. Aim for hipbelt to carry 70–80% of total mass.
- Torso sizing: match torso length within ±2 cm (measure C7 to iliac crest).
- External-frame
- Recommended load: 30–60+ kg. Best for long resupply marches, base-camp logistics, or heavy specialist equipment.
- Terrain: open trails, roads, glacier or snow where ventilation and ability to attach odd-shaped loads matter more than low-profile fit.
- Suspension details: tubular aluminum frames or welded alloys, adjustable platform height, superior airflow behind torso but higher snag risk in tight terrain.
- Notes: external frames distribute bulk away from shoulders, easing long-duration carriage at slow steady paces.
- Frameless
- Recommended load: 3–10 kg. Suited to short assaults, patrols with minimal gear, or emergency/liaison roles prioritizing speed.
- Terrain: close-quarter, short-duration missions where low weight and pack compressibility matter.
- Suspension details: rely on a sturdy hipbelt and sternum strap to shift load to hips; padding 25–45 mm preferred for comfort under light loads.
- Limitations: sustained loads above ~12 kg cause rapid shoulder fatigue and poor load control.
Practical fit, adjustment and durability checks
- Torso measurement: measure C7 to iliac crest; select suspension to match within ±2 cm. Misfit >3 cm increases lumbar strain.
- Hipbelt placement: center belt over iliac crests, not waistline. Proper placement moves load off shoulders and into hips.
- Load-lifter angle: set straps so angle between strap and torso is ~30–45°; pack should sit close to upper back without pulling shoulders forward.
- Shoulder strap shaping: S-curve straps with 20–30 mm foam and stabilizer wings reduce pressure points under 20–30 kg loads.
- Frame materials tradeoffs: aluminum frames offer predictable flex and repairability; carbon/composite stays save 15–40% weight but risk catastrophic failure under impact.
- Failure points to inspect: hipbelt seams, stay attachment rivets, webbing wear at load-bearing points. Carry spare buckle, short length of 25 mm webbing and shock cord for field repair.
- Selection checklist:
- Define typical loaded mass (kg).
- Match suspension to torso length and hip circumference.
- Choose frame type by dominant terrain and pace (internal for mobility, external for heavy steady hauls, frameless for speed/light loads).
- Verify compatibility with pack lid, hipbelt pockets and MOLLE attachment points required by unit equipment.
Modularity and MOLLE configuration: arranging pouches, admin panels and plate carrier attachment
Mount admin panel on upper-center MOLLE grid, engaging at least two horizontal PALS rows and three columns; secure with one vertical shock cord to prevent bounce.
Standard PALS spacing equals 1 in (25 mm) both horizontally and vertically; webbing width 1 in (25 mm). Maintain those dimensions when sewing or adding aftermarket panels for guaranteed compatibility.
Place heavy items low and close to spine: target center of mass within 2 in (5 cm) of spinal column and at lumbar height, aligned with hipbelt to minimize torque during runs, climbs and casualty drags.
Primary rifle-mag pouch layout: center-front placement, two stacked rows for fast reloads. Typical triple-mag pouch requires three PALS columns and four to six horizontal rows; for six-mag carry, mount two triple pouches stacked or a single six-mag panel occupying six columns.
IFAK placement: non-dominant hip for one-handed retrieval with forward-facing opening and single-handed pull-tab. Mount tourniquet vertically on outside upper edge of IFAK for immediate application.
Attach plate carrier to pack via at least four vertical MALICE-style straps, routing each strap through a minimum of four horizontal PALS rows to spread shear; add an anti-rotation bungee across lower attachment row and a quick-release tab for emergency separation.
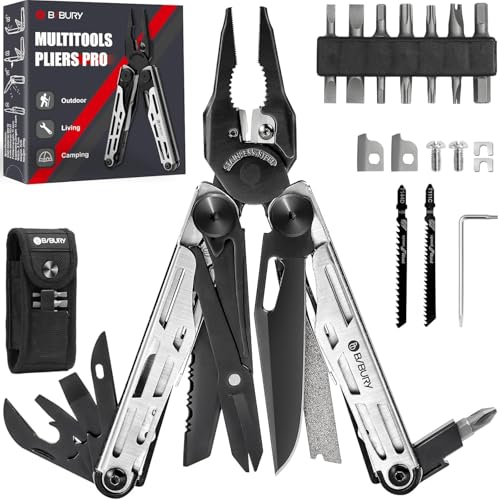
Allocate admin-panel pockets by frequency: top row for navigation aids (map wallet 8 x 5 in, compass), middle for comms (antenna, spare battery), bottom for tools (multitool, pens, headlamp). Employ color-coded pull-tabs and Velcro ID panels for rapid recognition under stress.
Stagger pouch heights to avoid interference with shoulder straps and cummerbund; trim excess webbing after mounting and lock down loose ends with zip-ties or 3 mm elastic keepers. Validate layout by donning full kit and performing a three-minute mobility circuit to confirm reach, retention and non-binding of critical items.
Hydration and comfort solutions: reservoir routing, hip belt setup and gait management
Select a 2–3L bladder routed over right shoulder with bite valve clipped to sternum strap 20–30cm below collarbone; orient valve at 45–90° to reduce kinking and allow one-handed access.
Reservoir routing and hose management
Install bladder in dedicated sleeve against pack back panel; run hose through left or right shoulder-port based on dominant hand and radio placement. Maintain 40–60cm tube length from collarbone clip to valve to prevent excess slack while allowing comfortable drinking. Fit quick-disconnect at tube-to-bladder junction at waist height for rapid refill without removing load carriage system.
Add 30–60cm insulated sleeve for subfreezing or high-heat operations; foam sleeve plus reflective wrap can cut conductive heat transfer of exposed tube by up to 40%. Anchor magnetic or low-profile clip to sternum strap ~20–30cm below collarbone to stop slapping during jog; add elastic retention loops every 15–20cm along shoulder strap to prevent sagging and friction points.
Choose a low-profile push-pull valve with 90–120° elbow for positive seal and a practical flow rate of 0.6–1.2 L/min under exertion. Purge air by routing tube uphill from fill port and lifting bladder 20–30cm before squeezing. For cooling, fill bladder with 50:50 ice:water; expect useful melt-based cooling for ~30–60 minutes depending on ambient temperature and workload.
Hip belt setup and gait control
Position hip belt so padded wings sit squarely over iliac crest; center buckle on abdomen and tighten until 60–80% of perceived load shifts from shoulders to hips. Set hip-belt pad width at 10–12cm for even pressure distribution; keep hip-belt harness below ribs to avoid restricting respiration. Adjust load lifters to 30–45° above horizontal to pull mass toward upper torso and reduce shoulder torque.
Maintain cadence of 100–120 steps/min with shortened stride to lower vertical oscillation and energy cost; favor midfoot contact with a slight forward lean of 5–10° measured from ankle. Employ trekking poles to reduce peak ground reaction by ~15–25% and permit longer effective stride without extra vertical bounce. On descents, shorten stride and increase pole engagement to protect hips and lumbar region.
Plan fluid intake at 0.5–1.0 L/hour for moderate workloads and 1.0–1.5 L/hour for sustained high-output or hot conditions; sip 150–250 ml every 15–30 minutes rather than taking large gulps. Schedule micro-rests every 45–60 minutes to retension hip belt and shoulder straps and to check tube routing; after hip retension, increase shoulder strap tension by ~10–15% to rebalance load.
Carry a spare bite valve and inline clamp; secure critical tube junctions with tape or zip-tie. For a kinked hose, rotate elbow 90° and reseat clip; replace bladder when seams show 1–2 mm weeping. For extended marches, periodically shift bladder within sleeve to avoid seam stress and to prevent localized pressure points against lumbar.
Field maintenance and repairs: patching, seam reinforcement and replacing straps or buckles
Pack a compact repair kit: 1 sewing awl with bonded nylon thread (heavy, ~0.9–1.2 mm), 2 spare lengths of nylon webbing (1″ and 1.5″, 2 m each), 1 roll 25 mm TPU/nylon repair tape (10 m), 4 adhesive-backed Cordura patches (100 x 150 mm), 1 tube polyurethane adhesive (e.g., Seam Grip or equivalent), 4 stainless pop rivets (5 mm shaft) with setter, 1 1″ side-release buckle and 1 1.5″ ladder-lock, small heat source (mini lighter or butane torch), curved upholstery needle, heavy-duty scissors, measuring tape and a set of paracord (4–6 m of 550 cord).
Patching procedures
For cuts ≤20 mm: clean edges, abrade around the hole with coarse cloth, apply TPU/nylon repair tape with 10 mm overlap on both sides, press for 30–60 s with firm pressure; for better adhesion at low temperatures, warm repair area with a lighter for 5–8 s (keep flame moving). For tears 20–80 mm: apply polyurethane adhesive to both patch and base, place a pre-cut Cordura or TPU patch (min 25 mm overlap), stitch around perimeter with 4–6 mm stitch spacing using bonded nylon thread, then apply a secondary layer of repair tape on the inside for shear load. For tears >80 mm or seam failure: cut a patch at least 50% larger than damaged area, angle edges to avoid stress risers, glue, then sew two parallel rows 6–8 mm apart; reinforce ends with bar-tacks spaced 6–8 mm.
For laminated or TPU-coated fabrics: use solvent-compatible adhesive (check manufacturer), avoid prolonged direct flame; use heat-seal tape where available and finish with a stitched perimeter when possible. For worn abrasion zones, apply a long strip of tape along high-wear length (minimum 50 mm overlap each end) and stitch longitudinally to prevent peel.
Seam reinforcement and replacement of straps/buckles
Seam re-stitching: follow original stitch line, use two parallel rows separated by 5–8 mm. Use a box-X stitch at load-bearing terminations: fold strap end 25–30 mm, sew a 25 x 25 mm box with an X across it using at least 6 passes, or use a heavy-duty bartack tool. Stitch length 4–6 mm; backstitch at start and finish. Where machine stitching is unavailable, use a sewing awl and drive stitch spacing evenly; waxed heavy nylon thread reduces abrasion and water ingress.
Replacing a strap: measure original width (common widths: 25 mm, 32 mm, 38 mm, 50 mm). Use matching-width webbing; if using narrower webbing temporarily, double it and sew a vertical seam to restore width and strength. For securing new webbing permanently, sew a box-X and add two 5 mm stainless rivets staggered 20–25 mm apart for redundancy. For buckle swaps, choose ladder-locks for length adjustment, side-release for quick detach; route webbing through hardware twice where possible to reduce slippage before final stitching.
Temporary field fixes: tie a lark’s head with 550 paracord and add multiple overhand wraps to create a makeshift strap; use a tight constrictor knot over webbing to act as an emergency stopper. If a buckle fails, lash a short length of webbing around the remaining hardware and secure with two half-hitches plus a finishing tape wrap to prevent abrasion.
| Item | Spec / Size | Primary use |
|---|---|---|
| Sewing awl + bonded nylon thread | 0.9–1.2 mm | Permanent seams, bartacks, box-X |
| Nylon webbing | 25 mm & 38 mm, 2 m each | Replace straps, reinforcement strips |
| TPU/nylon repair tape | 25 mm wide, 10 m roll | Patches, seam sealing, abrasion strips |
| Cordura adhesive patches | 100 x 150 mm, 2 each | Holes and large abrasion areas |
| Polyurethane adhesive | Small tube | Bonding patches and sealing seams |
| Pop rivets + setter | 5 mm stainless, 4 pcs | High-load anchor points when sewing not possible |
| Spare buckles | 1″ side-release, 1.5″ ladder-lock | Quick swap for failed hardware |
| Paracord (550) | 4–6 m | Emergency lashings, temporary straps |
FAQ:
Which backpack does the US military issue?
The U.S. military issues modular rucksacks built around the MOLLE (Modular Lightweight Load-carrying Equipment) concept. Issued items typically include an assault/patrol pack for short missions, a medium rucksack and a large rucksack for longer loads. These packs use PALS webbing so soldiers can attach pouches and gear in a configurable way. Earlier systems such as the ALICE pack were common decades ago, but most units now use MOLLE-pattern rucksacks or unit-specific variants supplied by approved manufacturers.
What features should I look for if I want a military-style backpack for hiking?
Pick a pack with durable fabric (Cordura or nylon 500–1000 denier), strong stitching and quality zippers (YKK or similar). Look for a padded hip belt and adjustable shoulder straps so the load rides on your hips rather than your shoulders. An internal or removable frame adds support for heavy loads. Hydration compatibility (a sleeve and port for a reservoir), PALS webbing for modular attachments, compression straps to stabilize weight, and a good rain cover or water-resistant coating are all useful. Match capacity to your trips: small day packs for short hikes, larger volumes for multi-day trips. Fit and comfort matter more than brand; try a loaded fit before committing.


