

Recommendation: Keep mission weight between 15–25 kg for short patrols and 25–35 kg for multi-day operations; place ammunition, water and the individual first-aid kit in top/side quick-access pockets for immediate retrieval.
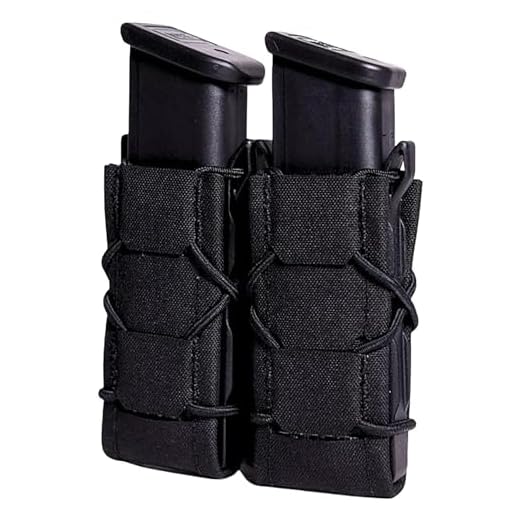
Ammo: 6–9 magazines for 5.56 mm (≈210–315 rounds) or 4–6 magazines for 7.62 mm. Store magazines in pouches on the belt or chest rig and keep 1–2 spare magazines inside the pack. Weight estimate: magazines add ~2.5–6 kg depending on caliber and count.
Hydration: 2 L minimum for temperate climates, 3–4 L in heat. Preferred configuration: 1 L hydration bladder plus one 1 L bottle. Bladder in sleeve against the spine for lower center of gravity; bottle in side pouch for quick access.
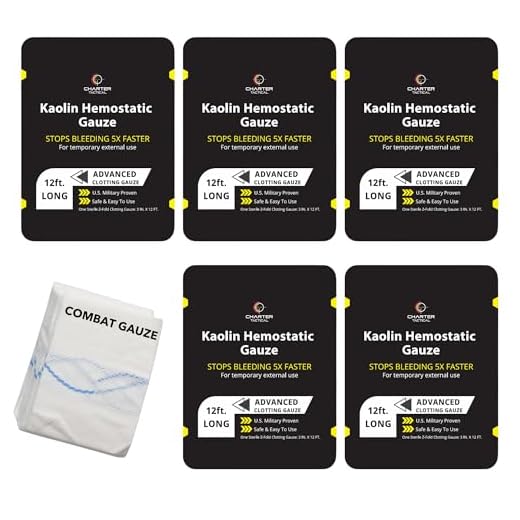
Trauma care: one tourniquet, one individual first-aid kit (IFAK) with chest seal, pressure dressing and hemostatic gauze, plus a compact pair of trauma shears. Store the IFAK in a shoulder or hip pocket reachable without removing the rucksack.
Nutrition and sleep: 1 MRE per 24 hours of activity; add 1–2 high-calorie snacks (energy bars, nuts). For overnight missions, lightweight sleeping system (0.8–1.5 kg) or a poncho liner; for multi-day, include a compact shelter/tarp and sleeping pad.
Clothing and comfort: 1 spare set of moisture-wicking base layers, 1 insulating mid-layer (fleece or synthetic, ~300–500 g), rain shell, extra socks (1–2 pairs). Pack clothing in compression sacks to save space and protect from moisture.
Navigation and comms: handheld radio with spare battery, charged power bank (10,000–20,000 mAh) and charging cable, compass + map in waterproof sleeve, headlamp with red/white modes and two spare batteries.
Tools and maintenance: multitool, small sewing kit, weapon cleaning kit (rod, patches, lubricant), folding entrenching tool if mission requires. Keep tools in internal compartments to prevent snagging external gear.
Packing technique: place heaviest items nearest the spine and slightly above the hip belt; lighter, bulkier items go lower and to the outside. Use modular pouches (MOLLE) to separate categories and compress the load with side straps. Adjust shoulder straps and hip belt so hips bear ~60–70% of weight.
Mission-specific extras: smoke/illumination rounds or signal devices as required, weather-appropriate footwear changes, insect protection (net or repellent) for tropical environments. Remove non-mission-critical comfort items if total weight exceeds planned limits.
Selecting a load-bearing system and packing sequence for multi-day marches
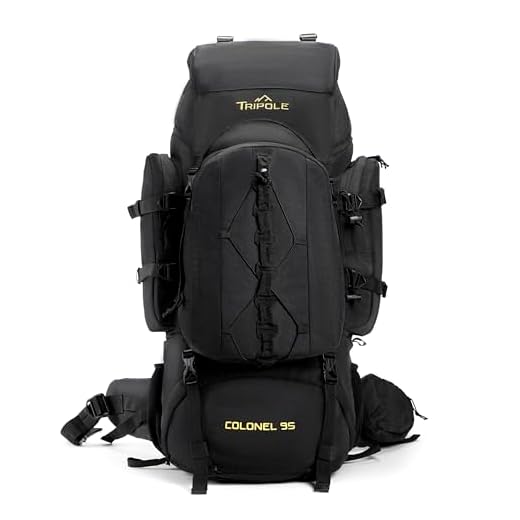
Choose an internal-frame rucksack with a wide, padded hipbelt and torso-adjustable suspension; aim for a sustained load equal to 20–35% of body mass (short, high-intensity missions may approach 40–45%).
- Volume sizing: 1–3 days – 35–50 L; 3–7 days – 50–80 L; >7 days – 80+ L. Match volume to mission and resupply frequency, not habit.
- Frame type: internal-frame for loads up to ~25–30 kg; external-frame only when regularly hauling >30 kg or overpack for specialist gear.
- Hipbelt: minimum padded width 10–13 cm, rigid stabilizer stays, integrated pockets. Hipbelt must transfer 70–80% of packed mass onto the pelvis when fitted correctly.
- Suspension: adjustable torso length with 4–6 cm increments, load-lifter straps set to 30–45° from the pack to the shoulder straps, sternum strap with emergency whistle recommended.
- Ventilation: mesh or spacer-back panels reduce hot-spot discomfort on multi-day marches; choose models that keep load close while allowing airflow.
- Materials and fittings: 500–1000D Cordura or equivalent, reinforced webbing/MOLLE for modular pouches, hydration sleeve for 2–3 L bladder, double-stitched stress points.
- Features to require: compression straps, removable lid/daypack (10–20 L), rain cover, dedicated sleeping-bag compartment or access port, ice-axe/trekking pole attachments if terrain demands.
- Target empty pack mass: under 2.5 kg for general-purpose packs; lighter for long-distance patrols where every 100 g matters.
- Bottom: Stuff-sack compressed sleeping bag or down quilt (waterproofed) to maintain low center-of-gravity and fill voids.
- Second layer: Soft, low-density bulk (sleeping pad if internal, rolled spare clothing) to cushion heavy items and prevent shifting.
- Core: Heaviest, densest items (fuel canisters, hard spare batteries, ammunition or tools) packed as close to the lumbar spine as possible – aim for the pack’s center of mass 5–10 cm above the iliac crest.
- Surround core: Food rations and dehydrated meal bags distributed equally left/right to avoid lateral imbalance; place a portion near the core to stabilise movement.
- Hydration: Bladder behind the core along the spine or side bottle pockets for weight balance; carry initial water weight close to the spine and resupply points in side pockets.
- Top: Rain shell, breathable insulation layer, and items needing rapid access (helmet cover, lightweight tarp) in the lid compartment or top pocket.
- External pockets/hipbelt: Navigation kit, compact first-aid, energy bars, small multitool, GPS, headlamp – items that must be reached without unloading the main pack.
- Compression and stabilization: Tighten side and top compression straps to draw the core inward; secure long items vertically along the frame to prevent pendulum sway.
- Fuel and hazardous items: Store away from sleeping system, double-bag liquid fuel, and keep ignition sources isolated in a top pocket or external pouch for safety and quick access.
- Nightly repack routine: After consumption of rations/fuel, perform a 5–7 minute rebalance – move remaining heavy items toward the core, retighten straps, and check hipbelt placement.
- Weight-management rule: weigh fully loaded kit before departure; if total mass exceeds 35% bodyweight for planned daily mileage, remove or redistribute non-critical items.
- Fit check: hipbelt centered on iliac crests, shoulder straps snug but not weight-bearing, load-lifters engaged; perform a 2 km shakedown with mission load and adjust suspension accordingly.
- Consumables planning: plan daily food portions so heavier consumables are consumed early and repacked toward the back to maintain balance over consecutive days.
- Spare clothing placement: keep a lightweight, waterproof shell in top-access for sudden weather; bulk insulating layers may be mid-pack to save space and stabilize the core.
Field medical kit: items, placement, and treating common battlefield injuries
Keep an Individual First Aid Kit (IFAK) on the chest rig or strong-side belt within a 5-second reach: 2 tourniquets (CAT or SOFT-T), 4 hemostatic gauze packs (Celox/QuikClot), 2 occlusive chest seals (HyFin), 1 14G×3.25″ decompression needle, 1 nasopharyngeal airway (28–34 Fr) with lubricant, 1 Israeli trauma dressing (4–6 in.), 2 compressed trauma dressings, 8–12 sterile 4×4 gauze, 2 pairs nitrile gloves, trauma shears, SAM splint (folded), field adhesive tape (1 roll), small penlight, and durable marker for time-marking tourniquets.
Placement and organization
IFAK on chest rig or belt for immediate access; place one additional tourniquet on the dominant-hand side of the belt for rapid reach during one-handed application. Reserve a medic pouch inside the patrol pack for bulk items: pelvic binder (SAM), IV/IO starter kit (if medic-qualified), chest tube kit for advanced providers, whole-blood coolers if available, and spare hemostatic agents. Store sharps and needles in rigid, puncture-proof containers. Use waterproof internal pouches and resealable vacuum bags for dressings; rotate consumables by expiry dates (hemostatic agents typically 3–5 years). For improvised freezing or storage tests consult product guidance – are pyrex glass bowls freezer safe.
Triage-first-response algorithms for common combat injuries
Massive hemorrhage: apply a tourniquet 2–3 inches proximal to the wound, never over a joint; tighten until bleeding stops, write application time on forehead or tape, do not release for transport. If bleeding persists or wound is compressible, pack the cavity with hemostatic gauze, apply direct pressure for 3–5 minutes, then secure with a pressure dressing. Combine tourniquet + packing if needed.
Open chest wound: seal with an occlusive chest seal immediately. Monitor for signs of tension pneumothorax (severe respiratory distress, hypotension, progressive hypoxia, unilateral absent breath sounds); if present and trained, perform needle decompression using a 14G×3.25″ device at the 2nd intercostal space mid-clavicular or 5th intercostal mid-axillary line, then re-evaluate and prepare for evacuation.
Airway compromise: perform jaw-thrust if spinal injury suspected; if airway remains inadequate and operator is trained, insert NPA sized from nostril to earlobe (avoid NPA with suspected basilar skull fracture). Maintain chin lift or basic airway adjuncts until advanced airway placement by trained provider.
Shock and hypoperfusion: keep casualty supine, conserve heat (foil blanket), elevate legs if no spinal injury; provide high-flow oxygen when available; establish IV/IO access only if trained and within scope. Rapid evacuation to higher care is mandatory for hypotension or altered mental status.
Fractures and suspected spinal injury: immobilize with SAM splint or rigid splints, pad pressure points, secure with cravats or tape; apply traction only by trained personnel. For pelvic instability apply a pelvic binder spanning greater trochanters.
Burns and contamination: cool burns with clean water (avoid ice), cover with sterile burn sheet or dry sterile dressing. Remove gross contamination with saline irrigation; pack penetrating blast wounds with hemostatic gauze if bleeding. For eye injuries shield the eye, avoid pressure, and evacuate.
Blast and multi-system trauma: check for airway, breathing, circulation repeatedly; anticipate delayed deterioration from pulmonary blast or intracranial injury. Prioritize hemorrhage control, secure airway, and expedite casualty evacuation to surgical capability.
Documentation and equipment hygiene: log tourniquet times and interventions on casualty card or marker; replace single-use items after use; disinfect reusable tools per protocol. Perform scenario-based training on all items included in the kit at least quarterly and follow clinical scope-of-practice for invasive procedures.
Food and water planning: ration choice, hydration strategy, and purification methods
Ration selection and pacing
Plan for 3,000–5,000 kcal per 24 hours and allocate 20–30% of total energy as ultra‑dense bars (~5 kcal/g) to minimize mass.
Ration types and numbers (typical figures): MRE/operational rations ~1,100–1,300 kcal per pack, gross weight 1.1–1.5 kg; freeze‑dried meal dry weight 80–150 g, energy 400–900 kcal per reconstituted meal, rehydration need 300–500 mL; high‑energy bars 200–350 kcal per 40–80 g bar (~4–5 kcal/g). Compact emergency blocks often provide ~2,000–2,800 kcal in 400–600 g.
Pacing rules: during high tempo movement aim for 300–450 kcal per hour of activity (small frequent feeds); during lower activity levels target total daily intake in the 3,000–3,500 kcal range. Example three‑day load: per 24 h – 2 MRE‑equivalents (≈2,400 kcal), six on‑the‑move bars (≈1,500 kcal), one freeze‑dried dinner (≈700 kcal) = ≈4,600 kcal/day; adjust for climate and tasking.
Packaging and preparation: prefer single‑serving vacuum packs and vacuum‑sealed bars to limit weight from packaging. Assign one hot meal option per evening if fuel is scarce; freeze‑dried dinners usually require 300–500 mL of boiling water and 60–90 seconds of simmer to rehydrate fully.
Hydration planning and purification methods
Baseline water needs: sedentary/temperate 2–3 L/day; moderate activity 3–6 L/day; hot/high exertion 6–12 L/day. Calculate water weight directly (1 L = 1 kg) and plan resupply accordingly; recommended on‑route carry is 1–2 days supply unless known water sources exist.
Container strategy: combine a rigid 1 L wide‑mouth bottle (for boiling/filtration) with a 1–3 L collapsible bladder for on‑move drinking. Carry multiple smaller containers to avoid a single point of failure and to allow staged resupply.
Boiling: bring to a rolling boil for 1 minute at sea level; at elevations above ~2,000 m extend to 3 minutes. Boiling reliably inactivates bacteria, protozoa and viruses.
Filtration: use a filter with pore size ≤0.2 µm (hollow‑fiber or ceramic) to remove bacteria and protozoa; those filters do not reliably remove most viruses. Typical flow rates 0.5–2 L/min; service life ranges 1,000–10,000 L depending on model and source water. Pre‑filter turbid water with a cloth or sediment filter and backflush the unit when flow slows (every 1–5 L in heavy silt conditions).
Chemical disinfection: chlorine dioxide tablets neutralize bacteria, viruses and Giardia reliably; for Cryptosporidium allow up to 4 hours contact time with cold water. Iodine is fast for bacteria/viruses but has reduced efficacy against Cryptosporidium and is not recommended for long‑term use, pregnancy, or thyroid disorders. Always follow manufacturer dosing and contact times for temperature/turbidity variations.
UV devices: battery‑powered UV pens treat clear water (1 L in ~60–120 seconds), effective against bacteria, protozoa and viruses; performance drops with turbidity and cold batteries. Combine UV with filtration when source water is cloudy.
Combined approach: for unknown or high‑risk sources use a sequence–pre‑filter → 0.2 µm filter → chemical or UV backup. For viral risk in downstream or human‑impacted waters, add chemical treatment after filtration or use UV after filtration.
Electrolytes and taste: include electrolyte sachets (sodium replacement) and small citrus or flavor tablets to encourage intake. Target sodium replacement roughly 300–700 mg per liter during high sweat losses; adjust by sweat rate and field signs of hyponatremia/dehydration.
Practical checklist (compact): per person per day – 3,000–5,000 kcal planned; 20–30% energy as high‑density bars; 1 rigid 1 L bottle + 1–2 L bladder; pump or gravity filter ≤0.2 µm with prefilter; 20–50 chlorine dioxide tablets (or single UV pen plus spare batteries); one 2,000–2,800 kcal emergency block. Recalculate loads for mission length and water‑source frequency before issuing kit.
Ammunition and weapons accessories: magazine management, cleaning tools, and spares
Assign a mission-specific magazine allotment: for a standard 5.56 rifle plan 6 magazines (≈180 rounds) for short missions and 12 magazines (≈360 rounds) for prolonged operations; handguns require 3–4 magazines (15–30 rounds each) as a baseline.
Label magazines with durable paint or heat-shrink bands indicating status (fully loaded, partial, service required) and record round-count and last-inspection date on each; keep one labeled “hot” set staged in the weapon pouch and reserve sets sealed in dry pouches to prevent contamination.
Inspect magazines after every exposure to sand, mud, or immersion: remove debris with compressed air or nylon brush, check feed lips for deformation, verify spring tension by counting rounds through the follower, and replace springs showing reduced resistance or if feeding failures exceed two occurrences per 200 rounds. Replace magazine springs after roughly 3,000–5,000 cycles or sooner if signs of wear appear.
Field cleaning kit (rifle-centric, minimal weight): one bore-snake per rifle; one 30–50 cm pull-through cord with weighted end; caliber-specific bronze bore brush (5.56, 7.62, 9mm); chamber brush; 12 cotton patches; 30 ml cleaning solvent; 30 ml lubricant (CLP or equivalent); small nylon brush; toothbrush; multi-tool; small parts tray; nitrile gloves; microfiber lens cloth. Target combined kit weight under 1.2 kg for each rifle operator.
Routine cleaning cadence: wipe bolt/carrier and chamber after every firing session; bore-snake through the barrel after 50–200 rounds (short bursts), full detail strip and solvent/brush scrub every 500 rounds or after heavy fouling. Use light, controlled lubrication on carrier/bolt surfaces and a single drop on the firing pin channel; avoid saturating magazines or ammo with oil.
Standard spare-parts set (rifle platform examples): AR-family – spare firing pin, cam pin, extractor spring, bolt gas rings (set of 3), spare buffer spring or buffer; AK-family – spare firing pin, extractor, recoil spring; universal spares – two spare magazines, two spare optic batteries (CR2032/CR123A/AA depending on device), two QD sling mounts, four spare mount screws, 20 cable ties, tube of medium-strength threadlocker. Store small parts in labeled, shockproof compartment boxes.
Optic and electronic spares: two battery sets per device, spare lens covers, microfiber cloth, silica gel packet per storage pouch, spare pressure-switch leads for weapon lights, and a compact torque driver with common bit set for mount screws. Keep one quick-detach red-dot mount and one set of back-up iron sights stowed separately from the optic.
Ammunition storage and rotation: use waterproof metal or polymer ammo cans with two desiccant packs per can; mark lot number and date on the exterior, and consume oldest lots first. Segregate tracers and special-purpose rounds in clearly marked containers and limit quantities to the minimum mission requirement.
Organize the spares kit into four labeled modules: magazines & ammo handling; cleaning & lubricant; mechanical spares; electronics & optics. Aim for rapid access: magazine module at the front of torso-mounted pouches, cleaning module in an exterior admin pouch, mechanical spares in a padded small-parts box, electronics in a sealed bag with silica. Reconcile inventory after each mission and replenish any used items within 24–48 hours.


