
 Michael Turner
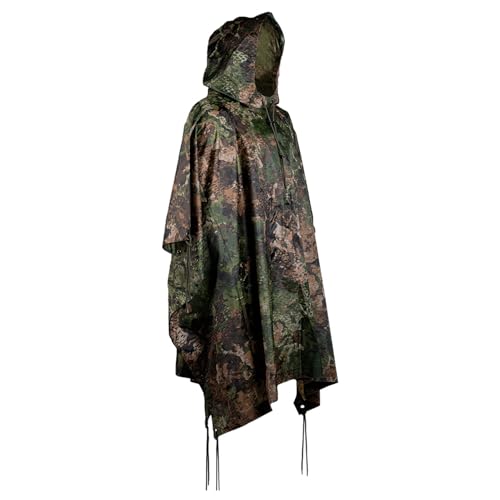
Recommended load: hydration 2.0–3.0 L (1.5 L bladder + 0.5–1.0 L bottle); food: 2 MREs + 500 kcal emergency bar (≈2,400–3,000 kcal total); ammunition: 3 × 30‑round mags for 5.56 NATO or 2 × 20‑round mags for 7.62; medical: compact IFAK with CAT tourniquet, 2 chest seals, 3 hemostatic dressings, 4 compressed gauze pads; shelter/sleep: lightweight bivvy or poncho liner (500–900 g); clothing: 1 insulating midlayer, 1 set dry socks; navigation/comms: map, lensatic compass, compact VHF radio + spare battery; tools: multitool, compact weapon cleaning kit, small roll repair tape; lighting: headlamp + 2 spare CR123/AA cells; hygiene: toothbrush, 20 g hand sanitizer, 1 small towel.
Packing and load distribution: place heaviest items close to the spine and slightly above the hips; position water low and centered for balance; keep the IFAK and rain shell in the top lid or chest rig for immediate access; magazines and primary tool on the outside pockets for rapid retrieval; secure loose items with paracord or elastic straps to eliminate rattle. Target total carried mass of 12–18 kg for short-foot patrols; accept up to 20–25 kg for extended missions but adjust route and pace accordingly.
Mission tailoring and maintenance: adjust volumes for climate – add +1–2 L water and sun protection (SPF 50, lip balm) for arid environments; add insulated layer, chemical heat packs and waterproof shell for cold/wet zones. Pre-mission checklist: verify ration expiry dates, check medication stocks and packaging integrity, confirm battery voltage, inspect seam and zipper integrity, and perform a quick-dry after wet operations. Silence measures: tuck buckles, wrap metal items in cloth, and use low-noise pouches for electronics.

Ruck Contents for Frontline Troops
Prepare a 72-hour tactical load: aim for 9–12 kg mission load (weapon and armor excluded), keep the heaviest items low and close to the spine, and place immediate-response gear on the hip or chest for one-handed access.
Standard loadout with counts and placement
- Ammunition & magazines – 6–8 rifle magazines (5.56) or 4–6 (7.62); 2 pistol magazines; spare ammo in sealed pouches on belt/chest rig; weight ≈ 1.0–1.6 kg depending on caliber.
- Hydration – 3 L bladder (installed against the spine) + 1 L bottled water in side pouch; water purification: Sawyer Mini or chemical tablets (100+ L capacity) stored in drybag.
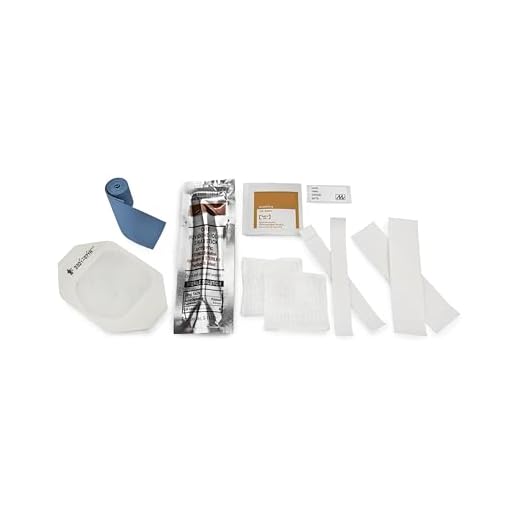
- Medical – Individual first aid kit (IFAK) on hip: 2 tourniquets, 2 hemostatic dressings, pressure dressing, chest seals x2, nasopharyngeal airway; lightweight casualty hold kit in main compartment.
- Protection & clothing – Waterproof shell (packable), insulated midlayer, mechanics gloves + cold-weather gloves, spare socks (2 pairs); stow outer garments in top-lid or compression sack.
- Shelter & sleep – One-person bivy or lightweight tarp, 3-season sleeping bag or quilt, inflatable groundpad; store at bottom to maintain low center of gravity.
- Sustenance – 3 MREs or equivalent high-calorie meals (3,000–4,000 kcal/day target), 6–8 energy bars, electrolyte sachets; snacks in top pocket for quick access.
- Comms & navigation – Handheld radio with spare battery pack, GPS unit with extra batteries, lensatic compass and laminated local map in waterproof sleeve; radio on chest rig, map in top lid.
- Tools & maintenance – Multitool, compact folding saw or entrenching tool (if needed), 10–15 m paracord, 2–3 m duct tape on dowel, small weapons-cleaning kit in waterproof pouch.
- Power & light – Headlamp with red/white modes + spare batteries, USB power bank (10,000 mAh) and solar trickle charger stored with electronics in waterproof case.
- Personal & hygiene – Toothbrush, small soap, quick-dry towel, hand sanitizer, blister kit (moleskin, adhesive), toilet paper in sealed bag.
- Documents & small items – ID, medical card, local currency, notepad and pencil, spare eyewear; keep in inner zip or waterproof pouch.
- Chemical/biological protection – If threat exists: respirator filters or protective mask stored in top-lid for rapid donning.
Packing order and upkeep
- Place heavy, dense items (ammo, water bladder full, fuel) centered and low against the back panel to reduce sway.
- Bottom: sleep system and bulk shelter; middle: bulk clothing, rations; top: rain jacket, map, snacks; exterior pockets: radio, IFAK, multitool.
- Hip belt pouches or chest rig for magazines, IFAK, and navigation tools to allow access without removing the ruck.
- Weekly checklist: verify expiry dates on medical supplies and rations, test electronics and replace batteries, reseal waterproof sacks, and rotate stored food.
- After every sortie: repack using the same layout, log missing/broken items on an inventory card taped inside the top lid for quick resupply.
Immediate combat load: ammo, quick-access optics and weapon spares
Recommended baseline: stage 6–8 30‑round 5.56 magazines on the plate carrier (total 180–240 rounds ready), 1–2 pistol magazines, 2 fragmentation grenades and 1 smoke for obscuration. For 7.62 rifles plan 4–6 20‑round magazines (80–120 rounds). Each loaded 5.56 30‑round mag weighs ~0.45–0.55 kg; account for this in load planning.

Placement and access: primary rifle mags on front chest pouches for one‑handed reloads; pistol mags in admin or hip pouches; specialty rounds (tracer, armor‑piercing) in a marked, waterproof pouch on the assault pack’s top flap for rapid identification. Keep two spare mags inside the plate carrier’s side or shoulder pockets if crossing open ground is expected.
Optics and power management: weapon‑mounted red dot or HWS must be primary; secure on the rail with torque appropriate to the mount. Carry 2 spare batteries per device (CR2032/AA/CR123A depending on model) in a sealed, desiccant‑lined pouch. Include a micro red dot in a quick‑release chest pouch as a hot‑swap spare for optic failure or weapon change.
Immediate weapon spares: for AR‑pattern rifles include a spare charging handle, spare firing pin, and a small bolt‑carrier lubrication tube in a weatherproof pouch. For belt‑fed or LMG crews carry at least one spare barrel and one spare feed tray. Store small spares in separate labeled zip bags to avoid contamination and speed identification.
Tools and field repairs: pack a compact multi‑tool, two heavy zip ties, a 0.5 m roll of electrical tape, a small tube of CLP/lubricant, and a set of Torx/Allen bits for optic/mount adjustments. Add a lens cleaning kit and small roll of elastic lens covers for optics protection.
Consumables and quantities: aim for 2–4 spare optic batteries for extended operations, 4–8 zip ties, one multi‑tool, one 50 ml lubricant bottle, and 3–5 m of 550 cord. Keep a single spare BCG only if weight allowance permits; otherwise prioritize charging handle + firing pin + extractor.
Quick audit before movement: confirm magazines loaded and indexed, optics powered and securely mounted, battery pouch sealed, and a labeled spares pouch accessible from the top of the pack or chest rig. This configuration minimizes time lost on malfunction swaps and maximizes rounds immediately available for engagement.
Individual first aid kit: tourniquet placement, hemostatic dressings and casualty priorities
Place a windlass tourniquet 2–3 inches (5–7 cm) proximal to a major extremity wound, tighten until distal arterial pulse is absent, and record application time on the strap and casualty forehead or helmet.
Tourniquet placement – stepwise
- Position: 2–3 in (5–7 cm) above the wound; never over a joint or on clothing if direct access is possible.
- Device: use a proven windlass-type (CAT or SOFTT-W) or approved commercial junctional device for groin/axilla wounds.
- Tightening: wind until distal pulse is gone and bleeding is controlled; secure the windlass and pack slack to prevent loosening.
- Multiple TQs: if hemorrhage continues, apply a second tourniquet proximal to the first; treat the wound between TQs as uncontrolled.
- Documentation: mark time of application clearly; do not loosen/remove outside of definitive surgical environment.
- Inspection: check for continued hemorrhage and device integrity at routine casualty checks, but do not attempt field loosening.
Hemostatic dressings, packing and adjuncts
- Selection: carry at least two hemostatic dressings (e.g., QuikClot ACS+, Celox or chitosan gauze) in waterproof pouches near the chest or belt for immediate access.
- Packing technique: expose wound, push dressing directly into the wound cavity to the deepest point, pack firmly until resistance is met, then maintain hard manual pressure for a minimum of 3 minutes.
- Overwrap: apply a pressure dressing or rolled gauze over the packed hemostatic dressing; secure with tape or an elastic bandage without disturbing the pack.
- Junctional and pelvic bleeding: combine hemostatic packing with a junctional tourniquet or pelvic binder; if pelvic fracture suspected, apply binder across greater trochanters immediately.
- Non-compressible torso hemorrhage: hemostatic dressings are not a solution for intrathoracic or intra-abdominal bleeding–prioritize rapid evacuation and surgical control.
- Adjunct items: chest seals (two, for sucking chest wounds), NPA for airway patency, nitrile gloves, shears and a permanent marker for time annotation.
Casualty priorities (use MARCH sequence for on-scene actions)
- Massive hemorrhage – control with tourniquet(s) or packed hemostatic gauze immediately; minutes matter for exsanguinating limbs.
- Airway – clear obstruction, perform jaw-thrust/chin-lift, insert NPA for unresponsive breathing casualties when indicated; consider surgical airway only with proper training and clear indications.
- Respiration – open chest wounds, apply two-sided chest seals, perform needle decompression per unit protocol for tension pneumothorax (use approved needle/catheter and site per training).
- Circulation – stop secondary bleeding, establish IV/IO access if trained, administer warm isotonic crystalloids or blood products per medical protocol during evacuation.
- Hypothermia & head injury – prevent heat loss (foil blanket, dry clothing), monitor level of consciousness and pupil changes, expedite surgical care for suspected intracranial hemorrhage.
Recommended minimum kit configuration for one operator: 1 windlass tourniquet, 2 hemostatic dressings (3–5 cm or packed strips), 2 chest seals, 1 NPA (appropriate sizes), pair of nitrile gloves, shears, marker, and a waterproof pouch. Store medical items in a quick-access chest or belt pouch rather than a deep pack.
Non-medical weather or comfort items sometimes included in a compact patrol kit: best umbrella for in pool use, best transparent umbrella.
Water planning: how many liters, filtration tools and refill points
Plan for 3–5 L per day for low-to-moderate activity in temperate climates; 5–10+ L per day for hot, humid or high-exertion missions; treat 1 L as ~1 kg when calculating load weight.
Suggested on-person/reserve split: keep 1 L within immediate reach (pocket bottle or 1 L canteen) and stow 2–4 L as mission reserve (hard bottles or 1.5–3 L hydration reservoir). For multi-day operations without guaranteed resupply, plan resupply intervals and reduce carried volume by mapping refill points.
Hydration hardware: single-cam reservoirs (1.5–3 L) for continuous sip access; 1 L aluminum or polymer bottles for hot/cold liquids and stove use; collapsible 1–2 L soft flasks for emergency reserve. Hard bottles survive impact and can be boiled; bladders save access time but are vulnerable to puncture and freezing.
Filtration and treatment hierarchy: mechanical filtration (hollow-fiber 0.1–0.2 µm) removes bacteria and protozoa and reduces turbidity; UV-C devices inactivate bacteria, protozoa and viruses (typical treatment ~60–120 seconds per liter in clear water); chemical disinfectants (chlorine dioxide tablets) provide viral protection and are lightweight backups but require contact time–follow manufacturer contact-time guidance. Use a two-method approach (filter + chemical or filter + UV) when source quality is uncertain.
Field specs and maintenance: expect hollow-fiber flow rates ~0.5–1.5 L/min depending on turbidity; pump filters ~0.5–2 L/min; gravity systems 0.5–2 L/min. Backflush or flush per manufacturer intervals; carry a small syringe or backflush tool, a spare o‑ring, and keep filters above freezing. Pre-filter highly turbid water with a bandana or mesh to extend element life.
Refill-point selection and routing: map perennial springs, mountain seeps, wells, municipal taps and friendly-force water points on mission charts. In temperate terrain expect reliable surface water every 5–10 km; in arid areas plan for 20–40+ km between dependable sources. Refill at the first secure source encountered rather than pushing on with a near-empty reserve.
Source-risk cues: avoid stagnant pools, downstream of agricultural runoff or industrial discharge, and obvious contamination (foam, sheen, dead fish). If forced to use marginal sources, remove solids (settle/strain), filter, then apply chemical or UV treatment. Boil at a rolling boil for 1 minute at sea level (3 minutes above ~2,000 m) to neutralize pathogens when other methods are unavailable.
Weight and resupply math: water mass (kg) = liters carried. Example: 24-hour need at 6 L = 6 kg; three-day autonomy without resupply = 18 kg. Reduce mass by increasing planned resupply frequency, prioritizing route selection that intersects mapped water sources, and relying on lightweight treatment options rather than carrying all mission water as bodily load.
Shelter and sleep system: poncho, sleeping bag choice and compact setup steps
Recommendation: Select a 3-season down bag rated to −5°C (20°F) with 700–900 fill power, compressed volume ≤12 L and weight ≤1,000 g; include a synthetic alternative rated to 0°C (32°F) for operations in persistently wet environments.
Down vs synthetic: Down at 700–900 FP gives best warmth-to-weight: typical weights 600–1,000 g and loft recovery after compression; store in a waterproof stuff sack (10–15 g DWR dry bag) when exposed to moisture. Synthetic maintains ~70–100% insulation when wet, but expect 30–70% higher weight and 1.5–2× greater compressed volume (15–25 L).
Temperature ratings and liners: Use EN/ISO comfort and lower-limit numbers: for static night rest choose a bag whose comfort rating is ≥5°C lower than forecast night temperature. Add a silk or fleece liner to increase rated warmth by ~3–7°C and keep liners in a small packable pouch (≤150 g).
Sleep pad selection: Match pad R-value to expected lows: R≈1.5 for mild (≥5°C), R≈2.5 for cool (0–5°C), R≥4.0 for subzero. Prefer insulated inflatable pads for compact volume (compressed to 1–2 L in a sleeve) and closed-cell foam pads as a minimal backup (weight 85–300 g depending on size).
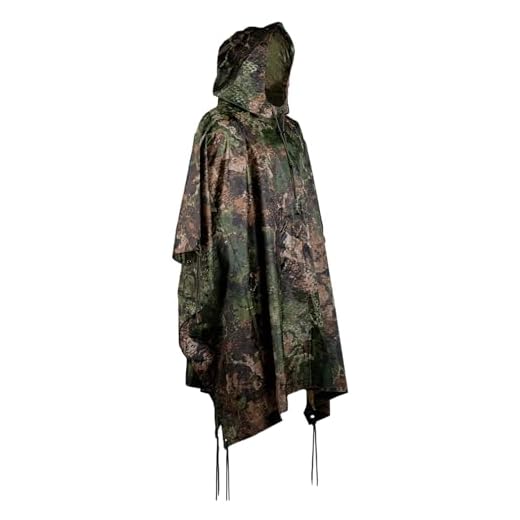
Poncho specifications: Choose a silnylon or coated nylon poncho/tarp 210×140 cm (≈84×55 in) with taped seams, reinforced grommets at corners and midpoints, and a center drain point. Weight target 300–500 g. Include a lightweight 3–4 mm cord ridgeline (3–4 m) and six stakes: four V-shaped aluminum stakes (20–30 g each) plus two heavier sand/soft-ground anchors.
Two common tarp pitches: A-frame: set two poles or trees ~140–160 cm apart, ridgeline height 110–130 cm, stake sides at 30–45° angles; provides wind deflection and head/foot coverage. Lean-to: use single high anchor and stake opposite edge low for quick quick-access shelter and improved ventilation.
Condensation control: Leave footbox vented 2–4 cm, pitch tarp with 10–20 cm gap at the ridge ends for crossflow, and avoid placing bivy bag directly against the tarp. If using down, keep liner and bag dry in a vapour-barrier or breathable outer sack and dry inside clothing before entry.
Compact setup steps: Step 1: Select flat site, clear sharp debris and dig small drainage trench if needed. Step 2: Lay poncho/tarp as groundsheet with center seam perpendicular to wind. Step 3: Deploy pad, inflate and position sleeping pad under chest/hips for maximum insulation. Step 4: Set ridgeline (3–4 m) between two points at ~120–130 cm height, tension with cord and two midpoints. Step 5: Pitch tarp to A-frame or lean-to; stake each corner with 30–45° pull and add guylines for gusts. Step 6: Enter bag, adjust vents, store clothes and electronics in closed dry bag at shoulder/foot end to reduce heat loss and prevent compression of loft overnight.
Food and fuel: ration types, calorie planning and lightweight cooking methods
Recommendation: plan 3,500–4,500 kcal per high-activity day and 2,500–3,200 kcal per low-activity day; carry 1.5–2 days of full rations plus a 800–1,200 kcal emergency reserve in ultra-dense form.
Ration types and metrics: MRE/retort pouches ~1,000–1,300 kcal per meal, weight 900–1,200 g per meal kit; freeze-dried meal pouch 600–900 kcal, dry weight 100–200 g; patrol/snack rations (compressed bars, nut mixes) 200–400 kcal per item at 50–120 g; high-fat packets (olive oil, nut butter) ~900 kcal per 100 ml or ~600–700 kcal per 100 g. Typical shelf life: MREs 3–5 years at room temperature; vacuum-sealed dehydrated pouches 2–10 years depending on packaging.
Calorie-density planning: use fat-forward items to minimize mass: pure fats ~9 kcal/g (so ~110 g for 1,000 kcal), nuts/chocolate ~5.5–6 kcal/g (~165–185 g for 1,000 kcal), dehydrated complete meals ~3–4 kcal/g (~250–330 g per 1,000 kcal). Target a minimum of 1,000 kcal per 200 g of high-density food for assault patrols where weight is critical.
Fuel method selection: canister stoves (isobutane/propane) are light and clean; expect ~10–15 g of canister fuel per 1 L boil in calm conditions–budget 30–60 g/day for three boils. Liquid-fuel (white gas/multi-fuel) works in cold and winds; estimate ~25–50 g white gas per 1 L boil–carry a refillable 100–200 g bottle for multi-day ops. Solid-fuel tablets (hexamine/Esbit) require ~2–4 tablets per 1 L boil; pack 10–20 tablets for short missions. Alcohol stoves typically consume ~30–40 ml denatured alcohol per 1 L boil.
Efficiency measures to reduce fuel and time: use a windscreen and pressure-stable stove to cut fuel use by 30–50%. Match pot size to ration: 450–700 ml pot for single-serve rehydrates; use a pot cozy (insulating wrap) to finish rehydration off-boil, saving one subsequent boil. Pre-measure water volumes and use minimal rehydration water printed on pouch to avoid wasted heating.
Minimal cooking kit checklist (recommended weights): titanium pot 450–600 ml (80–120 g), lightweight stove (canister or alcohol) 30–120 g, 1 plastic/ti spork (10–20 g), lighter + ferro rod (10–30 g), small windscreen (30–60 g). Aim for total cooking kit under 300 g for solo operations.
Pack and menu strategies: combine one heat-required meal per day with additional ready-to-eat high-calorie snacks. Add 50–100 ml oil packets per day to any dehydrated meal to raise calories by ~450–900 kcal while adding only 45–90 g of mass. Vacuum-seal mixed snacks in single-meal pouches for quick access and weight distribution.
Resupply and contingency rules: if resupply interval >48 hours, increase emergency reserve to 1,200–1,500 kcal in fat-dense form; if temperature <0°C, prefer liquid-fuel stoves or fuel canisters rated for cold use and add 10–25% extra fuel for longer burn times. Store fuel separately and label clearly; keep one backup ignition source per team member.