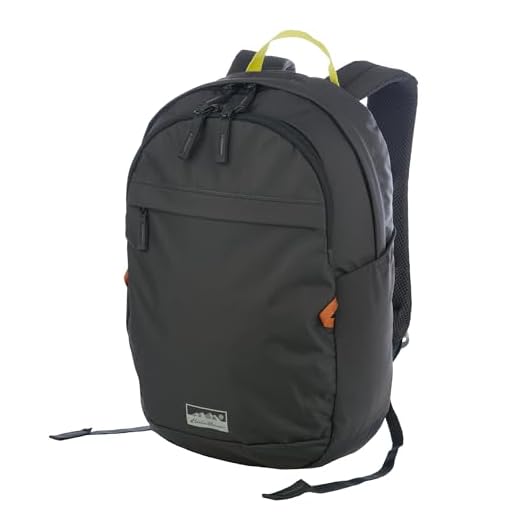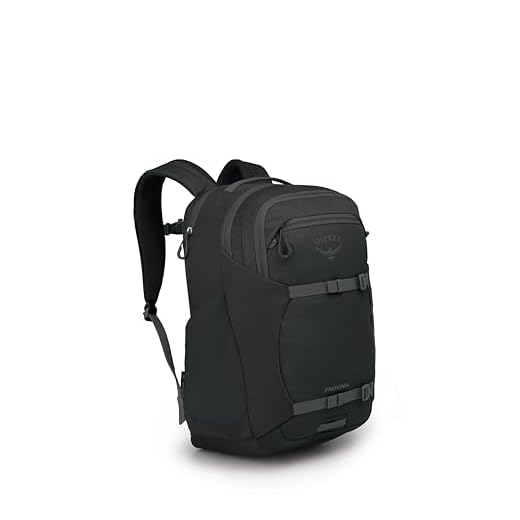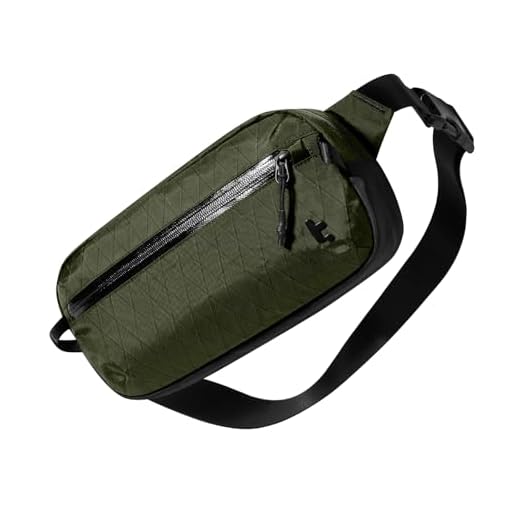


Target capacity: 20–30 liters for city use, 35–45 L for short trips. Aim for an empty weight between 600–1,200 g for urban carry and 900–1,600 g for larger weekend packs. Choose high-denier fabrics: 500D nylon or 1000D Cordura for abrasion resistance; look for a PU coating rated roughly 2,000–5,000 mm or a durable water-repellent (DWR) finish plus taped seams if you need true weather protection.
Fit and load management: shoulder straps 45–60 mm wide with 10–15 mm foam density for comfort, a lightly padded hip belt for loads above 8–10 kg, and a sternum strap to stabilize movement. The internal laptop sleeve should accommodate 13–16″ devices (approx. 30–38 cm height, 22–27 cm width). Keep carried load under 10–15% of body weight for sustained comfort during walking or cycling.
Organization and features: include at minimum one quick-access front pocket (for phone/wallet), two internal compartments or dividers, side pockets sized for 0.75–1 L bottles, and external compression straps to reduce bulk. For photographers or commuters, a modular divider or removable insert adds versatility. Check zipper quality (YKK or equivalent) and replaceable hardware for longevity.
Maintenance checklist: wash by hand with mild detergent, air dry away from direct heat, renew DWR with a spray-on product (e.g., fluorine-free formulas) and reseal high-wear seams with seam sealer if leaks appear. For repairs, use heavy-duty nylon thread and polyurethane repair tape for small cuts; replace buckles and webbing at outdoor gear repair shops when necessary.
Real-life daypack: concise guide and selection advice
Choose a 20–30 L ergonomic rucksack with a ventilated back panel, padded laptop compartment (up to 15″), and water-shedding fabric if your daily kit includes electronics and a change of clothes.
Capacity, fit and load limits
Capacity guidelines: 10–15 L for minimalist carry (phone, wallet, small bottle); 20–30 L for daily office or campus use with a 13–15″ laptop; 30–45 L for overnight trips; 45+ L for extended travel. Empty pack weight targets: ultralight 200–400 g; standard urban 500–900 g; travel 900–1,400 g. For comfort keep load beneath 10%–15% of body mass for day use; add a padded hip belt when carrying sustained loads above ~8–10 kg. Measure torso length from C7 vertebra to the top of the iliac crest and choose a harness with at least 2–3 cm of adjustment range.
Materials, security features and upkeep
Material choices: Cordura 500D for balanced durability and weight; Cordura 1000D for high-abrasion areas; 210–420D ripstop nylon for lighter models; TPU-laminated nylon or welded seams for full waterproofing. Hardware: prefer YKK zippers (AquaGuard or water-resistant models for exposed pockets), Duraflex buckles and reinforced strap attachment points (bar-tack or box-x stitching). Security features to look for: lockable two-way zippers, concealed slash-resistant panels, RFID-lined document pocket, and internal organization that hides valuables. Cleaning and repairs: spot-clean with mild soap and lukewarm water; avoid tumble drying and strong detergents; reapply a fluorine-free DWR spray when water no longer beads; repair tears with Tenacious Tape or replace sliders and buckles using rivets or bartack stitching; seam-tape welded seams for restored waterproofing.
Choosing the right size and capacity for everyday carry
Choose a 15–20 L daypack for most commuters: fits a 13–15″ laptop, 750 ml water bottle, packed lunch, light jacket and a small electronics pouch without excess bulk.
8–12 L – Minimal carry: phone, wallet, keys, 300–500 ml bottle, compact umbrella, small power bank; fits tablets up to 10″. Best for short errands, cycling or minimalist city use.
13–15 L – Compact commuter: 13″ laptop or large tablet + charger, slim notebook, sunglasses case, 500–750 ml bottle. Good for people who prioritize slim profile and quick access.
15–20 L – Standard commuter: 13–15″ laptop, lunchbox, light jacket, medium camera or A4 notebook, 750–1000 ml bottle, one accessory pouch. Balances capacity and daily comfort for most office or campus routines.
20–25 L – High-capacity day carry: 15–16″ laptop, lunch, mid-size camera kit (one body + 1–2 lenses) or gym clothes, larger water bottle (1–1.5 L). Choose this when you regularly carry multiple bulky items.
25–35 L – Multi-role pack: 17″ laptop, full camera kit or change of clothes plus shoes, lunch and larger organizers. Use when combining work, fitness and occasional parent or photo duties in a single bag.
Aim for loaded weight under 5–7 kg for all-day comfort; cyclists and long commuters should target 3–5 kg. If the packed weight exceeds ~5 kg, prioritize a padded hip belt and wider shoulder straps to shift load from shoulders to hips.
Measure actual items before selecting capacity: sum volumes and add ~20% spare capacity for bulky textiles (jackets, lunch). Check manufacturer internal dimensions–especially laptop sleeve height and depth–rather than relying on advertised liters alone.
Look for these features matched to capacity: padded, telescoping laptop sleeve for 15″+ units; clamshell opening for full-packing 20+ L models; external water-bottle pockets for quick access; compression straps to stabilize small loads; ventilated backpanel for packs above 20 L; removable hip belt when carrying 5+ kg regularly.
Quick decision rules: carry only electronics and small essentials → 13–15 L; add lunch and jacket → 15–20 L; include gym or photo kit → 20–30+ L. Prefer slightly larger volume than the bare minimum to avoid overstuffing and maintain organization.
Packing and organizing camera, laptop and charging gear for a daypack
Place the laptop into the rear padded sleeve, the camera body inside a modular padded insert at the center, and chargers in labeled cable pouches.
Packing order and physical protection
- Laptop placement: rear sleeve closest to the spine for stability; use 5–12 mm high-density foam or neoprene sleeve. Fit tolerance: leave 5–10 mm clearance around the device for shock absorption.
- Camera module: use a removable padded cube with 15–30 mm padding on walls and configurable dividers. Position the cube between the laptop and outer compartment so lenses face toward the center of mass.
- Lens handling: store lenses vertically with caps on; separate items by 10–30 mm (1–3 cm) using dividers. Place heavier lenses (70–200mm, telephotos) closest to the spine or bottom to keep weight centered.
- Body + prime setup: camera body with a short prime attached goes into a dedicated slot; keep a medium tele or zoom in an adjacent slot for easy single-handed removal.
- Tripod/monopod: use an external straps system or store collapsible tripods in an external pocket to avoid crushing internal gear.
- Weather protection: pack a waterproof cover or a 20 cm × 30 cm roll-up rain shield in a top pocket; keep silica packets with camera gear to reduce humidity.
Cable, battery and charger organization
- Power bank selection: choose a USB-C PD bank rated 60–100W output for laptop charging and camera USB-C charging. Recommended capacity 18,000–27,000 mAh for multi-device use. Carry-on only: keep power banks in hand luggage; be aware airlines allow up to 100 Wh without approval and 100–160 Wh with airline permission.
- Charger pouch system:
- One small pouch (12×8×3 cm) for short charging cables (15–30 cm) and adapters.
- One medium pouch (20×12×5 cm) for laptop charger, multiport PD wall charger, and USB-C hub.
- Use color-coded tape or heat-shrink labels on each cable: color for device type (red = camera, blue = laptop, green = power bank).
- Battery handling: carry 2–3 spare camera batteries per body in a padded hard case; keep hot-swap battery in camera and spares in a separate compartment to avoid accidental contact. Store lithium batteries in carry-on with terminals protected.
- SD card protocol: use a protective plastic or metal case holding 6–12 cards; label slots by card number and session (e.g., A01–A04). Keep one empty card in a quick-access pocket and backup cards in a separate compartment.
- Cable management tools: include 4–6 Velcro straps, a 10×6 cm cable roll or elastic organizer, and a USB tester if you need to confirm PD wattage on the go.
Packing checklist (quick scan): laptop + sleeve, laptop charger, camera body with lens attached, lens(s) in padded dividers, 2–3 spare batteries, power bank (PD 60–100W), short USB-C cable, camera USB cable, SD card case (4+ cards), small tool kit (blower, cloth, multi-tool), rain cover, cable pouches.
- Access pattern: keep daily-use items (phone charger, wallet, keys, one SD card) in top/front pockets; store heavier tech low and close to the back panel for balance.
- Daily prep: charge power bank to >80% and check spare battery levels before departure; perform a tactile checklist–laptop, camera, primary lens, spare battery, power bank–before zipping the main compartment.
Selecting materials and weather protection for outdoor and commuting use
Choose materials by exposure: 300–500D nylon or polyester with a durable water-repellent (DWR) finish and a 1,500–5,000 mm PU coating for daily commuting; 500–1,000D Cordura or laminated Dyneema Composite Fabric (DCF) with taped seams and welded closures for extended wet-weather use.
Fabric, reinforcements and hardware
Use 300–500D nylon/polyester (70–200 g/m²) for low-weight urban gear; select 500D or 1000D Cordura (higher abrasion resistance, heavier) for trail or trades work. For ultralight trekking choose DCF (50–200 g/m²) but add nylon patches on base and shoulder areas because DCF resists puncture poorly. Bottom panels: TPU- or PVC-coated fabric (≥ 1,000D equivalent) or reinforced 1680D ballistic nylon. Zippers: water-resistant coil or molded-YKK AquaGuard; aim for #8–#10 sizes on high-load openings. Webbing: 25–38 mm mil-spec nylon; buckles: Duraflex/ITW or equivalent. Stitching: bar-tack stress points and double-needle seams on load zones.
Waterproofing strategies and upkeep
Select closure type by wetness risk: roll-top with welded seams yields highest waterproofing for packs that must stay bone-dry; taped seams plus laminated waterproof liner (≥10,000 mm hydrostatic head) for full protection; storm-flapped water-resistant zippers for mixed use. Rain covers made from 70–100D ripstop nylon with 2,000–5,000 mm PU coating provide reliable short-term protection and stow in an integrated pocket; choose one with elastic hem and reflective trim. For electronics use dedicated TPU-lined sleeves or small dry bags rated ≥10,000 mm hydrostatic head.
Maintenance protocol: wash with lukewarm water and mild soap, air-dry out of direct sun. Restore DWR after cleaning using a wash-in or spray-on reproofing (Nikwax TX.Direct, Granger’s Repel or comparable PFC-free) and reactivate per product instructions (low heat dryer or warm iron through cloth if fabric allows). Re-seal needle-punctured seams with seam sealer or replace with professional seam tape; repair abrasion holes using adhesive-backed Cordura/nylon patches or welded TPU patches for laminated fabrics.
Adjusting straps, hip belts and load distribution to reduce fatigue
Set the hip belt so 70–80% of total carry weight rests on the hips; place the belt over the iliac crest (top of the pelvis) and tighten until you can slip two fingers between pad and body. This transfers load off the shoulders and reduces upper-body fatigue.
Adjustment sequence
Tighten in this order: 1) fasten and snug the hip belt, 2) bring shoulder straps up so pads contact but do not bear full weight, 3) set load-lifter straps to a 30°–45° angle from the pack to the shoulders, 4) clip and adjust sternum strap 6–8 cm below the collarbones, 5) finish with side compression straps to pull the load close to the torso. Recheck hip belt tension after shoulder adjustments; increase hip tension if shoulders still carry weight.
Load placement and balancing
Place the heaviest items within 4–6 cm of the spine, centered between the shoulder blades and lumbar area–this reduces torque and keeps the center of mass close to the body. Use weight distribution targets: 60–70% of mass centered near the mid-back, 20–30% lower toward the hip zone, remaining 10% for outer and top pockets. Keep heavy items centered left-to-right within ±100–200 g to avoid lateral sway.
For laptops and camera kits, locate the case in the internal sleeve or a central compartment close to the spine; avoid placing heavy gear in external side pockets. Store frequently accessed items (phone, keys, snacks) in hip-belt pockets or upper chest pockets to minimize stops and asymmetric reach.
Adjust sternum strap just enough to prevent shoulder straps from slipping; it should allow full chest expansion while holding straps inward. If neck or shoulder pressure persists, slightly lower or raise the shoulder straps in the harness slots to match torso length (measure from C7 vertebra to iliac crest for correct harness height).
Compression straps should be tightened until contents stop shifting; if soft items move, reorganize heavier pieces closer to the back or add packing cubes to stabilize. For long periods of carrying, perform micro-adjustments every 30–60 minutes: loosen shoulders briefly, re-center load, then retighten hip belt and load-lifters.
Anti-theft measures and quick-access options for crowded urban travel
Choose a slash-resistant daypack with lockable zipper sliders, a hidden rear RFID sleeve and an external waist-belt pocket for one-handed transit taps.
Slash protection: use shoulder straps and rear panel reinforced with stainless-steel or UHMWPE (Dyneema) cable mesh; straps with an integrated steel core resist cutting and should specify tensile strength ≥ 2000 N. Verify manufacturer claims by inspecting cut tests or third‑party reviews.
Zippers and locks: prefer YKK or equivalent water‑resistant sliders fitted with lockable pulls that can anchor to a small D‑ring. Carry a 3–4 mm braided steel cable lock with a 3–4 digit resettable combination for short stops; use a carabiner to secure the cable to fixed street furniture or a cafe chair leg.
Hidden compartments: keep passports, spare cards and large‑value items in a pocket pressed to the back (between bag and torso). Use an RFID-blocking sleeve that advertises blocking at 13.56 MHz and 125 kHz for contactless cards. Reserve front-facing quick-access pockets for low-value, frequently used items only.
Quick access design: place a shallow, zippered waist-belt pocket (~12×8 cm) for transit cards and small phones, and a top-panel magnetic pocket with a discrete zipper behind the flap for earphones or a metro card. Use magnetic closures with a secondary zip so a grab won’t expose contents.
Anti-snatch carry techniques: switch to front carry while on packed trains; route the shoulder strap across the chest and clip the sternum strap. When seated, thread a slim security cable through a strap and loop it under the chair to deter grabs.
Modular organization: keep a tethered key clip and a short leash for small camera bodies or wallets inside the main compartment. Store a compact umbrella in an exterior side pocket designed for collapsible umbrellas – see practical compact options like best umbrella for newborn photography and larger outdoor choices at best deck table umbrellas when selecting size and folding type.
Special cases: if transporting temperature-sensitive items or food items, check appliance reliability and transport planning – for example, research sources such as are there any problems with beko freezers before relying on frozen goods en route. For perishables, use an insulated pouch with phase-change packs rather than the main compartment.


