Contact the manufacturer’s support or a licensed security technician with photo ID and proof of purchase to request authorized recovery; I cannot provide step-by-step bypass instructions for a secured closure.
Locate model and serial identifiers first – common spots are the hinge area, beneath the interior lining, or stamped on the metal frame. Photograph those markings, save order numbers from receipts or retailer accounts, and check original packaging for any factory key code or default combination reference; these details are what manufacturers use to produce replacement components.
If immediate access is required, take the item and identification to an authorized service center or a reputable luggage/portfolio repair shop. Service fees typically range from $20 to $120 depending on brand and part availability; simple key replacements can be same-day, while factory parts or coded resets may take several business days after ownership verification.
Prevent future lockouts by registering the product with the maker, storing a spare key or code in a secure location (safe deposit box or trusted contact), keeping digital photos of serial/key numbers with purchase records, and noting the model on warranty paperwork for quick reference.
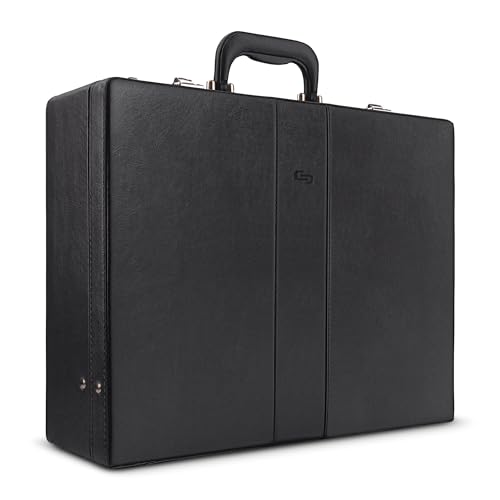
Identify the mechanism type and model on your case
Check for stamped brand names, part numbers, serials or symbols on the metal housing and inside the flap; photograph each marking and compare against manufacturer parts lists or exploded diagrams.
Determine the mechanism category by visible cues: a keyhole only = keyed tumbler; rotating wheels = numerical combination mechanism; small push-button or slide = mechanical latch release; keypad or battery compartment = electronic module. Record number of dials, presence of a reset pinhole, and whether the release is spring-loaded or sliding.
Keyway and profile diagnostics
Photograph the keyway from straight-on with a reference object (coin or ruler). Identify profile shape: flat blade, double-bitted, tubular (circular), wafer/tumbler. Compare images with online keyway galleries or locksmith reference charts to find matching profiles and manufacturer codes.
Measurements, photos and search terms
Measure and record: distance between fixing screws (center-to-center), bolt travel (mm), plate thickness, and screw thread diameter. Use a caliper for accuracy; common fastener threads on small cases are around 3–4 mm but record the actual value. Capture these photos: full front, side profile, close-up of keyway/dials, internal mechanism with lining removed, stamped markings, and mounting screw locations. Search with combined terms such as “[brand] latch assembly”, “[brand] combination mechanism”, “[part number] replacement”, or “model diagram” and submit photos to manufacturer support or specialty parts sellers for verification.
Check for Original Key, Spare Key or Written Combination
Locate and confirm the original key or recorded combination before attempting mechanical methods; inspect these specific sources immediately.
On the product: examine inner pockets, sewn linings, zippered compartments, pen loops and the underside of hardware plates for a folded slip, stitched envelope or branded pouch that commonly holds a key or combination card.
At home and work: check desk drawers, safes, key bowls, vehicle glove compartment, coat pockets, travel document folders and any labelled storage boxes. Ask household members or office administrators whether a spare was filed with other keys.
Digital and paper records: search purchase confirmation emails, retailer order history, product registration pages, phone photos taken at the time of purchase, planners, and password managers for numeric sequences saved under the item’s name.
Identification and manufacturer support: note model and serial numbers stamped on the hardware or case interior; provide those numbers plus proof of purchase to the manufacturer or authorized dealer – many will supply a replacement key or confirm the factory-set code.
If no original or spare is located, request from the seller or previous owner any handed-over documents, receipts or photos that might contain the combination; document any recovered code securely (encrypted file or password manager) and create a duplicate key at a reputable locksmith if a blank key profile or code is available.
| Item to check | Where to look | Action if found |
|---|---|---|
| Original key | Branded pouch, purchase box, key bowl, safe | Verify fit without forcing; photograph and store a copy; label for future reference |
| Spare key | Family/office, vehicle storage, desk drawer | Make a duplicate at hardware or locksmith; record key code if present |
| Written combination | Warranty card, planner, phone note, product photos | Test on the mechanism carefully; save securely in an encrypted location |
| Serial / model number | Underside, hinge plate, receipt | Contact manufacturer with serial and proof of purchase to request replacement key or combination confirmation |
| Previous-owner records | Seller emails, handover documents, property inventory | Request documented code or spare key and written confirmation of transfer |
Contact the Manufacturer for Default Codes or Reset Instructions
Call the manufacturer’s support line with model and serial number ready to request the factory default combination or the official reset procedure.
- Information to prepare:
- Exact model name/number and visible serial/production code from the casing or internal tag.
- Clear photos: exterior label, code wheels or keypad, hinge area, and any stamped identifiers.
- Proof of purchase: receipt, order number, retailer and purchase date; company ownership letter if applicable.
- Contact details: full name, return address, daytime phone and e‑mail.
- Primary contact channels:
- Phone support – request a ticket number and technician name; note business hours and expected SLA.
- Official e‑mail – attach photos and receipts; keep attachments under the carrier’s size limit or provide download links.
- Manufacturer support portal – open a case, upload files, select category related to security mechanism or code assistance.
- Authorized service centers – ask for local certified technicians for in‑person code resets or parts replacement.
- Sample e‑mail template (concise):
Subject: Request for factory code / reset procedure – Model: [MODEL], SN: [SERIAL]
Body:
- Purchased from: [RETAILER] on [DATE]; attached: receipt.pdf
- Attached photos: label.jpg, mechanism.jpg
- Request: Provide factory code or official reset instructions; advise on service center if physical inspection required.
Contact: [NAME], [PHONE], [EMAIL]
- What to expect from the manufacturer:
- Identity verification – copy of ID plus proof of purchase; some brands require notarized documents for high‑value items.
- Possible responses: factory code, model‑specific reset sequence, firmware or software update steps for electronic units, or referral to a service depot.
- Fees and timing – warranty cases are often free; out‑of‑warranty service may carry diagnostic and shipping charges; typical response window 24–72 hours for consumer brands.
- When sending the item, request a written estimate, tracking number, declared value and insurance coverage for transit.
- If the product is discontinued: request legacy support, archived manuals, or contact details for third‑party specialists familiar with old models.
Prepare proof of ownership and serial numbers for locksmith service
Bring these original documents: government-issued photo ID, original purchase receipt or email order confirmation showing buyer name, seller, date and transaction ID, warranty card or manufacturer registration, and the credit-card or bank statement line that matches the purchase. If purchase was via a marketplace, include the shipment tracking number or invoice PDF.
Locate serials and identifier codes: inspect metal nameplates, stamped numbers under the frame, printed barcode stickers inside zippered pockets, engraved digits on the fastening cylinder or latch housing, and fabric tags sewn into the lining. Record the full alphanumeric string exactly as printed, including hyphens, spaces and letter case.
Capture evidence photos: take one wide shot showing the item in context and one close-up of each identifier with a scale (ruler or coin). Use macro mode or a magnifier, enable flash if engraving is faint, and save raw/high-resolution files. Name files with model, serial and date (e.g., “ModelX_SN12345_2025-08-21.jpg”) and keep unedited originals plus cropped copies for quick viewing.
If original paperwork is missing: prepare a notarized affidavit of ownership that includes owner full name, description of the case (make, model, color), serial or last-known digits, date of purchase or transfer, and owner signature plus notary seal. Add a recent utility bill or bank statement showing name and address and any available shipment labels or seller correspondence.
Transfer and presentation protocol: send photos and PDFs to the technician ahead of the appointment via encrypted email or the locksmith’s secure upload portal; bring printed copies and the same files on your phone or a USB drive. Redact unrelated financial numbers on bank statements before sharing. If acting on behalf of someone else, provide a signed authorization letter with a copy of the owner’s ID and contact number.
Arrange non-destructive service with a certified locksmith
Hire a bonded, insured locksmith who issues a written no-drill/no-cut guarantee and specifies non-destructive entry techniques before scheduling.
Pre-appointment checks
Verify business license and certification: examples include ALOA Certified, CML (Master Locksmiths Association) or equivalent regional credentials; request certificate numbers and confirm via the issuing organization’s website. Ask for proof of liability insurance and a bond; request policy provider and limits. Read three recent, dated customer reviews that reference non-destructive work on portable cases or small enclosures. Obtain a written, itemized estimate with: service-call fee, hourly rate, expected total range, and explicit statement that no drilling or cutting will occur without prior authorization.
On-site protocol and deliverables
Photograph the case exterior and fastening hardware before work begins. Require the technician to explain the chosen method (decoding, impressioning, manipulation, key impression, or code reconstruction) and present any specialized tools to be used. Instruct the technician to pause and present options if a non-destructive method appears infeasible; continue only after signed consent for any additional measures. Collect a completion report and itemized invoice listing time, parts, final condition, and any new key codes or combinations created; demand a workmanship warranty (commonly 30–90 days). Retain all documents for insurance or resale records.
Document the process and repair or replace the security mechanism afterward
Photograph the security mechanism from six angles, include close-ups of any stamped numbers, capture the dial/wheel positions and record a timestamped video of the mechanism’s behavior before touching hardware.
Documentation checklist
File naming: use YYYYMMDD_stepNN.jpg and YYYYMMDD_video.mp4; log: spreadsheet columns = step#, action, tool, fastener ID, photo filename, elapsed time; parts photo: place a ruler (mm scale) next to each component for size reference; serials: transcribe serial/model numbers and photograph the interior label; combination state: capture dial alignment with a macro shot showing wheel gaps and index marks.
Disassembly record: label screw locations with small resealable bags and numeric stickers; keep screws grouped by bag; photograph each disassembly step from the same angle so reassembly order is obvious; note torque/driver size used (Phillips #0, #00, Torx T6, M2.5/M3/M4 thread size).
Damage audit: photograph fractures, deformed cams, worn teeth, corroded springs; measure bent cam offset (degrees) and metal thickness (mm). If housing crack >2 mm or cam misalignment >10°, mark for replacement rather than repair.
Repair vs replacement decision matrix
Repair if: stuck tumblers, rusty slides, missing spring tension, or stripped threads that respond to cleaning, lubrication and parts swap. Typical parts cost: springs $3–12, tumblers/wheels $8–30, mounting screws $1–5. Recommended materials: stainless replacement springs of same wire gauge, cam screws M3×6–8mm, replace broken pins with 1.5–2.0 mm stainless dowels.
Replace the mechanism if: housing fracture, cam teeth sheared, combination wheel teeth missing, or multiple irreplaceable parts – estimate: aftermarket mechanism $20–80; professional replacement labor $40–160. If the entire case is inferior or damaged beyond cosmetic repair, compare full-case options such as best luggage for over packers.
DIY repair tips: use graphite powder on friction wheels, silicone spray on sliding surfaces; avoid oil-based lubricants that attract dust. Use Loctite 222 on micro screws where vibration may loosen hardware; torque small screws to ~0.3–0.6 Nm. Replace springs with ones matching free length and constant force; if soldering is needed, use 60/40 rosin-core and protect surrounding plastic from heat.
Parts sourcing: search manufacturer part number from the interior label; if unavailable, photograph the mechanism’s underside and compare dimensions with aftermarket suppliers or locksmith distributors. Save vendor links and order numbers in the log.
Post-repair verification: run five full cycles of the mechanism while recording video; confirm repeatable dial positions and no play greater than 0.5 mm at the cam. Retain all replaced components in a small sealed bag attached to the case for warranty or resale clarity.
Cleaning and finishing: vacuum and spot-clean the interior; for fabric linings that need machine washing after repair, consult a reliable machine guide such as best full load quick wash washing machine to avoid shrinkage or damage.
FAQ:
I lost the key and forgot the combination to my briefcase. What practical steps can I take to get access without damaging the case?
First, stop using force or improvised tools that might break the lock or harm the contents. Look for any spare key or written combination where you keep documents. Check the briefcase manual, purchase receipt, or retailer account for a recorded code or key number. If the lock has a visible brand or serial number, contact the manufacturer or the store where you bought it; they can often provide replacement keys or reset instructions after you prove ownership. A licensed locksmith can open most briefcase locks with minimal damage and will usually ask to see ID or proof that the case belongs to you. Costs vary by location and complexity, but expect a modest service fee plus any replacement parts. If the case contains sensitive items, consider removing valuable items or asking the locksmith about on-site options so the contents remain secure. Avoid attempts that could void a warranty or make repair more expensive.
Is it legal and safe to try picking a briefcase lock or to use household tools to force it open at home?
Legality depends on ownership and local law: working on a lock that belongs to you is generally permitted, while tampering with someone else’s property can lead to criminal charges. Even for your own case, using improvised tools can damage the lock, the briefcase body, or the items inside, and may void any warranty or affect insurance claims. Rather than attempting lock-picking, try non-destructive options such as searching for written combinations, checking any backup keys, or contacting the manufacturer with proof of purchase. If those fail, a professional locksmith or an authorized service center is the safest choice; they can explain expected costs, whether the lock can be repaired or should be replaced, and what documentation they need from you. If the lock is electronic, contact the manufacturer’s support line and have the model and serial numbers ready; they can advise on authorized repair paths. In all cases weigh the risk of damage against the value of the contents before attempting home remedies.