


Recommendation: pick a carrier-mounted travel pack sized approximately 38×25×18 cm (15×10×7 in) with a rated payload of ≤12 kg and a body weight near 1.4 kg. Look for welded seams, TPU-laminated 600D polyester, and water-resistant YKK zippers to keep electronics and textiles dry during extended rides.
For fitment, ensure the base uses four mounting points that match a plate roughly 200×120 mm. Hardware should be stainless steel, M6 bolts tightened to 8–10 Nm, and include anti-rotation clamps or quick-release brackets for tool-free removal. If the carrier has slotted rails, choose straps with cam-locks and a reinforced anti-slip backing to prevent lateral movement at speed.
Construction details to prioritize: a reinforced EVA foam backer to protect paint, a welded waterproof inner liner, an internal compression strap system and at least two mesh pockets for organization. Reflective piping along seams improves visibility; an integrated rain hood or zip-off cover is a plus. Expect a usable main compartment of about 28 L with two external pockets of ~2–3 L each.
Packing and maintenance tips: place the heaviest items closest to the mounting plate and forward, secure contents with internal straps, and keep fluids in sealed bottles away from electronics. Clean the fabric with mild soap, rinse, and air dry; annually check welded seams and reapply a seam sealer if minor leaks appear. Inspect fasteners after the first 50–100 km and then at regular intervals during long trips.
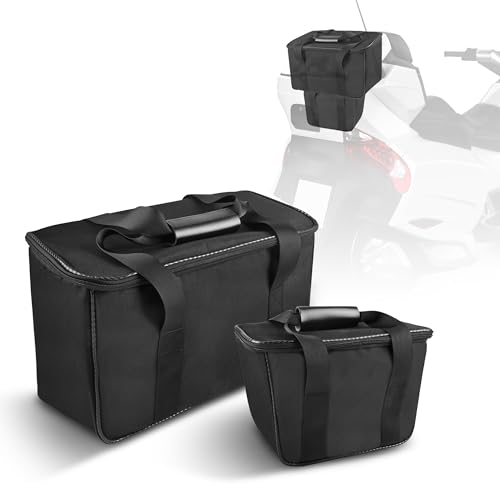
Practical Owner’s Outline for Three-Wheel Touring Rear Carrier Pouch
Limit payload to 8 kg (17.6 lb) and keep the heaviest items within 10 cm (4 in) of the vehicle centerline to preserve handling; if using a larger model, cap total stowed mass at 12 kg (26.5 lb).
Choose capacity by volume: common sizes are 18–28 L (small/medium) and 32–40 L (large). Typical external dimensions for a medium-shaped pouch: 30 × 20 × 18 cm (12 × 8 × 7 in). Fabric should be 600D polyester with TPU coating and welded seams; select units with water-resistant coated zippers and a drain port for condensation.
Mounting options: use the factory rear carrier plate or a three-point strap system that anchors to the frame or passenger footpeg mounts. When fitting with hardware, use M6 stainless bolts tightened to 8–10 Nm; add threadlocker medium-strength on steel-to-steel joints. If using straps, pick 25–30 mm cam straps rated ≥500 N and add a secondary tether to prevent forward slide in sudden stops.
Water defense: rated water resistance around IPX4–IPX6 is common for soft pouches; for true waterproofing, use a dry liner or internal waterproof sack. Reapply a fluoropolymer or silicone-based DWR spray annually or after heavy rain, and inspect seam tape for wear every 6 months.
Packing technique: pack heavy, compact items closest to the chassis and low in the pouch; soft clothing can wrap fragile objects. Use 2–3 internal compression straps or packing cubes to prevent shifting. Avoid storing unrestrained fluids and batteries together; remove or isolate spare lithium cells in individual protective containers.
Security measures: route a short cable or small chain through zipper pulls and attach to a fixed frame point; choose locks with at least 5 mm shackle and anti-cut rating. For overnight stops, carry a timber or steel anchor strap to loop through the pouch handle and an immovable object when a solid frame tie is unavailable.
Maintenance: clean exterior with mild soap and lukewarm water, rinse thoroughly, and air dry with zippers open; lubricate zipper sliders quarterly with a polymer zipper lubricant. Repair minor seam separation with a waterproof seam tape patch and replace heavily corroded attaching hardware promptly.
Handling and riding adjustments: reduce cornering speed and widen entry radius when the pouch is loaded; check fasteners and strap tension after the first 5 km (3 mi) of riding and every 100 km (60 mi) thereafter. If rear-wheel steering geometry is present, verify no interference between the pouch and suspension travel.
On-vehicle checklist before departure: straps secure and not chafing; mass ≤ 8–12 kg depending on size; zippers locked and taped if raining; secondary tether connected; quick-access items in external pockets. Keep this checklist visible when preparing for multi-day trips.
Which models and year ranges fit the Premium cargo tray carry case?
Recommendation: direct-fit on BRP three-wheel touring RT-series (RT, RT‑S, RT‑Limited) model years 2010–2024; F3-series (2014–2024) will fit only with a rear-plate adapter; RS-family and Ryker-family do not accept the factory mounting pattern without custom fabricated brackets.
Compatibility table
| Model family | Year range | Fit type | Notes |
|---|---|---|---|
| RT-series (touring) | 2010–2024 | Direct-fit | Requires OEM rear carrier plate or equivalent factory-installed mounting points. |
| F3-series (roadster) | 2014–2024 | Adapter required | Use rear-plate adapter to match bolt pattern; check clearances with passenger backrest or top case. |
| RS-family (sport) | 2010–2016 (varies by submodel) | Usually incompatible | Rear profile and bolt layout differ; aftermarket brackets sometimes available but fitment unpredictable. |
| Ryker-family (entry-level) | 2019–2024 | Not compatible | Frame and rear fender geometry do not provide the required mounting pattern. |
| Custom / modified units | Any year | Possible with fabrication | Welded or bolted adapter plates can provide a secure mount; verify load limits of rear structure. |
Adapter guidance
Check the rear mounting pattern before purchase: the correct install requires a rectangular 4-bolt pattern matching the accessory base. If your machine lacks the plate, verify clearance behind passenger backrest and around tail lights. Third-party adapter kits and universal plates exist; for vendor listings and manufacturing sources consult best umbrella fan outdoor factories. For any non‑factory installation, confirm hardware grade (stainless or zinc-plated), use lock washers or threadlocker, and test torque and vibration resistance on a short ride before loading for long trips.
Step-by-step mounting: required tools, fasteners and torque specs
Use a calibrated torque wrench and stainless fasteners: M6x16 tightened to 10 Nm (7.4 ft·lb) and M8x20 tightened to 20 Nm (14.8 ft·lb); if a M10 bracket is present tighten to 40 Nm (29.5 ft·lb).
Required tools: calibrated torque wrench (2–50 Nm range), 3/8″ drive ratchet, 8/10/13 mm sockets, 4/5/6 mm hex keys, flat and Phillips screwdrivers, small torque adapter for tight spots, blue threadlocker (Loctite 243), anti-seize compound (for stainless-to-aluminum contact), stainless flat washers, nylon-insert nuts (M6, M8), soft cloth or rubber pad to protect paint, strap tensioner or cam buckle if mounting uses straps.
Confirm hardware: use stainless or zinc-plated hex head bolts: M6x16 mm (class 8.8 or higher) for sheet-metal brackets, M8x20 mm for frame mounting points, M10x30 mm only for larger carrier brackets. Use matching flat washers under heads and nylon-lock nuts on through-bolt installations.
Step 1 – inspect and prepare mounting points: clean threads and mating surfaces, remove old debris, apply a thin coat of anti-seize to stainless fasteners where they contact aluminum to prevent galling; apply a single drop of blue threadlocker to bolt threads that fasten into steel inserts.
Step 2 – position the cargo pouch or carrier plate on the rear carrier; align all holes and confirm there is no contact with taillights, wiring or moving suspension parts. Use a soft pad between pack base and painted surfaces.
Step 3 – hand-thread all bolts first, using the smallest diameter fasteners in peripheral holes (M6) and larger bolts (M8/M10) for main structural points. Do not cross-thread; if resistance is felt back out and realign.
Step 4 – snug sequence: progressively tighten bolts in an X-pattern or alternating sequence so the base seats evenly. Use the torque wrench and set values as follows: M6 = 10 Nm (7.4 ft·lb); M8 = 20 Nm (14.8 ft·lb); M10 = 40 Nm (29.5 ft·lb). Final torque must be reached in two stages: first to ~50% of target, then to final value.
Step 5 – strap-mounted installations: tension straps until the pack is immobile but padding is not crushed. Use cam buckles or ratcheting strap to achieve firm hold; avoid over-tensioning which can distort mounting brackets or stress seams.
Step 6 – wiring and clearance check: cycle suspension through travel and turn handlebars full lock both directions to verify there is no rubbing. Re-check fastener torque for any bolts adjacent to moving parts after clearance confirmed.
Post-installation check: retorque all fasteners after the first 50–100 km (30–60 miles). Inspect bolts, fasteners and straps monthly and after heavy rides; replace any nylon-lock nut or strap showing wear. If bolts are into soft aluminum threads, reduce torque by ~10–15% from the listed values to avoid stripping.
Weight capacity, packing layout and safe load limits for the rear carrier
Limit total cargo on the rear carrier platform to 10 kg (22 lb) for sustained riding; absolute maximum 15 kg (33 lb) only for short, slow maneuvers.
Packing layout – placement and balance
Place the heaviest items directly over the carrier mounting flange and as low as possible; aim for the cargo center of mass within 10 cm (4 in) aft of the mounting plane and within ±5 cm (2 in) of the vehicle centerline. Use internal compartments or rigid inserts so dense items (tools, batteries, metal cans) sit closest to the base, lighter clothing and soft gear above. Keep the profile flat: cumulative stack height should not exceed 12 cm (5 in) above the carrier surface to limit aerodynamic lift and leverage.
Use two forward-facing compression straps and two lateral anti-shift straps. Route straps so they pull toward structural anchor points on the chassis, avoiding long wrap angles that increase leverage. Soft loops or edge protectors are required where webbing contacts metal edges.
Safe limits, dynamic loads and securing hardware
Treat the static capacity (what the platform supports when stationary) as up to 15 kg (33 lb) and apply a dynamic derating of ~33–40% for normal riding – target 10 kg (22 lb) as the working limit. During hard braking and cornering dynamic loads can briefly reach 1.5–2.0× the static value; factor that into strap selection and load placement.
Use tie-downs rated ≥1,000 lbf (4.5 kN) WLL (working load limit) with an appropriate safety factor; ratchet straps are acceptable but avoid over-torqueing hardware. Avoid sustained speeds above 100 km/h (62 mph) when carrying loads near the working limit and reduce speed by ~20% in crosswind or wet conditions.
After the first 8–16 km (5–10 mi) re-torque and re-seat all fasteners and straps, then check at every fuel stop. Inspect seams, attachment points and mounting hardware for elongation, abrasion or slippage before each trip.
Weather protection: best covers, liners and sealing techniques
Use a two-layer system: an external waterproof cover made from 600–1000D PU/TPU-coated fabric with taped or welded seams and a hydrostatic head of 5,000–10,000 mm, plus an internal welded TPU dry liner with roll-top closure and internal compression straps.
Best external covers – materials and features
- Fabric: 600D PU-coated polyester for lightweight/affordable; 840D or 1000D nylon (ballistic/Cordura) with TPU lamination for abrasion resistance and UV life.
- Waterproof rating: choose covers rated ≥5,000 mm HH for heavy rain; ≥10,000 mm HH for prolonged exposure or riding at speed.
- Seams: factory heat-welded or seam-taped seams only; stitched-only seams require aftermarket sealing.
- Closures: avoid exposed coil zippers – prefer waterproof zippers (laminated) plus a stitched storm flap that extends at least 25 mm beyond zipper line.
- Attachment: spread-load straps (nylon webbing with low-profile quick-release buckles) or cam straps anchored to carrier points; elastic hem alone is not sufficient for sustained highway speeds.
- Extras: reflective piping for night visibility, UV-resistant PU top-coating (min. 500 hours before color fade), integrated drain ports with grommets to evacuate trapped water from seams or interior channels.
Liners, sealing procedures and field repair
- Internal liner specs:
- Material: welded TPU or laminated nylon (no sewn seams); welded seams rated waterproof under 10,000 mm HH.
- Closure: roll-top with double-fold and side buckle (roll 3 times minimum); zippered liners acceptable only if they use waterproof zippers and seam-welded construction.
- Organization: internal compression straps, padded electronics sleeve in a separate welded pocket, and a small zippered dry pouch for documents.
- Desiccant: 20–30 g silica gel per 5–8 liters of internal volume, replaceable sachets kept in a vented pocket.
- Sealing techniques – workshop method:
- Inspection: identify stitch lines and seams that penetrate the coating; mark locations.
- Cleaning: degrease with isopropyl alcohol and allow 30 minutes to dry.
- Product selection: use a urethane-based seam sealer for PU coatings or a TPU-compatible seam sealant; for seam tape select a heat-activated TPU tape from a reputable supplier.
- Application – liquid sealer: apply a thin bead into the stitch line on the interior side, spread with a flexible applicator, remove excess, cure 24 hours at 20–25°C; repeat second coat if thread is saturated.
- Application – seam tape: lay tape centered over seam, follow manufacturer heat/pressure instructions (use a domestic iron with a protective Teflon sheet only if tape instructions permit), press and cool under a flat weight for 30–60 minutes.
- Testing: hose test at low pressure for 5 minutes; look for dye/marker on interior seams or use a paper towel to detect drips; reapply where needed.
- Sealing techniques – zipper and flap details:
- Add a stitched storm flap extending 25–40 mm beyond zipper, secured with rivets or bar-tack stitches spaced ≤50 mm.
- For existing zippers, add a glued neoprene or coated fabric flap with seam-sealant under the stitching to prevent capillary wicking.
- Small exterior zippers: treat with silicone-based zipper lubricant to repel water and keep teeth moving; wipe excess to avoid attracting dirt.
- Field repair kit (compact):
- Tube of urethane seam sealer (10–30 ml), adhesive seam tape patches, flexible repair tape (clear TPU/PU), small brush/applicator, alcohol wipes, spare shock cord and a 50 mm patch of coated fabric.
- Emergency technique: place electronics into a zip-sealed dry sack, apply pressure patch with repair tape over damaged area, then apply seam sealer when possible.
- Maintenance schedule:
- Monthly: inspect stitches, zipper runs and flap adhesion after wet rides; dry interior fully and rotate desiccant.
- Annually: reapply seam sealer to high-stress stitch lines and reproof coatings with a compatible water-repellent spray designed for PU/TPU laminates.
- Storage: store dry, uncompressed and away from direct sunlight; avoid prolonged contact with petroleum products that degrade coatings.
Security and quick-release options to prevent theft and ease removal
Fit a keyed quick-release base plate with an integrated lock cylinder and pair it with a 6–8 mm stainless-steel coated cable as the primary theft-prevention system; this combination allows single-handed removal in under 10 seconds while keeping the item secured to the vehicle when parked.
Recommended locking mechanisms: (1) cam‑latch base with built-in tumbler lock – low profile and resists prying; (2) spring‑plunger quick‑release pin with a keyed barrel – fast removal and good tamper resistance if the pin is hardened; (3) removable plate that secures with a padlock through a reinforced T‑bolt hole for the highest simplicity/strength tradeoff. Choose the plunger or cam if daily on/off access is required; choose the padlockable plate if leaving the carrier unattended for long periods.
Material and dimension targets: use hardened alloy or boron‑steel chain at 10–12 mm diameter for chaining to immovable structure, or a 6–8 mm braided stainless cable for securing items together; shackle or bolt thickness should be ≥10 mm for padlocks. Aim for hardware rated ≥5 kN tensile strength for chains, and corrosion‑resistant grades (316 stainless or zinc‑coated hardened steel) for coastal use.
Fastening guidance for anchor points: attach bases to structural members or welded tabs using M8 stainless steel bolts with one‑way or tamper‑proof heads, employ locking washers, and apply medium‑strength threadlocker on threads that must remain removable. Route security cables through the carrier chassis and any dedicated frame loop; avoid attaching only to cosmetic panels.
Quick‑release performance targets: target a repeatable release action under 10 N·m of user torque (hand‑operable), retainment force of at least 500 N vertical pull when locked, and a lock body that resists shimming. Select lock cylinders with anti‑pick pins or dimple profiles and replace inexpensive wafer locks with small marine‑grade cylinders where possible.
Theft‑deterrent practices: add a visible lock or beefy cable to discourage opportunistic thieves, register serials and photograph mounting hardware for recovery, and use UV pen or microdot marking on hidden surfaces. For overnight or long stops, loop a secondary chain to a frame member or fixed street anchor and remove valuables.
For short‑term weather protection and a quick shelter while removing or installing the carrier, consider a compact outdoor canopy option such as best rain umbrella for deck; if the pack doubles as a pet or aquatic gear carrier, check water quality accessories like best aquarium filter for turtles for safe transport of wet items or small containers.
Cleaning, fabric care and simple repairs to extend lifespan of your rear storage pack
Empty the storage pack, unzip all compartments and remove grit with a soft brush and a handheld vacuum before any wet cleaning.
Routine cleaning and stain removal
- Freshwater rinse after salt exposure; use low-pressure hose and allow to drain fully.
- For textile shells (Cordura, ballistic): hand-wash with 1 tsp pH-neutral cleaner per liter of water (Woolite or Nikwax Tech Wash). Agitate with soft brush, rinse twice, squeeze gently – do not wring.
- For PVC- or vinyl-coated panels: wipe with a mild detergent solution (1 tbsp dish soap per liter), rinse, then apply a UV/surface protectant (303 Aerospace Protectant) sparingly.
- Oil/grease spots: apply isopropyl alcohol (70%) on a microfiber cloth, blot from edges inward; test on hidden area first.
- Mold/mildew: spray 1 part white vinegar to 4 parts water, let sit 10 minutes, scrub with soft brush, rinse. For persistent bio-stains use oxygen bleach (sodium percarbonate) per package instructions; avoid chlorine bleach on coated fabrics.
- Machine washing only if manufacturer labeling allows: use cold, gentle cycle, delicates bag for removable soft items, remove hardware first, air dry.
Zippers, seams and fasteners
- Clean zippers with a nylon brush and freshwater. Dry and then apply Nikwax Zip Care or a PTFE-based zipper lubricant to sliders; avoid petroleum oils on plastic teeth.
- Slightly misaligned sliders: realign with pliers and test; replace sliders of common types using a replacement kit rather than forcing damaged teeth.
- Regularly inspect stitched seams. Re-seal stitch lines with a thin bead of silicone seam sealer (Gear Aid Seam Grip or Aquaseal) to restore water resistance; allow 24–48 hours cure.
- Replace corroded D-rings or buckles with 316 stainless steel hardware; use sizes matching original webbing width (e.g., 25 mm / 1″ or 38 mm / 1.5″).
Small repairs that hold well:
- Fabric punctures up to 3 cm: apply a self-adhesive nylon patch (Gear Aid Tenacious Tape) on inside and outside; press firmly and allow 24 hours.
- Longer rips: stitch with bonded polyester or nylon thread (Tex 135 / Bonded #69) using a heavy needle (100/16 or 110/18) and reinforce with a patch glued with Aquaseal; stitch first then seal the seam edges.
- Detached strap ends: overlap by at least 50 mm (2″), sew a box-X pattern or bar-tack using a sewing awl or heavy machine; inspect for abrasion and replace if webbing is frayed.
- Loose rivets: replace with stainless pop rivets sized to original hole diameter (3.2–4.8 mm common). Use hand riveter and back-up plate where load concentrates.
- For flexible-to-flexible bonds use Aquaseal or E6000; for vinyl-to-vinyl use a marine-grade contact cement. Clamp for full cure as manufacturer specifies (normally 24–72 hours).
- Avoid heat guns and direct sunlight for repairs; adhesives and coatings lose strength above ~60°C / 140°F.
- For sewing, a walking-foot heavy machine with a 20–24 mm throat and industrial needles gives best results; hand-stitching with a 2-needle saddle stitch resists unraveling where machines can’t reach.
Preventive maintenance schedule
- After every salty ride: rinse and dry.
- Every 1–3 months (or after heavy use): inspect seams, hardware and webbing; apply zipper lube and a light spray DWR (Nikwax TX.Direct or 303 Fabric Guard) to textile exteriors.
- Every 6 months: apply UV protectant to exposed trim and conditioned leather patches (Leather Honey or similar), and replace silica gel desiccants in internal compartments.
Quick repair kit to carry
- Tenacious Tape patch samples, small tube Aquaseal, bonded nylon thread and heavy needle, 2–3 stainless pop rivets, mini riveter, spare sliders, 10 g silicone seam sealer sachet, compact zipper lubricant stick, 2 silica gel packs.
Storage and long-term care
- Store dry, loosely filled or supported to avoid creases; avoid temperatures above 40°C and direct sunlight to limit polymer and coating degradation.
- Use breathable covers or cotton bags for long storage; include silica gel and check quarterly for moisture or salt residue.
- Document repairs and note weak points with a permanent marker inside a pocket to track recurring issues and plan reinforced upgrades.
FAQ:
Will the Deluxe Luggage Rack Bag fit my Can-Am Spyder model and how should I attach it for a secure hold?
The Deluxe Luggage Rack Bag is made to mount on the rear rack areas found on many Spyder models, but fit can vary by year and rack type. Before buying, compare the bag’s base dimensions with your rack surface and check whether your rack has exposed rails or a flat plate. Most bags attach with a combination of adjustable nylon straps and quick-release buckles or hook-and-loop tabs that thread around the rack bars and under frame points. To install: position the bag so its base sits flat on the rack, feed the straps under or around solid anchor points (avoid soft trim or non-structural pieces), tighten each strap evenly until the bag is snug, and secure any loose strap ends so they cannot contact the wheel or drivetrain. If the bag has built-in D-rings or a locking eye, route a luggage cable or small padlock through them for theft deterrence. For wet-weather protection, use the included rain cover or add a waterproof liner inside the main compartment. After the first short ride, recheck strap tension and seam integrity and retighten as needed.
How much gear can the rack bag carry and will it affect Spyder handling?
Capacity for these bags typically falls in the low tens of liters, enough for a jacket, small tools, or a helmet cover and a few personal items. Weight limits depend on the rack and bike model; if the manufacturer does not list a specific number, aim to keep load weight modest (single-digit kilograms) and centered as close to the bike centerline and rack surface as possible. Heavy or bulky items placed high or far aft can make steering feel heavier and may change braking behavior. To reduce handling impact, pack heavier items near the bag base, compress soft items toward the center, and use the bag’s compression straps or an additional strap to keep the load compact. Recheck tire pressures and suspension preload if you frequently carry luggage, and perform a short test ride at low speed after loading to confirm the bike’s balance and braking response.


