Carry your console in the cabin and keep all spare lithium-ion packs with you; do not stow spare batteries in checked baggage.
Airline and aviation authority rules: rechargeable lithium-ion cells under 100 Wh are allowed in carry-on without advance approval. Cells between 100–160 Wh require airline approval and are typically limited to two spare units per passenger. Cells above 160 Wh are not permitted on passenger aircraft. Spare batteries must never be placed inside checked bags.
Packing instructions: power the unit down completely, use a hard-sided padded case or wrap with at least 2–3 cm of foam around vulnerable corners, remove any external storage media and loose discs, and secure cables separately. For spare packs, cover terminals with insulating tape or use original retail packaging and place each battery in an individual plastic pouch to prevent short circuits.

Operational and security steps: keep proof of battery capacity (manufacturer label) accessible; request airline approval at check-in for packs labeled 100–160 Wh; be prepared to show documentation to TSA/airport security. If internal cells are non-removable, leave them installed and ensure the device is switched off and protected against accidental activation.
Risks and mitigation: checked bags face theft, crushing, extreme temperature swings and limited fire-suppression options – all increase the chance of damage or thermal events. Photograph serial numbers and retain receipts for insurance; if transporting a high-value console, consider hand-carrying plus a compact soft case inside a hard briefcase for added protection.
Transporting a console in carry-on or checked baggage
Carry the console in cabin baggage whenever feasible; checked baggage increases risk of impact, moisture exposure and theft, and security screening in the hold can result in rough handling.
Packing and power rules
Remove any optical discs and external storage drives; power the device off and secure all detachable parts (controllers, power bricks, cables) in padded pouches. Spare lithium‑ion batteries (including power banks) must travel in the cabin only: up to 100 Wh allowed without airline approval, 100–160 Wh allowed with airline approval (maximum two spares), and >160 Wh are prohibited. Insulate battery terminals with tape or original packaging.
Use a hard case with custom foam or dense padding if checking the unit is unavoidable. Center the device inside the case, surround with soft clothing, immobilize internal moving parts, and fasten with a TSA‑approved lock if you add one. Label the case “Fragile” and photograph serial numbers and condition before departure for claims.
Security, documentation and alternatives
Be ready to power the console on at security upon request; carry charger and any required cables separately. Back up saved data to cloud storage or an external encrypted drive prior to travel. Verify the airline’s carry‑on size and weight limits (typical maximum dimensions ~22×14×9 inches) and the carrier’s electronics policy; warranties and service options may differ by country. For high‑value units, compare checked travel risk versus insured door‑to‑door courier service and add appropriate travel/item insurance.
Carry-on vs checked baggage: which option minimizes damage and theft risk?
Recommendation: always keep the console and high-value peripherals in the cabin; cabin carriage greatly reduces both theft and mechanical-damage exposure compared with the checked hold.
Why checked holds increase risk: baggage handling involves conveyor transfers, manual loading/unloading, stacking under heavy bags and short uncontrolled drops–these generate shocks, compressive forces and abrasion that frequently cause cracked housings, broken ports and loose internal components. Security searches may open cases and increase opportunity for item loss or tampering.
Regulatory and battery rules (concrete): lithium-ion cells under 100 Wh are allowed in carry-on without airline approval; cells between 100–160 Wh require airline approval and are commonly limited to two spares; cells above 160 Wh are not permitted in passenger baggage. Always keep spare cells in the cabin and isolate terminals (tape or original packaging).
Packing specifications: use a hard-shell flight case with custom foam inserts; foam thickness of 2.5–5 cm (1–2 in) around the unit minimizes transmitted shock. For soft bags, add two layers of high-density foam and a rigid plate to spread point loads. Secure controllers and cables in separate padded compartments to prevent connector damage.
Theft mitigation steps: carry serial numbers and purchase receipts in cloud storage before travel; enable device tracking and remote-wipe features; remove external SSDs and game media and keep them on your person; avoid external case branding that advertises value; use a discreet, non-branded travel case and TSA-approved locks for cabin storage.
Insurance and claims: airline liability for checked property is limited under Montreal/Warsaw rules or carrier tariffs–if declared value exceeds limits, buy transit insurance or declare a higher value with the airline. Photograph items and serial numbers pre-flight; file damage claims within carrier windows (typically 7 days for damaged items, up to 21 days for lost/missing baggage).
Action checklist: 1) carry device and spare batteries in the cabin; 2) use a hard flight case with 2.5–5 cm foam; 3) power down, remove discs/cartridges and external storage; 4) tape battery terminals and follow 100/160 Wh rules; 5) save serial numbers and photos to cloud; 6) purchase extra transit insurance for items above airline liability limits.
What airline and TSA rules apply to lithium batteries, controllers and power banks?
Store spare lithium-ion cells and external battery packs in carry-on only; checked baggage is not acceptable for spare batteries.
Lithium-ion capacity rules: batteries up to 100 Wh (typical phone/portable batteries up to ~27,000–28,000 mAh at 3.7 V) are generally permitted in carry-on and may remain installed in devices placed in checked bags per some carriers. Batteries greater than 100 Wh but not exceeding 160 Wh require airline approval before boarding and are usually limited to two spare units per passenger. Batteries over 160 Wh are forbidden on passenger aircraft.
If a pack or cell lists only mAh, convert to watt‑hours with Wh = (mAh × V)/1000; use V = 3.6–3.7 V when voltage is not stated. Example conversions: 10,000 mAh @3.7 V ≈ 37 Wh; 30,000 mAh @3.7 V ≈ 111 Wh.
Lithium metal (primary/non‑rechargeable) cells are treated separately: most carriers and the TSA permit them only in the cabin and limit lithium content to 2 g per cell. Many common coin cells approach the limit–check manufacturer markings.
Power banks are classified as spare lithium batteries. They must be carried in the cabin, have terminals protected (tape, original packaging, or individual plastic cases), and follow the same Wh limits and airline‑approval rules described above. Airlines frequently confiscate power banks found in checked baggage at screening.
Controllers with non‑removable rechargeable batteries may stay installed; ensure the device is switched off and protected from accidental activation (case, disconnect vibration/lighting where possible). If the controller uses removable batteries, remove them and treat as spare batteries: carry in cabin with terminal protection.
Terminal protection and packing: cover exposed contacts, keep spares in original boxes or plastic battery sleeves, and separate spare cells from metal objects. Avoid storing loose batteries in pockets or compartments with keys.
US carriers follow FAA/IATA rules and TSA screening procedures: expect uniform enforcement of the 100 Wh / 160 Wh thresholds but verify specific airline limits and approval procedures prior to travel, especially for international itineraries or checked items that contain installed high‑capacity packs.
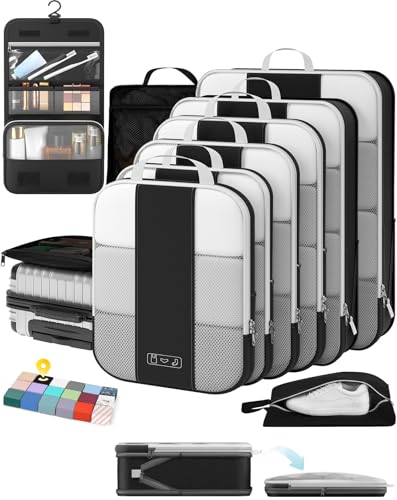
How to pack a console: padding, hard cases and cable management step-by-step
Recommendation: store the console in a rigid hard-shell case with 30–50 mm of external shock-absorbing foam and an inner layer of 10–20 mm closed-cell foam (EVA or XPE, density 30–60 kg/m³); keep a 15–20 mm clearance around all buttons and ports so nothing compresses controls during transit.
1. Remove media and detachable modules; eject discs, SD cards and any storage towers. Place small items in a zippered accessory pouch to prevent scratches and loss.
2. Power components: disconnect the power brick, wrap it separately in a 10 mm anti-static bubble wrap layer, and coil its cable in flat loops 5–8 cm diameter. Use 12 mm Velcro straps for each loop; avoid tight twisting that stresses cable ends.
3. Anti-static protection: wrap the console in anti-static foam sheet or anti-static bubble wrap (2 layers ≈ 10 mm total). Seal wrap edges with paper or low-residue tape; do not cover ventilation holes directly with adhesive.
4. Insert foam: cut a foam cradle from closed-cell XPE or EVA to match the console footprint. Base thickness 20–30 mm, side walls 30–50 mm. Create port cutouts so connectors sit recessed 15–20 mm from the case wall.
5. Hard case selection: choose ABS, polycarbonate or aluminum shell with secure latches and internal pressure-release valve. Internal dimensions should be ~20% larger than the wrapped unit to allow recommended padding; latch ratings >100 N per latch preferred.
6. Cable and controller management: route controllers and HDMI into a padded accessory compartment or small padded pouch. Coil HDMI and USB cables flat, secure with Velcro, label both ends with numbered tags for quick reassembly.
7. Shock testing: once packed, perform a 1 m drop test onto carpeted floor from three orientations (top, side, corner). If vibration or movement occurs inside the case, add another 10–20 mm of foam padding or use foam wedges to immobilize the item.
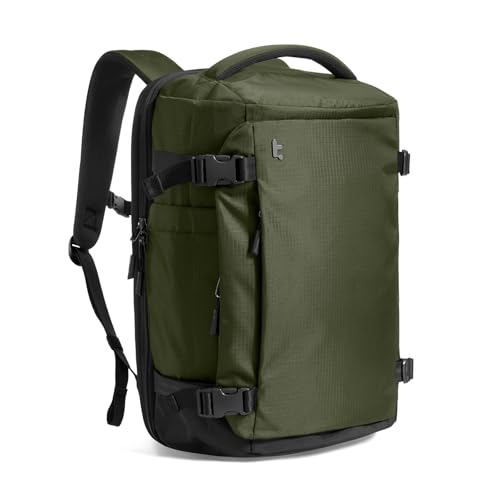
If you plan to carry an additional travel bag for peripherals, choose one rated for air travel: best outdoor duffel bag for air travel.
| Item | Specification | Reason |
|---|---|---|
| Hard-shell case | ABS/polycarbonate/aluminum; internal dim = device + ~20% | Rigid outer protection; prevents crushing and point impacts |
| Inner foam | EVA/XPE, 10–20 mm inner layer; 30–50 mm shock walls; density 30–60 kg/m³ | Energy absorption, custom-fit support, non-abrasive surface |
| Bubble/anti-static wrap | Small-bubble anti-static, 2 layers (~10 mm) | Surface protection against scratches and ESD |
| Cable straps | Velcro, 12 mm width; loops 5–8 cm diameter | Prevents cable strain and tangling |
| Accessory pouch | Padded, separate compartment or small case | Organizes controllers, adapters and spare parts; reduces rattling |
How to prepare a PC or tower for transit: securing GPU, drives and cooling
Remove the graphics card and pack it separately in its original box or a custom-cut anti-static foam insert; if removal is impossible, install a rigid support bracket and immobilize the card at the PCIe bracket with its screw plus a zip-tie through the bracket hole to stop vertical movement.
GPU removal checklist: disconnect all 6/8‑pin/12V cables, release the PCIe latch, unscrew the rear retention (M3 or 6‑32 screws), slide the card out while grounded, place into an anti‑static bag, then into foam with at least 25 mm clearance on all sides. Label power connectors and retain screws in a sealed bag.
Hard drives: remove 3.5″ HDDs for transit – they are shock‑sensitive. Mount each drive in a foam-lined hard drive tray or wrap in two layers of anti‑static bubble wrap with rigid cardboard faces. Use 6‑32 chassis screws for 3.5″ and M3 for 2.5″ drives; store SSDs in anti‑static bags inside a small suitcase or hard case. For M.2 NVMe modules, leave in place only if the M.2 retention screw is properly tightened; otherwise remove and store in an M.2 protective card.
Air coolers: unscrew tower coolers heavier than ~400 g and transport separately; clean old thermal compound with 90%+ isopropyl alcohol, cover CPU with a protective cap, and apply fresh paste on reassembly. For low‑profile coolers under ~300 g, leave installed but wedge dense foam between the cooler and the case frame to prevent twisting forces.
Liquid cooling: custom loops must be drained, fittings capped, and blocks/bottles wrapped in absorbent material inside sealed plastic bags. AIO units should be removed if possible; if left installed, secure radiator and fans with additional foam padding and place the case upright to avoid stress on pump housing. Consider packing the radiator and pump in separate compartments to limit shear forces on hoses.
Internal immobilization: place 20–30 mm dense polyethylene foam blocks at motherboard corners and along the GPU edge to prevent flex. Route and trim cables, use several zip‑ties to bundle loose leads, and tape connectors with Kapton or cloth tape to avoid snagging. Fasten the PSU with its screws and pad it with foam if it has a protruding fan.
Outer protection and transit packaging: use a rigid hard case or double‑box method with at least 50 mm of foam all around the chassis; secure the inner box with ratchet straps or heavy tape, mark orientation, and include a small silica gel packet to reduce humidity. For photography or studio transport solutions consider protective cases built for lighting gear such as a best flash umbrella profoto. If ambient temperature control is required during longer ground segments review thermal storage options like those discussed at are small drawer freezers any good.
Tips for transporting handhelds and high-performance laptops: power states, data safety and straps
Power down fully for any transit longer than a single short trip; set batteries to roughly 30–50% charge when devices will be idle 24+ hours and ~40% for storage beyond one month.
Disable automatic wake timers, Wake-on-LAN, scheduled updates and USB charging in firmware/OS. Turn off fast-start/hibernation features that can power the unit unexpectedly; use full shutdown or firmware-level hibernate that leaves circuits inert.
Remove or detach external batteries and spare cells; place each spare in an insulated pouch with terminal protection. For removable internal cells, if removal is practical, pack cells in separate anti-static bags and keep with carry items.
Encrypt internal drives with FileVault/BitLocker/LUKS and confirm recovery keys are stored off-device. Make a verified backup (one encrypted local copy plus one cloud snapshot) and record serial numbers and device IDs in a secure note.
Sign out of storefronts and social accounts, disable auto-login, remove SIM and microSD cards and store them in labelled, padded sleeves. Enable device location and remote-wipe services (Find My, Google Find My Device, or vendor equivalent) and test that the service reports last-known location.
Use a form-fitting padded sleeve inside a rigid case; add 10–20 mm closed-cell foam blocks to immobilize corners and prevent lateral movement. Apply soft elastic straps across the chassis only over non-sensitive zones–avoid screen edges, hinges, ventilation and port areas.
For handheld consoles, loop a wrist or lanyard strap through the device’s anchor point and secure the other end to the case interior with a low-slip clip or sewn anchor to prevent drops during access. For laptops, use an internal strap that holds the lid closed without compressing the display; a thin neoprene or elastic strap works best.
Protect cables and accessories separately in zip pouches; coil cables with Velcro ties and tuck them away from ports so they cannot lever the device open during movement. Do not route heavy or sharp items over screens or chassis.
For units with mechanical drives: remove the drive when feasible and transport in an anti-static foam block. If leaving a mechanical drive installed, add extra foam on both sides equal to at least twice the drive thickness to absorb shocks.
Photograph the device (front, back, ports, serial sticker) before transit and keep those images with purchase/serial records. Label the case interior with contact info and a brief handling note (e.g., “Fragile – keep flat”), and check ambient temperature limits: keep devices between 0–35°C during transport and avoid exposure above 60°C or prolonged cold below −20°C.
How to document, declare and insure your setup for lost or damaged baggage claims
Register serial numbers, photograph receipts and device IDs, and upload copies to cloud storage before departure.
- Documentation checklist (create one folder per device):
- High-resolution photos: front, back, serial/IMEI/serial-number plate, ports, accessories, and original packaging (at least 8–12 images).
- Video: 30–60s showing device working, boot sequence or a controller/port test with timestamped playback saved.
- Digital copies of purchase invoice, warranty, registration email, and original order page (PDF or screenshot with URL and date).
- Backup proof of ownership: serial-number screenshot from device settings, MAC or UUID if relevant, and any manufacturer registration ID.
- Cloud backup: save all files in two independent locations (e.g., Google Drive + encrypted external storage) and email copies to yourself.
- At check-in and arrival – immediate actions:
- If declaring high-value electronics, tell the check-in agent and ask about excess valuation or special handling options and fees.
- Inspect checked or claimed bags at the airline’s baggage desk immediately on arrival. Report missing or visibly damaged items there and obtain a Property Irregularity Report (PIR) or equivalent reference number.
- For theft, file a local police report at the airport/police station and keep the report number and copy for insurers and the carrier.
- Do not discard damaged packaging or repair the item before obtaining claim authorization and repair estimates; preserve the item exactly as found.
- Airline claim timelines and limits (standard benchmarks):
- Report visible damage within 7 days of arrival (IATA benchmark).
- File delayed-baggage complaints within 21 days after receipt of the bag; after 21 days airlines commonly treat property as lost.
- International air liability follows the Montreal Convention: currently 1,288 SDRs (roughly US$1,700 as of mid‑2024) per passenger for checked baggage, unless a higher declared value was accepted by the carrier.
- Always get the PIR or written receipt at the airport; failure to report immediately often voids airline claims.
- Insurance pathways – what to choose and how to file:
- Homeowner/renter policy: schedule the device as a scheduled personal property endorsement to cover full replacement value minus deductible; request a binding receipt from insurer showing scheduled item and limit.
- Travel insurance: buy a plan with specific electronics coverage and check single-item limits, sub-limits, and deductibles (common single-item caps: $500–$3,000). Purchase policy before travel start date; file within policy deadlines shown in terms.
- Credit-card purchase protection: check time limits (often 90–120 days from purchase) and coverage amount; keep original statement and card transaction ID for claims.
- Dedicated gadget insurance: useful for expensive towers/consoles; compare annual premiums versus item value, check repair-vs-replace terms, battery and wear exclusions.
- Claim submission packet (compile and submit together):
- Completed airline claim form or insurer claim form with PIR/claim number, flight number, baggage tag, and boarding pass copies.
- All photographs and video files with timestamps intact; note the filename convention and upload originals (don’t compress or edit metadata).
- Original or certified copies of purchase receipts, serial-number screenshots, manufacturer registration, and warranty documents.
- Repair estimate from an authorized technician or certified shop; itemized invoice for replacement if repair not possible.
- Police report copy if theft suspected; bank/credit-card statement showing purchase if no invoice available.
- Bank details for reimbursement and a photocopy of photo ID matching passenger name.
- Evidence preservation and procedural rules:
- Keep the damaged device, internal components, cables and original packaging until the claim closes or carrier requests disposal; they may require inspection.
- Do not attempt DIY repairs before claim approval; submit one authorized repair estimate and await instructions.
- Log all communications: date, time, representative name, reference numbers, and store emails/screenshots as proof.
- Practical numbers and timeframes to expect:
- Airline initial response: 7–30 days for acknowledgment; full settlement can take 6–12 weeks or longer if documents are missing.
- Travel insurer claim processing: 14–60 days typical after full documentation; faster with digital portals and complete receipts.
- Home/renter scheduled claims: appraisal and settlement often 30–90 days depending on required proof of replacement value.
- Deductibles: expect $50–$500 depending on policy; check single-item and aggregate limits before purchasing coverage.
If total replacement value exceeds carrier liability, submit simultaneous claims: airline for its liability limit (with PIR), then insurer or scheduled-endorsement claim for balance; supply the airline settlement letter as part of the insurer claim.
FAQ:
Can I put my gaming console in checked luggage on a plane?
Yes, but there are risks and steps to reduce them. Consoles can be placed in checked bags, yet checked baggage is exposed to rough handling, pressure changes and a higher theft risk. If you must check a console, power it down, disconnect external storage, and wrap it in thick padding or place it inside a hard-sided case. Remove any removable batteries or spare cells and carry those in the cabin (see airline and regulator rules on lithium batteries below). Label the case with your contact details and take photos of the device and serial number before handing the bag over in case you need to file a claim.
Are controller or spare lithium batteries allowed in checked baggage?
Spare lithium batteries should not go in checked baggage. Most airlines and aviation authorities require loose lithium-ion batteries (for controllers, power banks, spare battery packs) to be carried in the cabin only. Check each battery’s watt-hour (Wh) rating: items up to 100 Wh are typically allowed in carry-on without airline approval; batteries between 100 Wh and 160 Wh may be allowed with airline approval and usually in limited quantities; batteries above 160 Wh are generally prohibited from passenger aircraft. Protect battery terminals against short circuits by placing each battery in its original packaging, a protective case, or by taping over the terminals, and ensure they are individually insulated. Confirm the carrier’s policy before travel because rules and enforcement can vary by airline and country.
How should I pack a gaming PC or high-end laptop for air travel to avoid damage and problems at security?
If you travel with a full desktop or an expensive laptop, plan ahead to protect hardware and data. Steps to follow: back up all important files to an encrypted external drive or cloud storage before departure; take clear photos of serial numbers and condition; remove or secure loose parts (for desktops this can mean removing or fastening the graphics card, CPU cooler or large fans; place removed components in anti-static bags and padded cases); use a rigid, lockable travel case or a heavy-duty hard-shell suitcase with dense foam inserts tailored to the shape of the unit; cushion spinning hard drives—if possible, replace them with SSDs for transit or transport drives separately in padded cases because mechanical drives tolerate shocks poorly; keep power supplies, cables and adapters in separate compartments to avoid pressure on delicate connectors. For carry-on: bring laptops, small consoles and controllers in the cabin so they stay under your supervision and can be presented separately at security checkpoints when required. Expect security officers to request removal of electronics for screening; have them easily accessible to speed the process. If the rig is especially valuable, consider shipping it via a specialist courier who offers packing, tracking and declared-value coverage rather than checking it as baggage. Also review customs rules and warranty/service terms if you travel across borders—some repair or replacement claims may need purchase receipts. Finally, check with your airline about size, weight and battery rules well before departure to prevent surprises at the airport.