


Keep rings, necklaces, bracelets, watches and loose gemstones in the cabin bag or worn under clothing. Use a small hard-sided case for chains and loose stones, place that case inside an interior zip pocket, and avoid leaving valuables in outer compartments or in transit trolley bins. Photograph every piece, log make/model and serial numbers, and keep digital backups in encrypted cloud storage.
Confirm arrival-country declaration thresholds before travel: many destinations require declaration of personal effects above a set allowance (for example, returning residents to the United States commonly have an $800 duty-free allowance). If an item’s value exceeds the insurer’s single-item limit, obtain scheduled articles coverage or a separate policy that names each high-value piece.
Wear the most valuable single piece on the body during transit. Carry small items in a neck pouch or money belt beneath clothing; for flights with metal screening, remove only when requested by security staff and place items in a dedicated tray to prevent scratches. For fragile stones, use padded cases to prevent contact damage from X-ray conveyors and handling.

Review airline conditions of carriage: many carriers exclude high-value items from checked-baggage liability or set low maximum payouts. If forced to check an item, lock it inside a tamper-evident hard case, declare it at check-in if required, and purchase declared-value coverage. In case of loss or theft, secure a police report and an airline irregularity report immediately; these documents are required for insurance claims and customs procedures.
Which accessories must be removed during security screening?
Remove metal watches, bracelets, large rings and heavy necklaces before approaching the walk‑through metal detector; place these items in a tray or transparent pouch for X‑ray inspection.
Items most frequently required for removal: wristwatches (including smartwatches), solid bangles, stacked rings, chunky chains or pendants, metal belt buckles, cufflinks, tie bars, brooches, ornamental hairpins and metal shoe decorations. Thin wedding bands and tiny studs often remain on unless an alarm is triggered.
Body piercings: nose, navel, tongue and nipple studs commonly cause alarms; screening officers may request removal or offer secondary screening with a portable detector or a pat‑down. If removal is medically impossible, declare the condition and accept alternative screening procedures.
Religious items such as faith pendants, beads or sacred bangles typically receive alternate screening rather than mandatory removal; expect separate inspection, swab testing or visual verification and carry any supporting documentation when available.
Storage and handling tips: secure small valuables in a dedicated pouch inside the carry‑on, use a soft roll or a hard travel case to prevent tangling, and photograph high‑value pieces for insurance records. For larger trips that require organized, lockable compartments consider gear like the best wheeled duffel bag for international travel.
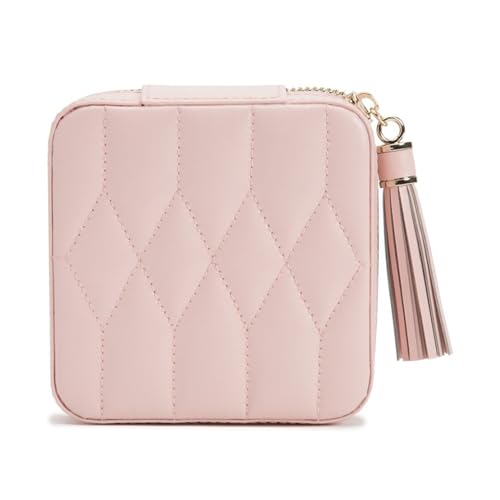
How to pack and protect valuable rings, necklaces and watches in a carry-on
Store high-value rings in a rigid ring case wrapped with 3–5 mm closed-cell foam and place the case in an inner jacket pocket or the zipped compartment nearest the torso.
Rings
Use individual ring boxes or small screw-top tins; if neither is available, wrap each band in lint-free cloth and slide into a 5 x 4 cm resealable bag with a cotton pad. Add one silica-gel sachet per two items to control moisture and an anti-tarnish strip for silver pieces. Secure closures with a small cable tie or medical-grade rubber band to prevent accidental opening. Aim for no more than 7 x 5 x 4 cm total volume per ring container to minimise bulk.
Necklaces and watches
Prevent chain tangles by threading necklaces through drinking straws and clasping before flattening; place each strawed chain into a padded zipper pouch (approx. 10 x 7 cm) with 3–5 mm foam. Store pearls and beaded strands flat between soft tissue inside a slim rigid box. For wristwatches use a compact watch roll or dedicated watch box; if space is limited, wear the most robust timepiece and stow spares separated by soft fabric. Keep spare bracelet links and resizing tools in a marked small case to avoid loose parts.
Photograph items (front, back, clasp and serial numbers) at high resolution, upload copies to cloud storage and email a set to a trusted contact; for structured guidance on documentation procedures consult how can a company enhance its document procedures. Store receipts and insurance details in a slim document sleeve inside the same compartment for consolidated access during inspection.
Declare high-value items at customs and document them precisely
Declare high-value items at customs when the combined value exceeds the arrival country’s personal allowance or when items are intended for commercial use; obtain a stamped export/de-entry document on exit to prove prior ownership.
- Check official thresholds before travel; example figures (verify on the destination website before departure): UK personal allowance for most arrivals £390; US informal exemption commonly US$800; EU rules differ by member state.
- Carry original purchase invoices showing seller name, invoice number, date, currency, VAT registration and paid amount. If converted to another currency, include the exchange rate source or bank statement.
- Obtain independent written valuation by an accredited appraiser for items above the insurer’s single-item limit; include appraiser name, accreditation, valuation date and method used.
- Collect gemological reports and metal hallmarks (GIA, IGI, EGL reports; assay or hallmark certificates) and list serial numbers, weights (grams), dimensions and gemstone carat weights on a single inventory sheet.
- Photograph each piece from multiple angles against a neutral background with a ruler for scale; embed or store metadata with date and filename; keep digital backups in cloud storage and email copies to a trusted contact.
- For temporary export and guaranteed re-import without duties: obtain CBP Form 4457 (United States) or use an ATA Carnet / Temporary Admission permit for professional exhibitions or commercial samples; carry the stamped document on re-entry.
- Items containing protected animal material (ivory, certain corals, tortoiseshell): secure CITES permits in advance; travel without permits risks seizure and heavy fines.
- When required to declare at arrival, complete the customs declaration clearly, present originals for inspection, and ask for a stamped receipt or written confirmation of declared status.
- Insure pieces for international transit with a policy that covers theft, loss and accidental damage; obtain an insurance valuation and policy number, and carry the claims form or insurer contact details.
- If planning to recover VAT or duty: obtain VAT refund forms and export stamps from customs at departure; retain stamped originals until refund is processed.
- When shipping separately via courier or freight: include a detailed commercial invoice, export declaration where required, tracking, and proof of insurance; request a signed delivery/receipt document from customs or carrier.
- Keep all stamped customs paperwork, invoices, appraisals and photographs for at least the duration of the trip plus the insurer’s claim window; digital copies should remain accessible even if paper originals are lost.
When in doubt, contact destination customs and the insurer in advance and obtain written confirmation of required documents and thresholds to avoid delays, seizure or unexpected duties.
What to expect from X‑ray and manual inspections and how to speed up screening
Place small valuable items in a single clear resealable pouch and keep that pouch at the top of the carry-on bag for instant removal at the security queue.
Most checkpoint X‑ray machines produce color-contrast images: organic materials appear in warm tones, plastics and ceramics in mid-tones, metals as high-density dark/bright regions. Tight clusters of small metal objects create dense shadows that can obscure contours of stones and settings, increasing the chance of a secondary check.
Secondary screening normally follows three paths: visual image review by an operator, explosive-trace detection (ETD) swab of trays or cases, and manual inspection of the item(s). ETD analysis typically returns a result within 30–60 seconds; manual handling and visual inspection usually add 3–15 minutes to total processing time unless further escalation is required.
To reduce alarms and speed passage: arrange metal pieces flat and spaced inside the pouch so chains do not overlap; avoid bulky carrying cases that produce large solid blocks on the X‑ray image; place the pouch alone on the conveyor rather than mixed with electronics, shoes or toiletry bottles. External pockets on the carry-on bag are faster for retrieval than digging through the main compartment.
Request a private inspection at the screening point if confidential handling is preferred; staff will usually comply and perform ETD swabs and a visual check behind a privacy screen. Keep clear, dated photos and a brief written description of high-value items in the same pouch to reduce handling time and to prove provenance if asked.
Avoid placing metal-frame umbrellas or long poles in the same tray as precious items; pack compact models separately or stow them in the overhead bin. For a compact option that fits a carry-on external pocket, consider a best quality folded umbrella.


