Choose a purpose-built trunk organizer matched to measured cargo space. Measure interior length × width × height before purchase: typical trunk volumes range – sedans 380–500 L, hatchbacks 300–400 L, compact SUVs 450–650 L, midsize SUVs 600–800 L. Select carry gear volume relative to trip duration: 30–40 L suits single-day outings, 60–80 L covers multi-day itineraries; rooftop cargo boxes commonly offer 300–600 L capacity and usually permit 50–75 kg maximum load, consult vehicle manual regarding roof load limits.
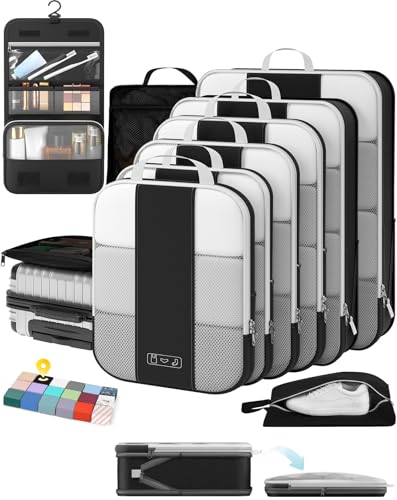
Prioritize materials and fastening: 600D polyester or PVC-coated tarpaulin with welded seams resists moisture; YKK zippers and reinforced stitching extend service life. Anti-slip rubber base and integrated anchor straps reduce shifting within the trunk area; look for pass-throughs compatible with seat belts or L-track tie-down compatibility. Collapsible organizers with internal dividers simplify storage when empty; rigid-shell cases protect fragile contents but occupy fixed volume.
Distribute mass to preserve handling and comply with payload ratings: keep individual bags under 20–25 kg when possible, place heavy items low and as close to the vehicle’s centerline as practical (ideally over or ahead of the rear axle). Secure loose items with cargo nets or ratchet straps and check tire pressures after loading (recommended +2–4 psi above unloaded pressure when carrying heavy cargo). When roof carriage is used, reduce trip speed and account for higher center of gravity; verify local regulations and vehicle placard limits prior to departure.
Dedicated cargo solutions – vehicle use
Select modular, low-profile cargo organizers sized to trunk volume: compact hatchbacks ~300–450 L; mid-size sedans ~450–550 L; small SUVs ~500–650 L; full-size SUVs ~650–900 L. Recommended interior containers: 40×30×20 cm (≈24 L) up to 50×35×30 cm (≈52 L); collapsible polyester with rigid base, water-resistant coating, and built-in tie-down points works best.
Weight limits and placement
Adhere to Gross Vehicle Weight Rating (GVWR) and axle limits printed in the owner’s manual. Typical GVWR ranges: small sedans 1,600–2,000 kg; mid-size sedans 1,800–2,300 kg; SUVs 2,000–3,000 kg. Keep heavy items low, centered laterally, and as close to the vehicle’s centerline as possible; place dense loads near or slightly forward of the rear axle to preserve handling. Do not exceed roof load rating when using rooftop carriers: common manufacturer limits 50–100 kg (including rack weight).
Fastening, straps and materials
Use ratchet straps with minimum breaking strength 1,500–3,000 kg and working load limit labeled on the product; secure long items with at least two straps crossing the load. Cargo nets and adjustable dividers rated 200–500 kg prevent shifting of small items. For weather exposure choose waterproof fabrics with taped seams and corrosion-resistant hardware (stainless steel or zinc-plated). When using hitch-mounted boxes, confirm tongue weight and hitch class compatibility; typical hitch-mounted box capacities 45–90 kg depending on receiver and vehicle specs.
Quick checklist: measure trunk internal dimensions before selecting any container, sum intended cargo mass and compare to GVWR and axle limits, secure every item with rated straps or nets, and document roof/hitch capacities via vehicle documentation prior to mounting external carriers.
Measure trunk, compare external case dimensions, allow explicit clearance margins
Measure trunk interior at the narrowest points: width (side to side), depth (rear seat back to tailgate), height (floor to underside of parcel shelf or closed hatch). Record values in centimetres; use those figures to vet external case dimensions before purchase.
How to measure precisely
Use a rigid tape measure; take three width readings (left edge, center, right edge) and use the smallest value. Measure depth along the floor at the lowest point and at the threshold; record the smallest. Measure height at both front and rear of the load area; use the smaller figure when comparing with case height.
Include wheel wells, spare-wheel recesses and hinge intrusions in the measurements. Measure trunk aperture (opening width and opening height) separately – an item with external dimensions that fit interior may still refuse passage through a narrow aperture.
Consider alternatives with lower-profile wheels or fold-flat handles; see a compact option here: best lightweight rolling backpack for travel.
Clearance and fit checklist
Minimum side clearance: 4–6 cm per side between case body and trunk walls to ease insertion and reduce abrasion.
Minimum top clearance: 8–12 cm above tallest case dimension to allow the lid or hatch to close without pressure on contents.
Aperture rule: opening width and height must exceed corresponding case external dimensions; if aperture < case dimension, case will not pass through even if interior volume would accept it.
Stacking rule: when stacking two cases, subtract 2–4 cm from maximum allowable height per case to allow hand clearance when lifting and reseating.
Orientation test: place the case in its likely transport orientation (wheels facing trunk lip, wheels toward rear seats, etc.) and verify that handle housings, wheels and garment straps do not catch on trim pieces.
Weight distribution: position heaviest items low and centered; secure with cargo nets or straps to prevent lateral shift when braking.
| Example trunk interior (W × D × H cm) | Recommended max single case external dims (W × D × H cm) | Side clearance (cm) | Top clearance (cm) | Notes |
|---|---|---|---|---|
| 100 × 80 × 40 | 96 × 74 × 32 | 4–6 total (2–3 per side) | 8 | Small hatchback; check aperture width before purchase |
| 120 × 95 × 45 | 116 × 89 × 37 | 4–6 total | 8–12 | Sedan trunk with deep well; use low-profile wheels to gain height |
| 140 × 105 × 60 | 136 × 99 × 48 | 4–6 total | 12 | Large SUV; allows taller roller suitcases or soft packs |
| Two carry items side-by-side | Combined width ≤ interior width − 8 cm | 8 total (between and sides) | allow 8–12 above top item | Subtract wheel housings when calculating combined width |
Soft vs hard: which resists sliding and crush in motion in a vehicle
Choose hard-shell cases when resistance to sliding and crush during transit inside a vehicle is the priority.
Performance comparison
- Sliding resistance: rigid shells present smooth exteriors and recessed wheels; without non-slip treatment they can move more on slick trunk floors. Textile bags conform to surface irregularities and often generate higher static friction against carpeted or rubber-lined cargo areas, reducing shift under light loads.
- Crush protection: hard panels retain internal volume under compressive loads, distributing point pressure across curved faces. Soft packs compress and transmit concentrated forces to fragile contents unless internal stiffening is added.
- Mass and stability: heavier rigid cases resist inertia-driven movement better than lightweight soft packs. Low center-of-mass packing reduces tendency to slide or tip.
- Securing options: molded shells commonly include recessed handles and anchor-friendly geometry that accept straps cleanly. Textile designs accept external straps, cinch systems, and tie loops that adapt to irregular cargo shapes.
- Stacking behavior: rigid cases stack predictably and support weight placed above; soft packs deform under sustained load, increasing crush risk to items beneath.
Practical measures to minimise sliding and crush
- Attach rubber or silicone anti-slip pads to shell bases and wheel housings; lay a non-slip trunk liner to raise overall friction between any case and vehicle floor.
- Use low-profile ratchet straps, cargo nets, or adjustable tie-downs anchored to cargo points to prevent fore/aft movement; place restraints across the widest section to spread restraint forces.
- Reinforce textile bags with internal stiffeners: corrugated plastic panels, thin plywood inserts, or purpose-built frame boards convert a soft pack into a semi-rigid unit that resists crushing.
- Pack heavy, solid items into rigid cases; place compressible items in soft packs and wedge them between harder cases to create a compact, interlocked load.
- Eliminate internal voids using packing cubes, compression straps, or rolled clothing to prevent collapse under lateral pressure.
- When using roof transport, choose rigid shells with integrated mounts; textile duffels must be wrapped in a waterproof cover, set on a non-slip pad, and secured with multiple tie-downs to avoid lateral shift and compression.
When sliding resistance and crush protection are primary requirements, rigid cases outperform textile packs in shape retention and impact distribution; textile solutions work well when reinforced, packed tightly, and secured with appropriate anti-slip measures and straps.
Securing baggage inside a vehicle: straps, nets and placement tips
Use 1.5-inch ratchet straps rated 2,000–5,000 lb plus a cargo net anchored to OEM tie-downs to eliminate movement during transit.
Straps and nets
Choose webbing width and working load limit (WLL) to match estimated mass: light loads up to 50 kg → 25–36 mm (1 in) cam straps with WLL 400–800 lb; medium loads 50–150 kg → 38–50 mm (1.5–2 in) ratchet straps with WLL 2,000–4,000 lb. Verify label showing WLL and minimum breaking strength; WLL commonly sits near one third of break strength. Protect sharp edges with corner protectors, folded cardboard or rubber sleeves to prevent abrasion. Install cargo nets with four solid anchor points; select nets with 30–50% elastic range and mesh no larger than 50 mm to stop small items. Use metal D-rings or bolted L-track when factory anchors are absent.
Placement and packing
Place heavy, dense items low and against the rear seatback; distribute weight between wheel wells to keep center of mass centered and low. Stack medium-weight items above the heavy base; use soft bags, clothes or foam as void fillers and wedge points of contact to reduce surge. Store small loose objects in lidded plastic bins or sealed compartments and secure those bins with straps or netting. Position fragile items upright, cushion with blankets and separate from rigid objects by foam layers. Maintain 5–10 mm clearance between load and rear hatch or window seals to avoid pressure during closure.
Tighten ratchets until straps feel firm without deforming contents; retighten after the first 10–20 km and at every extended stop. Secure excess strap tails with zip-ties or Velcro to prevent flapping against trim. Avoid routing straps across seatbelt webbing or hinge points. Place anti-slip mats beneath soft bags to lower sliding tendency, then combine with straps or nets for maximal restraint. Consider a compact everyday pack such as best backpack for high school boy when transporting school supplies.
Selecting roof and hitch carriers: weight limits, mounting points and aerodynamics
Choose a roof rack whose dynamic load rating exceeds planned cargo weight by at least 25% and a hitch carrier matching the vehicle’s tongue rating or higher.
Weight limits and mounting points
Factory roof-load ratings normally sit between 75 kg and 100 kg (165–220 lb) as a dynamic limit; static rooftop-tent limits often reach 200–300 kg (440–660 lb). Crossbar systems frequently publish per-bar and total-system ratings – treat the lower published value as binding. Hitch-class tongue-weight guidance: Class I ~90–100 kg (200–220 lb), Class II ~150–160 kg (330–350 lb), Class III ~225–250 kg (500–550 lb), Class IV/ V up to 450–500 kg (1,000–1,100 lb). Verify vehicle and hitch plate stamped ratings and subtract receiver-mounted accessories (bike racks, carriers) weight before loading cargo.
Mounting-point types: fixed threaded points, flush rails, raised rails, and factory tracks. Measure center-to-center distance between factory anchors and match carrier baseplate footprint; standard crossbar spread commonly ranges 61–92 cm (24–36 in). Use only manufacturer-specified adapters when clamping to gutterless roofs or panoramic-glass areas. Torque fasteners to values supplied by rack maker; re-torque after first 80 km (50 mi) and then every 500–800 km (300–500 mi) or after severe vibration events.
Aerodynamics, fuel penalty and placement
Low-profile cargo boxes increase drag roughly 5–10%; tall, blunt boxes can raise drag 15–30% and fuel consumption similarly. Exposed crossbars alone typically cause a 1–5% penalty. Mount boxes close to the windshield line when possible to keep airflow attached and reduce turbulence; place bulk mass near the vehicle centerline to limit yaw-induced instability. When transport of appliances like chest freezers is required, consult are there any small frost free freezers for size and handling guidance.
Hitch carriers: prefer models with anti-wobble pins, dual vertical support, and rated shank sizes matching receiver class. Use weight-distribution or sway-control devices when rear-mounted load approaches the receiver tongue limit. Ensure license plate and lighting remain visible; add auxiliary lights or plate relocation brackets when occluded.
Inspection checklist: confirm vehicle roof rating, verify hitch tongue rating, measure crossbar spacing, torque all fasteners, check clearances to overhead obstacles, and perform a short test drive at highway speed to detect flutter or instability before long trips.
Packing strategies – family trips and pet travel: compartmenting and quick-access items
Assign one clear 20–30 L bin to each adult, one 10–15 L bin to each child, plus a 15 L container dedicated to pet supplies.
Use color-coded packing cubes: large (50×30×15 cm, ~30 L) – tops; medium (35×25×10 cm, ~12 L) – bottoms; small (28×18×8 cm, ~4 L) – underwear, socks, chargers.
Organize by function: clothing, toiletries, electronics, snacks, entertainment, documents, medications, pet kit. Assign one labeled cube per function to simplify swaps during multi-day stays.
Pet kit specifics: crate sized to animal length plus 20–25% in length and height; water supply 2 L plus a collapsible bowl (500–1,000 ml); 24–36 meal portions depending on trip length; leash, harness, vaccination records and written vet contact details in a waterproof zip pouch; 30 waste bags per day when access to disposal points is limited.
Quick-access essentials: clear zip pouch with IDs, vehicle registration, insurance; 72-hour prescription kit with originals, dosing notes and photocopies; compact first-aid (sterile dressings, antihistamine, thermometer); high-protein snack stash (12 bars), 24 single-serve wet wipes, hand sanitizer 120 ml, disposable cutlery and napkins.
Place the primary grab bag within arm’s reach: under the front seat, in the center console or a seat-back organizer on the driver’s side. Keep a secondary emergency kit under cargo floor or trunk space; locate it when departing on longer trips in an SUV or van.
Seat-back organization: tablets in rugged sleeves, two activity books per child, kid-sized headphones, a small zip pouch with spare socks and an extra shirt per child in a waterproof pouch placed at top of the bin stack, enabling immediate access during rest stops.
Labeling and inventory: attach laminated checklist to each bin lid and scan QR code linking to a cloud spreadsheet with item counts and medication dosages. Use color stickers: red = medical, blue = food/snacks, yellow = pet.
Timing and workflow: pack main containers 24 hours prior; assemble quick-access grab bag 30 minutes before departure; run a five-minute checklist 10 minutes prior to leaving.
Sample plan – family of four + medium dog (48-hour trip): Adults: each 2 outfits, underwear, 1 sleep set, toiletries pouch; Children: each 3 outfits, swimwear, 6 diapers or equivalent; Communal: first-aid kit 1, snack tote with 16 snack packs, water 4×1 L; Pet: crate, 2 L water, 8 meal portions, 60 waste bags, leash, harness, vet records.
If sedatives or prescription calming aids form part of the animal care strategy, carry written vet dosing instructions and keep medications in original containers inside the pet pouch.