Materials (exact specs): 6–8 retail polyethylene sacks (stacked and heat-bonded) or 2 layers of 120–150 g/m² ripstop nylon as an internal liner; closed-cell EVA foam, 3/16″ (4.5 mm) for side panels and 1/4″ (6 mm) for base insert; #10 molded coil zipper, 22″ length for an 18″×12″ shell; 1″ polyester webbing for handles, cut to 26″ for over-the-shoulder or 18″ for hand carry; bonded nylon polyester thread, Tex 70–90; 3/4″ heat-activated seam tape; 5mm stainless rivets or bar-tack stitching for stress points.
Cutting and dimensions: Cut outer shell panels at 19″×13″ (adds 1/2″ seam allowance each side) for two side panels and a single 36″×13″ strip for the wraparound face; base: 18″×12″ plus 1/2″ seam allowance. Foam core: match inner panel shapes but subtract 1/8″ per edge to allow insertion. For a carry size ~18″×12″×8″, total volume ≈ 1,728 in³ (~28 L).
Sewing and assembly tips: Stack polyethylene layers and fuse with a household iron on medium heat using parchment between layers; press 30–45 seconds per 12″ area. If using a sewing machine, fit a size 16/100 or leather needle, set stitch length to 3.0–3.5 mm, and use a walking foot for even feed. Use 1/2″ seam allowance; double-stitch seams with a second pass 2–3 mm from the first. Reinforce handles with a 2″×3″ box stitch and add rivets at handle ends spaced 1.5″ apart. Apply 3/4″ seam tape over interior seams with a heat sealer or iron set to manufacturer temperature for thermoplastic adhesive.

Hardware and finishing: Install the #10 zipper into the top edge using a zipper foot and baste in place before final stitching. For corners, add triangular 2″ patches of double-layer material and tack with 4–6 rivets or an X-stitch pattern. Insert foam base into a sewn pocket to keep shape; glue with hot-melt EVA adhesive if needed. Final expected empty weight: 0.3–0.9 kg depending on foam and hardware choices.
Load recommendations and care: limit carried load to 10–12 kg to avoid seam failure; test a prototype with incremental loads of 2 kg steps up to target. For cleaning, wipe with mild detergent and cold water; avoid machine washing if polyethylene outer is used. Store flat with base insert removed to prolong foam life.
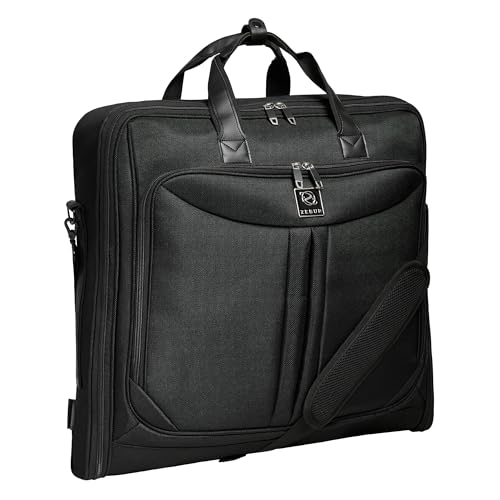
Convert Big-box store sacks into a robust travel case
Materials and specifications
Use woven polypropylene panels rated 90–110 GSM; cut two front/back panels 60 × 40 cm and a gusset strip 20 × 160 cm for a standard carry-on footprint. Reinforce edges with 25 mm nylon webbing (break strength ≥1,200 lb) sewn with bonded nylon upholstery thread (size 69) using a box‑X stitch pattern at 8–10 stitches per inch. Internal frame: 3 mm aluminium L‑channel along the perimeter, fastened to a 5 mm birch plywood base. Wheels: four 50 mm polyurethane spinner wheels with 6 mm stainless steel axles; secure with M6 flange nuts and stainless washers. Telescoping trolley: two‑stage aluminium tubes (outer Ø 25 mm, inner Ø 20 mm) with a commercial trolley kit and M4 mounting screws. Closure: heavy‑duty #10 nylon coil zipper, minimum length 60 cm for the main opening. Sealing: polypropylene seam tape plus a thin bead of polyurethane seam sealant at all external seams.
Assembly procedure and testing protocol
Cut panels with a 5 mm allowance for seams. Fold gusset to meet front/back panels and machine sew the webbing around the entire perimeter before attaching the zipper. Stitch pattern: 4 passes for the webbing attachment (two parallel lines plus the box‑X at handle points). Rivet the aluminium L‑channel every 60–80 mm using 5 mm stainless pop rivets; back the rivets with internal washers for tear resistance. Mount plywood base inside the L‑channel using M5 screws through pre‑drilled holes; attach wheel plates to the plywood using M6 bolts tightened to 6–8 Nm. Install the trolley kit into a reinforced internal pocket bound by webbing and anchored to the plywood with M5 rivets in a 4‑point pattern.
Apply heat‑activated seam tape with a hot‑air welder set between 160–175 °C, advancing at approximately 0.5–1 m/min; if a welder is unavailable, use contact adhesive rated for polypropylene and press firmly for 24 hours. Final checks: load test to 20–25 kg for 24 hours, perform three 75 cm drop tests onto corners and edges, inspect for seam gaps or hardware loosening. Target finished weight: 1.5–2.5 kg depending on reinforcement choices; expected internal volume roughly 45–48 L for the given panel dimensions.
Selecting carrier types and testing load capacity
Select heavy-gauge woven polypropylene carriers or 3–6 mil high-density polyethylene film with reinforced, gusseted bottoms; aim for a working load rating ≥ 40 lb (18 kg) and validate to at least 2.5× that target (≈100 lb / 45 kg) during testing.
Recommended material specs and construction
Prefer woven polypropylene (80–160 gsm) or laminated polypropylene with box-bottom construction and heat-sealed seams. Film thickness: ≥3 mil for single-sheet plastics; ≥5 mil recommended for repeated use. Stitching: nylon thread, 6–8 stitches/inch, double-stitched handle attachment. Metal or plastic rivets at handle anchors increase shear resistance by ~30% versus stitched-only handles. Use internal stiffener: corrugated cardboard or 3 mm HDPE sheet to distribute point loads across the base.
Quantitative testing protocol
1) Visual inspection: check seams, weld beads and handle anchors for manufacturing defects before any load. 2) Incremental static load test: suspend carrier from a calibrated scale or load cell, add weight in 10 lb (4.5 kg) steps, hold each increment 3–5 minutes, record permanent deformation at each step. 3) Proof load: reach 2.5× design working load and hold 1 minute; note failure mode (handle pull-out, seam tear, film rupture). 4) Dynamic drop test: with contents simulating concentrated and distributed loads, drop from 1 m onto plywood over concrete in three orientations (base, corner, side) – three repetitions each. 5) Handle shear test: clamp body and load only handles with a steady pull equal to 1.5× working load for 60 seconds. 6) Edge-concentrated test: place 1″ wide wooden strip under base center and apply load to simulate high-stress compression points. 7) Abrasion/cycle test: rub seam area across 80–120 grit surface for 50 cycles and re-evaluate seam integrity.
Record weight at first permanent deformation and weight at failure; accept designs where first deformation ≥ 1.5× working load and failure ≥ 2.5× working load. Reinforce weak points with 2″ nylon webbing riveted and stitched, adhesive-backed fabric tape over seams, and a cardboard base insert. For interior stabilization and odor control, include silica gel packets, cotton liners or related additives such as best add ins for dog food.
Reinforcing seams and corners with tape and fabric patches
Materials and tools
Tape: filament (fiberglass-reinforced) tape 50 mm wide, tensile rating 70–120 lb per 25 mm; acrylic cloth tape for flexible joints.
Patches: ripstop nylon or 600D polyester squares (recommended sizes: 10×10 cm for routine corners, diamonds 12×12 cm for high-stress points); polyethylene-compatible adhesive-backed film for thin plastic carriers.
Fasteners/adhesives: contact cement (industrial), hot-melt glue stick (industrial), or polyolefin weld adhesive for polyethylene; optional grommets/rivets (6–8 mm).
Sewing: bonded polyester or nylon upholstery thread; industrial needle 100/16 (machine) or sailmaker needle for hand-sewing; stitch length 3.0–4.0 mm (≈8–10 stitches per inch).
Tools: seam roller, heat gun or household iron with parchment, heavy-duty sewing machine or awl, rivet press.
Step-by-step technique
Apply a 8–12 mm single or double fold to raw seam edges and press flat; this reduces fraying and provides a base for tape and stitching.
Place a 50 mm filament tape strip centered over the seam on the interior side, overlapping the tape ends by 50 mm beyond the stitch stop; use a seam roller to eliminate air pockets and ensure full adhesive contact.
On the exterior, run a second tape strip offset by 3–5 mm from the seam center to form a laminated sandwich; overlap end laps by 50 mm and press firmly.
Cut corner patches as diamonds (12×12 cm) or rounded squares (10×10 cm). Round the patch corners to reduce peel initiation. Score the backing and apply contact cement to both patch and host surface, wait until tacky (typically 2–5 minutes), then bond and roll under pressure.
Topstitch patches around the perimeter with a 3.0–4.0 mm stitch length using bonded polyester thread and a 100/16 needle; for corner stress points stitch a box with an X inside (box size 20–30 mm) to distribute load.
For thin polyethylene carriers where needle holes cause failures, avoid through-stitching: use heat welding (hot-air or iron with parchment) to fuse a polyethylene patch to the substrate, or use adhesive-backed poly film plus an external tape flange. If mechanical attachment is required, install a rubber or plastic washer under each rivet or grommet to protect the film.
When reinforcing handle mounts, extend tape 25–50 mm onto adjacent panels, apply a 40×80 mm reinforcing patch on both faces, then stitch a box+X; alternatively, install 6–8 mm grommets through the stacked patch and backing plate to eliminate stitch pull-through.
Final test: load the finished assembly to 150% of expected working load for 24 hours; inspect tape adhesion, stitch integrity, and patch edges for lift. For reference on strap placement and hardware options consult best messenger bag for across body.
Creating an internal support frame using cardboard and duct tape
Use double-wall corrugated cardboard (BC or BC/EB combination, ~6–8 mm total thickness) for main panels and 72 mm (3″) heavy-duty cloth-backed duct tape for load-bearing joints; expect a functional internal frame that supports roughly 15–25 kg distributed load with this setup.
Materials and dimensions
- Panels: double-wall corrugated, cut to inner shell dimensions minus 6–10 mm per edge to allow insertion and tape bulk.
- Corner posts: roll cardboard into square tubes 30–40 mm per side; wall thickness from 2–3 layers of corrugated sheet.
- Base reinforcement: two laminated single-wall sheets (C-flute, ~3.5–4 mm each) bonded to form a 7–8 mm composite base.
- Duct tape: 72 mm width, heavy-duty; have 10–20 m on hand for a medium-size carrier. Use 48 mm (2″) for small repairs only.
- Optional adhesive: spray contact or PVA for lamination; hot glue for spot bonds if available.
- Fasteners: cable ties or brass brads can be used inside tubes for added shear resistance, but avoid puncturing outer shell.
Step-by-step construction
- Cut main panels to size: subtract 6–10 mm from measured interior width/height to prevent binding; mark folds and panel interfaces on the corrugated flutes for cleaner joints.
- Form corner tubes: stack two or three strips of corrugated, roll tightly into a square tube ~30–40 mm wide, secure longitudinal seam with a 50 mm tape overlap spiraled along the length; produce four identical tubes.
- Laminate base: glue or tape two single-wall sheets with staggered seams; run tape along all edges, folding 20–30 mm over the face to create a stiff flange that distributes load into corner tubes.
- Attach base to corner tubes: set tubes upright at each corner, tape a 50 mm flange from the base to each tube with two perpendicular tape strips (one along each adjoining face) to prevent rotation.
- Add side panels: slide side panels between corner tubes; secure with 50–75 mm tape strips at 100–150 mm spacing along each vertical seam. Use overlapping tape pieces (min. 50 mm overlap) and wrap once around the tube for a locked joint.
- Create cross-bracing: cut two 80–100 mm-wide strips the full internal width and length; place them in an “X” across the interior and tape each end to adjacent corner tubes and to the base. For higher loads, add an additional central transverse strip under the base.
- Reinforce opening edges: form 15–20 mm folded cardboard edge liners and tape them over the rim; tape should wrap from the interior flange around the edge to the exterior to prevent rim collapse.
- Final wrap and fillets: apply 72 mm tape along every external joint, then add triangular fillet gussets (50 x 50 mm) at each interior corner taped on both faces to distribute shear into larger surface area.
Testing protocol: apply a 20 kg static load centrally on the base and measure deflection; acceptable deflection for field use 10 mm, double the base lamination or add two additional transverse braces.
Installing handles, secure closures, and basic water resistance
Install two 1″ nylon webbing handles with 6″ gripping sections and 22″ tails; anchor each tail through a 4″×4″ vinyl or PVC patch using four 3/8″ stainless steel Chicago screws with 1/2″ stainless washers to spread load – expected single-handle load capacity: ~150 lb when properly reinforced.
Sewing specs: stitch a 1/2″ from edge with bonded nylon upholstery thread (size 69) in a box‑X pattern; use a heavy‑duty THICK needle (16/100 or 100/16) and set machine tension slightly higher than normal for multiple layers. Where machine stitching is impractical, install 1/8″ aluminum or stainless pop rivets every 1.5″ along the patch perimeter, adding 3/4″ diameter washers under head and tail for tear resistance. For carry points that may see repeated stress, add a 3″ long internal cardboard or thin HDPE spreader plate under the patch to prevent local deformation.
Closure options with measured recommendations: a) Waterproof coil zipper (#10) sewn into a 1″ fabric flap with 1/2″ overlap; place zipper 1″ below top edge so the flap covers slider. b) Roll‑top closure: fold 3 times (~2″ per fold) and secure with a 1″ cam buckle strap – route strap ends through 1/2″ D‑rings riveted with 3/8″ rivets. c) Heavy tarp Velcro strip (2″ wide) plus a short zipper for small openings: Velcro adds quick access, zipper provides theft resistance.
Seal strategy for polymer carriers: remove surface oil with isopropyl alcohol (70–90%). For polyethylene (PE) and polypropylene (PP), apply plastic welding with a 300–450°C plastic welding gun along seams; use matching PE/PP filler rod. If welding tools unavailable, apply 1″ polyurethane seam tape using a contact adhesive rated for vinyl; bond with 30–60 seconds of firm roller pressure and let cure 24 hours. For stitched seams, inject marine‑grade neutral cure silicone into stitch perforations with a syringe, smooth with a flat spreader, then overpatch with a 3″ vinyl tape strip centered on the stitch line.
Chemical and temperature limits: marine silicone tolerates -40°C to +120°C; polyurethane seam tape retains flexibility -30°C to +80°C. Avoid solvent‑based adhesives on thin PE; they typically fail. After sealing, allow 24–48 hours cure at >15°C and test with a 10 psi water spray for 2 minutes over seams before regular use.
| Item | Quantity | Specs | Purpose |
|---|---|---|---|
| 1″ nylon webbing | 2 pieces | 22″ tails, 6″ grip | Main handles |
| Vinyl/PVC patch | 4 | 4″×4″, 2 mm | Reinforce anchor points |
| Chicago screws (stainless) | 8 | 3/8″ shaft, with washers | Load fastening |
| Pop rivets (stainless) | 20 | 1/8″ rivets | Edge reinforcement |
| Bonded nylon thread | 1 spool | Size 69 | Sewing handles/patches |
| Waterproof coil zipper | 1 | #10, length per opening | Primary closure |
| Polyurethane seam tape | 1 roll | 1″ or 2″ wide | Seam sealing |
| Marine‑grade silicone | 1 tube | Neutral cure | Fill stitch holes |
For comparison with commercial alternatives and material ideas consult best luggage brands in saudi arabia; adopt any hardware specs that match those products when upgrading components.