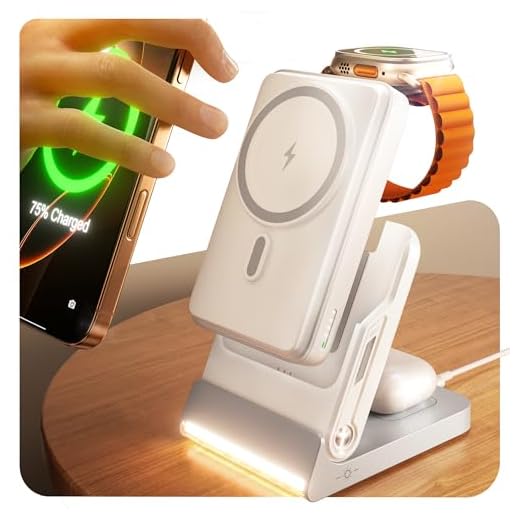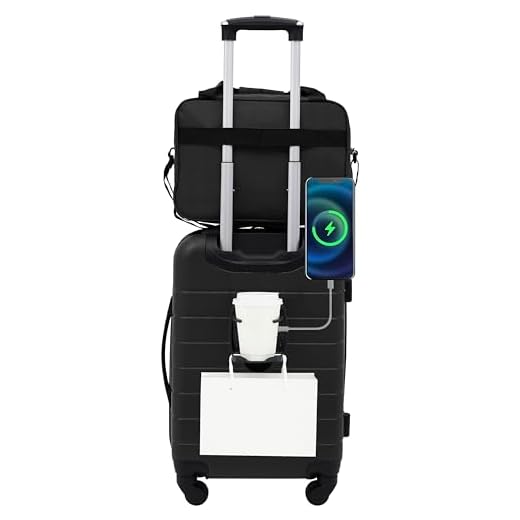


Select models that allow quick battery removal for cabin carriage: a 20,000 mAh cell at nominal 3.7V equals 74 Wh (20,000/1000 × 3.7 = 74 Wh), safely under the common 100 Wh limit. Batteries between 100–160 Wh require airline approval; batteries exceeding 160 Wh are banned on passenger aircraft.
Typical architecture uses a lithium‑ion cell (nominal 3.7V) connected to a boost converter and a power‑delivery controller that negotiates output voltages: standard 5V at up to 2.4A, and stepped voltages such as 9V, 12V or 20V for PD-capable devices, enabling outputs commonly quoted as 18W–30W. An internal cable links the battery compartment to an exterior charging receptacle; status LEDs, power buttons and built‑in fuses manage state and safety.
Choose units carrying regulatory marks (CE, FCC, RoHS) plus built‑in protection against overcharge, overdischarge, overcurrent and short circuits. Prefer packs that include thermal cutoff and automatic current limiting. If the power pack cannot be removed, do not place the bag in checked baggage due to fire risk and regulatory restrictions.
Operational recommendations: charge the pack to full before departure; carry an appropriate certified cable and an inline charging meter to verify voltage/current on the go; avoid pass‑through charging during flight unless the manufacturer explicitly certifies safe simultaneous charge/discharge. For long battery life, store at ~40–60% state of charge if unused for weeks, and keep the unit below 60°C during transit; secure the exterior connector using the supplied cover to prevent accidental shorting.
Before purchase, review printed specifications for nominal capacity (mAh), Wh calculation, output voltage/current ratings, and removable battery instructions. Test outputs at home using an inline power meter and inspect seals on the battery compartment for easy access during security checks.
Battery-Integrated Suitcase: Practical Operation
Use a removable lithium‑ion power pack rated under 100 Wh to charge devices via the built‑in charging connector; remove the battery during airline screening if requested.
Typical assembly: an external charging connector mounted on the shell links through insulated wiring to a compact control board and a secured battery compartment. The control board contains a boost/buck regulator, overcurrent protection and battery‑management circuitry (BMS) that monitors cell voltage, temperature and state‑of‑charge.
Output characteristics: common factory outputs are 5 V at 2.1–2.4 A (≈10–12 W). Higher‑spec units support negotiation protocols delivering 9–12 V or higher profiles via Type‑C connectors, enabling 18–45 W levels depending on internal regulator and pack capability. Expect 10–15% energy loss between battery rated capacity and delivered device energy due to conversion inefficiency and cable drop.
Capacity and regulations: capacity appears in watt‑hours (Wh) or milliamp‑hours (mAh). Convert mAh to Wh: (mAh × nominal cell voltage) / 1000. Example: 20,000 mAh at 3.7 V ≈ 74 Wh. Rules generally allow packs under 100 Wh in cabin baggage; 100–160 Wh require airline approval; packs above 160 Wh are typically forbidden on passenger aircraft. Keep the pack removable and labeled with its Wh value.
Safety and maintenance: choose certified packs carrying UN38.3 and recognized safety marks (CE, ETL, etc.). Do not use swollen or mechanically damaged modules. Store long‑term at ~30–50% charge, avoid prolonged exposure above 60 °C, and replace packs that overheat or show rapid self‑discharge. If indicator LEDs show fault patterns or excessive heat appears, disconnect and service the module.
Practical tips: use short, high‑quality cables to reduce voltage drop and preserve charging speed; prefer Type‑C when device and suitcase electronics support fast‑charge negotiation. Most factory installations route power only; onboard connectors usually prevent data transfer. Carry a spare certified external pack as redundancy and store cables in an internal pocket to prevent strain on internal harnesses.
Repairs and replacements: match the original Wh rating, nominal cell voltage and BMS characteristics when replacing the internal pack. Avoid splicing internal wiring; have replacements fitted by authorized service centers to maintain safety certification and airline compliance.
Wiring the external charging connector to the internal battery
Run the connector’s positive lead through a 2.5–3 A resettable fuse to the boost/protection board VOUT; tie the connector negative directly to the pack negative/common ground; place the charge-input and battery-management module between the external charging inlet and the cell pack so charge and discharge paths are isolated.
Typical electrical architecture
Cell pack (single-cell lithium or multi-cell pack) → battery-management/protection PCB (BMS/charger) → boost converter (3.7 V → 5 V) → external A-type or C-type female connector (discharge path). The external charging inlet (micro-B, C-type inlet or dedicated DC jack) connects to the charger input on the BMS/charger board, not directly to the cells.
Key wiring points: VOUT from the boost module feeds the external connector through the fuse; charging input must go into the charge-controller input terminals; ground/common negative remains shared. If a removable power bank is used, terminate the pack on a keyed connector (JST, Molex) inside an internal pocket so the exterior connector only mates to that internal plug.
Practical wiring recommendations
Wire gauge: 22 AWG for up to 2.4 A; 20 AWG for up to 5 A. Use silicone-insulated stranded wire for flex reliability. Connector choices: panel-mounted A-type or C-type female for exterior; JST-SR, Molex MicroFit or Molex KK for internal mating. Protection: a polyfuse (PTC) 2.5–3 A on the V+ feed, plus the BMS overcurrent and short-circuit protection. Strain relief: secure cables at the connector housing and route away from hinges and zippers.
| Item | Recommended spec | Notes |
|---|---|---|
| Cell type | 18650 Li-ion single cell pack (nominal 3.7 V) or 2S/3S depending on internal design | Most consumer boost modules expect a single-cell nominal input; match charger to cell configuration |
| Protection/charger | Integrated BMS with charge input (TP4056-style for single-cell) or multi-cell charger | Choose board with temperature and overcurrent features |
| Boost converter | 5 V output, 2.4–3 A capable | Quality synchronous boost reduces heat and increases efficiency |
| Fuse | PTC resettable 2.5–3 A | Place on V+ between boost output and exterior connector |
| Internal connectors | JST-SR / Molex MicroFit | Polarised, friction-lock types for vibration resistance |
| External inlet | Panel-mounted C-type or micro-B inlet | Route to the charger input terminals on BMS/charger |
Test procedure: verify no shorts at rest, confirm open-circuit voltage at boost input matches pack voltage, then measure 5 V at the exterior connector under light load. Verify the charger terminates and the BMS cuts output on simulated short or overcurrent.
Removable power bank: where it sits and how to access it
Store the removable battery in the dedicated padded pocket behind the main lining near the trolley handle and always carry it in the cabin; remove it before checking the case.
Typical locations and physical features
Common placement: rear compartment behind the organizer panel, a slim zippered pocket under the top handle, or a foam-cut recess under the interior lid. Modules usually sit in a foam cradle or Velcro strap and align so the charging connector faces the shell opening for quick removal. Typical module sizes: 10,000 mAh ≈ 85×55×22 mm, 20,000 mAh ≈ 110×68×30 mm; thickness often determines whether the module slides out or must be lifted out vertically.
Step-by-step removal and inspection
1) Open the exterior access zip marked by a battery symbol or a small flap; security screens often expect immediate access. 2) Release any retention: undo Velcro, unclip a snap, or loosen a short screw (models that use captive screws will have a captive panel). 3) Slide the module along its guide rails or lift straight out; disconnect any quick-release cable by pressing the small latch and pulling gently. 4) Verify the label: note cell chemistry (Li-ion), rated Wh and mAh; calculate Wh if only mAh shown using Wh = (mAh/1000)×3.7. 5) Place the bank in its protective sleeve or separate plastic pouch and keep terminals covered to prevent shorting during inspection or transit.
Practical checks: confirm rated Wh ≤100 for unrestricted cabin carriage; 100–160 Wh requires airline approval; >160 Wh is not allowed in passenger aircraft. Examples: 27,000 mAh at 3.7 V ≈ 100 Wh; 43,000 mAh ≈ 160 Wh. Label must be legible.
Maintenance tips: inspect contacts for corrosion, ensure the retention strap holds the module firmly during rolling, and test the quick-release connector periodically for a snug fit. For business travel that pairs a compact case and protective accessories, consider a model from this review: best luggage for suits as carry on. Keep a slim umbrella in an accessible pocket for wet-weather carry: best carbon fiber umbrella.
Recharge options for suitcase battery: wall charging, pack swapping, and in-case charging
Charge the internal battery to 100% with the supplied AC adapter (USB‑C PD preferred) before each trip; typical time: 3–4 hours for a 10,000 mAh (37 Wh) pack at 18W input.
-
Wall charging (recommended procedure)
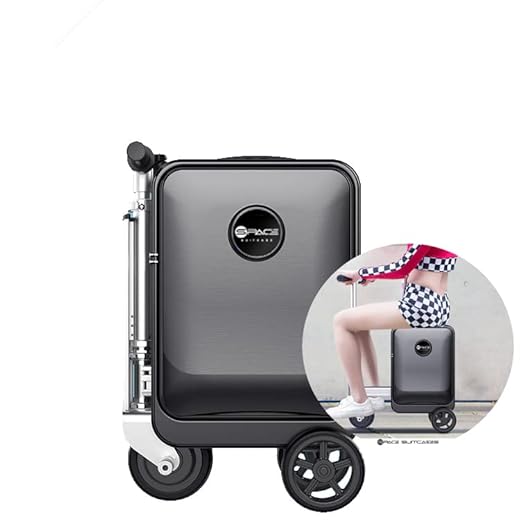
Hot PickSpace Suitcases Smart Rideable SuitcaseInnovative electric scooter luggage designThis motorized suitcase allows you to ride through travel terminals effortlessly while providing ample storage for your items. Its durable construction and powerful battery make it a practical and fun travel solution.- Match the charger output to the pack’s labeled input (common inputs: 5V/2A, 9V/2A, 12V/1.5A). Use a USB‑C PD charger for fastest negotiated charging; 18–30W is typical for travel packs.
- Use a high-quality short cable (≤1 m) rated for the charger wattage to reduce losses and heat. Cheap cables can limit current and raise temperature.
- Charging time estimate: Time (h) ≈ (mAh ÷ 1000 × nominal voltage) ÷ charger watts. Example: 20,000 mAh × 3.7V = 74 Wh; at 18 W → ≈ 4.1 hours (plus overhead).
- Safe ambient range during charging: 0–45°C. Avoid charging in enclosed hot trunks or checked baggage.
-
Swapping removable packs (step-by-step)
- Power off suitcase electrical outputs and any attached devices.
- Unlock and open the designated battery compartment; use the pull tab or latch provided–never pry connectors.
- Remove pack by its insulated tab; inspect connector pins or magnetic contacts for debris or deformity.
- Insert replacement pack aligned to the guide rails until it seats and clicks; confirm LED status on the pack or external indicator.
- Close and secure the compartment before re-enabling external charging or device outputs.
A hot-swap is possible only if the model explicitly supports it; otherwise always power off before swapping to avoid arcing or data interruption.
-
Charging while pack remains inside (in-case charging)
- Two common architectures: removable power bank connected via internal harness, or fixed internal battery with an external charging inlet.
- If the pack stays inside, route the AC cable to the external inlet and monitor the external LED indicators. If the case has ventilation slots, keep them unobstructed during charge.
- Some designs disable charging when the compartment is sealed to reduce heat buildup; follow manufacturer safeguards printed in the manual.
- Avoid charging unattended in checked baggage; airline rules require spare lithium batteries in carry‑on only. Check the battery Wh rating on the cell: Wh = (mAh ÷ 1000) × nominal voltage (usually 3.7 V).
-
Airline and safety limits (quick reference)
- ≤100 Wh: generally allowed in carry‑on, spare packs must be in carry‑on.
- 100–160 Wh: airline approval required; typically limited to two packs per passenger.
- >160 Wh: usually prohibited in passenger aircraft.
- Cover exposed terminals, avoid metal contact, keep spare packs in protective sleeves.
-
Maintenance and longevity
- Li‑ion cycle life: expect ~300–500 full cycles to ~80% capacity. Partial cycles extend calendar life.
- For storage over 3 months, leave pack at ~40% state of charge and store at cool temperatures (≈15°C).
- Replace packs showing swelling, high self-discharge, or connector damage.
Additional resources: best adrenal support for dogs.
Typical power outputs provided by suitcase charging sockets (V, A, W)
For reliable phone charging choose at least 5 V / 2 A (10 W); for tablets or ultraportables select a Type‑C Power Delivery connector rated 30 W or higher.
- Basic A‑type connectors: 5 V common; currents 1 A (5 W) or 2–2.4 A (10–12 W). Found on entry‑level cases for emergency phone top‑ups.
- Quick Charge (QC) profiles: stepped voltages between 3.6 V and 20 V. Typical negotiated combinations used by built‑in chargers: 5 V/3 A (15 W), 9 V/2 A (18 W), 12 V/1.5–2 A (18–24 W).
- Power Delivery (PD) over Type‑C: negotiates 5–20 V and up to 5 A. Common negotiated wattages seen in travel packs: 18 W (9 V/2 A), 30 W (15 V/2 A), 45 W (15 V/3 A), 60 W (20 V/3 A), 100 W (20 V/5 A). Many case batteries stop at 30–65 W due to internal battery limits.
- Simultaneous-output limits: manufacturers often cap total output across connectors. Examples: single A‑type = 10 W; A + C combined = 18 W total; higher‑end models allow C PD 45 W + A 12 W but advertise a combined ceiling (e.g., 60 W max shared).
- Internal battery energy: common pack capacities are 10,000 mAh ≈ 37 Wh and 20,000 mAh ≈ 74 Wh (calculation uses nominal cell voltage 3.7 V: Wh = mAh × 3.7 / 1000). Packs above 100 Wh are restricted for air transport.
Practical recommendations:
- Match rated output to your device: phones 10–18 W; tablets 18–30 W; small laptops 45–65 W. If plan to charge a laptop, confirm the Type‑C PD rating on the connector label.
- Check connector markings: printed V and A (or W) beside the socket indicate maximum per‑socket capability; if only mAh shown, convert to Wh to estimate energy available for multiple charges.
- Use quality cables: for >60 W PD use a cable rated for 5 A; thin cheap cables may limit current and reduce delivered wattage.
- Expect shared limits: plugging multiple devices often reduces per‑socket voltage/current because the battery management system enforces a total power cap.
- Avoid drawing current beyond listed values; repeated overload causes heat and reduces pack lifespan.
Carry-on first: keep all spare lithium-ion and lithium-metal batteries on board; do not stow spares in checked baggage
Spare rechargeable cells and external power packs must travel in the cabin. Installed batteries inside devices are generally permitted in checked bags only if the device is switched off and protected against accidental activation, but many carriers still require such devices to be carried in the cabin. Integrated batteries inside suitcases usually must be removable; if not removable, most airlines will refuse checked carriage of that case.
Capacity limits and airline approval
Rechargeable lithium-ion: cells or battery packs up to 100 Wh: permitted in carry-on (spares only in cabin). Packs >100 Wh and ≤160 Wh: airline approval required; typically a maximum of two spare packs per passenger and only in cabin. Packs >160 Wh: prohibited on passenger aircraft unless shipped as cargo under special dangerous-goods arrangements. Non-rechargeable lithium-metal cells: lithium content ≤2 g per cell allowed in cabin only; >2 g prohibited on passenger aircraft.
Packing, labeling and practical checks
Protect terminals: tape exposed terminals or keep batteries in original packaging or in individual plastic pouches to prevent short circuits. Calculate watt‑hours if not printed: Wh = (mAh × V)/1000 and carry manufacturer specs or label if possible. Declare high-capacity packs when seeking airline approval. Keep devices powered off and disable any wake functions; remove batteries if the carrier requests when checking a case. Expect gate or check-in staff to inspect battery markings; lack of visible ratings may lead to refusal to transport.
Troubleshooting loose connectors, non-charging devices, and status LEDs
Disconnect the removable battery pack and all cables before any inspection or repair; do not attempt soldering or probing while the pack remains connected.
Quick verification steps
Swap the cable and the powered device to rule out a faulty lead or gadget. Measure open-circuit voltage at the external connector: standard output poles should show approximately 5.0–5.2V for legacy outputs; negotiated fast-charge rails can present 9V, 12V, 15V or 20V after protocol negotiation. Typical consumer power modules deliver 1.0–3.0A on a single output; a drop greater than 0.5V under expected load indicates excessive contact resistance.
Use an inline power meter or a multimeter plus a controlled load to check voltage under load. If voltage collapses below 4.4V at nominal load on a 5V rail, suspect a weak battery, a failing protection circuit, or high-resistance connections. Measure continuity between connector ground shell and pack negative; any short between positive and negative (<1Ω) requires immediate battery isolation.
Repairs, cleaning, and component checks
Visual inspection: look for bent contacts, corrosion, loose mounting screws, frayed internal wires, cracked plastic, and lifted PCB pads. Clean contacts with 70–90% isopropyl alcohol and a soft brush; dry completely before reassembly. Compressed air helps remove debris from the receptacle cavity.
Mechanical tightening: tighten any external mounting screws that secure the connector housing. If the external receptacle is loose in its cutout, add a thin non-conductive shim or replace the housing. For slightly loose female contacts, replacement of the receptacle is safer than repeated manual bending; repeated bending fatigues the metal and increases resistance.
Solder and PCB checks: inspect solder joints at the connector for hairline cracks. Cold joints often present intermittent charging; reflow suspect joints with proper soldering iron temperature and flux. Verify internal wire terminations (commonly JST or Molex); reseat or replace connector plugs if pins appear oxidised or loose. Maintain polarity markings when reconnecting cells or modules.
LED diagnostics: measure LED forward voltage–approximately 2.0V for red, 3.0–3.3V for green/blue–and check the series resistor; expected resistor values range from ~100Ω to 1kΩ depending on LED current. If LEDs do not indicate charge state but the pack outputs correct voltage, the LED driver or microcontroller may be faulty. Replace the LED assembly or the indicator PCB if tests show open circuits or incorrect resistor values. For intermittent blinking, probe the microcontroller supply rail for stability; noisy or sagging supply suggests regulator or battery issues.
Final tests and safety: after repairs, perform a controlled charge/discharge cycle and monitor temperature. If the pack becomes hot (>45°C) or batteries are swollen, stop use and dispose following local lithium battery regulations. If uncertain about internal battery handling or PCB-level repairs, seek a qualified electronics technician.


