Before you set sail, ensure your gear identifiers are securely fastened. Begin by taking the provided labels and gently sliding them into their respective plastic holders.
Next, use the perforated slots in the plastic holders to carefully thread them onto your bags. It’s advisable to attach them to sturdy handles to prevent any risk of detachment during transit.
Verify that all necessary information, such as the reservation number and your last name, is clearly visible. Avoid obscuring any part of the label to ensure smooth handling by the staff.
Lastly, double-check that all identifiers are securely attached to each piece of gear before your departure. This simple step will streamline the arrival process at your destination.
Proper Placement of Cruise Bag Labels
Position the sticker on the outside of the travel case. Ensure it is clearly visible and free from obstructions. This aids in quick identification during the boarding process.
Secure Fastening Techniques
Utilize a sturdy plastic loop or string to firmly attach the identification piece. Avoid using adhesive options like tape, which could lead to detachment over time. A secure knot ensures stability throughout the transportation process.
Labeling Guidelines
| Step | Action |
|---|---|
| 1 | Locate the designated label area on the bag. |
| 2 | Remove protective covering from the sticker. |
| 3 | Position the label, ensuring full adherence. |
| 4 | Secure with a string or loop through any available holes. |
| 5 | Conduct a final check to ensure visibility and tightness. |
Confirm the information on the label is accurate and matches your travel documents. Double-checking helps avoid any potential mix-ups upon arrival.
Understanding Disney Cruise Luggage Tags
Receiving your identification labels is a straightforward process, often included in your preliminary booking documentation. These identifiers serve to streamline the distribution of personal belongings upon arrival.
Typically, these labels feature a sturdy design, allowing for visibility and durability during transit. Each label includes your stateroom number, cruise itinerary, and personal details, ensuring that your belongings reach you without confusion.
Follow these key points for optimal use:
- Complete any necessary information on the label before attaching it to your suitcase.
- Ensure that the label is securely fastened to the handle of your bag to prevent loss.
- Keep a copy of your reservation and label details in a separate location for reference.
Each item will typically be collected at the port, simplifying your experience. Your bags are then delivered directly to your stateroom, allowing for a smooth start to your vacation.
For some travelers considering space-saving solutions in their homes, check are there any 400mm wide fridge freezer options that might suit your needs.
Materials Needed for Attaching Tags
Gather the following supplies: strong adhesive tape, scissors, a pen, and available string or ribbon. These items are crucial for securing identification on your bags effectively. Ensure that the adhesive tape is durable enough to withstand the rigors of travel. Use scissors for precise cutting of any excess material, which can help streamline the process.
Additionally, have a pen ready to write your information clearly on any attached cards. The string or ribbon can serve as an alternative fastening method, especially if adhesive supplies are not adequate. This approach can enhance the visibility and accessibility of your identifiers.
For those interested in further exploring travel options, consider checking out the best places to backpack in march for exciting adventures.
Step-by-Step Guide to Attach the Tags
Begin with ensuring that each piece of baggage has a designated identifier. Lay the identifier flat on a clean surface. Grab a strong adhesive strip that comes with the marker.
Next, peel back the protective film of the adhesive strip, exposing the sticky side. Carefully position the identifier at the desired location on the handle or body of the item. Align it for optimal visibility.
Firmly press down on the identifier for several seconds to secure it in place. Examine the edges to confirm complete adhesion.
For additional support, consider looping a cable tie around the handle and through any relevant slots on the identifier. Pull the tie tight and trim any excess length to maintain a neat appearance.
Finally, perform a quick check on all items to ensure identifiers are securely applied and clearly visible. This will facilitate easier identification during pickup.
Common Mistakes to Avoid When Attaching Tags
Avoid using tape or glue for securing identification labels. These methods can damage the documents and may not withstand handling during transport.
Do not ignore the weight limits for each piece of baggage. Ensuring compliance will prevent additional fees at the check-in point.
Refrain from overcrowding the fasteners with multiple identifiers. This can cause confusion and lead to mishandling.
Do not neglect to fill out all required information on the stickers, such as name, contact details, and reservation number. Incomplete data can hinder retrieval in case of loss.
Avoid placing identification wrongly. Position them on the top handle for visibility during sorting and loading.
Ensure labels are securely fixed to prevent detachment. A loose tag can easily fall off and cause your belongings to be misplaced.
Be cautious not to cover any barcodes or QR codes with other items. This can obstruct scanning processes at checkpoints.
Do not rely solely on the identifiers. Consider adding an additional method of identification such as a personal mark on your items.
Where to Place the Luggage Tags on Your Bags
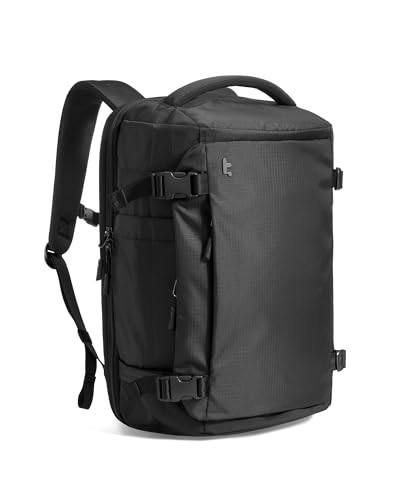
Secure the identifiers to the exterior of each piece of baggage. The recommended position is on a flat area where they can be easily visible. For suitcases, place them on the handle or the top side, ensuring they are not obstructed by any other items. For additional storage options like backpacks or duffel bags, the ideal placement is near the top or side pocket for accessibility.
Specific Techniques for Different Bag Types
For hard-shell suitcases, use the provided strap or fasteners to tightly fit the identifier. This minimizes the chances of it getting dislodged during transit. Soft-sided bags benefit from being attached to a zipper pull or securely lodged within an outer pocket while still visible. For smaller items, consider a carabiner clip for a sturdy connection.
Visibility Considerations
Aim to position the identifiers away from any zippers, seams, or areas prone to wear and tear. Ensure that they won’t be obscured by a cover, handle, or other accessories. The higher the visibility, the easier it will be for staff and handlers to identify your items quickly.
What to Do if You Lose a Luggage Tag
If a tag goes missing before or during your trip, act quickly to mitigate issues. First, contact your accommodation or transportation provider’s customer service. Provide your reservation details and describe the lost identifier. They may offer a replacement or guidance on next steps.
Document Your Belongings
Maintain an inventory of your items. Photos can help identify contents if you need to report a loss or seek assistance. Include a list of distinguishing features for easier recognition by airline staff or hotel personnel.
Consider Temporary Solutions
In absence of a replacement label, create a temporary identifier using any available materials. A piece of paper or card with your name, contact number, and destination information securely fastened to your bag can suffice. Just ensure it’s easily visible.
For future travels, keep a digital record of your shipment identification numbers and contact details of your service providers. This can expedite assistance in resolving any similar issues.
FAQ:
What materials do I need to prepare Disney cruise luggage tags?
To attach Disney cruise luggage tags, you will need the official tags provided by Disney, which are usually sent to you prior to your cruise. You’ll also need a pair of scissors to cut the tags from the sheet if they’re pre-printed, as well as a pen to fill in any necessary information. If using adhesive tags, ensure you have clear instructions at hand for proper application.
How do I properly attach the Disney cruise luggage tags to my bags?
To attach the Disney cruise luggage tags, first ensure that you have filled out the tags with your name, address, and contact number. Then, securely fasten them to your luggage handles using the provided plastic loops or ties. Make sure the tags are visible and can’t easily be removed to prevent mix-ups during boarding and disembarkation.
What should I do if I misplaced my Disney cruise luggage tags?
If you lose your Disney cruise luggage tags, it’s best to contact Disney Cruise Line customer service as soon as possible. They may be able to send you replacements or provide alternative instructions. In the meantime, you can create temporary tags using sturdy paper. Write your contact information on the paper and securely attach it to your bags until you receive official tags.
Are there any specific requirements for the size or type of luggage tags when cruising with Disney?
Disney cruise luggage tags are designed to fit specific guidelines, which generally include being large enough to display your information clearly. It’s important to use the tags provided by Disney to avoid any potential issues with boarding your luggage. These tags are made of durable material to withstand handling during your cruise and should be affixed securely to ensure they remain attached throughout your trip.
Can I use my own luggage tags for a Disney cruise, or do I have to use the official ones?
While you can use your own luggage tags for a Disney cruise, it is recommended to use the official tags provided by Disney. These tags are specifically designed for the cruise line’s luggage handling process. However, if you prefer to use your own tags, make sure to clearly include all necessary information and consider attaching the official tags as an additional measure to ensure proper identification.