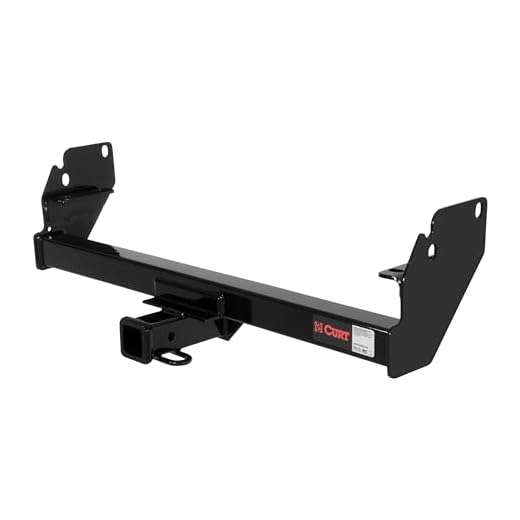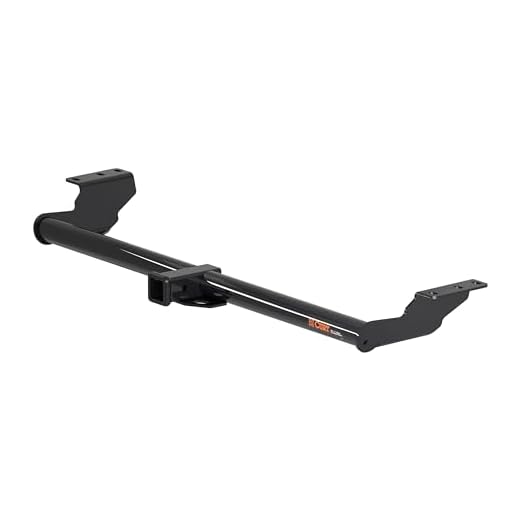


Ensure a proper fit by selecting the right hitch compatible with your vehicle’s specifications. A Class III or IV hitch is typically suitable for heavier loads, while Class I or II hitches work well for lighter cargo. Consult your vehicle’s manual for specific weight limits and hitch recommendations.
Next, align the connection points of the cargo hauler with the hitch assembly on your vehicle. Lower the connection onto the hitch’s ball, ensuring that it fits snugly. Engage the latch mechanism to secure the setup. Afterward, check the safety pin; it should be properly inserted to prevent accidental disconnection during transit.
Integrate safety chains for extra security. Cross the chains beneath the cargo unit and attach each end to the vehicle’s towing apparatus. This configuration helps maintain control if the primary connection fails. Conduct a test by gently tugging on the hauler to confirm everything is securely fastened.
Before hitting the road, verify all lights are operational, including brake and turn signals. A functioning lighting system enhances visibility and alerts other drivers of your intentions. Perform a quick walkaround inspection to ascertain that the load is evenly distributed and balanced within the confines of the hauler.
Attaching a Luggage Hauler
Begin with ensuring the vehicle’s hitch is compatible with your cargo carrier. Check the weight rating of both the hitch and the hauler, ensuring the former can support the latter’s load. Position the hauler near the hitch, aligning the coupler with the hitch ball.
Lower the coupler onto the hitch ball and secure it by tightening the latch or mechanical lock. Verify that the hauler is firmly seated on the ball by observing any gaps; there should be none. Next, utilize safety chains by looping them through the designated points on the vehicle and the hauler. Crisscross them for added stability and secure the ends.
Ensure lights function correctly if the cargo platform has electrical connections. Use a tester to confirm that brake lights, turn signals, and running lights operate as intended. Adjust mirror positions for better visibility when driving with the extended load. Finally, conduct a quick walk-around to verify stability and security before setting off.
Check Your Vehicle’s Towing Capacity
Verify your vehicle’s pulling ability before proceeding with any transport tasks. This ensures safety and compliance with regulations. Locate the owner’s manual to find the specific rating for your model, often stated in pounds (lbs) or kilograms (kg).
Understanding Capacity Ratings
Familiarize yourself with the various ratings associated with hauling:
| Rating Type | Description |
|---|---|
| Gross Vehicle Weight Rating (GVWR) | Maximum total weight of the vehicle and cargo. |
| Gross Trailer Weight Rating (GTWR) | Maximum weight a vehicle can safely carry behind it. |
| Payload Capacity | Weight of the cargo carried within the vehicle. |
Performing a Capacity Check
To determine how much weight your vehicle can tow, subtract the payload from the GVWR. For example, if the GVWR is 6,000 lbs and your payload is 1,500 lbs, your trailer can weigh up to 4,500 lbs.
In addition, consider any aftermarket modifications or additions that might impact dynamics, such as towing hitches or weight-distributing devices. Consulting with a professional can provide further insights into your specific setup.
Choose the Right Hitch for Your Cargo Carrier
Selecting the proper coupler for your cargo carrier is critical for safety and functionality. Ensure compatibility with both your vehicle and the load you’ll be transporting.
- Weight Rating: Examine the weight capacity specified by the manufacturer. Ensure that the hitch can support the total load, including the cargo and the carrier itself.
- Hitch Class: Choose from various classes based on your vehicle’s specifications. Classes I through V indicate different weight capacities, with Class I suitable for lightweight applications and Class V for heavy-duty uses.
- Ball Size: Confirm the appropriate ball diameter needed for your cargo carrier. Common sizes are 1-7/8”, 2”, and 2-5/16”. Verify compatibility to prevent accidental detachment.
- Installation Method: Decide whether a fixed or adjustable model suits your needs. Adjustable hitches offer flexibility for different loads and can save time.
- Trailer Type: Ensure the hitch matches the specific design of your cargo carrier, whether it’s a conventional rectangular design or a specialized platform.
- Durability: Look for materials that resist corrosion and wear, such as those made from stainless steel or coated with protective finishes.
Each of these factors will help you choose the best coupling mechanism for your carrier, enhancing both safety and convenience on the road.
Inspect the Trailer and Hitch Components
Conduct a thorough examination of all parts before connecting. Begin with the hitch assembly, ensuring that it is securely attached to the vehicle. Check for any signs of wear, rust, or damage, as compromised components can lead to failure.
Inspect the ball mount for a proper fit. It should sit tightly in the receiver without excessive play. The hitch ball must be correctly sized for the coupling of the cargo carrier; verify that it matches the specifications outlined by the manufacturer.
Examine safety chains. These should be rust-free and undamaged, with a suitable length to ensure a secure connection to the vehicle. Cross them beneath the coupling to provide added security and prevent it from dropping if it becomes unhitched.
Check the electrical connections if required. Ensure that the trailer lights function correctly, including brake lights, turn signals, and running lights. Faulty lights can lead to dangerous situations on the road.
Finally, verify the load distribution. Make certain that the weight is evenly distributed across the load-bearing surface to prevent swaying or instability during transit. Proper balance is key to safe transportation.
Align the Trailer with the Tow Hitch
Position the vehicle in a straight line with the coupling mechanism of the cargo carrier. Make adjustments by moving the vehicle slowly forward or backward until the hitch aligns perfectly with the trailer’s mounting point.
If needed, utilize a spotter who can guide you from the rear to ensure precise alignment. Ensure that both the ball mount and the coupler are at the same height for smooth engagement.
Aiming for a visual line-up can help; check both the side mirrors and look for any obstructions. This step is critical as misalignment can lead to difficulty in securing the connection.
Before completing the process, verify that your vehicle is equipped to handle the weight of the cargo by checking for a best car pressure washer for home use, ensuring that the buildup of dirt won’t interfere with the installation.
Once properly aligned, proceed to lock or secure the hitch to guarantee that the attachment remains strong while driving.
Securely Fasten the Cargo Carrier and Conduct Safety Inspections
Ensure the coupler is locked in place before driving. Test the connection by gently pulling the unit forward to confirm it is securely attached. Insert a safety pin or lock to prevent accidental release.
Check all electrical connections for proper functionality. Verify that brake lights, turn signals, and clearance lights are operational. Faulty connections can lead to dangerous situations on the road.
Inspect safety chains. Cross them beneath the coupling mechanism to provide additional security. Allow enough slack for turns but not so much that they could drag on the ground.
Verify tire pressure on both the vehicle and the transport unit. Under-inflated tires can lead to blowouts while on the move. Aim for the pressure specified by the manufacturer for optimal handling.
Examine the load distribution to ensure weight is balanced. This affects handling and braking, helping to prevent swaying or fishtailing while driving.
Conduct a final walkthrough. Double-check all fastenings, connections, and lights. This last step is key to ensuring a safe trip.
Test the Setup Before Driving
Ensure stability and functionality by performing a thorough check of the entire configuration. Begin by testing the connections to confirm everything is secure and properly fastened. Utilize the following steps:
- Conduct a visual inspection of all connection points for signs of wear or misalignment.
- Engage the vehicle’s lights and signals to verify that all electrical connections are functional.
- Ensure that the safety chains are crossed underneath the coupler for added security.
- Check the weight distribution and ensure that the load is balanced within the allowable limits.
Road Test
Take a short drive in a safe area to evaluate the setup’s performance. Pay attention to:
- Braking response: Ensure the vehicle stops smoothly without any unusual behavior.
- Turning capability: Check for any swaying or instability during turns.
- Sound checks: Listen for any rattles or sounds indicating loose components.
If adjustments are needed, make them before proceeding on a longer journey. Always prioritize safety to ensure a smooth ride. Consider the reliability of your gear, like the best purple leaf umbrella or the best auto closing umbrella for your outdoor travel plans, as preparedness enhances the overall experience.


