

Apply a little graphite lubricant on the teeth of the slider to tackle a jammed mechanism. This product, often available in pencil form, can ease the friction that causes these issues. A quick rub along the edges will typically suffice.
If the pull tab is detached, try using a paperclip or safety pin as a temporary handle. Thread the clip through the slider’s hole to regain functionality until a more permanent solution can be implemented.
For misaligned tracks, gently pull apart the fabric surrounding the fastener to inspect. In many cases, repositioning the slider or carefully removing debris can restore smooth operation. If damage is significant, consider replacing the entire fastener unit with a compatible model.
Repairing a Stuck Slider
Use a lubricant, such as soap or petroleum jelly, to ease the operation of the slider. Apply it directly to the track or teeth around the stuck area. After applying, gently move the slider back and forth to work the lubricant in.
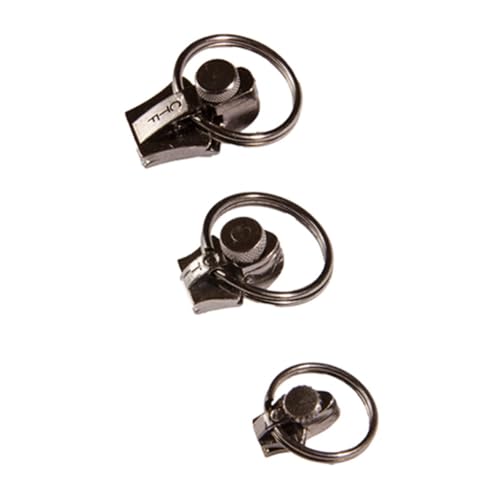
Replacing the Slider
If the slider is damaged, you can replace it. Remove the existing slider by carefully cutting the top stop using scissors. Slide off the old slider and replace it with a new one. Secure the new slider by using pliers to crimp a new stop at the top of the track, ensuring it fits snugly.
Realigning Teeth
Misaligned or bent teeth can cause issues. Carefully inspect the track and use pliers to straighten any bent teeth. If teeth are missing, consider adding a few heat-sealed stoppers to the corresponding spots to re-establish a functional path.
| Issue | Solution |
|---|---|
| Stuck slider | Apply lubricant and work slider back and forth |
| Damaged slider | Replace with a new one after removing the top stop |
| Misaligned teeth | Straighten with pliers; add stoppers if necessary |
Identify the Type of Zipper Damage
Examine the fastener closely. Look for common issues, such as misalignment of teeth, which may prevent smooth movement. Another frequent problem is a broken pull tab; if this part is damaged, you will need an alternative solution for gripping. Additionally, inspect the slider for signs of wear or damage. A slider that is too loose or too tight can cause significant malfunction.
Teeth and Alignment Issues
Check if the teeth are not properly meshing. Debris, fabric caught in the mechanism, or bent teeth can cause this issue. Gently clean any debris with a soft brush or cloth. If teeth are bent, try to straighten them with pliers, ensuring they remain intact.
Slider Condition
Assess the slider’s functionality. A dysfunctional slider may require replacement. If it moves erratically or won’t budge, consider tightening it by pinching the sides with pliers. However, excessive force might worsen the situation, leading to further complications.
Gather Necessary Tools and Materials
Collect the following items before addressing the malfunction:
- Replacement Slider: Ensure compatibility with your existing fastening mechanism.
- Fabric Adhesive: A strong adhesive suitable for textiles to secure any loose elements.
- Sewing Kit: Needles and thread matching the color of your fabric for minor repairs.
- Pliers: Useful for handling small components, particularly when working with the slider.
- Scissors: Sharp scissors to trim any excess material or threads.
- Small Screwdriver: If your attachment features screws, a suitable screwdriver will be necessary.
- Wax or Lubricant: Helps smooth the movement of the mechanism, if applicable.
- Safety Pin: Handy for temporarily holding elements together during repair work.
Having these tools at hand will facilitate a smoother repair process.
Repair a Stuck Zipper Slider
If the slider is not moving smoothly, try applying a small amount of lubricant, such as rubbing alcohol or graphite powder, to the teeth. This can reduce friction and allow for easier movement.
Inspect the teeth for obstructions like fabric caught in between. Gently push or pull the stuck area to remove any debris without damaging the material.
Sometimes, the slider may be misaligned on the track. Carefully reposition it by gently squeezing the slider and pulling it back on the track. Make sure it’s seated properly before trying to move it again.
If the slider is bent or damaged, use pliers to straighten it out. Apply minimal pressure and work slowly to avoid breaking the slider completely.
After attempting these methods, test the movement of the slider multiple times to ensure it operates smoothly. If issues persist, it may be necessary to replace the slider entirely.
Replace a Missing Zipper Pull
To replace a missing pull tab, use a sturdy material like a keyring or a piece of string. Start by ensuring the zipper slider is in the closed position. Slide the keyring through the small hole at the end of the slider to create a new handle. For a string, tie a knot at one end, insert the other end through the slider hole, and secure it with a knot or bead to prevent it from sliding out.
Using Alternative Materials
Common objects like paper clips, lanyards, or even a thin shoelace can serve as makeshift pull tabs. Attach by threading them through the slider’s loop, ensuring they offer enough grip for easy functionality.
Testing Your New Pull
Once the new pull is in place, test it by sliding the mechanism up and down a few times. Ensure it opens and closes smoothly, making adjustments as needed for comfort and usability. Regular checks will ensure continued effectiveness of the replacement solution.
Fix a Dislodged Zipper Track
If the track of your fastening mechanism has come out of alignment, realigning it can restore function effectively. Start by inspecting the area where the track is dislodged. Gently pull the slider to the nearest point where the track has not been displaced. Ensure that the fabric on both sides is not caught and is free from obstructions.
Realignment Method
Use a pair of flat-nose pliers to delicately squeeze the sides of the slider. This action can help secure a better grip on the track. If necessary, wiggle the slider slightly while pushing it along the dislodged track to guide it back into position. Be careful not to apply excessive force, which could cause further damage.
Permanent Reinforcement
For longer-lasting results, consider using a bit of fabric glue on the track where it was dislodged. After realignment, apply a small amount of glue discreetly and allow it to dry completely. This will provide an additional layer of security and prevent future dislodgement.
Maintaining your belongings is essential, including selecting the best soil for dwarf umbrella tree for any plant care you have alongside your travel gear. Ensure everything remains as intended, including checking accessories like the best ladies folding umbrella for unexpected weather changes. If any problems arise during storage, remember to check your organizational tools and containers, such as asking, are tesco baby weaning freezer trays bpa free to keep your essentials safe.
Reinforce Zipper Seams for Longevity
To extend the life of your travel gear’s closure mechanism, applying reinforcement to the seams is essential. Use a needle and heavy-duty thread for added strength.
Select the Right Thread
- Choose polyester or nylon thread for durability.
- Avoid cotton thread, as it can tear easily under stress.
Stitching Process
- Turn the fabric inside out to access the seam easily.
- Position the seam under the sewing machine or use hand-stitching if preferred.
- Sew a straight or zigzag stitch along the edge of the seam to provide extra support.
- Ensure stitches are tight but not overly so, allowing for flexibility.
Regularly inspect the reinforced seams for signs of wear. Addressing any issues promptly can prevent more significant problems later on.
FAQ:
What are the common causes of a broken zipper on luggage?
A broken zipper on luggage can be attributed to several factors. One of the most frequent causes is catching the zipper on fabric or items inside the bag, leading to misalignment or damage. Another common issue is wear and tear from frequent use, which may result in the slider losing its grip on the teeth. Dirt and debris can also accumulate in the zipper track, hindering smooth operation. Lastly, a manufacturing defect may occasionally cause the zipper to malfunction. Identifying the specific issue is the first step in determining how to fix it.
How can I temporarily fix a broken zipper if I can’t reach a tailor immediately?
If you find yourself with a broken zipper and lack immediate access to professional help, a few temporary fixes can help. For a zipper that won’t close, try using a paperclip or safety pin to substitute for the zipper pull. Simply attach it to the slider, allowing you to pull it up or down. If the zipper teeth are misaligned, carefully realign them with your fingers and apply some soap or lubricant to assist movement. In case the zipper split, you can temporarily secure the bag with hair ties or small rubber bands around the zipper track to keep it closed until you can access proper repair services. These approaches can help keep your luggage secure for the time being.