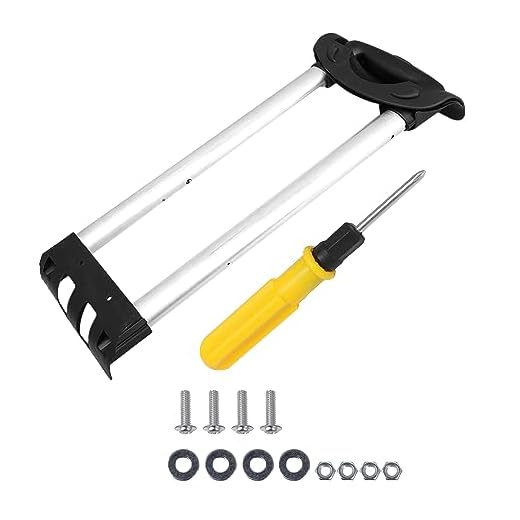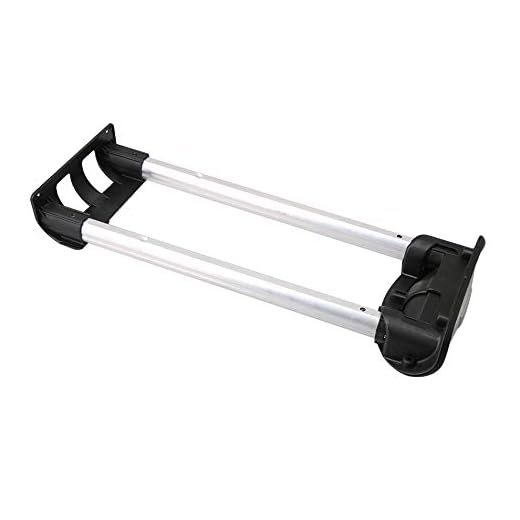


Replace a broken support with a strong, durable alternative such as metal or high-quality plastic. Remove damaged parts carefully; avoid forcing anything. Use a heat gun or hairdryer to soften glue if necessary. Once detached, take the broken piece to a local hardware store for guidance on suitable replacements.
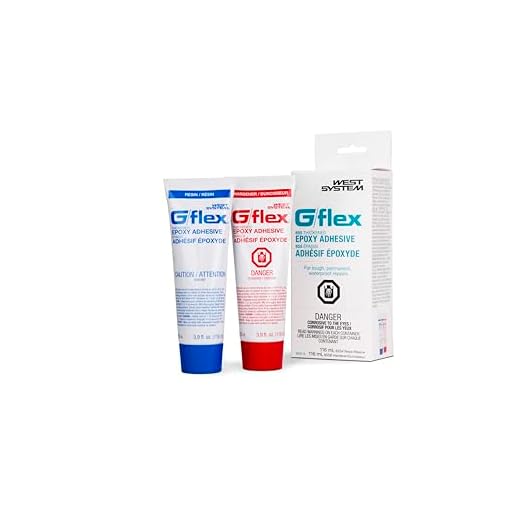
For reassembly, use a strong adhesive like epoxy or super glue that can withstand stress. Ensure surfaces are clean and dry before applying. Hold the parts tightly together until the adhesive sets, which usually takes about 24 hours for a complete bond. Using clamps can provide extra support while the glue dries.
If the break is clean, consider reinforcing the joint with a small piece of sturdy fabric or tape during repair. This addition can enhance strength and longevity. Regularly inspect repaired areas for wear to maintain functionality and prevent future failures.
Repairing the Carrier Component
Begin by assessing the current condition of the carrier element. If it is cracked or broken, obtain a strong adhesive that is suitable for plastic materials. Clean the damaged area thoroughly to remove dirt and grease, allowing for a better bond.
Apply the adhesive according to the manufacturer’s instructions, ensuring even coverage. Firmly press the parts together and hold them in place for the recommended time. For added stability, consider using clamps or weights to maintain pressure while the adhesive cures.
Reinforcement Techniques
If additional strength is necessary, reinforce the connection with a piece of plastic or fiberglass. Cut a small patch from an old piece of plastic, ensuring it is large enough to cover the repair. Use adhesive to secure the patch over the joined area, providing extra support.
After the adhesive has fully set, sand down any rough edges to prevent snagging or further damage. This extra step will enhance the durability of the repair and prolong the life of the carrier component.
Identifying the Type of Damage to the Plastic Holder
Examine the part closely for any visible fractures or cracks, as these indicate structural weaknesses. Look for breaks that disrupt the visual symmetry of the component, often caused by impact or stress. Pay attention to loose or missing attachments which could affect functionality.
Common Issues
Surface scratches may not compromise integrity but can weaken the material over time. Additionally, check for signs of deformation; if the shape has changed, the component might not fit correctly with other parts. Ensure the locking mechanism operates smoothly; sticking or jamming suggests internal damage that requires further inspection.
Assessing Functionality
Test the strength of the sections by applying gentle pressure. If they bend or feel unstable, they need replacement. Verify alignment with corresponding parts; misalignment can point to underlying issues. Use these observations to determine the best course of action for repair or enhancement.
Tools and Materials Needed for the Repair
Prepare a strong adhesive suitable for plastic bonding, such as epoxy or cyanoacrylate, which ensures a durable hold.
Gather a small flathead screwdriver or a similar tool to assist with disassembling the broken components, if necessary.
Use sandpaper or a file to smoothen the edges of the damaged area to achieve better adhesion.
A clean cloth or paper towels will help remove dust and debris before applying any adhesive.
Consider using clamps or rubber bands to hold the pieces together securely while the glue dries.
If needed, additional plastic pieces can be sourced to support reinforcement where damage is extensive.
For minor scratches or scuffs, consider employing a specialized plastic polish to restore the appearance after repairs.
Step-by-Step Guide to Replacing Broken Parts
Begin by removing the damaged component from its place. Use a screwdriver to carefully loosen any screws securing the piece. If there are any clips or latches, gently pry them free with a flathead tool to avoid damaging surrounding areas.
Removing the Old Component
Once detached, clean the area to eliminate any debris or leftover material that may interfere with the installation of the new part. This ensures a snug fit and enhances performance.
Installing the New Component
Align the new piece properly and apply any necessary adhesive if required by the manufacturer’s guidelines. Secure it in place using the screws from earlier or the ones that come with the new item. Ensure everything is tightened adequately without over-torquing, which could lead to further complications.
| Step | Action | Tools Required |
|---|---|---|
| 1 | Remove the damaged part | Screwdriver, flathead tool |
| 2 | Clean the area | Cloth, cleaning solution |
| 3 | Align and install the new part | Screwdriver, adhesive (if needed) |
Finally, test the integrity of the installed component by gently applying pressure to ensure it is secure. This minimizes the risk of future breakage.
Techniques for Reinforcing Weak Plastic Holders
Use epoxy resin or super glue to bond fractured sections. Apply a thin layer over the break and clamp the parts together until cured. For added durability, fill gaps with a plastic filler before sealing.
Incorporate fiberglass mesh or strips to strengthen the structure. Cut the mesh to fit around damaged areas and adhere it with resin for extra support.
Consider using heat to reshape and fuse cracked sections. A heat gun can soften the material, allowing for realignment before cooling and hardening again.
Install metal brackets or plates to distribute weight more evenly across weak areas. Secure them with screws or strong adhesive for reinforcement.
Utilize a 3D-printed part as a replacement if a specific section fails. This ensures a custom fit and can enhance strength by using more durable materials.
Combine techniques: use adhesive, fillers, and reinforcement in a multi-step approach to maximize recovery and longevity of the repaired component.
Best Adhesives for Repairing Plastic Components
To achieve a durable bond when mending damaged materials, choose cyanoacrylate glue (super glue) or epoxy resin for effective results. Both adhesives cater to various types of breaks and fractures found in cases.
Recommended Adhesive Types
- Cyanoacrylate Glue: Ideal for quick fixes, this adhesive bonds within seconds and is perfect for small cracks. It works exceptionally well on rigid plastics.
- Epoxy Resin: Best for heavy-duty repairs, epoxy provides a strong, lasting hold. Mix the resin with the hardener for optimal performance, making it suitable for larger areas of damage.
- PVC Cement: Effective for certain plastic types, particularly for plumbing components. It creates a solvent bond, ensuring components stay together.
- Plastic Welding Adhesive: Utilized for structural repairs, this method involves chemically melting and joining the surfaces, offering a strong bond.
Application Tips
- Clean the surfaces thoroughly for better adhesion.
- Follow the manufacturer’s instructions regarding application and curing times.
- Apply in a well-ventilated area to avoid inhalation of fumes.
For additional resources on travel gear, consider checking our guide on the best luggage for south america.
If you encounter issues with kitchen appliances during repairs, like the ones discussed in this article, see if there are any problems with hotpoint freezers.
Preventive Measures to Avoid Future Damage
Regularly inspect all components for signs of wear and tear. Pay attention to areas where stress is commonly applied, such as joints and attachment points.
Store the bag in a cool, dry place away from direct sunlight to minimize exposure to harsh environmental factors that can weaken materials over time.
Implement a routine for maintaining handles and straps. Clean them with appropriate materials and ensure that any dirt or debris is removed to maintain their structural integrity.
Use protective covers or cases during travel to shield your gear from potential impacts and abrasions while in transit.
Be mindful of weight limits when packing to prevent undue stress on the structural components. Distribute weight evenly to avoid focusing force on specific areas.
Avoid overloading any pockets or compartments, which can lead to tearing or breaking under excessive strain.
Familiarize yourself with handling techniques, especially when lifting or placing it in transportation. Carefully navigate through tight spaces to prevent unintentional damage.
Consider purchasing additional safeguards such as buffer pads or wraps that can absorb shocks during travel.
Lastly, keep spare parts and repair kits on hand, ensuring that minor issues can be addressed before they escalate into significant problems.


