


Begin by ensuring that the identification you intend to use is printed clearly. Utilize materials that can withstand the rigors of travel, as durability is important. Ensure to cut the printed items to the appropriate size, around 2 inches by 3.5 inches, to easily fit within the designated holders.
Next, position the printed pieces face down on a flat surface. This alignment is crucial to prevent damage during the process. Carefully fold the edges inward, ensuring that each fold results in clean, sharp creases. Pay attention to consistency, as this will ensure that each piece maintains a uniform appearance.
Secure the folds with a small piece of tape if necessary. This additional step can enhance the stability of the cutouts, making them less likely to come apart during transit. After securing, gently slide each prepared piece into its holder, making sure they are fully enclosed to avoid any loss.
Finally, attach the completed holders to your travel items. Utilize sturdy straps to ensure they do not detach during your trip. Regularly checking their attachment will provide peace of mind and keep your identification safe throughout your travels.
Folding Instructions for Identification Brandings
Begin by orienting your item on a flat surface with the printing facing upwards. Ensure that the cut edges are aligned neatly. Take the bottom portion and bring it upwards to meet the top edge, forming a rectangle. Smooth out any creases to maintain a professional appearance.
Next, fold the left side towards the center, then repeat with the right side, ensuring they overlap slightly. This compact design helps prevent it from unfolding during transit.
Final Adjustments
Once the item is neatly folded, secure it with a rubber band or a small piece of tape to avoid accidental unfolding. This approach guarantees that your identifiers remain intact and legible during handling.
For travelers seeking convenience, consider packing a best windbreaker umbrella for unexpected weather. In addition, hunt down the best foldable umbrella Australia designed for portability and ease of use.
Choosing the Right Size for Your Identification Markers
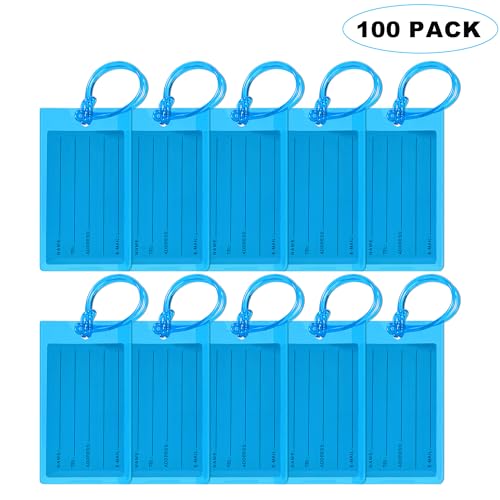
Select a dimension that is easily visible yet compact enough to avoid obstructing your bag’s design. A common recommendation is to choose sizes around 2 x 3.5 inches for optimal visibility without being cumbersome.
- Standard Size: Usually 2 x 3.5 inches, suitable for most carriers.
- Mini Size: About 1.5 x 2.5 inches, ideal for smaller bags or personal items.
- Custom Size: Some prefer unique dimensions, but ensure clarity and legibility of printed information.
Ensure your chosen option allows sufficient space for necessary details such as name, contact number, and any relevant identification code.
Avoid excessively large measures as they may be prone to snagging on conveyor belts or other baggage handling systems. Similarly, overly small markers can be difficult to spot, risking loss or mix-ups.
Test the selected size by placing a mock-up on your bag to gauge visibility and practicality. Adjust as necessary before settling on your final choice.
Preparing Your Luggage Tag for Folding
Use a flat surface to lay out the identification piece. Ensure the printed area is facing up to avoid misalignment during preparation. Smooth out any creases for clarity and to facilitate the process ahead.
Gather materials such as scissors and writing instruments. If necessary, trim any excess edges to match targeted specifications, ensuring it adheres to size requirements for specific carriers.
Mark designated folding lines lightly with a pencil to guide your movements. This makes it easier to achieve precision and maintain the integrity of the details printed on your item.
Once guidelines are in place, gently crease along those lines. Avoid pressing too hard to prevent damage, yet aim for enough definition to help maintain shape when in use.
Check that any attached elements, like strings or holders, are correctly aligned. This allows for seamless attachment to your belongings, ensuring visibility during handling.
Step-by-Step Folding Technique for Alaska Airlines Tags
Begin with the tag laid flat on a smooth surface, ensuring all information is visible. Pinch the tag at the top edge, aligning it with the bottom edge for a crisp crease.
Next, lift the bottom section vertically until it meets the top. This should create a more compact structure. Use your fingers to press down on the fold, securing it tightly to prevent any accidental openings.
After that, take one side of the folded piece and bring it towards the centerline. Repeat with the opposite side, creating a narrower profile. Ensure both edges meet in the middle precisely.
For added durability, slightly round the corners of the folded sections. This will help prevent wear and possible tears during transit. Finish by securing the folded piece with a clear adhesive or a rubber band if necessary.
This method ensures your identifiers remain neat, organized, and legible, ready for any travel requirements without hassle.
Common Mistakes When Folding Luggage Tags
Avoid creasing the identification area, as this can obscure important information. Ensure the contact details remain visible and legible after the process.
Incorrect alignment is another issue. Make sure the edges are matched precisely, maintaining the intended shape without any misalignment that could lead to obvious tears or functional problems.

Neglecting to secure the fasteners is a common error. Use appropriate attachments to keep everything in place during travel, preventing potential loss or damage.
Over-complicating the design can create confusion. Stick to a simple format that avoids unnecessary bulk while allowing for easy readability and functionality.
Failing to check for durability is critical. Use strong materials that withstand travel conditions; flimsy options may tear or wear out quickly.
Lastly, not considering the size can lead to issues fitting the item properly on your carrier. Always double-check measurements to guarantee compatibility and prevent mishaps.
Securely Attach Folded Identifiers to Your Bags
Utilize a strong string or durable plastic loop to fasten the compact identifiers. Ensure that the securing method withstands pull and wear during transit. Cut an adequate length of string or loop to allow for easy attachment and detachment.
Thread the string through the hole in the folded identifier, ensuring that it is anchored firmly. When securing to a handle or an external section of your bag, wrap the string several times around, tightening it adequately. For additional security, tie a knot to prevent slippage.
Consider using plastic zip ties for a more robust fastening method, particularly on larger items or rough surfaces. Zip ties provide a more permanent solution, but they can be cut off easily if needed.
Maintain visibility by attaching the identifier to an easily accessible area of your bag. Avoid placing it in depths or recesses where it may become obscured or damaged.
| Attachment Method | Advantages | Considerations |
|---|---|---|
| String or Loop | Easy to adjust, renewable | May wear out, check for damage |
| Plastic Zip Ties | Strong and reliable | Cannot be reused, need cutting tools |
Inspect your attachments periodically during travel to ensure they remain secure and intact. This review can prevent loss or confusion about ownership, especially if multiple bags are present.
Tips for Maintaining Identification Labels During Travel
Always keep identification securely stored when not in use. Use a protective cover to shield from moisture and physical damage. Regularly check for wear and tear before each trip.
Cleaning and Inspection
Wipe tags with a damp cloth to remove dirt and debris. Inspect for any frayed edges or faded information. Replace if damaged to ensure legibility and proper identification.
Storage Solutions
Consider using a dedicated pouch or pocket on your suitcase for storing identification. This prevents loss and keeps it easily accessible. Ensure that each bag has a clearly labeled tag to avoid mix-ups at the carousel.
For added security, attach a secondary, discreet identifier inside the bag as a backup. This helps in case the outer label is lost. Remember to update any details that change, such as contact information or travel routes. For more information on related topics, check out which of the following is a monomer of protein.