

Utilize a reliable adhesive material to create a personalized identifier for your travel belongings quickly and easily. This approach not only enhances the visibility of your items but also adds a touch of individuality to your travel experience.
Gather your supplies: a sturdy adhesive sheet, scissors, and a writing instrument. Cut a rectangular piece from the sheet–dimensions of approximately 3 inches by 5 inches are recommended for optimal space. Ensure the edges are smooth to prevent any accidental damage during travel.
Write your name, contact number, and any other relevant information on the surface using a permanent marker. Consider adding a decorative element or pattern to reflect your style while maintaining legibility. Once complete, securely fold the adhesive sheet around the handle of your bag, ensuring it adheres firmly to avoid any loss during transit.
This simple yet innovative method ensures that your items stand out among others while providing necessary information for easy identification. Enjoy your travels with a uniquely crafted identifier that showcases your creativity and practicality.
Gather Necessary Materials for Your Luggage Identification Marker
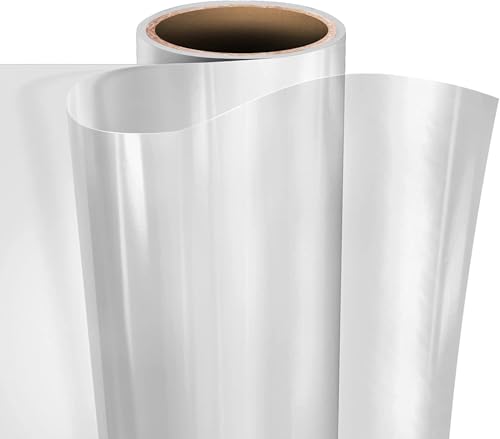
Begin with a sturdy roll of high-quality adhesive film. This will serve as the primary material for your creation.
Next, acquire a pair of scissors to ensure precise cuts. A sharp blade simplifies the process and enhances the neatness of your edges.
A pen or marker is essential for adding personal information. Choose a reliable writing instrument that resists smudging once applied.
Consider using a piece of card stock or a similar sturdy paper for the information section. It provides a solid base for your details and keeps them legible.
Additionally, obtain a keyring or a plastic loop to attach the finished piece securely to your baggage. This ensures easy identification at a glance.
If desired, include decorative elements like stickers or stamps to personalize your item and make it visually appealing.
Cut and shape the adhesive strip for your identifier
Choose the dimensions for your identifier based on personal preference, typically 3 inches by 6 inches. Use scissors to cut a rectangular piece from the adhesive roll.
To create sturdy edges, cut strips of the adhesive approximately 1 inch wide for reinforcement. These strips will help maintain the shape once folded over.
Layer these strips on the edges of the main rectangle. Ensure they overlap slightly at the corners to avoid fraying or peeling.
Once the edges are lined, trim any excess length, ensuring clean corners for a polished appearance. For a rounded effect, consider using a rounded object to trace a curve in the corners before cutting.
To create an opening for threading a strap, cut a notch in one end of the rectangle. This opening should measure about 1 inch wide and 1 inch deep, providing a secure fit for your attachments.
Test the flexibility of the material to confirm it maintains its form but remains lightweight enough for easy handling. Adjustments can be made by trimming further if necessary.
Final adjustments can include adding decorative elements, such as additional strips or patterns, using a different color if desired, to enhance personalization.
Attach a writable surface for your information
Utilize adhesive label sheets or self-adhesive photo paper to ensure your details are easily readable. Cut the label to the desired size, ensuring it fits snugly onto the prepared area of your creation. This approach allows for a customizable space to include your name, contact number, or address.
Waterproofing and durability
To enhance longevity, consider covering the writable surface with clear adhesive laminate or a piece of transparent vinyl. This protects your information from wear and weather while maintaining visibility. Ensure the edges are sealed to prevent moisture from seeping in.
Choosing the right writing instrument
Opt for permanent markers or fine-tipped pens designed for non-porous surfaces. These tools provide clarity and resistance to smudging, ensuring your information remains intact during transit. Test any writing instrument on a scrap piece before applying it to the final surface to guarantee it adheres properly.
Incorporate a Durable Strap for Attachment
Select a sturdy material for the strap, such as nylon webbing or a strong cord. Cut a length of approximately 6-8 inches to allow for easy handling and attachment.
Creating the Strap
Fold the chosen material in half to form a loop, and secure it using a piece of strong adhesive or by stitching the ends. Ensure that the bond is tight, as the strap will endure frequent use.
Attaching the Strap
Use additional adhesive on the base of your crafted item to attach the loop securely. Ensure that it is well-centered and positioned to prevent any unintentional detachment during travel.
| Material | Length | Attachment Method |
|---|---|---|
| Nylon Webbing | 6-8 inches | Adhesive or Stitching |
| Strong Cord | 6-8 inches | Adhesive |
Regularly check the integrity of the strap to ensure it remains functional and replace it as necessary for optimal reliability.
Add Personal Designs or Decorations to Your Identifier
Incorporating unique touches elevates your identifier’s visual appeal. Use permanent markers or fabric paint to inscribe your initials, favorite quotes, or symbols. Tailor your design to reflect your personality.
Stickers and Washi Tape
Apply colorful stickers or washi tape for a fun, decorative touch. Choose themes that resonate with your style–whether they’re travel-related graphics or your favorite colors, the choice is yours.
Embellishments
A touch of embellishments like glitter or sequins can add sparkle to your creation. Secure them with a clear adhesive to ensure durability. For a more tactile approach, consider adding patches or fabric swatches that represent destinations.
For more travel tips, check out the best luggage brand malaysia or explore camera accessories at are dslr camera lenses universal.
Test the Durability and Visibility of Your Identifier
To assess the robustness of your identifier, conduct a series of stress tests. Simulate real-world conditions by exposing it to moisture, sunlight, and abrasion. Submerge it briefly in water to ensure the materials withstand dampness without deteriorating. After drying, examine for any signs of peeling or damage.
For visibility, place the identifier in various lighting conditions–bright sunlight, dim environments, and uneven surfaces. Ensure that the information is legible and recognizable from a distance. Use high-contrast colors for the writable surface to enhance readability. If necessary, reinforce edges with additional strips to prevent fraying and improve longevity.
Finally, secure the identifier to a suitcase and give it a few shakes and pulls to test attachment strength. Confirm that the strap holds firm and remains in place during movement. This multi-faceted testing will guarantee your creation remains reliable and easy to spot throughout your travels.