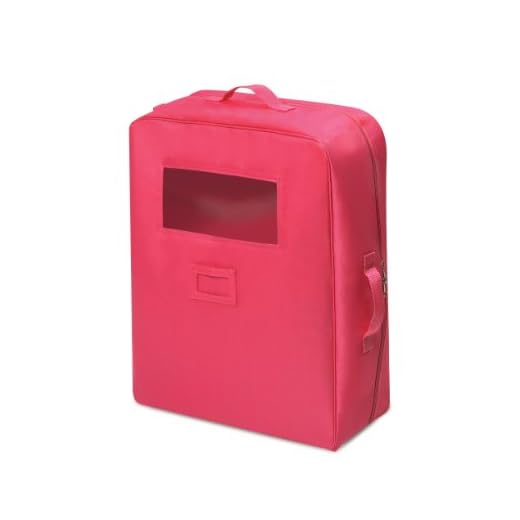


For a chic accessory that complements any miniature travel scenario, opt for lightweight materials like felt or fabric. These choices offer excellent durability and can be easily stitched or glued into fun shapes.
Begin by creating a basic structure using cardboard or sturdy paper. Shape it into a rectangular form, ensuring it can stand upright. Cut additional pieces for decorative fronts and sides, adding character to the design with vibrant colors or patterns.
Decorate the exterior with stickers, stamps, or hand-drawn artwork to give a personal touch. Incorporating functional elements like tiny zippers or Velcro closures enhances both usability and charm, creating a functional yet fashionable piece.
Finish with coordinating handles; simple strips of fabric or ribbon securely attached will allow for easy carrying. This final detail ensures each piece is ready for adventure, providing endless imaginative play for collectors and enthusiasts alike.
Choosing the Right Materials for Doll Travel Gear
Select sturdy yet lightweight options like balsa wood or thick cardstock for a solid frame. These materials provide structure while remaining manageable in size. Consider using fabric like felt or cotton for external coverings–both are easy to work with and allow for creative decorations.
Foam sheets work well for padding and lining; they ensure the contents stay protected during play. Opt for vibrant adhesives suitable for both fabric and paper for assembly. They guarantee a secure bond that withstands playful handling.
For wheels and handles, look for small plastic components or recycled materials like bottle caps, which add functionality without weight. Combining these elements will yield a charming and practical accessory for your miniature adventurer.
Creating a Design Template for Your Travel Case
Begin with a detailed drawing or digital sketch of the desired shape and size. Ensure the dimensions match the requirements for your miniature travel accessory. Consider a rectangular or rounded design that mimics actual cases, providing a balance between aesthetics and functionality.
Incorporating Functional Elements
Plan for compartments and pockets within your design. These can help organize smaller items effectively. Sketch sections for clothing, accessories, and other essentials, ensuring each compartment is proportional to the overall size.
Add Personal Touches
Incorporate unique patterns, colors, or textures in your template. Use software tools or hand-drawn designs to visualize various styles. Consider themes that resonate with personal taste, such as floral prints or geometric patterns, to enhance the overall appeal.
Step-by-Step Guide to Assembling Travel Gear
Begin with cutting the chosen fabric into two rectangles for the main body. Dimensions should reflect the scale; approximately 4×6 inches works well. Use a straight edge to ensure clean lines for proper alignment.
Next, sew the rectangles together along three sides, leaving the top open. Opt for a small stitch setting to guarantee sturdiness. Turn the fabric inside out to hide seams.
Adding Dividers and Details
Create dividers using smaller fabric pieces to organize the interior. These can be sewn to the main body. Customize with pockets or compartments by adding additional fabric squares and securing with stitches.
Add embellishments such as buttons, stickers, or markers for a unique touch. Consider attaching a small handle using ribbon or fabric strips for easy carrying.
Finishing Touches
Finally, reinforce the open edge with a hem to prevent fraying. Attach any additional components like wheels or straps if desired. This can also be a chance to personalize by painting or drawing a favorite character or motif on the exterior, making it one-of-a-kind.
For further inspiration on styles, check out the best luggage brands.
Decorating Your Doll’s Travel Bag for a Unique Look
Opt for stickers, decals, and washi tape to personalize your travel case. These materials can easily transform the appearance and make it distinctive. Utilize a variety of themes, such as floral, geometric, or cartoon characters, to reflect your character’s style.
Customizing with Colors and Patterns
Mix and match paint or colored markers to add bold designs on the exterior. Create stripes, polka dots, or other playful patterns. Use stencils for precision and consistency in your artwork.
Accessorizing for Extra Flair
Attach miniature accessories like keychains, ribbons, or charms to zipper pulls. This will not only add visual interest but also provide a fun, whimsical touch. Consider using small fabric patches which can be sewn or glued onto the surface for additional texture and depth.
| Decoration Type | Description |
|---|---|
| Stickers & Decals | Easy to apply, available in various designs to match your theme. |
| Paint & Markers | Perfect for creating original artwork; choose permanent options for durability. |
| Miniature Accessories | Adds dimension and character; great for customization. |
| Fabric Patches | Provides texture and can be stitched for a secure hold. |
Incorporate these decorative elements to create a one-of-a-kind travel case that stands out and showcases personal flair.
Tips for Ensuring Durability of Your Miniature Carrier
Select high-quality materials that can withstand wear and tear. Materials like sturdy fabrics or durable plastics are recommended for long-lasting construction.
Double-stitch seams for added strength. When sewing, a zigzag stitch can complement straight stitches, enhancing durability and preventing fraying.
Reinforcement Techniques
- Add metal or reinforced plastic corners to prevent damage during handling.
- Consider using a reinforced base to provide stability and prevent sagging over time.
Regular Maintenance
Inspect your creation regularly for any signs of damage or wear. Minor repairs can greatly extend its life. Clean with appropriate materials to maintain its appearance and functionality.
Store in a dry, cool place away from direct sunlight to prevent material degradation.
Customizing Travel Gear for Different Adventures
For travel gear that matches various escapades, identifying a theme for each set is key. Whether it’s beach day, camping adventure, or a city exploration, choose colors, patterns, and accessories that resonate with the destination’s vibe. For a beach theme, consider ocean blues and sandy yellows with stickers of seashells or surfboards.
Personalized Accessories
Adding interchangeable accessories can enhance functionality and style. Create small pouches that can be velcroed or snapped on and off for different trips. Think mini backpacks for hiking or elegant ticket holders for city trips. Custom tags with initials or favorite symbols can also lend a personal touch.
Interactive Elements
To make the gear more engaging, incorporate interactive components. Small compartments for snacks or a built-in mirror can elevate the experience. Incorporating wheels or handles designed for easy mobility, aligned with the specific adventure, ensures practicality meets enjoyment. For professional or legal insights, check this link: how can a contractual relationship be created.


