
Begin the process by ensuring you have the right tools: a screwdriver (either Phillips or flathead, depending on the screws used), a replacement set of wheels, and possibly a pair of pliers. Clear the area around your vintage piece, providing ample workspace to maneuver comfortably.
Study the attachment mechanism closely; most models feature bolts or screws securing the mobility components. If they’re hidden beneath covers or protective plates, carefully pry those off with a flathead screwdriver. Take your time to avoid breaking any parts.
Once exposed, systematically unscrew the fasteners holding the mobility attachments in place. Store these screws in a safe location to prevent losing them. Gently pull the old wheels away from the base, ensuring no additional parts are connected.
Align the new attachments with the pre-drilled holes, pressing them into place securely. Reinsert the screws, tightening them adequately to ensure a sturdy fit. Conduct a quick test to confirm proper functionality before using your classic carry-on again.
Guide to Dismantling the Supports on Vintage Samsonite Carriers
First, gather necessary tools: a suitable screwdriver and pliers. Inspect the base where the components attach. Most carriers feature screws or bolts securing the support structures. Use the screwdriver to loosen and remove these fasteners cautiously.
After disassembling the screws, gently lift the support section to avoid damaging the casing. If it resists, check for hidden screws or clips. Pay attention to any release tabs that might need pressing before detaching completely.
For vintage models where parts may be rusted or worn, applying a penetrating oil can facilitate disassembly. Allow it to sit for a few minutes, then proceed with unscrewing. Once detached, inspect the remaining hardware for any further maintenance or replacement needs.
| Step | Action |
|---|---|
| 1 | Gather tools: screwdriver, pliers |
| 2 | Inspect attachment points for screws or bolts |
| 3 | Loosen and remove fasteners |
| 4 | Lift the support section gently |
| 5 | Check for hidden screws or release tabs |
| 6 | If stuck, apply penetrating oil |
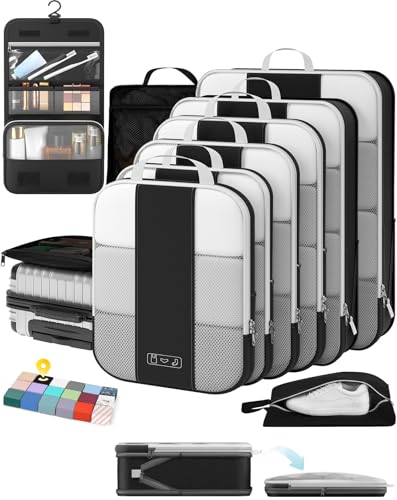
For replacements, ensure compatibility with your specific model. Excellent options can be found, similar to the best choice products 9ft steel half patio umbrella w crank mechanism or the best all in one saltwater aquarium kit. Verify sizes and fittings to ensure a seamless update.
Gather Necessary Tools for Wheel Removal
Gather a flathead screwdriver and a Phillips screwdriver. These tools will enable access to the screws securing the components in place. Additionally, a pair of pliers may be needed to hold onto stubborn screws while unscrewing them.
Consider having a utility knife or scissors on hand for any adhesive or fabric that might obstruct the removal process. It’s wise to use a small container or magnetic tray to keep screws organized and prevent loss.
Safety Gear
Wear safety goggles to protect your eyes from debris or accidental slips. Gloves may also provide grip and prevent injuries while handling sharp tools.
Workspace Preparation
Clear a flat, well-lit workspace free from distractions. Lay down a microfiber cloth or towel to protect the surface of the item while working. Ensure easy access to all necessary tools during the procedure.
Identify the Type of Wheel Mechanism Used
Assess the model of the suitcase before proceeding. Check for either riveted or bolted connections for the casters. Riveted ones require drill tools to detach, while bolted options can be unscrewed directly.
Examine the wheels closely–rubber tires indicate potential replacement for all units, while plastic designs might necessitate the entire assembly change. Ensuring the compatibility of new parts is critical to avoid future mishaps.
Check for Integrated or Individual Casters
Some designs feature integrated wheel systems, meaning multiple units function as a single piece, complicating the extraction. Others may use individual replacements. Identifying this can save time and effort.
Look for Adjustment Points
Inspect the suitcase’s base for hidden screws or panels that may provide easier access to the wheel mounts. These can simplify maintenance and facilitate a smoother reinstall process if repairs are undertaken.
Remove the Screws or Fasteners Securing the Wheels
Locate the screws or fasteners that hold the components in place. Typically, these will be situated at the base of each wheel assembly or along the side. Use the appropriate screwdriver or wrench that matches the type of fastener for a secure grip.
Steps to Access and Unscrew
- Position the suitcase upright for better visibility and access.
- Carefully examine each wheel area to identify the specific screws or clips.
- Choose a screwdriver with a fitting head size; avoid damaging the screw heads.
- Turn counterclockwise to loosen and remove each screw fully.
- Keep screws in a small container to prevent loss during the process.
Some models may use rivets instead of screws. In such cases, a drill may be necessary to carefully remove the rivets without damaging adjacent material.
Tips for Effective Removal
- Apply a penetrating oil to stubborn screws if they resist turning.
- A magnetic screwdriver can be useful to prevent screws from dropping.
- Consider using a pair of pliers if a screw is stripped and cannot be turned.
Once the fasteners are removed, gently detach the wheel assembly. This process allows for easy replacement or repair. For travelers seeking versatile options, consider checking out the best airline personal item backpack for your next trip.
Detach the Wheels from the Luggage Frame
With the necessary tools at hand and the type of mechanism identified, proceed to disconnect the wheels carefully. Utilize a screwdriver or the appropriate tool based on the fastener type. Align the tool with the securing points and apply consistent pressure while turning to avoid stripping the screws.
Handling Different Mechanisms
If the structure features a snap-on style, gently pry the wheel away from the assembly using a flathead screwdriver. For models with clips, manipulate the clip mechanism to free the wheel without damaging the surrounding area. Always check for hidden locks or levers that may prevent removal, ensuring to disengage them first.
Inspect the Structure
After detachment, inspect the axle and surrounding components for wear or damage. This verification helps in assessing the need for replacement parts. Clean the area before introducing new wheels, ensuring optimal performance and longevity upon reassembly.
Inspect and Replace Damaged Wheel Components
Carefully examine each individual part of the wheel assembly for signs of wear or damage. Check the wheel itself for cracks, chips, or excessive wear on the rotating surface, as these can affect performance significantly.
Assess Axles and Bearings
Look at the axle and bearings for any signs of rust or debris. If the axle is bent or the bearings are stiff, replacement is necessary. Clean any grime from these components using a soft cloth, and consider applying a lubricant to ensure smooth operation.
Replace Parts as Needed
If damaged components are found, obtain suitable replacements. Many online retailers or local hardware stores stock compatible parts. Ensure that the new components match the specifications required for proper fitting. Install each new part by following the specific instructions related to the component to secure a flawless attachment.
Reassemble the wheel assembly, ensuring everything is aligned properly. Test for smooth rotation before using the case again.
Reassemble Luggage After Wheel Replacement
Align all components meticulously, ensuring that each new caster fits seamlessly into the designated slots. Begin by inserting the replacement parts into their respective positions within the structure.
Secure each piece with the appropriate screws or fasteners. Use a screwdriver or wrench suited for your specific hardware. Tighten each fastener firmly, but avoid over-tightening, as this might damage the frame or the wheels.
Once every unit is secured, check for any wobble or instability by gently twirling or rolling the bag. Adjust if necessary. Ensure that any remaining parts are reattached securely, such as covers or trim pieces.
Perform a final inspection of the setup, looking for any gaps or misalignments. Test the mobility by rolling the luggage over a flat surface. This will help identify any issues before putting it back into regular use.
If everything appears satisfactory, clean the exterior of the case to remove any dust or fingerprints accumulated during the repair process. This step not only enhances appearance but also maintains the integrity of the material.
Finally, your piece is ready for travel once more. Store it securely or pack it with care for your next adventure.