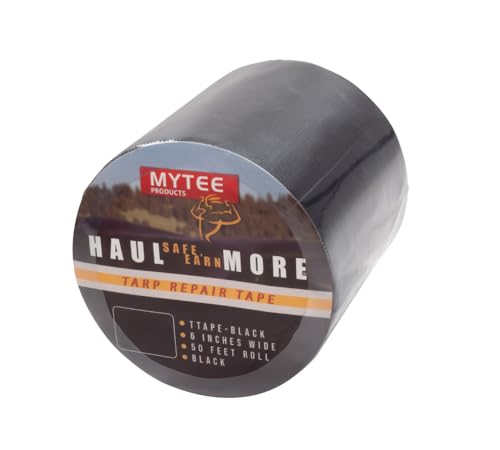


Using a heavy-duty adhesive tape can be your first line of defense against substantial rips. Look for a tape designed for outdoor use, as it provides better adhesion and durability. Ensure the area around the damaged section is clean and dry before applying tape, as this enhances the stickiness and longevity of the repair.
Consider employing a sewing kit for a more permanent solution. If tears are long, a needle and thread will help you reinforce the damaged area effectively. Choose a waxed thread for added strength and apply a simple running stitch to bring the edges of the fabric together securely. Finish with a knot to prevent unraveling.
For synthetic fabric, a patch may be necessary. Cut a piece of similar material slightly larger than the tear, apply fabric glue, and press it onto the damaged area. To improve the bond, place a weight on the patch while it dries. This approach is particularly useful for canvas and nylon bags.
Using iron-on patches can also yield strong results. Position the patch over the tear and follow the package instructions for heat application. This method is quick and can seamlessly restore the appearance of your luggage.
Lastly, if the wheels or handles are affected, consider replacing these parts separately. Many manufacturers sell individual components that can be easily installed with some basic tools, ensuring functionality is restored without an extensive overhaul of the entire piece.
Fixing Severely Damaged Suitcases
To address significant damage, consider using a strong adhesive designed for fabric and metal. Clean the damaged area thoroughly to ensure proper bonding and apply the adhesive according to the manufacturer’s instructions.
For fabric or synthetic materials, patches can be helpful. Choose a patch that matches the suitcase’s color, cut it to size, and secure it with the adhesive. This method reinforces the affected area and prevents further ripping.
If zippers are compromised, replacing them is a practical solution. Remove the old zipper using a seam ripper and stitch in a new one that fits. Make sure to test the zipper before stitching completely to ensure it functions smoothly.
For handles, assess whether they can be reattached or require full replacement. If they can be reattached, use a heavy-duty glue for strong adhesion. For replacements, select handles that match the weight and style of the bag for durability.
In addition to these methods, investing in quality accessories like best patio umbrella stands bases can protect your baggage from weather elements during travel, reducing the chances of damage.
Regular maintenance can extend the life of your travel gear. Checking for damage, cleaning, and using protective covers can prevent severe issues.
For specialized tools, consider the best cutting lawn mower blades which can serve in specific cases where heavy-duty cutting is necessary for materials that are tough to work with.
Assessing the Damage to Your Luggage
Begin by thoroughly examining the affected areas for cuts, punctures, or frayed seams. Identify all types of damage–superficial scratches may only require a wipe while deeper rips could need more attention. Check zippers and handles for functionality; any malfunction may impair the entire piece’s usability.
Use a flashlight to spot hidden issues inside pockets or compartments. This inspection will reveal less visible tears or loose stitching. Take notes or photos of each issue for reference during the fixing process.
If the fabric is unscathed but the underlying structure is compromised, inspect the frame or wheels meticulously. A sound interior can sometimes mask external damage. This comprehensive evaluation will guide you in selecting the appropriate materials and methods for restoration.
Prioritize your repairs based on severity. Address the most critical problems first, ensuring your travel companion is functional and durable post-restoration. Any minor flaws might be overlooked if they do not impact the overall integrity of the item.
Choosing the Right Repair Materials
Selecting appropriate materials is fundamental for effective restoration. Assess the type of fabric or material your suitcase is made from before proceeding. Common options include nylon, polyester, and leather, each requiring specific approaches and products.
For synthetic fabrics like nylon or polyester, high-strength adhesive tape offers a quick solution. Opt for water-resistant options for added durability. Fabric patches can also be used; ensure they match the color and texture to maintain a uniform appearance.
When dealing with leather, specialized leather glue is recommended. It provides strong adhesion and flexibility, allowing for seamless mending. Reinforcement with leather patches enhances longevity while matching the original design.
Consider thread types as well; for sewing, polyester threads are less prone to fraying and are available in various colors. Heavy-duty needles designed for the respective material strength will facilitate stitching.
For zippers or handles, replacement components may be necessary. Choose sturdy zippers that match the existing dimensions and test handles for weight capacity to avoid future failures.
| Material Type | Recommended Repair Material | Usage Note |
|---|---|---|
| Nylon/Polyester | Adhesive Tape | Use water-resistant version for optimal results. |
| Nylon/Polyester | Fabric Patches | Select color and texture to match. |
| Leather | Leather Glue | Allows for strong and flexible bonds. |
| Leather | Leather Patches | Reinforces area while matching original design. |
| General | Polyester Thread | Durable and fray-resistant for stitching. |
| General | Heavy-Duty Needles | Choose based on material type. |
| Zippers | Replacement Zippers | Match dimensions for seamless fit. |
| Handles | Replacement Handles | Test for weight capacity before installation. |
Evaluate your available tools as well, including scissors, needles, or a sewing machine, ensuring readiness for efficient tasks. The combination of proper materials and tools supports longevity and usability of your restored belongings.
Step-by-Step Guide to Sewing Torn Fabric
Gather the following materials: needle, strong thread, scissors, fabric patch (if necessary), and pins. Ensure the thread color matches the fabric closely.
1. Prepare the Area
- Choose a clean and well-lit workspace.
- Lay the item flat on a surface, ensuring easy access to the damaged area.
2. Trim the Edges
Carefully cut any frayed edges around the rip using sharp scissors. This will facilitate a smoother stitching process and help the fabric mend better.
3. Align the Fabric Edges
- Hold the torn edges together, ensuring they overlap slightly if necessary.
- If using a patch, position it over the hole, extending beyond the damaged area by at least an inch.
4. Pin the Fabric
Secure the edges with pins to maintain their position while sewing. Space the pins about an inch apart for stability.
5. Start Sewing
- Thread the needle with a length of strong thread, knotting one end.
- Begin stitching at one end of the tear, using a simple straight stitch or a zigzag stitch for added strength.
- Space stitches close together, about 1/8 inch apart.
6. Secure the Seam
Once you reach the end of the tear or patch, tie off the thread securely. Add an additional knot for strength, and trim any excess thread.
7. Remove Pins
Carefully take out the pins now that the stitching is complete. Inspect the seam for any gaps or missed spots.
8. Final Touches
- Iron the repaired area on low heat to smooth out any wrinkles.
- Check the repair to ensure it holds; reinforce if necessary with additional stitches.
Techniques for Fixing Broken Zippers
Begin by examining the zipper for any visible defects such as misalignment or stuck sliders. If the slider is not moving smoothly, lubrication can help. Apply a small amount of graphite powder or soap to the zipper teeth to improve its operation.
If the slider has come off one side, follow these steps to reattach it:
- Remove the old stop from the bottom of the zipper using pliers.
- Reinsert the slider onto the track, ensuring it faces the correct way.
- Reapply a new stop with pliers to secure the slider.
In cases where teeth are missing or damaged, consider replacing the zipper entirely. For a quick fix, you can use a safety pin to temporarily hold the fabric together and keep the contents secure.
For separating zippers, gently pull the two sides apart and check for any fabric caught in the mechanism. If there’s fabric, carefully remove it to restore functionality.
To reinforce a weak zipper, sewing a few stitches along the zipper seam can stabilize the area, preventing future failure. Use a matching thread for aesthetics.
For zippers that won’t stay closed, use a small piece of clear nail polish on the teeth to hold them together until a replacement is feasible.
Always carry a small zipper repair kit for emergencies; it can include spare sliders, stops, and tools needed for on-the-go fixes.
Reinforcing Weak Areas with Patches
Choose durable materials such as heavy-duty fabric or leather for patches. Ensure the color and texture match the existing luggage for a cohesive look.
Before applying a patch, clean the area thoroughly to remove dirt and grime. This improves adhesion and allows for a better bond.
Cut the patch slightly larger than the damaged area, allowing for a solid grip on surrounding fabric. Round the edges of the patch to minimize peeling over time.
Utilize a strong adhesive suitable for fabric or a heat-activated bond for a more permanent solution. Apply evenly to avoid bubbling, and press firmly for optimal sticking.
For added security, sew around the edges of the patch after the adhesive has set. Use a needle and thread that match the existing fabric, opting for a zigzag stitch to ensure flexibility and strength.
Regularly inspect the patched areas and address any signs of wear early to prolong the lifespan of your travel gear.
Tips for Maintaining Your Repaired Luggage
After fixing your travel gear, implement these practices to extend its lifespan. Store with care: keep your belongings in a cool, dry place, avoiding direct sunlight which can weaken materials over time.
Regular cleaning is essential; use mild soap and water for fabric or a damp cloth for hard surfaces. Ensure zippers and seams remain free of dirt and debris to maintain functionality.
Invest in protective accessories like covers or bags to shield against scratches and impacts during transport. This extra layer can significantly diminish wear and tear.
Inspect frequently for minor issues. Addressing small damages promptly can prevent escalation into more serious problems. Keep a maintenance kit with essentials such as extra fabric, thread, and tools handy for quick fixes.
Be mindful of packing methods. Distribute weight evenly and avoid overpacking. This prevents undue strain on seams and zippers.
Also, consider investing in sturdy gear for weather protection, such as the best wind resistant folding umbrella, to ensure your belongings stay dry and secure.
FAQ:
What are some common methods for repairing badly torn luggage?
Repairing badly torn luggage can be approached in several ways, depending on the extent of the damage. For minor tears, a strong fabric adhesive can be used to bond the fabric back together. Make sure to clean the area before applying the adhesive and hold the pieces together until it dries. For larger tears, sewing may be necessary. Use a heavy-duty needle and thread compatible with the material of the luggage. Another option is to use a patch, either purchased or homemade, to cover the tear. You can attach the patch with adhesive or by sewing it on for a more secure fix. If the damage is extensive, professional repair services are available for a more durable solution.
How do I know if my luggage is beyond repair?
To determine if your luggage is beyond repair, inspect the damage closely. If the fabric is significantly shredded, seams are completely torn apart, or critical structural components like zippers or wheels are broken beyond fixing, it may not be worth attempting a repair. Additionally, consider the overall condition of the suitcase; if it’s old and has multiple issues, it might be more economical to replace it instead of repairing it. Repair costs can add up, so always weigh the repair options against the price of a new piece of luggage.
Are there professional services that can repair luggage, and how do I find one?
Yes, there are professional luggage repair services available in many areas. You can find them by searching online for local luggage repair shops or contacting the manufacturer of your luggage, as some offer repair services for their products. Additionally, larger department stores or travel specialty shops may have repair services or can recommend a reliable service provider. Be sure to read reviews and possibly consult other customers to ensure quality before committing to a repair service.