

The first step is to assess the damage to your case carefully. Look for cracks, broken wheels, or faulty zippers to determine the best course of action. For cracks, use a clear epoxy resin to fill and seal the areas that have been compromised, ensuring you follow package instructions for application and curing times.
If wheels are broken or missing, replacement options are widely available online. Make sure to measure the size of your existing wheels and note the wheel housing type before purchasing new ones. Use a screwdriver to detach the damaged wheel and attach the new one securely.
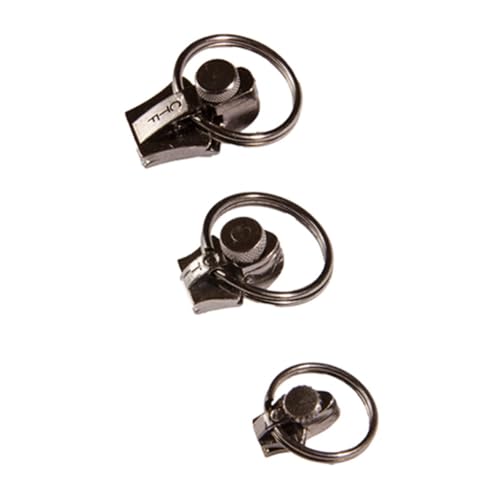
For zippers that are stuck or misaligned, a simple lubricant, like petroleum jelly or a specific zipper lubricant, can help. Apply it sparingly to the teeth of the zipper, then gently maneuver the slider back and forth until it moves smoothly again. If the zipper is completely broken, consider replacing it with a new one by sewing or using a zipper replacement kit available at craft stores.
For deeper scratches or scuffs on the surface, a specialized plastic polish can restore the shine and minimize the appearance of marks. Simply follow the product instructions for application and buffing. Always test any cleaning or repair product on a small, inconspicuous area first.
Regular maintenance can prolong the lifecycle of your travel gear. Clean it after every trip, store it properly, and avoid overpacking to prevent wear and tear. With timely repairs and attention to detail, your durable cases can serve you well for years to come.
Restoring Your Travel Case
Begin with a thorough inspection of any cracks or dents. Apply a heat gun or hairdryer on low for minor imperfections to make the material flexible, allowing you to gently push the dent out. Be cautious to avoid overheating, which can cause further damage.
Fixing Zippers
If the zipper is misaligned, try to realign it by gently pulling the slider back and forth. For stuck zippers, lubrication with a wax candle or lip balm can ease the movement. In cases where the slider has broken, you may need to replace it. Purchase a new zipper slider that matches the size and type of your original and follow online tutorials for guidance on installation.
Reinforcing Corners
Corners suffer most wear. Use epoxy resin to strengthen them. Clean the area, apply the resin with a small brush, and allow it to cure completely. For an extra layer of protection, consider adhesive corner protectors available in stores.
For adventures, consider adding an extra carry option. Check out the best cheap waist pack for cycling to keep your essentials secure while on the go.
Assessing the Damage to Your Luggage
Examine the outer shell for cracks, dents, or any distortions. Pay attention to the corners and edges, as they are more susceptible to impact. Use a flashlight to reveal hidden blemishes or scratches that may compromise its integrity.
Open all compartments to evaluate the zippers, locks, and handles for functionality. Ensure zippers glide smoothly and locks engage properly. A malfunctioning zip can often be remedied with some lubricant, while a broken handle may require a complete replacement.
Check for any structural deformities that might disrupt the suitcase’s ability to stack or roll. Affected wheels should be inspected for wear or damage; if they wobble or are difficult to rotate, replacement may be necessary.
Consider the material of the case; some plastics can be repaired with heat and molding techniques, while more rigid cases may need epoxy. Always use suitable repair tools to avoid causing further damage.
Once assessed, outline the necessary tools and materials needed for the repairs. A helpful resource for gear-related activities can be found at best umbrella rig for striped bass.
Tools and Materials Needed for Repairs
For effective rehabilitation of your rigid travel cases, gather the following tools and materials:
Basic Tools
- Screwdriver Set: Both flathead and Phillips screwdrivers are necessary for removing and tightening screws.
- Utility Knife: Ideal for cutting away damaged materials or tape.
- Pliers: Useful for gripping and turning stubborn components.
- Heat Gun: Assists in reshaping plastics if they become warped.
Repair Materials
- Epoxy Adhesive: Strong bonding agent for cracks or breaks in the outer shell.
- Plastic Patch Kit: Contains various patches to cover larger holes or fractures.
- Replacement Zippers: Essential for replacing malfunctioning zipper tracks.
- Velcro Strips: Helpful for securing unattached segments or reinforcing closures.
Ensure you have all tools and materials organized before starting your project to streamline the process.
Fixing Cracks and Dents on the Shell
For minor cracks and dents, a heat gun or hairdryer can be effective. Apply heat gently to the damaged area, allowing the plastic to soften slightly. Once malleable, use your fingers or a tool to press the area back into shape. Allow it to cool down for the material to harden again.
For Deeper Cracks
Utilize a plastic repair compound, which can fill in gaps and restore structural integrity. Clean the area thoroughly, mix the compound as instructed, and fill the crack. Once dried, sand down any excess to create a smooth surface.
For Dents
To remove dents, a vacuum cleaner and a pot of boiling water can be combined. Pour boiling water over the dented surface to soften it. Afterward, use the vacuum cleaner to create suction over the area, which can help pop the dent out. It may take a few tries to achieve a satisfactory result.
| Damage Type | Recommended Method | Materials Needed |
|---|---|---|
| Cracks | Heat application and press | Heat gun/hairdryer |
| Deeper Cracks | Fill with plastic compound | Plastic repair compound, sandpaper |
| Dents | Heat and suction method | Boiling water, vacuum cleaner |
Consult specific guides for detailed instructions. For security enhancements during travel, consider exploring alternatives like are dome security cameras better. This ensures that personal belongings remain safeguarded even in storage.
Repairing Zippers That Won’t Zip
Inspect the zipper for misalignment or obstructions. If the teeth are not interlocking, gently realign them by pulling the slider back and forth. For stuck zippers, apply a lubricant such as bar soap or a silicone spray to ease movement.
Common Issues and Solutions
- Stuck Slider: Remove any debris from around the slider. If it remains stuck, use pliers to gently squeeze the slider back into shape.
- Missing Teeth: If teeth are absent, consider a zipper replacement. If it’s a minor gap, try using a needle and thread to sew a temporary fix around the opening.
- Unraveled Zipper Stop: Use a needle and thread to sew a new stop or reattach the existing one if it has come loose.
Maintenance Tips
- Regularly clean the zipper track with a soft brush to prevent dirt accumulation.
- Apply wax to the zipper regularly to maintain smooth operation.
- Avoid overstuffing the compartment, which can strain the zipper mechanism.
Replacing Broken Wheels and Handles
To swap out damaged wheels, first, locate and remove the screws securing each wheel. Use a screwdriver to ensure they’re completely detached, then slide the old wheel off the axle. Position the new wheel onto the axle, aligning any notches or grooves. Reinsert the screws and tighten them securely.
For handles, inspect the area where they attach. If the handle is removable, simply unscrew it from its base. Align the new handle with the screw holes and fasten it in place. In cases where the handle is permanently attached, you may need to replace the entire assembly. To do this, pry open the casing gently without damaging the surrounding material, extract the broken unit, and install the new handle by following the reverse of the disassembly process.
Ensure compatibility of replacement parts with your travel case model. Check manufacturer specifications or consult retailers for appropriate options.
Maintaining Your Gear After Repairs
Regularly clean your gear with a damp cloth and mild soap to remove dirt, grime, and stains. Make sure to dry it thoroughly to prevent moisture buildup, which can lead to mold or mildew.
Storage Tips
Store your belongings in a cool, dry place. Avoid areas with extreme temperatures or high humidity. Utilize protective covers to shield against dust and potential impacts. Consider keeping it upright to prevent warping or bending.
Longevity Practices
Inspect zippers and wheels periodically to ensure smooth functioning; apply silicone lubricant for zippers and minimal washer fluid for wheels. Handle with care, especially when lifting or placing on hard surfaces. Regular inspections will help catch issues early.


