


Begin with a thorough inspection of your case. Check for cracks, dents, and any broken zippers. Collect all necessary tools: a screwdriver, adhesive, or replacement parts as needed.
For cracks, utilize a strong adhesive that bonds to plastic materials. Carefully apply it to the damaged area, ensuring it fills the crack completely. Allow sufficient time for the bond to cure before testing the durability of the repair.
If the zipper is malfunctioning, examine it closely. Often, misaligned or stuck zippers can be resolved by cleaning out debris. For broken pulls, you can replace them using a metal ring or a durable string as a temporary solution. If the entire zipper is compromised, consider replacing it entirely, which might require sewing skills or professional assistance.
Faded or scratched surfaces can be rejuvenated with specially formulated cleaning solutions or polish designed for hard plastics. Applying these products enhances appearance and provides an added layer of protection against further damage.
Finally, ensure all wheels are functioning correctly. If any are loose, tighten the screws. For non-spinning wheels, check for debris or wear and consider replacing them if necessary.
Instructions for Mending Rigid Travel Cases
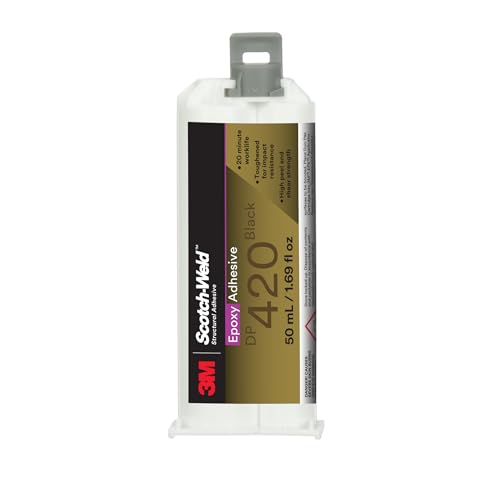
For cracks or breaks in the exterior, use a high-quality epoxy adhesive. Clean the surface thoroughly, apply the adhesive according to the manufacturer’s guidelines, and clamp the pieces together until set. Sand lightly once cured for a smooth finish.
Dealing with Scratches
To eliminate scratches, use a fine polishing compound or plastic polish. Apply a small amount to a microfiber cloth and rub gently in circular motions. This can restore some shine and reduce the visibility of the marks.
Replacing Zippers and Handles
For dysfunctional zippers, detach the old zipper using small pliers. Purchase a replacement zipper compatible with your case. Attach it securely by sewing or using fabric glue, ensuring smooth operation with test pulls. If handles are broken, remove them with a screwdriver, and install new ones that match the original size and mounting holes.
Identifying Common Types of Damage
Examine your travel case for visual and structural issues. Here are the most frequent forms of damage you might encounter:
| Type of Damage | Description | Signs to Look For |
|---|---|---|
| Cracks | Fissures on the exterior that weaken the body. | Visible splits, sharp edges, or fragments missing. |
| Dents | Indentations caused by impact. | Shallow dips on the surface, altering its shape. |
| Scratches | Surface abrasions affecting aesthetics. | Thin lines or marks that may expose underlying material. |
| Broken Zippers | Malfunctioning zippers that obstruct opening. | Zipper not closing or stuck in position. |
| Figuring (Handles) | Looseness or breakage in handle mechanisms. | Handle detaching or wobbling when lifted. |
| Wheel Damage | Compromised wheels affecting mobility. | Wheels missing, broken, or making noise while rolling. |
Catching these issues early can prevent further complications and extend the life of your belongings.
Gathering Necessary Tools for Repairs
Begin with a small screwdriver set, ensuring it includes both flathead and Phillips options. This assortment will prove beneficial for loosening or tightening screws.
Next, acquire a strong adhesive designed for plastic materials. Look for products labeled as suitable for traveling gear to ensure durability. A heat gun or hairdryer can also be useful for softening areas needing adjustment.
Consider having the following tools on hand:
- Pliers for gripping and bending components.
- A utility knife for precision cuts.
- Sandpaper or a file to smooth rough areas.
- Duct tape as a temporary fix for cracks or breaks.
- A measuring tape for accurate assessments.
- Replacement parts, such as handles or wheels, if necessary.
Additionally, keep a cleaning solution available for prepping surfaces before applying adhesives. This ensures better adhesion and longer-lasting results.
For convenience, consider storing these tools in a compact kit. This organization allows for quick access during unexpected issues on the go. For leisure activities, a good best umbrella for picnic table provides protection while you work.
Fixing Cracks and Scratches on Hard Cases
To address cracks, begin by cleaning the affected area with mild soap and water, removing all dirt and debris. Let it dry completely.
For cracks wider than 1/4 inch, use a plastic adhesive specifically designed for hard surfaces. Apply the adhesive according to the manufacturer’s instructions, ensuring a complete bond. For smaller cracks, a high-quality epoxy can suffice. Once dried, sand the surface lightly to ensure a smooth finish.
Removing Scratches
For shallow scratches, a scratch-removal polish can be very effective. Apply a small amount to a soft cloth and rub gently in a circular motion until the scratch diminishes. This typically works well with polycarbonate or ABS cases.
Color Matching and Touch-Ups
For deeper scratches or areas where the color has worn off, touch-up paint can be useful. Find a paint that closely matches your case’s color, then apply it carefully with a fine brush. Allow it to dry completely before handling the case again.
Replacing Broken Zippers on Hardside Luggage
Remove the damaged zipper by carefully cutting the stitching that holds it in place. Use a seam ripper for precision. Take note of how the old zipper was attached to replicate the pattern later.
Purchase a replacement zipper that matches the length and type of the original. Opt for heavy-duty options for better durability. Zippers often come in various colors, so choose one that complements the case.
Align the new zipper with the edges of the opening, ensuring it fits perfectly. Pin it in place to prevent slipping while sewing. Use a strong thread, preferably nylon or polyester, suitable for the material of the suitcase.
Sew the new zipper onto the case by hand or using a sewing machine, applying firm, consistent stitches along the edges. Use a zipper foot if available to allow for better maneuverability.
Once the zipper is securely attached, test its functionality. Open and close several times to ensure smooth operation. If the zipper gets stuck, check for any misalignment or fabric interference.
Finish the job by sealing any raw edges with fabric adhesive to prevent fraying. This will enhance the durability of the repairs and extend the life of your travel case.
Replacing Wheels on Your Suitcase
Examine the wheels for damage. If a wheel is cracked or missing, a replacement is necessary. You can find matching wheels online or at local stores specializing in travel gear.
To remove the damaged wheel, locate the screws on the underside of the suitcase where the wheel is attached. Use the appropriate screwdriver to detach it. If the wheel is pressed in, carefully pry it out using a flathead screwdriver.
Attach the new wheel by aligning it with the bracket or socket. Secure it with screws, ensuring a snug fit. Test the mobility by rolling the suitcase to confirm the wheel is functioning correctly.
If you can’t find exact replacements, consider buying a universal wheel kit. Follow the manufacturer’s instructions for installation, usually involving similar steps as outlined earlier.
Regular maintenance extends the life of your wheels. Clean them from debris and lubricate with a silicone spray to keep them rolling smoothly.
Sealing Seams and Ensuring Waterproofing
To maintain the integrity of your travel case, sealing seams is paramount. Begin with a high-quality seam sealant specifically designed for hard-shell materials. Apply the sealant evenly along the seams, ensuring complete coverage. Use a small brush or applicator tip for precision, especially in tight areas.
Choosing the Right Materials
Select a waterproof sealant that adheres well to the luggage material–common choices include silicone-based or urethane sealants. For enhanced protection, consider using adhesive tape designed for waterproof applications along the seams before applying the sealant.
Testing for Waterproofing
After sealing, conduct a water test to ensure effectiveness. Use a water source, such as a garden hose or a best pressure washer rotary nozzle, to simulate rain. Observe for any leaks and reapply sealant if necessary. Regular maintenance and inspections will help preserve waterproofing over time.


