Utilize fabric glue or a sewing kit to mend tears within the inner compartment of your travel bag. Begin by cleaning the area around the damage to remove any dirt or debris, which will ensure better adhesion. If opting for glue, apply a thin layer on the edges of the tear, press them together, and hold for the recommended drying time.
For larger rips, stitching may be the preferred method. Choose a thread that matches the color of the interior fabric. Use a needle suitable for heavy materials and employ a backstitch technique for added strength. This approach will help withstand the rigors of travel and keep the fabric intact.
Consider replacing damaged sections altogether with a new piece of fabric. Measure the area and cut a new lining that fits snugly. Attach it using fabric adhesive or stitching for a clean finish. This not only revitalizes the appearance but also prolongs the lifespan of the bag’s interior.

To further enhance durability, applying fabric or leather protector spray can provide an additional layer of defense against future wear and tear. This simple maintenance can significantly extend the life of your travel companion.
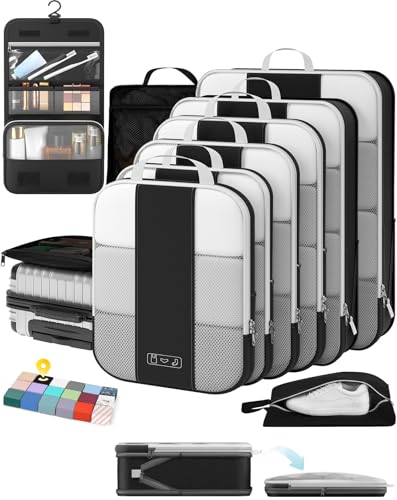
Repairing Your Bag’s Interior Fabric
Use heavy-duty fabric glue for small tears. Clean the area thoroughly, apply the adhesive, and press the edges together. Allow it to cure based on the product instructions.
Patching Approach
If the material is extensively damaged, consider using a patch. Cut a piece of fabric that matches the color and texture, slightly larger than the damaged section. Secure it with a fabric glue or sew it on for additional strength.
Seam Reinforcement
For loose seams, hand-stitching can restore functionality. Select a thread that matches the original and use a simple backstitch for durability. This technique reinforces the area and prevents further separation.
Always check the manufacturer’s care guidelines before applying any repair techniques, as specific materials may require unique products or approaches.
Identifying Damage in Luggage Lining
Inspect the interior carefully, paying attention to areas that frequently experience wear. Look for rips, tears, or fraying edges that may compromise overall integrity.
Check Common Problem Areas
- Seams: Examine stitches for loose threads or gaps that indicate separation.
- Corners: Assess corners for signs of stress, as these regions often bear the most weight.
- Pockets: Verify the condition of interior pockets, ensuring they are intact and securely attached.
Additional Signs of Damage
- Discoloration: Look for stains or discoloration that may indicate moisture or other exposure conditions.
- Odor: Unpleasant smells can suggest mildew or other damage affecting materials.
- Pulled Fabrics: Notice any areas where the fabric may be pulling away from the frame or seams.
Document all identified issues for reference during the repair process. Prioritize the most critical damages that affect functionality before tackling minor imperfections.
Choosing the Right Materials for Repair
Select appropriate fabrics based on durability and compatibility with the damaged area. Consider nylon or polyester for their resilience against wear and tear. Leather can also be an option for a more robust finish if the style suits your needs. Always match the texture and color to ensure a seamless appearance.
Recommended Materials
| Material | Characteristics | Best Use |
|---|---|---|
| Nylon | Lightweight, water-resistant, strong | General repairs |
| Polyester | Durable, fade-resistant | Long-lasting patches |
| Leather | Supportive, classy finish | High-end items |
| Fabric Adhesive | Flexible, strong bond | Seam repairs |
| Thread | Strong, various colors available | Stitching repairs |
Additionally, for waterproofing, consider applying a fabric sealant post-repair. For sourcing the necessary materials, shops that specialize in outdoor gear or crafting often provide a selection of options. For larger purchases, check out the best place to buy a large umbrella for similar quality materials.
If photography equipment is involved, the best umbrella for group photography may offer ideas on durable covers and fabrics that could aid in your project.
Steps to Remove and Replace Damaged Lining
Begin with carefully unzipping and opening the bag. Inspect the seams to locate the specific area that requires replacement.
Removing the Damaged Section
- Use a seam ripper to carefully detach the old material from the stitching. Take your time to avoid damaging surrounding fabric.
- Once loosened, peel away any adhesive or remnants that may remain. Clean the area with a lint roller or a damp cloth.
Installing New Material
- Cut a piece of new fabric that matches the dimensions of the removed section, allowing for a slight overlap for securing.
- Position the new fabric in place, ensuring proper alignment with existing sections. This will help maintain a uniform appearance.
- Utilize a sewing machine or needle and thread to stitch the new piece into place. A zigzag stitch can provide additional durability.
- Reinforce edges with fabric glue for extra stability, especially at seams.
Finish by smoothing out any wrinkles and rechecking the application. Let it dry completely before using.
Techniques for Reinforcing Luggage Edges
Utilize a heavy-duty fabric or synthetic material, such as ballistic nylon, when enhancing perimeter sections. These materials provide excellent durability and resistance to wear and tear.
For added strength, employ a sewing technique known as double stitching along the edges. This method significantly reduces the chances of seams coming undone under stress.
Another effective approach involves applying adhesive-backed reinforcement patches. Place these strategically at high-friction areas to prevent premature damage. Choose patches that match the color and pattern of your item for a seamless appearance.
Incorporate thermoformed plastic or rubber bumpers at the corners. These provide a protective layer that absorbs impact, preserving the integrity of the structure.
If the existing framework is compromised, consider using a rigid support frame inside the shell. This technique not only stabilizes but also enhances the overall strength against external pressure.
For edge protection, use a durable trim that can withstand frequent travel. Vinyl or leather trim offers both style and sturdiness, making them ideal choices. Ensure they are securely attached, either through sewing or adhesive application.
Finally, maintain the cleanliness of edges by applying a protective sealant or spray. This not only prevents moisture damage but also keeps scratches at bay, helping to prolong the life of the entire piece.
For more inspiration on creating supportive environments, check out the best aquarium in new jersey.
Tips for Sewing Luggage Lining Seamlessly
Use a durable thread suitable for fabric applications; polyester or nylon threads are preferable for their strength and flexibility. Choose a needle designed for the material to ensure clean stitching. If working with thicker fabrics, consider a heavy-duty needle.
Stitch Types
Opt for a straight stitch for most seams, ensuring tight and consistent lines. A zigzag stitch may be beneficial for stretchable materials, allowing them to flex without fraying. Test your chosen stitch on scrap pieces to check for fabric compatibility.

Seam Finishing
Finish edges with a serger or a zigzag stitch to prevent fraying. Alternatively, fold over the raw edge and stitch to create a clean, polished seam. Iron seams flat after stitching to help maintain structure and shape.
Final Touches for a Professional Finish
Use a quality fabric glue to secure any loose edges and reinforce high-stress areas within your piece. Apply a thin layer, ensuring it spreads evenly without clumping. Following this, allow it to dry fully before moving to the next phase.
For a polished look, trim any excess material carefully using sharp scissors. This precision prevents fraying and creates a clean line. If visible, consider applying bias tape along edges for a finished appearance, enhancing durability and aesthetics.
After reassembling, inspect every seam for alignment. Use a hot iron on a low setting to gently press seams, ensuring they lay flat and adding a crisp finish. Pay attention to any irregularities; they can detract from the overall look.
Finally, consider adding a protective spray to guard against wear and moisture. Choose a product suitable for the fabric type, and apply it in a well-ventilated area. This added measure extends the usability of your item while preserving its refreshed appearance.
FAQ:
What materials do I need to repair the lining of my luggage?
To repair the lining of your luggage, you will need a few basic materials. First, gather a pair of scissors for trimming damaged parts. You will need fabric or fabric glue that matches your luggage’s lining material. If the lining is torn, look for a needle and thread that matches the color of the fabric for hand-sewing repairs. A sewing machine can also be helpful for larger patches. Additionally, consider using a patch of similar fabric if the tear is extensive. Finally, a ruler or measuring tape can aid in cutting your fabric to the correct size.
Can I fix my luggage lining without sewing?
Yes, you can repair luggage lining without sewing by using fabric glue or adhesive patches. Start by cleaning the area around the tear. Cut a piece of fabric or an adhesive patch slightly larger than the damaged area. Apply fabric glue to the back of the patch and press it firmly onto the lining, ensuring there are no air bubbles. Allow sufficient time for the glue to dry according to the instructions provided. This approach works well for minor tears and can be a quick solution for keeping your luggage functional without the need for sewing.