


Begin with a screwdriver that matches the screws on the base of your suitcase. Most often, a Phillips head will suffice. Locate the screws that secure the casters to the suitcase frame and unscrew them carefully. Preserve these screws for future use in case you wish to reattach the rollers.
After disassembling, check the weight difference. Often, removing the casters can decrease the overall weight, making it easier to handle smaller bags. If necessary, consider padding out the newly exposed regions with soft fabric or foam to avoid damage during transit.
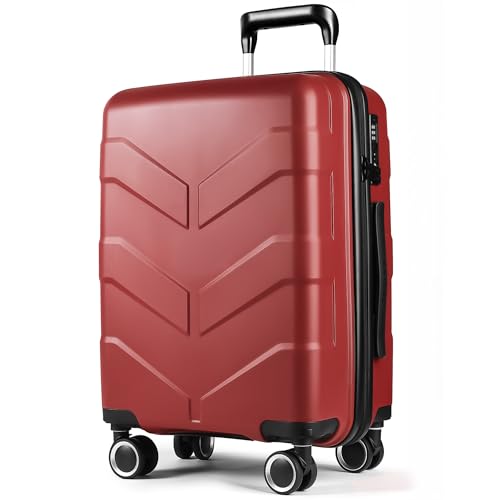
For those who regularly travel and seek a streamlined experience, think about a wheeled option designed for compactness and functionality without sacrificing usability. This adjustment enhances portability while ensuring compliance with airline regulations for size and weight.
Removing Casters for Compact Storage
Begin by gathering the necessary tools: a screwdriver or wrench, depending on the fasteners used. Carefully inspect the base of the carrier to identify the mounting system securing the casters. Most often, you will encounter screws or bolts.
Once you have located the fasteners, securely support the item to prevent it from tipping over during the process. Unscrew or unbolt the attachments, ensuring a safe and controlled removal of each caster. Store the removed components in a safe location in case reinstallation is desired later.
After completing this task, assess the overall design for stability. If needed, consider extra padding for the bottom to avoid potential damage during transport. This adjustment can greatly enhance the convenience of storage.
For quality merchandise and accessories, check out these resources: best luggage shops melbourne and for outdoor activities, explore the best backpack sprayer for pesticides.
Assessing the Type of Wheels on Your Luggage
Identify your travel gear’s wheel configuration before altering its dimensions. Examine if the casters are fixed or removable. Fixed wheels are typically integrated into the bag, complicating removal. In contrast, removable ones often feature screws or fasteners that allow for detachment. Use a screwdriver to inspect and loosen screws, if applicable.
Observe the wheel type–spinner or luggage wheel. Spinner wheels offer 360-degree rotation, enhancing maneuverability, while traditional wheels may have a sturdy design but limit movement direction. Choosing between these types affects both usability for travel and potential for modification. Best front loading washing machine for hard water can serve as a practical reference for those interested in optimizing space.
Tools Required for Assessment
Gather necessary tools including a small screwdriver and possibly pliers for firm grip. If the wheels have any locking mechanism, ensure to consult the manufacturer’s guidelines for safe detachment. An accurate assessment facilitates an efficient approach towards reducing the size of your travel gear.
Understanding Wheel Assembly
Recognize the differences in assembly among brands, as some may employ unique attachment systems. Identifying the assembly structure ahead of time will simplify the process of removing or replacing the wheels, thus aiding in the transition to a more compact form. Analyze whether adjustments are feasible without compromising the integrity of the bag.
Tools Required for Wheel Removal
Gather the following instruments for successful maneuvering of the casters from your carrier:
- Ratchet and Socket Set: A metric or imperial socket set will be needed to fit the specific bolts securing the casters. Common sizes are 10mm and 13mm.
- Screwdriver: Depending on the design, a flathead or Phillips screwdriver may be necessary to remove screws holding the wheels in place.
- Pliers: Useful for gripping and twisting any stubborn components that resist removal.
- Utility Knife: This tool is handy for cutting away any adhesive or obstructions that may interfere with the process.
- Work Gloves: Protect hands from potential injury or abrasion during the process.
- Safety Goggles: Prevent debris from causing eye injuries when using tools that may create splinters or projectiles.
Additional Considerations
Consider using a magnetic tray to keep small parts organized during the operation. Furthermore, having a towel or mat to work on will help protect surfaces and make the process more manageable.
Prepare your workspace adequately. A well-lit area will enhance visibility and precision while handling tools and components.
Step-by-Step Guide to Removing Luggage Wheels
Gather necessary tools before proceeding: a screwdriver, pliers, and possibly a socket wrench, depending on the attachment type.
1. Prepare the Luggage
Position the suitcase on a stable surface, ensuring it remains upright to prevent any damage during the process. Check for any existing damage to the area surrounding the wheel assemblies.
2. Unscrewing the Wheel Assembly
Identify the screws securing the wheel assembly. Using the appropriate screwdriver, turn the screws counterclockwise until they are fully loosened. For stubborn screws, pliers may provide extra grip. Place the screws in a small container to avoid misplacement.
3. Detaching the Wheel
Carefully pull the wheel assembly away from the suitcase frame. If resistance is encountered, double-check for any remaining screws or clips that may be holding it in place.
4. Completing the Process
After both assemblies are removed, inspect for any remaining parts attached to the suitcase. Ensure all screws are secured back into their container. Consider covering the exposed areas with adhesive tape to prevent tears or snagging during travel.
Fixing or Covering the Wheel Compartment After Removal
Sealing the area where the casters were attached is essential for creating a streamlined appearance and ensuring durability. Consider the following options:
- Patch with Fabric: Use a durable fabric that matches or complements the exterior. Cut a piece large enough to cover the entire opening and securely attach it with fabric adhesive.
- Use Plugs or Caps: Find rubber or plastic plugs that fit snugly into the compartment. They provide a clean finish and prevent debris from entering.
- Custom Fabrication: For a more professional look, consider creating a hard shell that fits the opening precisely. This can be crafted from lightweight materials like plastic or wood and painted to match.
- Reinforcing with Tape: If other options are unavailable, sturdy tape can temporarily cover the gap. Choose water-resistant tape for added protection.
- Flexible Sealant: Applying a flexible sealant around the edges can create a waterproof barrier while maintaining some give for structural integrity.
Ensure that any method chosen provides adequate stability and durability, so that the modified bag remains functional for travel.


