


For a timeless and practical carrying solution, maintaining a distance of approximately 1.5 to 2 centimeters between seams is recommended. This ensures strength and durability, especially for everyday use items.
When stitching the material, choose a thread that complements the color and texture of the fabric, creating an aesthetically pleasing and long-lasting join. A thicker thread is often preferred to withstand wear, while a contrasting color can add a unique visual element.
Incorporate a method that allows the edges to align precisely for a streamlined finish. Testing various techniques on scrap pieces is advisable to perfect the process before handling the actual project.
Understanding the Edge Stitching Technique
Utilizing a distance of approximately 1/8 inch is recommended for decorative seams in handcrafted goods. This spacing ensures durability and aesthetic appeal while maintaining the structural integrity of the product.
Selection of the right thread plays a crucial role in achieving optimal results. Opt for thicker threads for prominent visibility and reinforcement, while finer threads facilitate subtlety and finesse in your creations.

Consider the needle type as well; a heavier needle will puncture thicker materials effectively, whereas a lighter needle works well with more delicate textures. Regularly changing your needle will prevent snagging and enhance the quality of each seam.
To maintain uniformity throughout stitching, keeping a consistent tension on the thread is vital. This practice avoids puckering and promotes a smooth finish. Experiment with different stitch patterns to find the most suitable for your project.
| Technique | Description |
|---|---|
| Spacing | Maintain approximately 1/8 inch from the edge for reinforcement. |
| Thread Selection | Choose thickness based on desired visibility and strength. |
| Needle Choice | Use the appropriate needle size for material thickness. |
| Tension Control | Consistent thread tension prevents puckering. |
In addition to mastery of the stitching technique, ensure to explore options that fit varied needs, such as best luggage for overnight or weekend trips. This understanding enhances the overall craftsmanship and functionality of your creations.
Measuring Distances for Accurate Stitch Placement
Use a gauge to ensure the distance between the seam and the material’s border is consistent. Aim for a minimum of 1/8 inch to prevent fraying while maintaining a polished look.
Mark your measurements on the surface with a fabric chalk or a disappearing ink pen to keep lines clear. This step aids in visual alignment during the sewing process.
To achieve symmetry, utilize a ruler or measuring tape, measuring from the edge to predefined markings at regular intervals. For instance, if working with a piece that has multiple sections, consider measuring 1 inch for each segment to establish uniformity.
Use templates for repetitive designs to save time and ensure accuracy. Create a sturdy template from cardboard or plastic, allowing for multiple cuts and repetitive markers.
Evaluate your settings before you begin sewing. Test on a scrap piece of fabric to confirm that measurements align with your expectations. Adjust as necessary before proceeding with the actual project.
Remember to account for the thickness of the material when determining placement. Thicker materials may require greater distances from the edge to maintain stability and appearance.
Selecting the Right Thread for Edge Sewing
For high-quality seam construction, use polyester or nylon thread. These materials provide excellent durability and resistance to fraying, ensuring longevity. The thickness of the thread is crucial; typically, for finer leather projects, opt for thread sizes between 0.6mm and 1mm. This range offers a balance of strength and flexibility.
Thread Types
- Bonded Nylon: Known for its strength and resistance to abrasion. Ideal for heavier weights.
- Polyester: Offers UV resistance and holds color well, making it great for outdoor designs.
- Waxed Thread: Enhances grip and is less likely to slip through the material, beneficial for hand sewing.
Color Coordination
Choose thread colors that complement or contrast with the material. A matching thread color provides a subtle, polished look, while contrasting colors can highlight seams and add visual interest.
Test sewing on scrap material to assess the thread’s behavior with the chosen tooling, ensuring compatibility and satisfying results. The right thread selection will enhance both the functionality and aesthetics of the final product.
Tools Needed for Precision Edge Stitching
For achieving high-quality seams, a sewing machine with adjustable tension settings is paramount. Look for models that allow you to modify stitch length and width, providing greater control over the output.
Next, invest in a set of leather awls. These tools enable accurate marking and punching of holes for consistent needle placement, which is crucial for uniformity.
A reliable cutting mat will protect surfaces while ensuring clean edges. Pair it with a rotary cutter for smooth, precise cuts, facilitating a professional finish.
Use a ruler or straight edge made of metal for guidance when marking lines. This avoids inaccuracies during the setup phase. Additionally, a good quality stitching pony or clamp is vital for holding the material securely during the stitching process.
Thread selection should match the project’s requirements. Use waxed thread to enhance durability and prevent fraying, ensuring a long-lasting result.
Finally, consider a high-resolution camera for documenting your work. For recommendations, check out the best digital camera brans to capture those intricate details.
Common Mistakes in Edge Stitching and How to Avoid Them
One primary error is incorrect distance maintenance from the material’s edge, leading to uneven stitches. Utilize a ruler or gauge to ensure accurate measurement, enhancing consistency throughout the project.
Another frequent oversight involves selecting unsuitable thread types. Opt for heavy-duty options that complement the material’s weight and texture to prevent fraying or breakage during use.
In addition, neglecting to secure the threads properly can cause unraveling. Always knot the threads securely at the start and end of your work. Consider using a backstitch or lockstitch technique for added durability.
Failing to maintain tension while stitching can lead to bunching or loose areas. Practice keeping an even, steady hand motion across the material, adjusting tension as needed to achieve a smooth finish.
Lastly, inadequate tool selection detracts from quality. Ensure you have sharp needles and an appropriate presser foot for your sewing machine. High-quality tools significantly improve precision and reduce errors.
For outdoor projects, consider investing in a best spf patio umbrella to protect your workspace, ensuring optimal conditions for stitching and long-lasting results.
Maintenance Tips for Long-lasting Sewing Techniques
Regular inspection of seams is essential. Check for loose threads or signs of wear. Address minor issues immediately to prevent further deterioration.
Use high-quality conditioning products on fabric to maintain softness and prevent cracking. A dedicated leather conditioner can enhance longevity and appearance.
Store your crafted item in a cool, dry place, away from direct sunlight, to avoid fading and drying out of materials.
Clean gently with a soft, damp cloth; avoid harsh chemicals that could damage fibers. For stubborn stains, test any cleaner on a hidden area first.
When not in use, consider using a protective cover to shield against dust and moisture.
Sewing maintenance involves regular tightening of loose parts. Ensure all hardware remains secure and functional to prevent accidental breakage.
Monitor environmental conditions, as temperature and humidity can affect the integrity of materials. Aim for stable conditions to preserve the structure.
Consult with a professional for repairs, particularly if major issues arise. Timely interventions can greatly enhance durability and appearance.
FAQ:
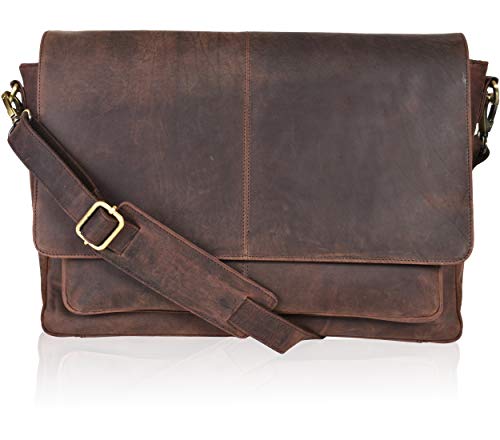
What are the dimensions of the edge stitch leather messenger bag?
The edge stitch leather messenger bag typically measures around 12 inches in height, 16 inches in width, and about 4 inches in depth. These dimensions may vary slightly depending on the specific model or manufacturer. The size is designed to comfortably accommodate a variety of items, making it suitable for daily use, such as carrying a laptop, books, and personal belongings.
How can I maintain the quality of my edge stitch leather messenger bag over time?
To maintain your edge stitch leather messenger bag, consider the following tips: First, regularly clean the leather with a damp cloth to remove dust and dirt. For deeper cleaning, use a leather cleaner that is appropriate for your bag’s specific type of leather. Additionally, consider applying a leather conditioner every few months to keep the material supple and prevent cracking. Avoid exposing the bag to excessive moisture, and if it gets wet, dry it at room temperature away from direct heat sources. Lastly, store the bag in a dust bag or a dry place when not in use to protect it from scratches and environmental factors. By following these maintenance practices, you can extend the life and appearance of your messenger bag significantly.


