


The key to successfully fitting your camera equipment into a crossbody carrier lies in selecting the right bag with proper padding and compartments. Choose a design with customizable dividers that allow you to securely position the camera body and lenses to minimize movement and potential damage.
Utilize specialized lens cases for additional protection. These can be placed within the main compartment, ensuring that each lens is shielded from scratches and impacts. For added convenience, consider a bag that features exterior pockets for quick accessibility to accessories like memory cards, batteries, and filters.

When setting up your carrier, position weightier items toward the bottom for better balance. This way, the setup reduces strain on your shoulder while distributing the load evenly. If your model has a rain cover, don’t forget to use it for unexpected weather conditions. Lastly, always test the bag’s comfort by adjusting straps before hitting the road.
Optimal Techniques for Transporting a Camera in a Crossbody Satchel
Utilize padded dividers or inserts specifically designed for camera equipment. These provide cushioning and prevent any unwanted movement during transit. By adding these elements, you can safeguard your gear while maximizing available space.
Strategic Arrangement of Components
Place heavier items, such as lenses and the main body, closer to your back for better weight distribution. Keep smaller accessories like memory cards and batteries in easily accessible exterior pockets. This organization not only enhances comfort but also facilitates quick access during active shooting scenarios.
Protective Measures
Consider using a rain cover or a weather-resistant fabric pouch to shield the equipment from moisture and dust. This additional layer offers peace of mind while ensuring your apparatus remains in optimal condition. For those interested in related equipment storage solutions, check out are there any freezers 450 wide.
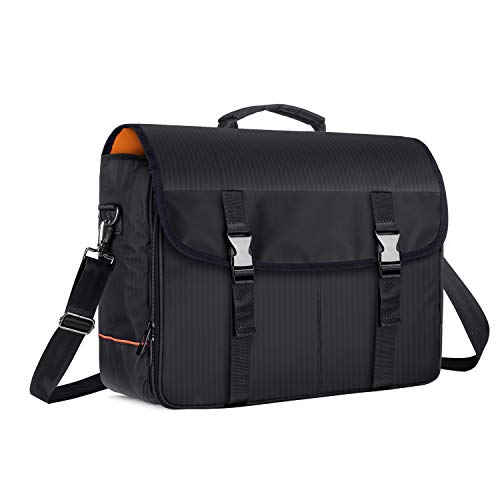
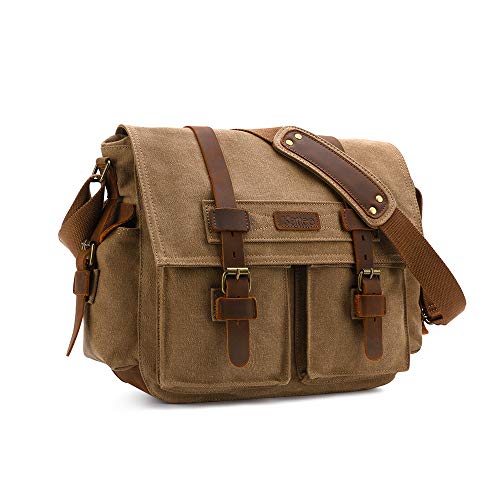
Choosing the Right Messenger Bag for Your DSLR
Select a model with dedicated compartments to ensure your gear is secure. Look for padded sections to protect against impacts. An adjustable divider can help you customize the interior layout to accommodate different lenses and accessories.
Key Features to Consider
- Material: Opt for weather-resistant fabrics to shield your equipment from rain and spills.
- Weight: Lightweight designs are easier to handle during long outings.
- Straps: A comfortable, padded shoulder strap enhances carrying experience. Some bags even come with crossbody options for better stability.
- Accessibility: Choose a style that allows for quick access to your camera without needing to fully unfasten the carrier.
Size Matters
Determine the right size by assessing your equipment. Ensure there’s enough space for your camera, multiple lenses, and other accessories. A larger capacity might be necessary if you plan to include extra items, such as a best small umbrella stroller for big kid during outings.
Keep in mind that a bag that’s too big can lead to shifting and discomfort, while one that’s too small may be insufficient. Aim for a balanced fit to maintain ease of transport.
Consider additional organizational features like external pockets for quick access to essentials, such as memory cards or your phone.
Invest in a quality bag that meets your photography needs while fitting comfortably into your lifestyle. For example, if you often shoot in windy conditions, check out options recommended as the best wind resistant folding umbrella for added protection during shoots.
Properly Organizing Your Camera and Accessories
Separate compartments play a critical role in maximizing space and preventing damage. Use padding or dividers within your chosen carrier to designate areas for your camera body, lenses, and additional gear like batteries and memory cards.
Utilize Pouches for Smaller Items
Employ small pouches or cases to store accessories such as filters, lens caps, and cleaning supplies. This not only keeps them accessible but also avoids potential scratching or damage to your equipment. Color-coding these pouches can enhance visibility and organization.
Arrange by Frequency of Use
Place the most frequently used items in easy-to-reach areas. Reserve less accessible sections for spare items you might not require immediately. For instance, position your primary lens and camera body at the top or front while stowing extra batteries toward the back.
Labeling sections can further streamline your setup. Use tags or stickers for quick identification of contents. This can save time, especially in dynamic situations requiring swift access to your gear.
Finally, routinely assess and reorganize your setup to adapt to any changes in shooting style or equipment. Regular maintenance of your organization system ensures that you remain prepared for various photography scenarios.
Using Padded Inserts for Added Protection
Investing in padded inserts significantly enhances the safety of your camera equipment. Choose inserts that fit your gear perfectly, providing snug compartments for your camera body and lenses. Look for adjustable dividers, allowing for customized organization based on your specific equipment, which ensures that items do not shift during transport.
Opt for materials such as foam or thick fabric, which offer excellent cushioning against shocks and impacts. Inserts with water-resistant features will also add an extra layer of defense against unexpected weather conditions, protecting your valuable gear from moisture.
During assembly, make sure to position the heaviest items at the bottom. This not only improves stability but also minimizes the risk of damage to more delicate components. Consider how to secure smaller accessories, like batteries and memory cards, within the insert to prevent them from becoming lost or damaged.
In addition to basic padded inserts, explore multi-compartment options that include specialized slots for equipment like tripods or filters. This versatility allows for a more organized setup, making it efficient to find what you need on-the-go.
Securing Your DSLR During Transportation
Utilize a reliable strap to tightly fasten your equipment within the chosen container. This prevents any unwanted movement, reducing the risk of impact damage. Look for bags equipped with built-in safety features such as locking zippers or flaps that shield the main compartment.
Use of Internal Dividers
Internal dividers assist in isolating various components, keeping them from colliding with each other. These can be adjustable to fit the specific dimensions of your setup, ensuring a snug fit for cameras, lenses, and accessories.
| Type of Insert | Purpose | Material |
|---|---|---|
| Foam Padding | Shock absorption | High-density foam |
| Neoprene | Water resistance | Neoprene |
| Fabric Pocket | Accessory organization | Durable fabric |
Secure External Fastenings
Ensure that any external fastenings such as buckles or straps are securely fastened. This acts as a secondary barrier against accidental slips or falls, providing an additional layer of protection for your valuable gear.
Accessing Your Camera Quickly and Efficiently
Position your equipment strategically within the storage solution to facilitate swift access. Place frequently used items, like your main camera body, near the opening for easy retrieval.
Utilize Quick-Access Features
- Search for models that include exterior pockets designed for quick access.
- Consider magnetic or Velcro flaps for silent opening without fumbling.
Maintain a Consistent Layout
Organize your gear in a consistent manner to minimize confusion. For instance, dedicate specific compartments for lenses, filters, and batteries, ensuring you know precisely where each item is located.
The routine of consistent placement will enhance speed during impromptu shots or events. Prioritize keeping your camera facing outward in the chosen section to allow immediate readiness.
Practice Your Retrieval Technique
- Rehearse pulling out your camera in various scenarios to build muscle memory.
- Experiment with one-handed operation for smoother and faster access.
Effective planning and practice will enable you to capture fleeting moments without hesitation. Implementing these strategies ensures that your photography endeavors remain proactive rather than reactive.