


Select a sturdy fiber such as cotton or acrylic, which balances durability and ease of handling. This ensures your creation withstands daily use while also providing a pleasant tactile experience.
Utilize a moderate hook size, often in the range of 4.5 to 5.5 mm. This range allows for sufficient structure without creating tension, enabling beginners to achieve even stitches effortlessly.
Begin with a foundation chain that aligns with your desired width; typically, a range of 30 to 40 stitches serves as a solid base. Adding multiple rows of single or double stitches creates the body and can be varied to create unique patterns or textures.
Incorporate a flap and strap for functionality. Consider using a simple button or snap for closure, adding an attractiveness while enhancing practicality. These elements can be easily adjusted to match your personal style.
Finishing touches such as weaving in ends and tidying edges contribute to a polished appearance. Experiment with colors and patterns, allowing your creativity to shine through while you construct a practical accessory.
Creating a Stylish Satchel in Simple Steps
Select a suitable yarn, preferably medium weight (like worsted), to achieve the desired sturdiness. Choose a hook size based on the yarn label, typically a G or H size works well.
Materials Needed
- Yarn (medium weight)
- Crochet hook (G or H)
- Scissors
- Tapestry needle
- Measuring tape
- Magnetic snap or button (optional)
- Strap material (if not crocheting the strap)
Basic Steps
- Start with a foundation chain that measures the desired width of the satchel’s body.
- Work in rows, using a simple stitch like single or double crochet to form the main body.
- Continue until reaching the desired height, then complete a few rows to create the flap.
- Seal the sides with slip stitches or join as you go, ensuring a sturdy finish.
- For the strap, chain a length suitable for shoulder wear, or alternatively, sew a pre-made strap to the sides.
- Add a closure if desired, securing it at the flap for better functionality.
Customize colors and stitch patterns to match personal style. Experiment with different textures for a unique approach, incorporating embellishments like pockets or patches. Enjoy the crafting process and the satisfaction of using a handmade accessory!
Selecting the Right Yarn and Hook Size
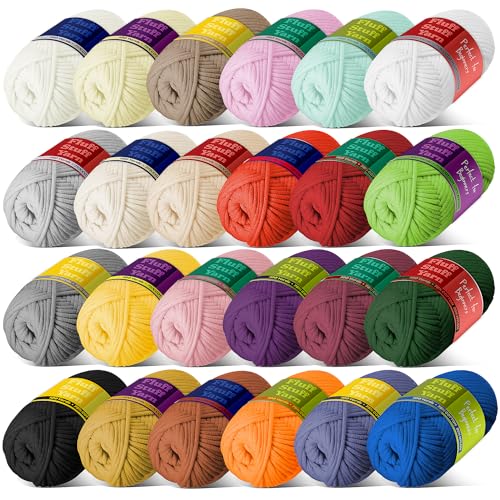
Opt for medium-weight yarn, such as worsted or aran, which is versatile and easy to handle. Common choices include acrylic or cotton blends, as they provide durability and ease of care.
For hook size, a 5mm to 6mm (H to J) crochet hook is ideal, facilitating comfortable tension and stitch definition. Adjust the hook according to the yarn texture; a larger hook can result in a looser, airier fabric, whereas a smaller size promotes a tighter weave.
Yarn Weight Guidelines
Choosing yarn based on thickness affects the final product. For a sturdy structure, select a yarn labeled as medium (Category 4). Avoid materials that are too fine, as they may not provide adequate support for your creation.
Testing Your Tension
Perform a gauge swatch to check your tension. This step ensures your piece meets the desired dimensions and has the right fit. Aim for about 16-20 stitches over 4 inches, adjusting your hook size or yarn weight as needed.
Understanding Basic Crochet Stitches for Bag Construction
Begin with the foundation chain; this sets the base for your work. Create a series of connected loops that will determine the width of your project. A chain of around 30 to 40 stitches is typical for a compact design.
Single and Double Stitches
The single stitch offers a tight, sturdy fabric, ideal for structure. Insert your hook into the desired stitch, yarn over, pull through, and finish by yarning over again and drawing through both loops on your hook.
Double stitches provide a looser, more textured finish. Begin similarly by yarning over before inserting your hook into the stitch. After pulling through, yarn over again and repeat the process, which creates height and drape.
Slip Stitches and Half Double Stitches
Slip stitches serve well for joining pieces and creating neat edges. Simply insert your hook, yarn over, and pull through both the working stitch and the loop on your hook.
Half double stitches combine elements of both previous techniques, offering a balance between thickness and flexibility. Yarn over first, insert your hook, pull through, then yarn over twice more to complete the stitch.
Understanding these foundational techniques will streamline the construction of various compartments and features in your creation, ensuring both functionality and aesthetic appeal.
Creating the Base and Sides of the Messenger Bag
To establish a strong foundation, begin with a chain that is as long as the desired width of your item. Use a light tension for flexibility. Complete a row of single crochet to create the initial layer, ensuring even stitches for a uniform look.
Building the Base
After forming your foundation, continue with single crochet rows until you reach the preferred depth. Aim for at least six to eight rows, adjusting based on the thickness of your yarn and the intended size of the product.
- Count your stitches regularly to maintain straight edges.
- If unevenness occurs, snug up your tension by slightly tightening your grip on the yarn.
- Keep the base flat to avoid curling.
Forming the Sides
Switch to half double crochet for the sides to give them an elevated structure. Start with the last row of the base, and then crochet upwards along the sides, working in the round to connect at the corners.
- At each corner, perform two stitches in the same stitch to create a rounded edge.
- Stitch until the desired height is met, typically around six to eight inches.
- Ensure the side edges are consistent in height and stitches.
Remember to regularly check that your sides are perpendicular to the base, maintaining a clean and structured appearance. This method will provide stability and the right form for your project.
Adding Straps and Closure Options for Security
To ensure safe transport of personal items, consider sturdy strap designs. Thick cotton or acrylic yarn is recommended for durability. A single strap can be created using a long chain stitch, or opt for two straps for added comfort and stability. Attach them securely to the top edges of your creation using a slip stitch.
For a locking mechanism, explore various options such as button closures or magnetic snaps. Buttons can be crocheted or purchased, providing a classic look. Magnetic snaps offer a quick access solution; stitching them into the lining can enhance both functionality and style.
To further ensure security, contemplate adding a flap that folds over the opening, which can be secured using the chosen button or snap. This not only protects contents but also adds a decorative touch.
For anyone seeking organization, internal pockets can serve as a great bonus. Use a different color yarn to distinguish these areas. Modular pockets can be stitched directly into the lining, giving easy access to smaller items such as keys or cards.
As an aside, if you enjoy crafting while ensuring your workspace is tidy, check out the best gliders for a washing machine to maintain a clean crafting environment.
Finishing Touches: Embellishments and Personalization
Accentuate your creation with embellishments that reflect your style. Start by considering appliqués in fun shapes or your favorite motifs. Cut these from felt or crochet them separately and sew them onto your piece for a unique touch. Additionally, incorporating buttons can provide both aesthetic appeal and functionality. Choose colorful or themed buttons that resonate with your design.
Adding Pockets and Lining
For added practicality, sew an interior lining using fabric that complements your project. This not only enhances durability but also allows for an organized layout. Consider adding pockets to keep smaller items secure. Use contrasting fabric for the pockets to create a striking look and make it easier to locate items.
Color and Texture Variety
Experiment with color and texture by integrating different yarns or incorporating fabric strips. This method can create a stunning visual effect. If you wish to change the color of any metallic elements like snaps or buckles, consider using the best spray paint for patio umbrella, which is suitable for a variety of surfaces and ensures a uniform finish.
| Embellishment Type | Description |
|---|---|
| Appliqué | Shapes sewn onto the surface for decoration. |
| Buttons | Functional and decorative fasteners available in various designs. |
| Pockets | Fabric additions inside for organized storage. |
| Fabric Lining | Enhances durability and visual appeal. |
Consider personalization options, such as monograms or initials, to make it truly yours. This can be done with embroidery or fabric paint. Lastly, if you want to give it as a gift, include a little note or a small tag to add a personal touch.
Enhance practicality and aesthetics by exploring various features available through the best affordable reclining umbrella stroller, which showcases innovative designs for everyday use. Enjoy crafting a piece that not only serves a purpose but also stands out.