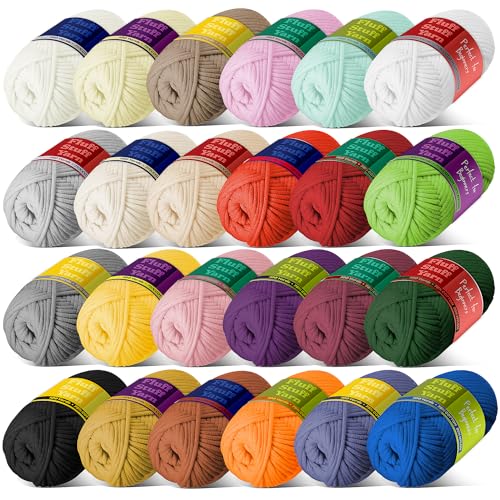


Choose cotton or acrylic yarn for durability and a comfortable texture. Select a hook size that complements your yarn–usually around 4mm or 5mm. This will ensure your stitches are neither too tight nor too loose.
Start with a rectangular base. Create a chain to your desired width, then work in rows using the half double crochet stitch for a solid foundation. Keep the height appropriate for your daily essentials.
Incorporate a simple stitch pattern such as double crochet to add texture to the body, adjusting the length as needed. Create a sturdy strap by chaining the desired length and working back in rows. Reinforce attachment points to enhance stability.
Finish with lining to protect your items and add a polished look. Use fabric that matches your aesthetic, cutting it to fit securely inside the project. Sew or pin in place to secure the lining.
Add embellishments or pockets if desired for practicality and style. Personal touches, such as buttons or patches, can enhance the uniqueness of the carry-all.
Construction Tips for a Crochet Tote
Utilize sturdy yarn to ensure durability; cotton or acrylic blends work well. Choose a hook size that complements the yarn weight, generally a 5mm to 6mm for a balanced texture. Begin with a foundation chain that matches the desired width of the project, followed by single or double crochet stitches to establish the base. Keep an even tension to avoid distortion.
For sides, switch to a contrasting color yarn to create visual interest. Incorporate different stitch patterns like half double crochet for varied texture. Consider incorporating a lining for added structure; lightweight fabric can enhance the look and provide support.
For the closure, use buttons or magnetic snaps. Position them securely at the top edges to maintain accessibility. Straps can be crafted using long chains or flat panels, ensuring they’re reinforced for added strength and comfort during wear.
Finishing touches like decorative tassels or appliques can personalize the item. Experiment with additional embellishments to showcase creativity. Test all components for functionality and wearability once completed, adjusting as needed for optimal performance.
Selecting the Right Yarn and Hook Size for Your Project
Choose yarn that balances durability and softness; cotton or acrylic blends are often ideal. For larger pieces, opt for a medium weight (4) yarn for a structured look.
For a sturdy result, use a suitable hook size: typically, a 5mm or 6mm hook works well with medium weight yarn. Adjust the hook size if you prefer a tighter or looser fabric.
Test your gauge before starting. Create a small swatch to ensure your tension aligns with the desired dimensions. This step prevents size discrepancies in the final product.
Consider the anticipated wear and aesthetics. If creating a casual accessory, vibrant colors can add flair, while neutral tones may offer versatility.
Avoid novelty yarns for foundational components. Using consistent yarn types ensures stability and functionality in your creation.
Understanding Basic Stitches for Your Tote Project
To create a stylish and sturdy tote, grasp the fundamental stitches that form the foundation of this craft. Start with the chain stitch, which is the initial step for any project. This stitch provides the base to build upon and determines the width of your creation.
Next, the single crochet stitch serves as a building block for most designs. This stitch offers a tight and dense fabric that is perfect for durability and structure. Practice maintaining consistent tension to avoid uneven results.
Essential Techniques
The double crochet stitch adds height and visual interest to your piece. It works by yarn over, inserting the hook into the fabric, pulling through loops, and finishing by yarn over again. This technique provides a lacy feel, which can be used to create unique patterns or designs.
Incorporating slip stitches can help in joining rounds or finishing edges neatly. It creates a smooth transition, ensuring that your final piece looks polished and well-executed.
For inspiration or to find resources related to aquatic themes, consider checking out the best aquarium in missouri. It can offer ideas for color schemes or motifs that can be integrated into your project.
Creating the Body and Flap of the Bag: Step-by-Step Guide
For the main section and flap, begin with a foundation chain that matches your desired width. For instance, if aiming for a medium-sized satchel, a chain of approximately 40-50 stitches will suffice. Use the first row to establish a solid base with single or half double crochet stitches, ensuring even tension throughout.
Forming the Body
Continue working in rows until reaching the desired height. Typically, around 30-40 rows will yield a practical depth. To add texture, alternate between different stitch patterns, such as clusters or v-stitches. This not only enhances aesthetics but also contributes to the bag’s sturdiness.
Crafting the Flap
For the flap, once the body height is reached, create a separate section. Chain the same number of stitches as the width for consistency. Work rows until the flap extends roughly 5-10 inches. Incorporate buttons or magnetic snaps for closure; this adds functionality and ensures secure storage.
After completing these sections, consider reinforcing the base by weaving in extra stitches or attaching a durable lining. This ensures longevity, especially if carrying heavier items. If applicable, check out the best battery power backpack sprayer for additional ideas on materials that can enhance your project.
Finishing Touches: Adding Straps and Personalizing Your Item
To attach straps, consider using either webbing or a yarn-based option. For a sturdy and stylish solution, cut webbing to the desired length, typically 40 to 48 inches. Secure the ends with a heavy-duty sewing machine or by hand stitching, ensuring they are tightly attached to the sides of the constructed piece.
If you prefer a yarn strap, create a long chain of stitches, usually 6 to 10 inches wide. Ensure that the length provides a comfortable fit when worn over the shoulder. A single crochet or half double crochet gives added durability.
Personalization can elevate your creation. Sew on embellishments like patches, buttons, or appliqué designs that reflect your personality. Adding a lining enhances appearance and provides structure–choose fabric that complements your yarn choice.
For an extra touch, consider dyeing portions of your item or using multiple colors for a striking effect. Patterns can be created by varying stitch tension or incorporating different techniques such as bobbles or shells for texture.
Finally, consider practicality–zippered pockets or magnetic closures can be integrated for added functionality. For high-efficiency options, check out the best gas powered backpack leaf blower to streamline your crafting space.