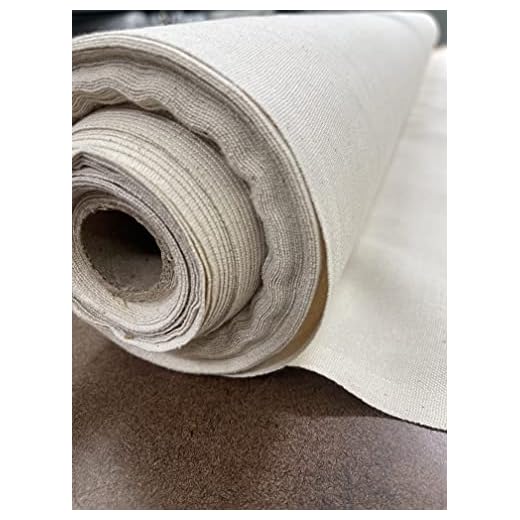

Begin with quality materials like durable canvas or denim, which provide the necessary strength and resilience for daily use. Choose a fabric with a pleasing texture and weight to enhance both aesthetics and functionality.
Prepare a cutting plan to create panels for the outer shell, lining, and any additional pockets. A structured design supports organization, making it easier to access essentials on the go. Use a rotary cutter or sharp scissors for clean edges, ensuring precision in every piece.
Focus on reinforcement at stress points such as handles and seams. Double-stitching or adding rivets can enhance durability, preventing premature wear. Consider incorporating a magnetic snap or zipper for secure closure, allowing easy access while keeping contents safe.
After sewing the outer layer, turn your attention to the interior lining. This adds a professional finish and protects items from snagging. Use lightweight cotton for breathability and ease of maneuverability during construction.
Finally, personalize the accessory with pockets or decorative elements like patches and embroidery, reflecting your style. This not only enhances the look but also increases its practical use for carrying daily necessities. Enjoy the process and take pride in your custom creation!
Selecting the Right Materials for Your Messenger Bag
Use durable canvas or denim for the outer layer, as these fabrics withstand wear and tear effectively. Opt for lightweight nylon or polyester for the lining, ensuring ease of handling and additional water resistance.
Reinforcement and Structure
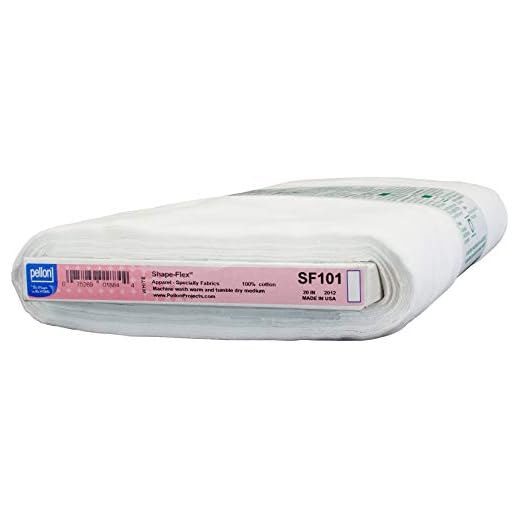
Incorporate a sturdy interfacing or fusible lining to provide structure. This adds support, especially for larger designs, preventing sagging over time. Consider using foam padding for extra protection of your contents.
Hardware and Accessories
Choose high-quality zippers and buckles that match the bag’s overall aesthetic. Metal hardware offers more durability compared to plastic components. Additionally, select webbing that’s strong yet lightweight for straps to enhance comfort during use.
Prioritize color coordination between outer and inner materials for an appealing look. Test fabric combinations to ensure they withstand everyday use without fading or fraying, maintaining a professional appearance.
Measuring and Cutting Fabric for the Bag Components
Begin with precise measurements based on the desired dimensions of the finished product. Use a fabric ruler or measuring tape to obtain width, height, and depth measurements, ensuring to add seam allowances of at least 0.5 inches to each side.
For each component, such as the main body, straps, and lining, calculate the sizes required. For example, if the outer part requires a finished size of 12 inches by 16 inches, your cut should be 13 inches by 17 inches, accounting for seams.
Use a rotary cutter for clean, straight edges. Lay the material flat on a cutting mat, aligning your measurements. Use weights or pins to hold the fabric steady while cutting, minimizing movement.
Mark cutting lines with tailor’s chalk or fabric markers to ensure accuracy. Avoid cutting along the grainline unless specified in your design; this maintains shape and structure. After cutting all pieces, check for consistency in size across components.
For interfacing, repeat the measuring process. Ensure it matches the size of the fabric pieces it will support. This boosts sturdiness.
Organize cut pieces in a manner that avoids misplacement. Clearly label if needed, especially when working with similar fabrics. This step ensures a smooth assembly process later on and reduces the chances of confusion.
Sewing Techniques for Creating a Durable Lining
Utilize French seams to secure the edges of the interior fabric. This technique encases raw edges, preventing fraying while providing a polished finish. Begin by sewing wrong sides together, then trim excess fabric before turning the piece right side out and sewing again.
Incorporate interlining for added strength. Choose a lightweight fusible interfacing that adheres to the fabric with heat. Iron it onto the wrong side of your material; this will increase durability and improve structure.
Employ double-stitching along stress points, such as corners and strap attachments. This method reinforces seams, ensuring longevity under daily use. Make two passes with your sewing machine, spacing the stitches close together.
Edge-stitching the lining around the opening enhances the visual appeal and prevents it from shifting. After assembling the lining, sew close to the seam to create a clean finish that keeps everything in place.
| Technique | Description |
|---|---|
| French Seams | Encases raw edges for a polished, fray-resistant finish. |
| Interlining | Adds strength and structure to the fabric. |
| Double-Stitching | Reinforces seams at high-stress points for durability. |
| Edge-Stitching | Secures lining in place while enhancing appearance. |
Consider using a rotary cutter for precise cutting of fabric pieces. This tool offers sharper precision than traditional scissors, ensuring accuracy for all lining components. Remember to maintain consistent tension while sewing to avoid puckering.
For unique storage solutions, check out this best choice products modern spherical metal entryway umbrella storage stand for added inspiration in organizing your workspace.
Incorporating Functional Features: Pockets and Closures
Prioritize the strategic placement of pockets, making them easily accessible while maintaining aesthetics. Consider a front flap pocket for quick access to essentials like a phone or wallet, ensuring the pocket is secured with a Velcro or snap closure for added safety.
Types of Pockets
Use different pocket styles for versatility. A zipped interior pocket within the main compartment safeguards valuable items. For larger items, add side pockets that accommodate water bottles or umbrellas. Use contrasting fabrics for visibility, enhancing the bag’s design while maintaining functionality.
Choosing Closures
Select closures based on security and convenience. Magnetic snaps provide a clean look while ensuring the main flap stays closed. Zippers offer extra protection, especially for the interior. Test the functionality of each choice during assembly to guarantee ease of use.
Finishing Touches: Adding Straps and Reinforcements
Select durable materials for straps, ensuring longevity and stability. Consider nylon webbing or cotton canvas for strength. For added comfort, opt for padded shoulder straps. Secure the straps by stitching them to reinforced areas of the fabric.
- Cut strap lengths based on the desired drop. Typical lengths range from 40 to 60 inches.
- Use a triangular shape for fabric reinforcements at attachment points. This distributes weight effectively, minimizing wear.
- Double stitch or box stitch around attachment points for extra strength.
To finish your straps, attach hardware like D-rings or clips. These allow for adjustable lengths and versatility. Ensure all hardware is of good quality to prevent breakage.
Add a layer of interfacing to handle stress points. This additional material reinforces areas that bear weight, enhancing durability.
Maintain a cohesive look by matching the strap color and material to the overall design. A visually appealing contrast can enhance functionality and aesthetics.
Consider a unique touch by adding personal elements, such as custom embroidery on the straps. This detail adds character and makes the item stand out.
For reference in complex constructions like this, check are drones considered aircraft for design inspirations that include weight distribution concepts.


