


Begin with a sturdy strap; detach it from the side and reattach it to the upper section of the carrier. This adjustment allows for an adjustable fit for shoulder wear, essential for comfort during extended use. Opt for additional hardware if necessary to enable a more secure attachment point.
Next, reshape the structure by securing the base effectively. Fold the bottom flap upwards and utilize any built-in fasteners or straps to hold it in place. This step not only provides integrity to the form but also aids in maintaining a consistent silhouette that echoes classic rucksack designs.
Consider enhancing storage options through the addition of side pockets or external attachments. This provides easy access to essentials and increases the practicality of your new carry solution. Look for compatible clips or hooks that can be easily integrated into existing attachment points.

Finally, ensure that the overall carry system is balanced. Test the weight distribution by loading the carrier and adjusting the straps as needed. A stable and balanced form will greatly enhance the carrying experience, aligning functionality with personal style.
Transforming a Messenger Tote into a Rucksack
For an effortless transition, begin with a simple strap modification. Remove the existing shoulder strap and replace it with two adjustable straps. Position these on opposite sides of the tote for a balanced weight distribution.
Add padding to the straps for enhanced comfort. You can use foam or fabric to create a cushioning effect. Securely stitch or attach these padded sections to the straps to reduce strain during wear.
Incorporate a quick-release mechanism for ease of use. This ensures that you can swiftly switch between carrying methods without hassle. A clip or latch can be an ideal solution for this adaptation.
Consider adding a bottom support. Reinforcing the base will enhance durability and shape, making it easier to carry heavier items without worry. Use sturdy materials to ensure longevity.
For added functionality, integrate compartments or pockets that provide easy access to essentials. Organize your items within the rucksack for practical use. This will not only keep your belongings tidy but also allow you to carry more efficiently.
Complete the transformation with a quick test. Wear the modified accessory and adjust the straps accordingly to achieve a comfortable fit. For quality gear, explore options for the best luggage bags in uae that might inspire further customizations.
Choosing the Right Materials for Conversion
For a successful transformation, prioritize durable fabrics such as canvas or nylon that withstand wear and tear. These materials offer strength and resilience, essential for daily use. Look for water-resistant or waterproof options to protect contents from moisture, particularly if traveling. Reinforced stitching is crucial; double-stitched seams enhance longevity. Use strong zippers and buckles that can endure frequent opening and closing.
Straps and Back Support
Select padded straps made from breathable materials to ensure comfort during extended wear. Adjustable straps contribute to a customized fit, crucial for different body types. Consider using materials like polyester for additional strength without adding excessive weight. Evaluate the inclusion of meshed fabrics for ventilation, preventing overheating during wear.
Fasteners and Additional Features
Incorporate quality fasteners that allow for versatile carrying options. Magnetic snaps or clips enhance accessibility. Additional pockets for organization can be made from lightweight mesh or fabric, providing easy visibility and access. For those traveling extensively, consider integrating a hidden sleeve for securing onto wheeled luggage, enhancing convenience. Explore reviews and guides to choose the best backpack for European backpacking for further insights.
For maintenance tips on materials, such as cleaning methods, reference guides on how to clean dog urine from wooden fence, which emphasize effective cleaning solutions.
Steps to Reinforce the Bag Structure
Reinforcement of the structure is crucial for a smooth transition from a traditional design to an ergonomic version. Begin with the installation of a stiffening agent at the base. Material like plastic sheets or high-density foam can provide stability while maintaining flexibility.
Next, consider additional stitching to enhance seam strength. Utilize heavy-duty thread and a sewing machine to secure critical areas, especially where weight is concentrated. Double stitching on the straps and attachment points adds durability and prevents premature wear.
Install support panels on the back side. Cut pieces of rigid material to fit snugly against the inner lining. This offers support and helps distribute weight evenly when worn as a backpack.
Incorporate adjustable components. Use adjustable straps, allowing for a personalized fit and better weight distribution. This is particularly vital for comfort during extended use.
Lastly, reinforce zipper and closure points. Adding extra fabric around these areas can help prevent tearing and ensure longevity. Opt for high-quality zippers designed for substantial load bearing.
Adding Adjustable Straps and Fasteners
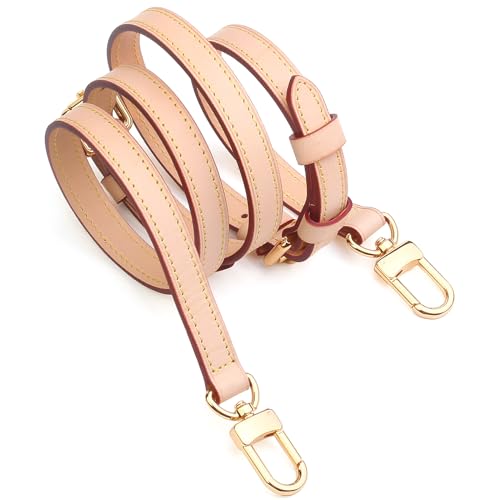
Utilize durable webbing and adjustable hardware to create functional straps. Consider nylon or polyester for their strength and resistance to wear. Cut two lengths of webbing – typically between 1 to 2 inches wide – to suit the desired length for comfort. Secure these to the upper corners, ensuring they allow for effective weight distribution.
Fastening Options
Incorporate fasteners that provide stability and ease of use:
- Carabiners: Excellent for quick attachment and detachment; ensure they are rated for weight capacity.
- Side-release buckles: Allow for easy adjustments; select a size that fits snugly with the webbing.
- Velcro straps: Useful for securing excess webbing or providing a quick fastening option.
Adjustability Techniques
To enhance versatility, implement the following methods:
- Thread one end of the webbing through the buckle, looping it back and securing it with stitching.
- Create a sliding adjustment by using a tri-glide slider on the webbing for length modifications.
- Ensure that all hardware is attached securely, reinforcing with stitching where necessary to prevent failure.
This structured approach grants the flexibility needed for various carrying styles, making the transformation seamless and user-friendly.
Testing the New Backpack Design for Comfort
To ensure comfort in the newly converted carrier, wear it for at least 30 minutes loaded with typical items. This allows for assessment of weight distribution and strap positioning. Seek to identify pressure points on the shoulders and back.
Adjusting Straps
Tweak the adjustments on the shoulder supports and any stabilizing bands. Straps should allow easy movement while maintaining a snug fit. During the trial, walk, bend, and perform basic activities to test mobility.
Weight Distribution Evaluation
Focus on how the load sits against the body. A well-balanced design minimizes strain. If the weight shifts towards the lower back, consider adding extra padding or repositioning the load. Record feedback on comfort levels after various physical movements to refine the structure further.
FAQ:
What tools and materials do I need to convert a messenger bag into a backpack?
To transform a messenger bag into a backpack, you will need a few basic tools and materials. First, gather a sewing machine or needle and thread for hand sewing. You’ll also need sturdy fabric for reinforcement, such as nylon or canvas, to ensure the backpack is durable. D-rings or clips are useful for creating adjustable straps, and you may also get some webbing for the straps that will go over your shoulders. Scissors, a measuring tape, and pins or fabric clips will aid in cutting and securing your materials during the process. Lastly, having a seam ripper on hand can help if you need to reverse any mistakes. Remember to measure your bag before starting to ensure a proper fit for all components.

Can I add extra features to my backpack once I convert it from a messenger bag?
Yes, there are several features you can add to enhance your backpack after converting it from a messenger bag. Consider incorporating padded shoulder straps for comfort, particularly if you plan to carry heavy loads. Adding pockets can be very useful for organization; you can sew on exterior or interior pockets based on your needs. If you like to carry a laptop, think about creating a dedicated padded compartment for added protection. Additionally, you could install a sternum strap or even a waist belt to distribute weight more evenly across your body. Remember, the key is to maintain balance and functionality while ensuring that the modified backpack meets your personal style and practical requirements.


