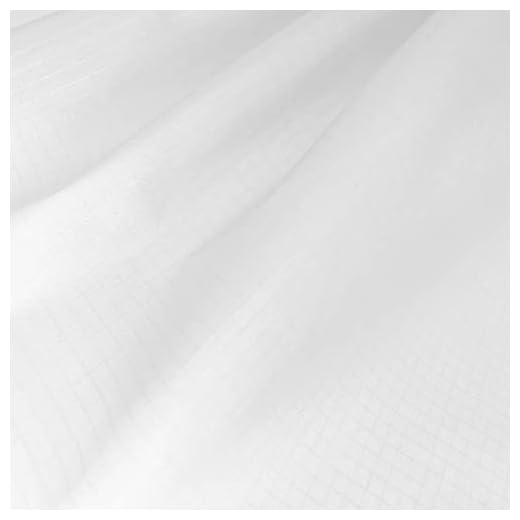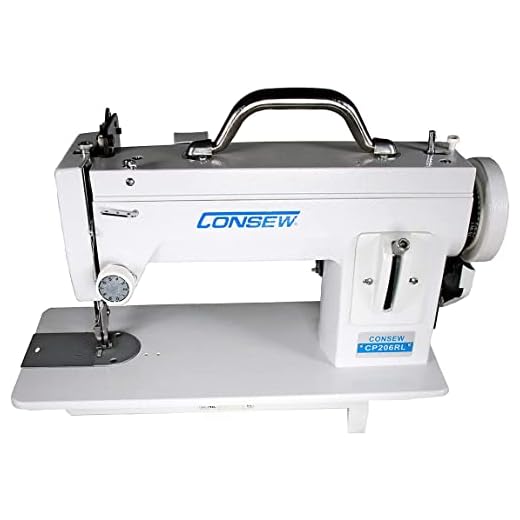


Choose sturdy fabric like cotton canvas or denim to ensure durability and style in your creation. A yard or two should suffice, depending on the desired size. Prepare all necessary tools including a sewing machine, scissors, thread matching your fabric, and a ruler for accurate measurements.
Prepare a pattern for the main body and flap, considering dimensions that suit your needs–typically, a width of 15 inches and height of 10 inches work well. Include additional seams for the sides and bottom for reinforcement. Cut out your pieces meticulously to guarantee clean edges and accurate assembly.
Assemble the outer layers first by stitching the sides and bottom to the main section. Create compartments by adding internal pockets, which make organization easier. Don’t forget to attach a sturdy strap; a length of 50-60 inches with adjustable functionality is commonly preferred. Finish with a secure closure mechanism, such as Velcro or a button, to keep contents safe.
Before finishing, test the structure and make adjustments if necessary. This practice not only elevates functionality but also adds to the aesthetic appeal of your finished project. Take your time during the crafting process; creating a personalized carryall is a rewarding experience.
Steps for Crafting a Stylish Carrier
Choose sturdy fabric, like canvas or denim, for durability and style. Cut pieces with precision based on your design. A typical set includes a body, flap, and strap.
Use interfacing to add structure to the exterior piece. Measure and iron it onto the fabric before assembling.
For pockets, select a contrasting or coordinating fabric. Cut, sew, and attach them before final assembly to ensure clean edges and easy access.
Assemble the main section by placing the right sides together. Sew along the edges, leaving a seam allowance. Turn the fabric right-side out for a polished finish.
For the flap, cut a rectangular shape. Fold and hem the edges. Attach it to the back panel using reinforcements to manage stress when opening and closing.
Create a strap that’s adjustable. Cut the strap fabric long enough to reach the shoulder comfortably. Use metal hardware for adjustability and strength.
Ensure all seams are finished with a zigzag stitch to prevent fraying. Regularly check alignment during the process for a professional appearance.
| Component | Recommended Size |
|---|---|
| Main Body | 16″x12″ |
| Flap | 16″x8″ |
| Strap | 2″x50″ |
Finish the edges with bias tape for a refined look. This not only enhances durability but also adds a design element.
Selecting the Right Fabric for Your Messenger Bag
Choose heavy-duty canvas or denim for durability. These materials can withstand daily wear and tear, making them ideal for frequent use.
For a lightweight option, consider nylon or polyester. These fabrics provide water resistance and are easy to clean, which is beneficial for those who may encounter rain or spills.
If you want a more refined look, explore cotton twill. It adds a touch of elegance while still offering sturdiness. Look for options treated with water-resistant finishes for added protection.
When selecting fabric, also think about the inner lining. A smooth polyester or nylon lining can help items slide in and out easily, enhancing usability.
- Cotton Canvas: Durable and available in many colors and patterns, excellent for customization.
- Ripstop Nylon: Lightweight and resistant to tearing, perfect for outdoor versatility.
- Waxed Canvas: Offers a vintage style and excellent water resistance.
For added functionality, consider reinforcing high-stress areas with a heavier fabric, such as Cordura or ballistic nylon; this extra toughness can extend the lifespan of your creation.
Always test a swatch before committing. Making a small sample can help determine how the fabric behaves when sewn and in use.
For those looking for storage options, check out the best luggage with lots of storage to inspire your design and functionality choices.
Tools and Equipment for Sewing
Invest in a reliable sewing machine equipped with a walking foot for consistent fabric feeding. This will enhance the precision of your stitching, especially with thicker materials.
A universal needle size ranging from 80/12 to 90/14 is suitable for diverse fabrics. Keep a selection of specialty needles for specific tasks, such as denim or leather needles, to tackle various textile types effectively.
Gather essential tools like tailor’s chalk or fabric markers for marking patterns accurately. A rotary cutter and a self-healing cutting mat facilitate swift and exact fabric cutting, minimizing waste.
Utilize high-quality straight pins or clip sets designed for thicker fabrics to ensure stable layering during the stitching process. A magnetic pin holder can streamline pin management, enhancing efficiency.
For finishing edges and preventing fraying, invest in a serger or overlock machine. This equipment offers a professional touch to seams, making your project durable and polished.
Keep a seam ripper handy for correcting mistakes with ease. Its sharp blade allows for quick unpicking of stitches without damaging the surrounding fabric.
Finally, ensure ample workspace with a sturdy table or desk, allowing freedom of movement while sewing. Proper lighting and a comfortable chair will further enhance your sewing experience, contributing to a more enjoyable crafting process.
Understanding the Messenger Bag Design and Dimensions
For optimal functionality, aim for a final size around 15 inches in width, 10 inches in height, and 4 inches in depth. This dimension strikes a balance between portability and capacity, allowing it to hold essentials like a laptop, books, or documents. Adjust according to specific needs and items.
The design typically features a structured flap that provides easy access while ensuring secure closure. Decide on the flap size, which generally extends about 3 to 6 inches beyond the main compartment. This prevents contents from spilling out and adds visual appeal.
Incorporate a strap length of approximately 40 to 50 inches, which facilitates versatility in wearing styles, such as crossbody or shoulder. Ensure that the strap width is around 1 to 2 inches for comfort during extended use.
Consider pockets: a front pocket can be about 6 to 8 inches deep for smaller items, while internal compartments may vary in size based on user requirements. When planning dimensions, think about the thickness of the materials used, as this will influence the overall structure and volume.
A well-constructed piece has reinforcement at stress points, such as the attachment of the strap and corners. Use heavier materials in these areas to enhance durability.
Select color schemes and patterns that reflect personal style while considering practical aspects like dirt resistance and ease of cleaning. Bold colors or patterns can mask minor stains, while neutral tones offer a more professional appearance.
Step-by-Step Instructions for Cutting Fabric Pieces
Measure and mark the dimensions based on your design template. Use a fabric measuring tape for accuracy and make clear marks using tailor’s chalk or a fabric marker.
Required Materials
- Fabrics for exterior and lining
- Scissors or rotary cutter
- Cutting mat (if using a rotary cutter)
- Measuring tape
- Tailor’s chalk or fabric marker
Cutting Steps
- Lay the fabric flat on a cutting mat to ensure a smooth working surface.
- Pin the pattern pieces to the fabric securely to prevent shifting during cutting.
- Cut along the edges of the pattern pieces with sharp scissors or a rotary cutter, applying gentle pressure.
- For curved or intricate shapes, take your time to ensure clean edges.
- Double-check all pieces against your design plan to verify accuracy.
For cleaning your workspace, consider using the best pressure washer for graffiti removal for tougher spots.
Techniques for Assembling and Sewing the Bag Together
Begin assembly with the main body. Align all edges of the outer fabric pieces, ensuring a smooth surface. Use straight pins or clips to secure the layers, maintaining even spacing for stitching.
Using a Sewing Machine
Opt for a walking foot attachment for even feed, especially if dealing with thicker materials. Set the machine to a medium stitch length for durability. Start sewing from the bottom seam, progressing towards the top, and remember to backstitch at both ends for added strength.
Finishing Touches
Trim any excess fabric after stitching to reduce bulk, and use pinking shears to prevent fraying. For a polished look, topstitch along seams. This not only secures the fabric layers but also adds a decorative edge. Finally, consider adding magnetic snaps or Velcro for closure–these details enhance functionality and ease of use.
To complement your creative endeavors, explore this best luggage for study abroad for additional style and utility options.
Adding Finishing Touches and Personalizing Your Creation
Incorporate unique hardware like clasps, rivets, or decorative elements to enhance both functionality and style. Choosing metal finishes such as brass or silver can add a sophisticated look. Consider using adjustable straps or a padded shoulder section for increased comfort.
Adding pockets or internal organizers can significantly improve practicality. Think about the size and placement of these features for easy access. For a personal touch, apply custom embroidery or fabric paint with initials, quotes, or designs that reflect your personality.
Explore decorative stitching or contrasting thread colors to add visual interest. Using a zigzag or decorative stitch on edges not only secures fabric but also enhances appearance.
For an eco-friendly flair, attach badges or patches made from recycled materials, merging sustainability with individuality. Experiment with layering fabrics for a one-of-a-kind aesthetic, combining textures like denim and canvas.
Finish with a protective spray to improve durability, ensuring your piece lasts through daily use. Store it with care to maintain shape and structure. With these additions, your creation will be uniquely yours, showcasing personal style while remaining functional.


