

Materials and color: recommend EVA foam 3 mm for body panels, faux leatherette 0.5 mm for outer skin, brass micro-rivets 2 mm, waxed polyester thread 0.5 mm. Match main hue to Pantone 468 C for on-screen accuracy; use matte sealant to avoid specular highlights. For straps use 1.5 mm leatherette folded twice to reach final thickness ~3 mm.
Construction steps: 1) Cut main panels at 75×60 mm, allow 3 mm seam allowance. 2) Glue EVA to acrylic frame using contact adhesive; clamp 30–45 seconds per joint. 3) Reinforce corners with 4×6 mm triangular patches. 4) Stitch top flap using 2.0 mm spacing; set rivets 4–5 mm from edges. Expect assembly time 90–120 minutes for a single unit.
Mounting and motion: attach satchel to character chassis via 0.5 mm stainless piano wire anchor points at two locations separated by 35 mm; allow 6–10 mm lateral play for realistic swinging. For stop-motion keying use 12-frame overlap on main strap motion; secondary bounce amplitude 6–10 degrees, decay coefficient ~0.25 per second. For CG rigs, set two FK targets on strap and one low-weight simulated cloth solver for subtle damped oscillation.
Filming and test parameters: shoot at 24 fps; record reference pass at 60 fps for motion analysis. Use macro lens ~100 mm, aperture f/8–f/11 to keep entire satchel sharp; key light temperature 5600 K, fill at -3 EV. For close-up texture checks capture 1:1 macro shots at 300 ppi for fabric grain study. Recommended references: production notes from the 1998 feature, “Character Rigging for Animation” pages 45–63, and a 3D printing profile set to 0.2 mm layer height for prototype parts.
Ant Inventor: Field Pack Replica Guide
Use 1.0–1.2 mm vegetable-tanned leather, cut main body to 15×10×8 mm for a 60 mm-tall figure; target total pack mass under 2 g to avoid top-heaviness; brass hardware: 6 mm roller buckle, 2 mm copper rivets; thread: waxed polyester 0.6–0.8 mm; thin closed-cell foam 3 mm for internal stiffening; two 2 mm N52 neodymium disc magnets for detachable mounting; acrylic paints: Burnt Umber 4:1 Raw Sienna base, Titanium White highlights; liquid superglue for rapid edge bonding; micro file and 000 sandpaper for edge finishing.
Pattern and scale
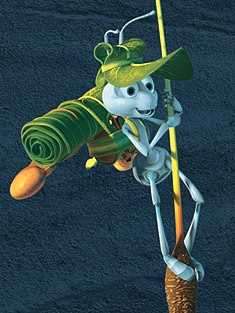
Main panel 15×10 mm, gussets 15×4 mm (two pieces), flap 12×8 mm; add 1 mm seam allowance for hand saddle-stitch; place rivets at lower corners, 5 mm from edges. For smaller figures (35–40 mm tall) reduce all dimensions by 60% (main panel ~9×6 mm). For larger collector figures (80–100 mm tall) increase dimensions by 50% and use 0.8–1.0 g total internal ballast target.
Assembly and finishing
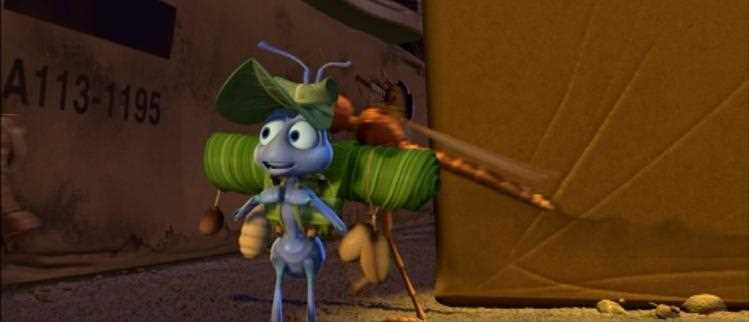
Cut leather, bevel edges, burnish using beeswax paste; pre-punch holes every 3 mm for saddle stitch using 0.4 mm punch; saddle-stitch using waxed thread and 000 needle. Bond glued joints using a thin CA film, clamp for 10–20 seconds. Insert foam core glued to interior to retain shape while minimizing mass. Mounting: sew elastic harness straps 2 mm wide onto inner pack base, route around torso and secure under abdomen using tiny stitches, or embed two 2 mm magnets into pack base and counterpart on figure back for quick removal; ensure opposite magnet polarity to prevent accidental detachment. Painting: apply thinned acrylic wash (1 part paint to 6 parts water) for base tone, blot excess immediately; highlight edges using dry-brushed Titanium White at ~2% pigment; seal using matte varnish sprayed at 20 cm distance in two thin passes. Balance check: fit pack on figure and add micro-lead shot (max 0.2 g) only when necessary, place at lowest interior point to lower center of mass and avoid forward tipping.
Materials and exact dimensions to craft a screen-accurate ant-protagonist rucksack prop
Primary recommendation: build a rigid internal form and skin it with heavyweight canvas for correct screen silhouette. Core components: closed-cell EVA foam 6 mm for outer shell, EVA foam 3 mm for layered detailing, 3 mm clear acrylic back plate (28 x 10 cm / 11 x 4 in) for structure, 8 oz cotton duck canvas cut for outer skin, 2 mm closed-cell foam for strap padding, braided hemp cord 4 mm diameter for ties, heavy-duty polyester thread (#69) and contact cement (Barge or equivalent) for bonding.
Final wearable dimensions (scale for adult torso, measured flat): overall height 34 cm (13.4 in), overall width 28 cm (11.0 in), gusset depth 16 cm (6.3 in). Top flap: 20 x 14 cm (7.9 x 5.5 in) with 1.5 cm (0.6 in) rounded corners. Main opening diameter when laid flat: 18 cm (7.1 in). Internal flat board: 20 x 10 cm (7.9 x 3.9 in) of 6 mm EVA under the main body to keep base shape.
Pattern pieces and cut counts: main front panel 34 x 28 cm (1), rear panel 34 x 28 cm (1), gusset strip 16 x 72 cm (1) including 6 mm seam allowance total (add 6 mm to all cut edges for sewing/bonding), flap 20 x 14 cm (1), top drawcord casing 3 x 56 cm (1, folded), shoulder straps 70 x 4 cm (2) outer canvas plus 70 x 2.5 cm (2) foam padding inserts. Back stiffener: acrylic plate 28 x 10 cm glued between rear canvas and foam layer.
Hardware specification: 25 mm (1 in) ladder-lock buckles (nylon) for length adjustment, 20 mm brass D-rings for lower strap anchors, 6 mm brass rivets for stress points (6 pieces), 15 mm plastic side-release buckle optional for chest strap. Use 3/8 in (10 mm) diameter cotton loop reinforcement at top handle anchor.
Assembly notes: bond EVA shell pieces using contact cement, trim edges after cure for clean joins, wrap acrylic back plate in thin neoprene layer before insertion to remove chafe. Stitch canvas shell using 6 mm seam allowance; perform topstitch 3 mm from edge to hold shape. Insert foam padding into strap channels and close channel with ladder-tacked topstitch at 25 mm intervals.
Paint and surface finish: prime canvas with diluted PVA sealer (1 part PVA : 3 parts water). Airbrush base tone olive drab hex #6B8E23 at 60% coverage, add saddle-brown hex #8B4513 on flap and lower patches. Weathering: dry-brush burnt umber acrylic (20% pigment) across edges, highlight edges with titanium white diluted 10% for subtle wear. Seal with matte clear acrylic spray at two light coats.
Weight considerations: finished prop should be under 1.1 kg (2.4 lb) to remain comfortable; heavier internal plates increase strain. For photography-only props, replace acrylic stiffener with 4 mm MDF to reduce flex but accept slight weight gain.
Storage and transport: pack inner dust bag cut from muslin and store in a breathable bag such as a best backpack laundry bag to prevent mildew; for outdoor shoots use a collapsible shield like a best easel umbrella as temporary weather protection.
Step-by-step assembly plan for constructing the pack frame, pouches and straps
Use 3.0 mm aluminum rod (6061-T6) for the primary hoop: final outer dimensions 180 mm high × 140 mm wide × 60 mm deep; bend radius 8 mm; allowance +2 mm for paint. Secure two 1.5 mm cold-rolled steel back plates (120×100 mm) to the rod using M4 countersunk rivets at 30 mm centres; drill holes Ø4.5 mm.
Frame fabrication
Cut rod 560 mm long to produce two mirrored side runs plus top arch; anneal at 350°C for easier bending, cool naturally. Form jig: plywood template tolerance ±1 mm. Grind ends flush, deburr, then tack-weld or use two M4 stainless bolts (nuts loctited) to join side runs to the steel back plates. Add a 3 mm EVA foam core (60 mm thick profile cut to 140×120 mm) glued using contact cement; allow 24 hours cure.
Install internal cross-brace from 2.0 mm aluminum strip 120×20 mm positioned 60 mm from top arch; fasten using M3 machine screws into tapped holes on steel plates. Countersink all screw heads to sit flush with plate surface. Final frame weight target: 220–260 g.
Pouches and fastenings

Patterns: main pouch body 140×100 mm finished size; cut exterior material 300×220 mm to allow 10 mm seam allowance and 40 mm flap. Use 1.2 mm veg-tanned leather or 600D Cordura for outer layer, 0.8 mm cotton canvas for lining, 3 mm EVA for padding. Sew using bonded nylon thread 92, stitch length 3.0–3.5 mm. Reinforce corners with 40×30 mm leather patches sewn and glued using Barge contact cement.
Closures: use 10 mm brass snaps or 12 mm press-studs; place snap base 20 mm from flap edge and centre horizontally. For magnetic closure option, recessed Neodymium disc magnets Ø8 mm × 2 mm glued into shallow cavities in flap and body, polarity tested prior to final gluing.
Mounting tabs: cut four 20×60 mm leather tabs, fold to 10 mm thickness and stitch across top edge of each pouch; install two M4 rivets per tab aligned to frame plate holes (20 mm spacing). Ensure rivet mandrel seats flush; add 1 mm neoprene washer between tab and plate to reduce wear.
Strap system: use 30 mm polyester webbing or 25 mm seatbelt webbing. Shoulder strap length 560 mm each (adjustable range 460–660 mm); cut two pieces plus 100 mm tail for adjuster. Chest strap 220 mm adjustable via 25 mm tri-glide. Stitch ends using box-x pattern 20×20 mm with 4 passes; seam margin 10 mm. Final sewn assemblies should hold 300 N static load during QA test.
Hardware: tri-glides and adjusters 25 mm anodised aluminium, D-rings 18 mm for lower attachments, M4 copper rivets for permanent joints. Place rivets 15–20 mm from strap ends; add 40×30 mm leather backing pad under each rivet location.
Assembly order: 1) fabricate and align frame; confirm hole pattern on steel plates; 2) attach foam core and cross-brace; 3) construct pouches completely off-frame; 4) fit mounting tabs to pouches, dry-fit on frame to verify spacing; 5) thread straps through adjusters before final attachment to avoid rework; 6) permanently rivet tabs and set rivets; 7) trim excess webbing, heat-seal synthetic ends, burnish leather edges; 8) paint and finish external surfaces, cure 48 hours.
Tools and consumables: high-torque sewing machine (walking foot), leather needles size 0/2, rivet setter, 4–6 mm twist drill set, bench vise, heat gun, contact cement (Barge) and E6000 for metal-to-fabric bonds. Test protocol: perform 500-cycle strap adjustment test and 30 kg pull test on each attachment point before cosmetic finishing.
Reference and regulatory note: materials transported for shoots may be subject to local rules; see are drones allowed in italy for an example of jurisdictional guidance that can affect location shoots and prop movement logistics.
Painting, texturing and aging methods to match the ant protagonist’s pack color and wear
Apply an airbrushed three-stage basecoat: dark undertone, neutral mid-tone, light highlight – nozzle 0.2–0.3 mm at 18–22 PSI, three passes per stage, 40% overlap.
Color matching formula and paint choices
- Suggested mid-tone mix (acrylic): 60% Sap Green, 25% Yellow Ochre, 15% Titanium White (thin 10–15% with acrylic flow improver). Approximate hex: #7DA14A.
- Undertone (shadow) mix: 70% Raw Umber + 30% Sap Green, heavily thinned for glazing layers to settle into seams.
- Highlight mix: Mid-tone + 20% Titanium White + a tiny pinch (1–2%) of Naples Yellow for sun-bleached warmth.
- Brands: Vallejo Model Color, Tamiya Acrylics, and Liquitex Heavy Body work well; use acrylic lacquer only if compatible with previous coats.
- Primer: grey 1k or acrylic primer; sand at P400 between primer and basecoat for surface keying.
Aging, wear and texturing sequence
- Surface texture
- For woven fabric effect, brush on a thin layer of acrylic texture paste mixed 1:3 with base mid-tone, then stipple with a coarse foam sponge before it skins (creates random grain).
- For stitched seams, press sewing string into wet paste to create shallow channels; after cure, sand lightly with 800 grit to soften peaks.
- Pre-shading
- Airbrush shadow mix into seams, folds and under flap edges at 10–12% opacity (multiple passes). This locks perceived depth beneath the basecoat.
- Basecoat and modulation
- Apply neutral mid-tone by airbrush in thin even layers. Add two subtle modulation passes: one slightly cooler (add ultramarine, 5–8%), one slightly warmer (add yellow ochre, 5–8%) to break flatness.
- Edge wear and abrasion
- Dry-brush edges with highlight mix on a flat brush (wipe excess thoroughly). For frayed fabric use a torn sponge and stipple in highlight and a paler tone for abrasion speckles.
- For small chips: use the hairspray or salt chipping method. Salt: moisten mid-tone, sprinkle fine table salt in high-wear zones; when sealed and painted over, remove salt and reveal organic chips.
- Stains and streaking
- Oil paint filters: thin raw umber or burnt sienna oil paint 1:10 with mineral spirits, apply as vertical streaks and wipe selectively with cotton swab to simulate dirt migration.
- Acrylic washes: mix 1 part burnt umber ink to 8 parts water + 0.5 part flow improver. Apply into seams then wick away with paper towel to leave residue in recesses.
- Dust and pigment buildup
- Use powdered pigments (Raw Umber, Yellow Ochre, light gray) applied with a soft brush; fix with a 2:1 matte varnish/pigment fixer spray. Target high-contact lower areas for heavier accumulation.
- Shine variation
- Spray satin varnish over fabric surfaces, then gloss selectively on straps and points that receive oil/handling; finish with a light matte mist to integrate gloss edges without flattening completely.
- Micro details
- Graphite rubbing: drag a soft pencil along strap edges and seams to emulate grease and handling; seal lightly to avoid smudging.
- Use a toothbrush flick of thinned mid-tone + tiny white highlight to simulate paint flecks from encounters with grit.
Tools, solvents and abrasives
- Airbrush: 0.2–0.3 mm nozzle, 18–22 PSI. Thinner ratio 10–15% for acrylics.
- Brushes: flat 6–10 mm for dry-brush, round 000–1 for detail, stiff foam for stippling.
- Sanding: P240 for aggressive shaping, P400–P800 between coats, P1200 for final smoothing on hard areas.
- Abrasives: 0000 steel wool for subtle scuffing; tungsten carbide knife or dental pick for controlled frays.
- Fixers: pigment fixer or a 2:1 matte varnish/pigment fixer spray; use alcohol-based cleaners only on cured paint systems.
Quality control checklist
- Contrast check under neutral daylight (5,500 K) to verify shadow depth and highlight balance.
- Tactile test: rub high-contact zones lightly to confirm fixed pigments and no unintended gloss migration.
- Photograph at 1:1 scale and compare to still frames for color temperature; iterate using ±5% adjustments to green or yellow components until match is visually consistent.
FAQ:
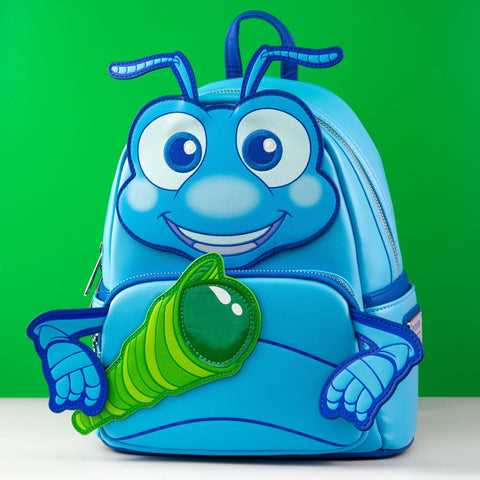
What role does Flik’s backpack play in A Bug’s Life?
Flik’s backpack works as his portable workshop and storage for found items he plans to reuse. It appears in several scenes as the place he keeps small tools, parts from human objects, and prototypes for his inventions. Beyond its practical use, the bag acts as a visual hint to his habit of collecting odd pieces and trying new ideas, making his actions easier to understand without extra dialogue.
How does the backpack reflect Flik’s personality and character development?
The bag mirrors Flik’s inventive, persistent nature. Its patched fabric and mismatched fastenings show that he treads a path apart from other ants: he prefers tinkering to following tradition. As the story progresses the backpack becomes a sign of acceptance — at first it marks him as different, later it shows how his creative work can benefit the whole colony. Small changes in how he treats and uses the bag — carrying it more confidently, sharing its contents — underline shifts in his relationships with other characters.
Did the animators base the backpack on real-world objects or specific design references?
Animators often study everyday tools and handmade kits to create believable props at a smaller scale. For Flik’s backpack they drew on the idea of a homemade kit made from thrifted fabric, wire, acorn caps and other scavenged bits so the result would read as improvised and practical. Close-up shots emphasize stitches, seams and patched areas so the audience accepts the item as functional for an insect-sized character.
Are there visible changes to the backpack between early and late scenes?
Yes. Early appearances show it more tattered and experimental, with loose items and unsteady closures. Later it looks slightly more organized and worn in the way a frequently used tool would be: seams are smoothed and attachments sit more securely. Those small visual shifts help signal that Flik and his ideas have moved from trial toward wider use.
Are there any Easter eggs or small details in the backpack that viewers might have missed?
Close viewers have pointed out tiny touches in several frames: a mismatched button that looks like a seed, faint thread colors that match Flik’s outfit, and a small notch cut into a strap that suggests repeated opening. Fans have also compared those details to other props in the film, spotting recycled bits that create visual continuity. These little elements reward repeated viewings and underline the care put into background design.


